The time has come. What a lovely night: I’m sitting in my little white desk chair, burning my raspberry scented candle, and weaving together a story I’ve been itching to tell you for ages. Why haven’t I told it sooner? It’s about an endeavor that until this month, I simply haven’t had the nerve to attempt. In keeping with their character and mission, however, the Daring Bakers have once again pushed me out of my comfortable nest. For weeks now I’ve been flapping my wings in a frenzy, uncertain as to whether I’d fly through this challenge like a graceful (albeit nonexistent) Willow Bird, or fall to my (melodramatic) doom. Well, here I am telling you the story I’ve longed to tell you, so it must be good news, right? Let me tell you a tale of magnificence, of magic, of madness, of . . . feet?
Of feet.
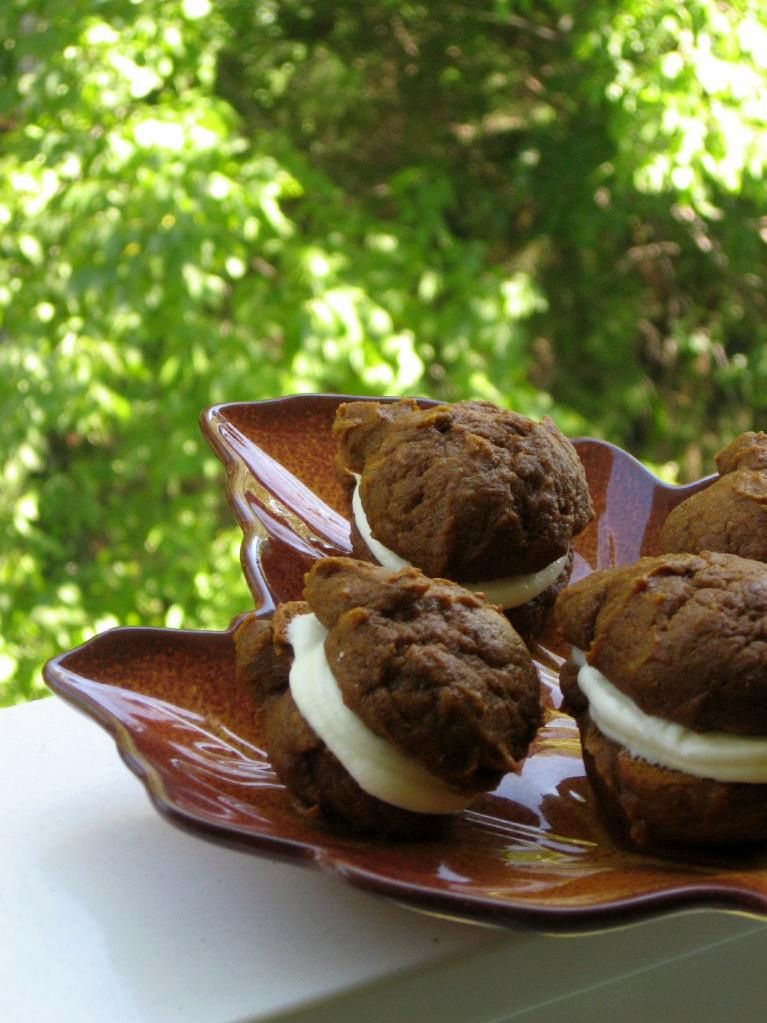
Don’t be grossed out, podophobics — these aren’t the sort of feet with heels, arches, and toes. These are the sort of feet that bakers across the world have been dreaming of long before this month’s challenge rolled around. You’ve probably guessed by now that I’m referring to the sweet little feet on a lovely French macaron.

The 2009 October Daring Bakers’ challenge was brought to us by Ami S. She chose macarons from Claudia Fleming’s The Last Course: The Desserts of Gramercy Tavern as the challenge recipe.
Macarons are unique, delicate sandwich cookies with a crisp shell, soft innards, and a variety of different fillings. They’ve been called “the new cupcakes” because of their petite portion sizes, their diverse flavorings, and their meteoric increase in popularity in recent years. While I don’t think they’ll be replacing cupcakes anytime soon, macarons are infinitely versatile. The shells can be flavored with cocoa, powdered fruits, and teas; colored with bright powdered food coloring; and filled with any one of myriad ganaches, frostings, creams, nut butters, or jams.

The recipe for macarons is deceptively short and (forgive my beloved puns) sweet. The plethora of nit-picky addendums to said recipe, however, expose the truth: macarons are difficult to perfect. They’re finicky about ingredient ratios, oven temperatures, folding intensity and duration, your kitchen decor . . . you get the idea. I was nervous but determined as I set my first batch of egg whites out on the counter to age. To be honest, the aforementioned nit-picky how-tos probably added to my anxiety more than they aided my technique. My obsessive compulsive nature was on overdrive trying to compile the 847,948 macaron tips I had read, some of which conflicted and some of which were insanely detailed. I wouldn’t have been at all surprised to find someone prescribing optimal wrist angles for folding batter or proper macaron-making hairstyles.
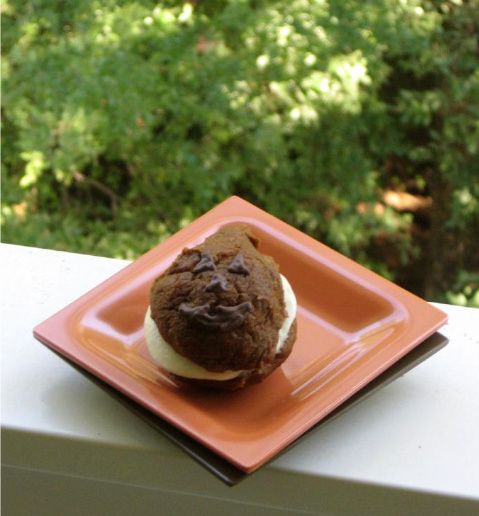
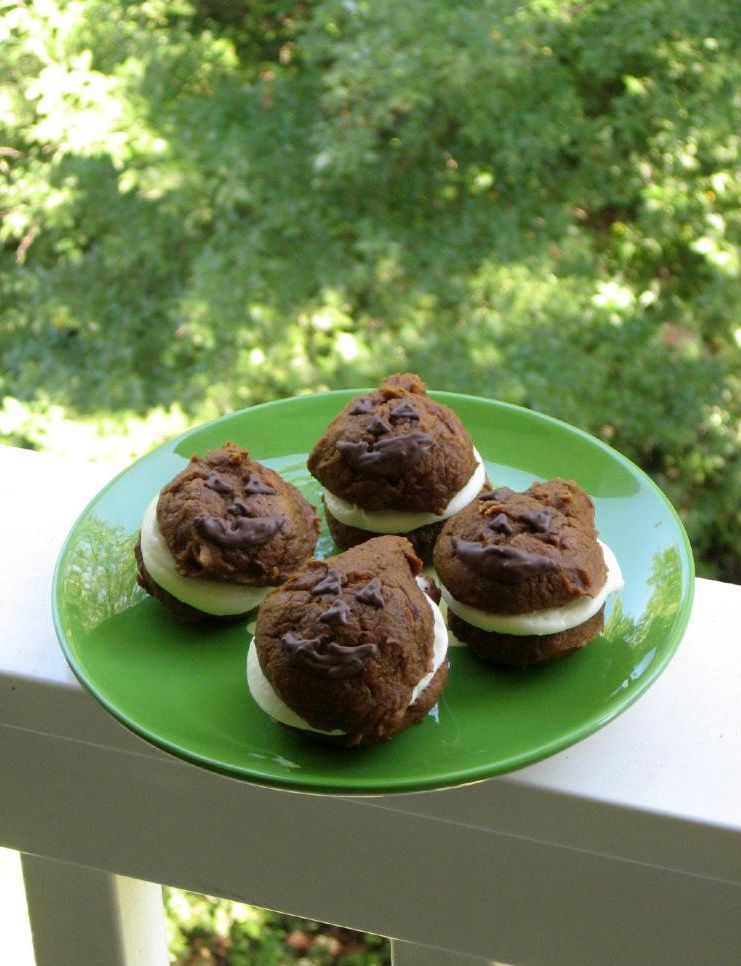
At some point, you have to stop reading the mountain of macaron manuals and just jump on in. In that spirit, I picked up some cardamom in the bulk spice section of my local grocer and set to work on Cardamom Pumpkin Macarons.

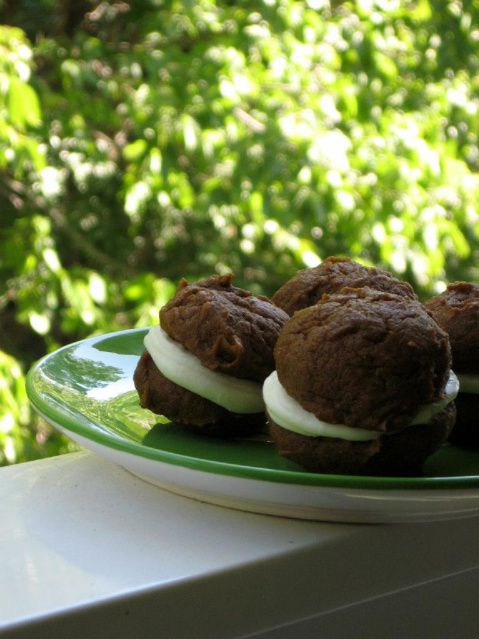
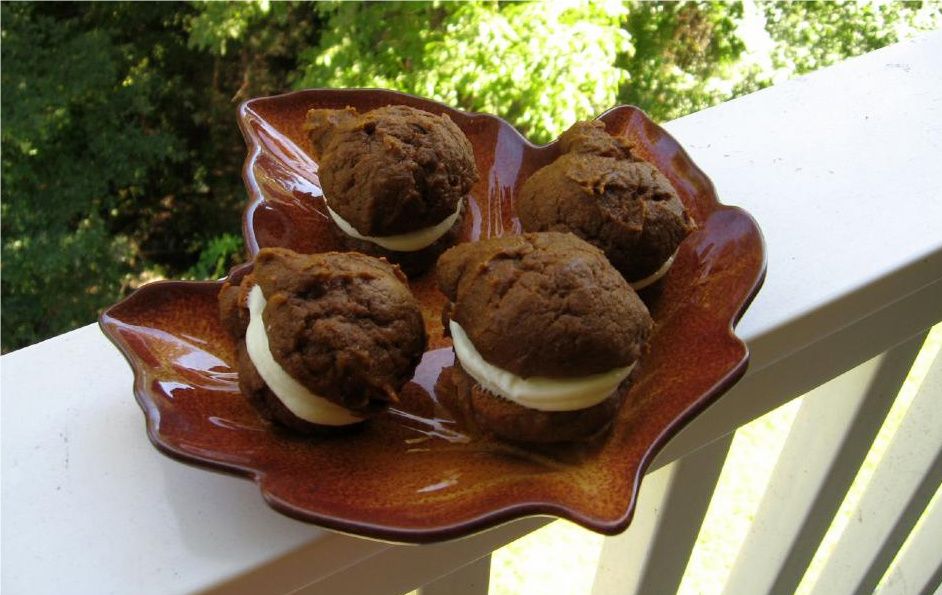
Macaron recipes all typically follow a basic pattern: beat egg whites and sugar to a stiff meringue, process almonds and powdered sugar together until fine, sift to remove lumps, fold dry ingredients into wet ingredients to form the macaronage, pipe out into circles, and bake. I added the cardamom into my macaron shells and whipped up Tartelette’s Pumpkin Cream Cheese Filling to sandwich between them. I sprinkled some roasted, salted pumpkin seeds in the center of some of these macarons for good measure.

When I knelt to peer into my oven window and saw feet on my macarons, I grabbed my phone and my camera. The former was to call Mike and share my elation, while the latter provided a video memento of my victorious achievement. I love knowing that so many fellow bakers (daring or otherwise) have felt the joy of this very moment while sitting in front of their own ovens.
Despite my elation, my first batch of macarons certainly wasn’t perfect. They were delicious, but the shells were a bit flat. After reflecting and reading, I decided the flatness of the shells was probably due to overfolding my macaronage, and that the Daring Bakers recipe was a risk, seeing as it used a different ratio of ingredients than the accomplished Tartelette. Thus I made the following changes: I would count my strokes as I folded in my dry ingredients, ensuring that they were under 50, and I would use Tartelette’s recipe.

Batch #2 was comprised of plain macaron shells with two fillings: Cream Cheese Buttercream with Strawberry Jam, or David Lebovitz’s Chocolate Filling. And finally, using only 45 folding strokes, egg whites aged for 48 hours, and Tartelette’s careful ratio, I achieved a magnificent macaron!

While both fillings were good, we strongly preferred the chocolate filling to the somewhat overly tangy cream cheese buttercream. Y’all know I love cream cheese, but the taste of this recipe struck me as a bit odd (maybe I did something wrong). I do love the idea of cold, fruity jam on top of cream, but next time I’ll use a regular vanilla buttercream.
These gorgeous bites would be perfect with tea or coffee (I have to admit, though, I’m not a coffee drinker. In fact, that’s Coke Zero in the mug up there — go ahead and laugh). Because of their flexible flavoring, macarons are also ideal for any time of day. Eat a light jam macaron on the patio for breakfast, a buttercream macaron for a late morning brunch, or a ganache-filled macaron for a decadent dessert. Don’t be discouraged if your first try doesn’t yield perfection; the eventual success and satisfaction is worth the wait!

Cardamom Pumpkin Macarons
Recipe By:
-Claudia Fleming’s The Last Course: The Desserts of Gramercy Tavern (adapted by me)
–Tartelette (pumpkin cream cheese filling)
Yields: around 2 dozen macarons (48 shells)
Macaron Ingredients:
2 ¼ cups (225 g, 8 oz.) icing sugar
2 cups (190 g, 6.7 oz.) almond flour
2 tablespoons (25 g , .88 oz.) granulated sugar
1/2 heaping teaspoon ground cardamom
5 (Have at room temperature) egg whites, at room temperature (I followed the popular recommendation and aged my egg whites for 24-48 hours on a counter top, covered with a paper towel)
Pumpkin Cream Cheese Ingredients:
2 oz (60gr) cream cheese, at room temperature
2 oz (60gr) freshly cooked or canned pumpkin
1/8 tsp ground cloves
Directions:
1. Preheat the oven to 200°F (93°C). Combine the icing sugar and almond flour in a medium bowl. If grinding your own nuts, combine nuts and a cup of confectioners’ sugar in the bowl of a food processor and grind until nuts are very fine and powdery.
2. Beat the egg whites in the clean dry bowl of a stand mixer until they hold soft peaks. Slowly add the granulated sugar and beat until the mixture holds stiff peaks.
3. Sift half of the almond flour mixture into the meringue and fold to combine. Fold quickly at first and then gently. Add cardamom to your batter. Sift in the remaining almond flour and continue to fold, but be gentle! Don’t overfold, but fully incorporate your ingredients. Note: Count your strokes and try to stay under 50. The macaronnage should “flow like magma,” whatever that means, when it’s ready.)
4. Spoon the mixture into a pastry bag fitted with a plain half-inch tip (Ateco #806). You can also use a Ziploc bag with a corner cut off. It’s easiest to fill your bag if you stand it up in a tall glass and fold the top down before spooning in the batter.
5. Pipe one-inch-sized (2.5 cm) mounds of batter onto baking sheets (double up on baking sheets if they aren’t professional grade) lined with nonstick liners (or parchment paper). Note: I piped mine too close together. Be careful.
6. Bake the macaroon for 5 minutes. Remove the pan from the oven and raise the temperature to 375°F (190°C). Once the oven is up to temperature, put the pans back in the oven and bake for an additional 7 to 8 minutes, or lightly colored. Note: Don’t get so excited about their feet that you yank them out too soon; if you do, the feet will collapse into a sad ruffle. Don’t ask me how I know this.
7. Cool on a rack before filling.
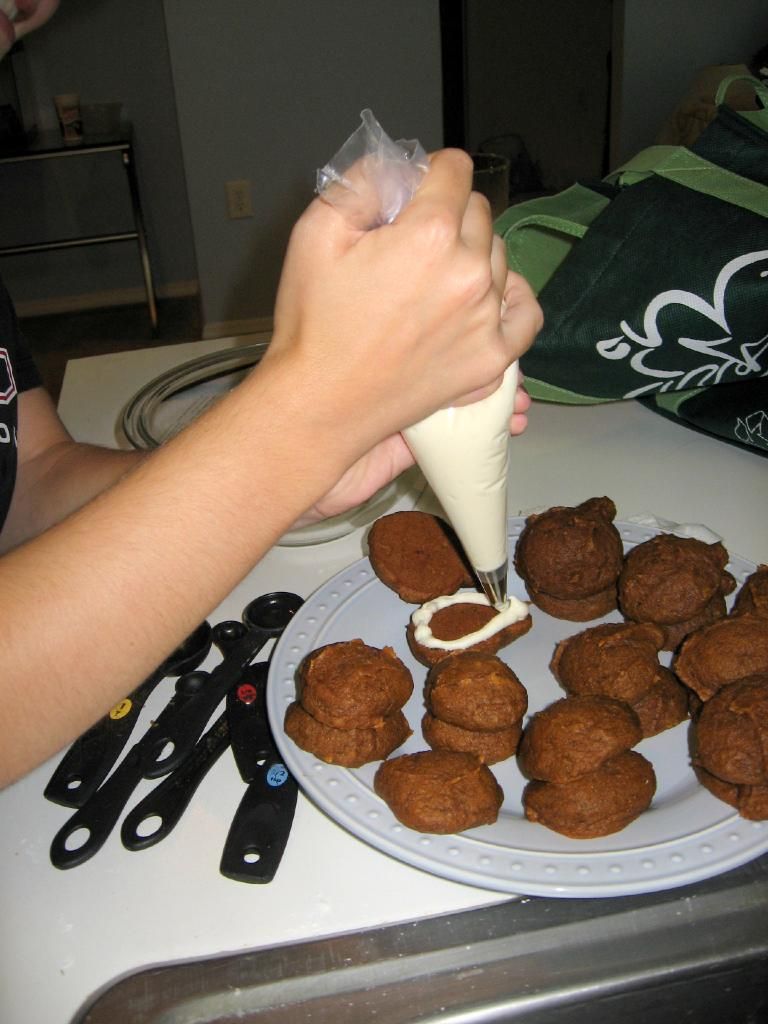
For filling: In a medium bowl, mix the cream cheese, pumpkin and cloves until completely incorporated. Fill a pastry bag with this mixture and pipe onto half the shells and top with another shell.
Note: If I had this to do over again, I’d use Tartelette’s recipe (below) with cardamom added for the macarons.

Plain Macarons with Two Fillings: Cream Cheese Buttercream with Strawberry Jam and Chocolate Ganache
Recipe By:
–Tartelette (macarons, cream cheese buttercream, adapted by me)
–David Lebovitz (chocolate filling)
Yields: around 15-17 macarons (30-34 shells)
Macaron Ingredients:
3 egg whites (about 90 gr)
30 gr granulated sugar
200 gr powdered sugar
110 gr almonds
Cream Cheese Buttercream Filling Ingredients: Note: I would have preferred regular buttercream. This filling had an odd flavor.
1 1/2 sticks (170 gr) butter at room temperature
4 oz (120gr) cream cheese, softened
3 egg whites
1/2 cup (100gr) sugar
2 Tb water
1 tsp vanilla extract or 1/2 vanilla bean split open and seeded.
Strawberry jam (or flavor of your choice)
Chocolate Filling Ingredients:
½ cup (125 ml) heavy cream
2 teaspoons light corn syrup
4 ounces (120 gr) bittersweet or semisweet chocolate, finely chopped
1 tablespoon (15 gr) butter, cut into small pieces
Directions:
For the whites: the day before (24hrs), separate your eggs and store the whites at room temperature in a covered container. If you want to use 48hrs (or more) egg whites, you can store them in the fridge. In a stand mixer fitted with the whisk attachment, whip the egg whites to a foam, gradually add the sugar until you obtain a glossy meringue. Do not overbeat your meringue or it will be too dry and your macarons won’t work. Combine the almonds and powdered sugar in a food processor and give them a good pulse until the nuts are finely ground. Pass through a sieve. Add them to the meringue,with the coloring and give it a quick fold to break some of the air and then fold the mass carefully until you obtain a batter that flows like magma or a thick ribbon. Give quick strokes at first to break the mass and slow down. The whole process should not take more than 50 strokes. Test a small amount on a plate: if the tops flattens on its own you are good to go. If there is a small beak, give the batter a couple of turns. Fill a pastry bag fitted with a plain tip (Ateco #807 or #809) with the batter and pipe small rounds (1.5 inches in diameter) onto parchment paper lined baking sheets (double up on baking sheets if they aren’t professional grade). Preheat the oven to 300F. Let the macarons sit out for 30 minutes to an hour to harden their shells a bit and bake for 8-10 minutes, depending on their size. Note: Don’t get so excited about their feet that you yank them out too soon; if you do, the feet will collapse into a sad ruffle. Don’t ask me how I know this. Let cool. If you have trouble removing the shells, pour a couple of drops of water under the parchment paper while the sheet is still a bit warm and the macarons will lift up more easily do to the moisture. Don’t let them sit there in it too long or they will become soggy. Once baked and if you are not using them right away, store them in an airtight container out of the fridge for a couple of days or in the freezer.
For strawberry cream cheese filling: In the bowl of stand mixer, whip the egg whites until they have soft peaks. In the meantime, combine 2 Tb water with the sugar to a boil in a heavy saucepan and bring the syrup to 250F. Slowly add the sugar syrup to the egg whites. If you use hand beaters, this is even easier and there is less hot syrup splatter on the side of your bowl and in the whisk attachment of the stand mixer. Continue to whip until the meringue is completely cooled. Slowly add the butter, one tablespoon at a time. The mass might curdle but no panic, continue to whip until it all comes together. Add the cream cheese, the same way, a little at a time until everything is smooth. Whisk in the vanilla extract, or paste or bean. Keep it to spreadable consistency for the macarons and refrigerate the leftover for cupcakes or mini toast in the fridge up to 3 days or in the freezer.
To assemble macarons, pipe cream cheese buttercream onto one side topped with a dollop of jam. Sandwich the other shell on top. Refrigerate to set.
For chocolate filling: Heat the cream in a small saucepan with the corn syrup. When the cream just begins to boil at the edges, remove from heat and add the chopped chocolate. Let sit one minute, then stir until smooth. Stir in the pieces of butter. Let cool completely before using. When cool, I whipped the chocolate with a handmixer to achieve a good spreading consistency. I then piped a large dollop in the middle of shells and sandwiched other shells on top. Refrigerate.


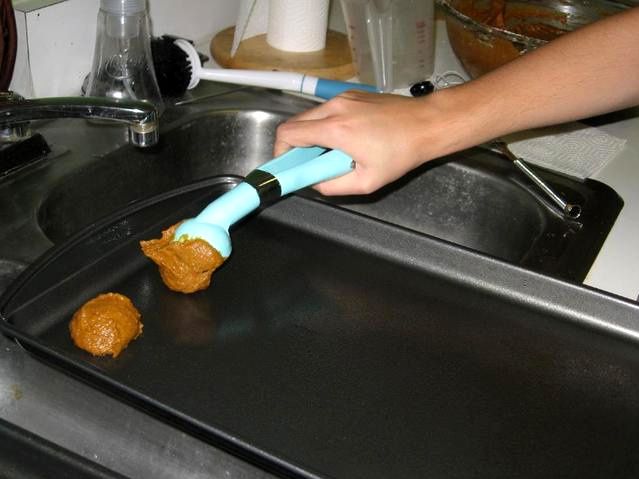
Piping batter onto a macaron template and then the cookies fresh out of the oven (and a little wonky).


Blurry proof of feet for batches 1 and 2!


I hope you enjoyed this post! Don’t forget to cruise the Daring Bakers blogroll to see all of the creative French macarons.
 Share this post with friends!


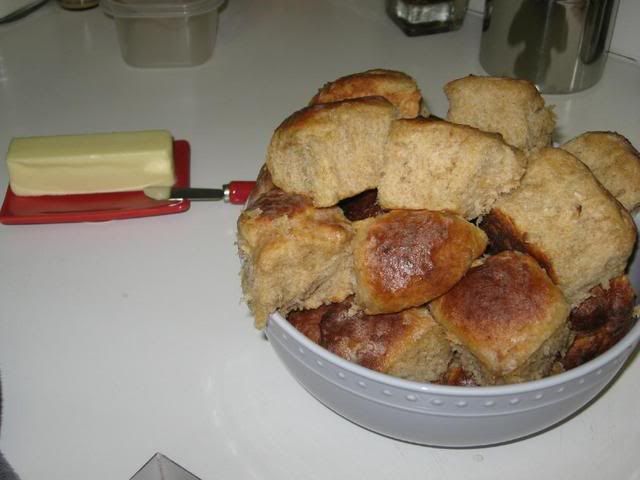 Overnight Yeast Rolls — These fluffy, delicious, buttery yeast rolls are part of my family’s annual Thanksgiving tradition. When I realized I was old enough to make them myself (and at any time of year, too), it was one ecstatic day in the kitchen!
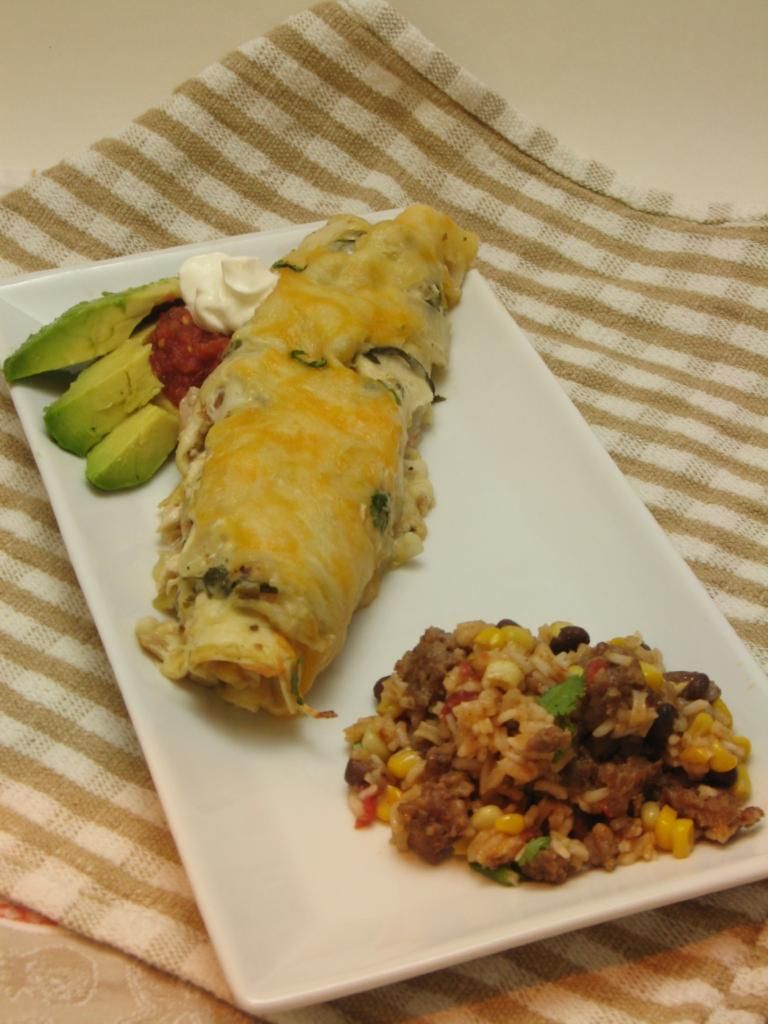 Green Chile TURKEY Enchiladas — Okay, these don’t quite fit on the Thanksgiving dinner table, but maybe you find yourself wondering what to do with all your juicy turkey leftovers? These Green Chile Chicken Enchiladas can be transformed into turkey-filled treats, and what a great way to spice up leftovers. The recipe is so seductive, yet very simple — it won’t take up all of your Black Friday!