ganache

Chocolate & Coconut Cream Pie Bars

Several months ago, I attended the Foodbuzz Blogger Festival in San Francisco, California, 2,700 miles away from my home. Traveling alone is always a meaningful, reflective experience for me. To process my trip, I periodically share vignettes that I hope are meaningful to you, as well.

. . .

Normally, I would have said no.

On-the-spot requests for money make me nervous, and I made a rule years ago to always say no. I give food or supplies freely, as I’m able, to anyone who asks me for them. But I only give money if I have a space to sit, read about the organization, and make a thoughtful choice. That’s my rule, anyway.

But I wasn’t standing at a check-out counter being asked to donate a dollar to a charity, or walking down the street being asked for change. I was sitting on the BART, the Bay Area’s system of trains, and the little boy in front of me was adorably nervous. I waited politely as he took a deep breath and began a clearly well-rehearsed speech. It came out as one halting sentence.

“Hi-I-am-part-of-the-Boys-&-Girls-Club-and-we-are-raising-money-to-go-to-our-basketball-tournament-in-Reno-I-have-already-collected-all-but-$55-can-you-help-by-donating-today?” He took another big breath, obviously relieved to have finished his spiel.

I saw his friend delivering a similar pitch across the car and briefly considered that this might be an elaborate scheme to get more video game or snack money. My innate cynicism comes from personal experience, since I may or may not have canvassed my neighborhood when I was a tiny entrepreneur telling folks that I was an orphan soliciting donations for cancer treatments. Not one of my prouder moments. Thankfully, I don’t think anyone was fooled. A few people tried to tame their amusement as they slipped me some change, which, in hindsight, was unnecessarily generous.

Regardless of my own childhood scheming, I instinctively felt the child in front of me on the train was being honest, and what’s more, I decided I didn’t care. He had mustered up plenty of pluck to come ask me for a few dollars, and I was going to give them to him. I opened up my envelope of cash (such a tourist) and pulled out a few bills for him. His relief turned into joy. “Thank you!” he cried as he walked across the car.

I heard him deliver his pitch to another woman with a satisfied emphasis on his new balance: “…and all I need is $48 now!” She grinned at me as she handed him a couple of bills as well.

A few minutes later, I saw another passenger on the train say no. The boy, clearly coached to deal with this politely, veiled his disappointment as best he could and gave a resigned little nod. I glanced over at the woman and noticed she’d been watching the exchange as well. When she looked over at me, her face had the same sympathetic smile I was sure my own face was wearing. I didn’t blame the other passenger — after all, any other day and any other mood and I might have decided to follow my own rule — but I did resolve to pray for all the boys to get to go to their basketball tournament.

(And you know what? If he’s playing video games or eating some cheesy poofs with my money at this very moment, by golly, I hope he’s enjoying them.)

. . .

It’s funny how sometimes things — like a brief exchange on a train — build a little nook in your heart. Some moments are like that. Some people are like that.

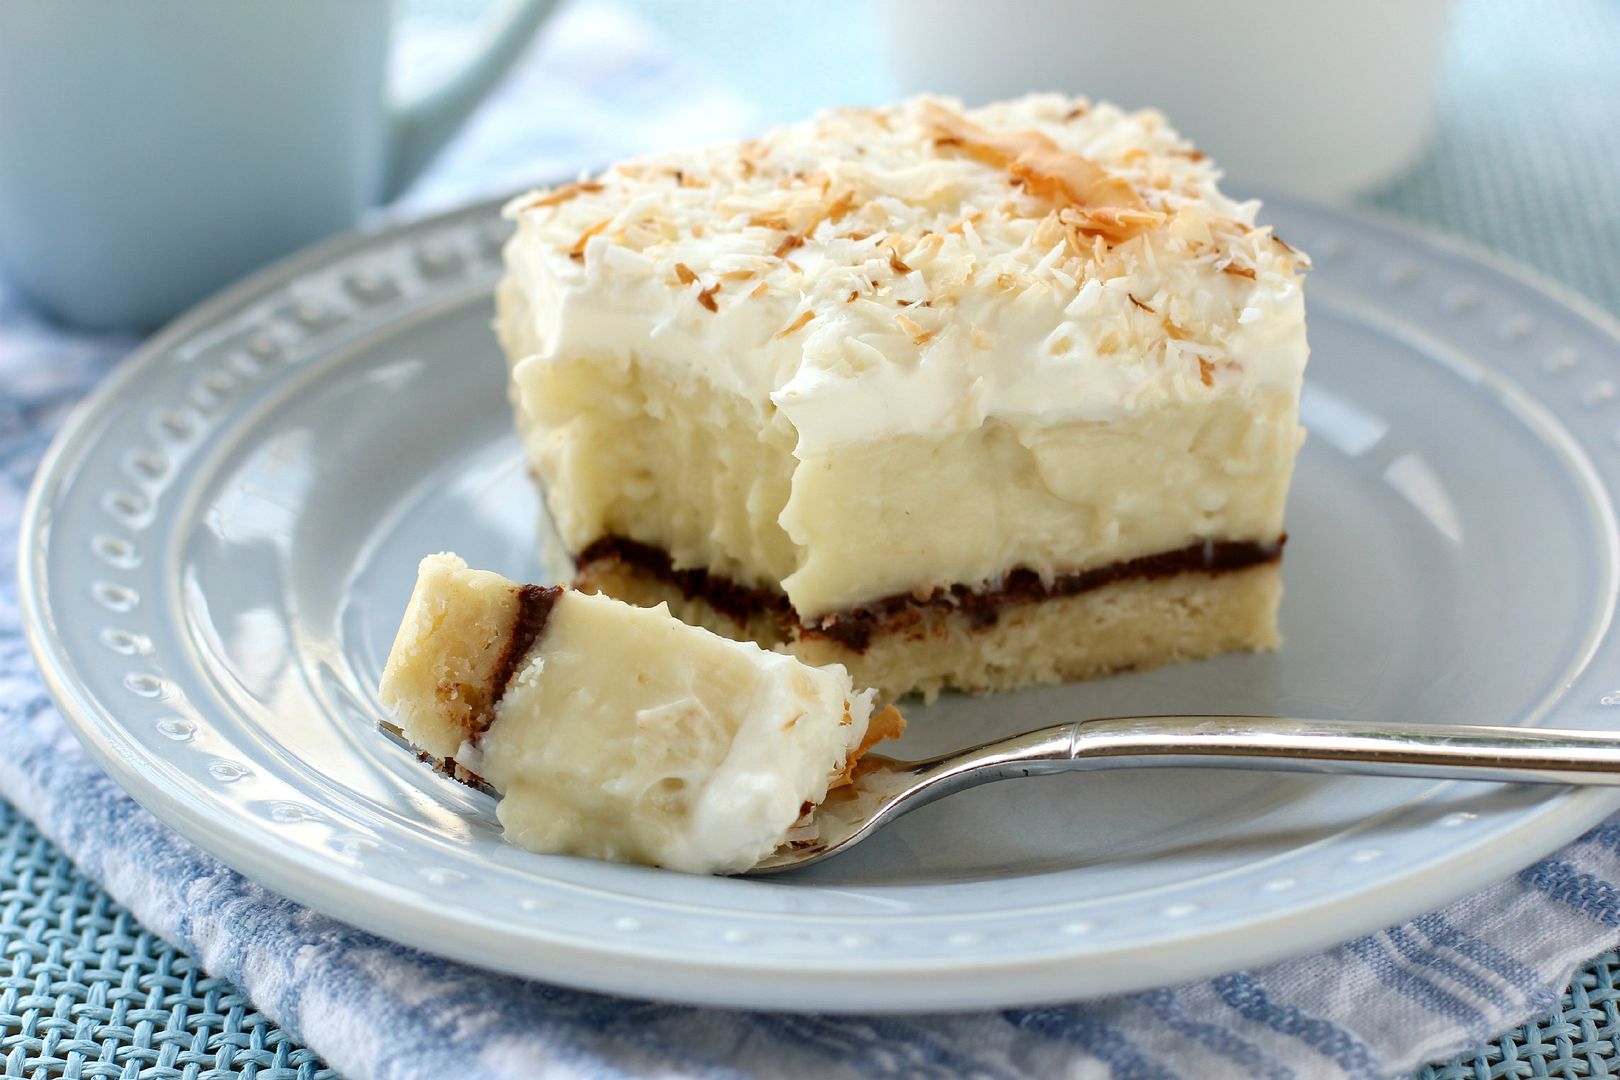
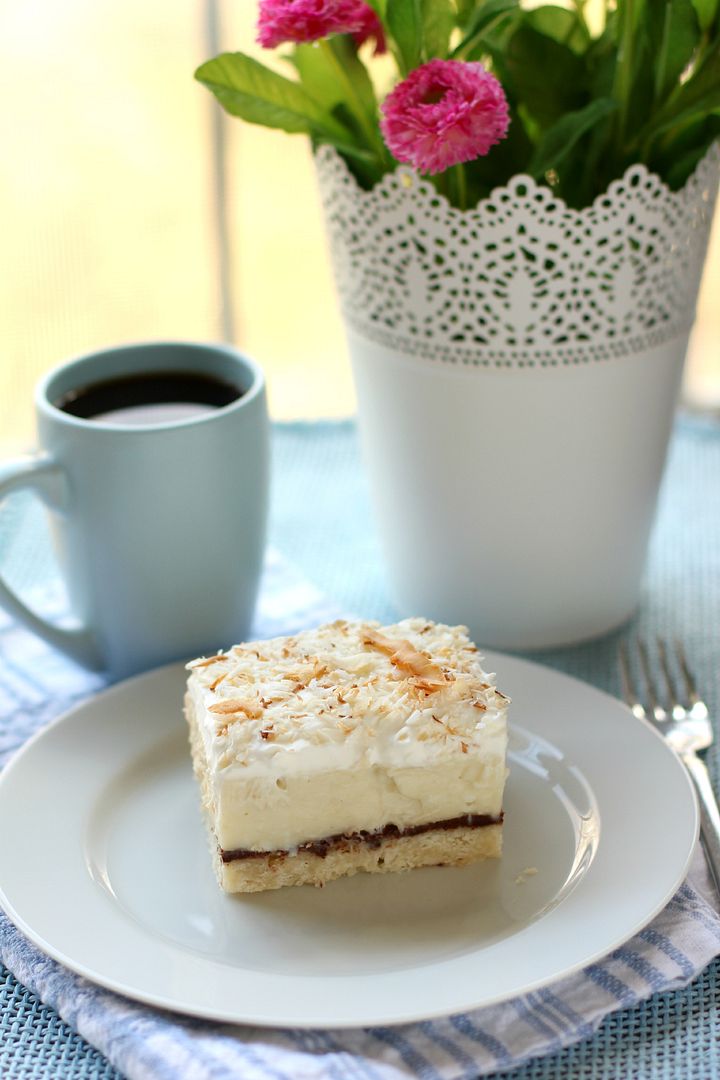
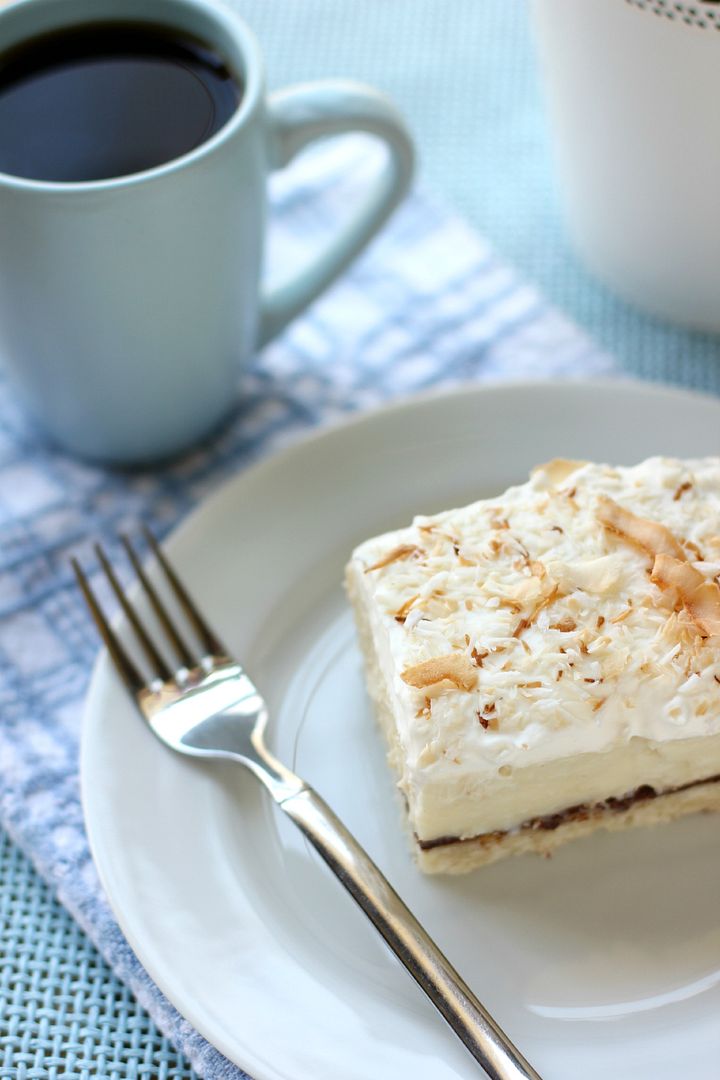
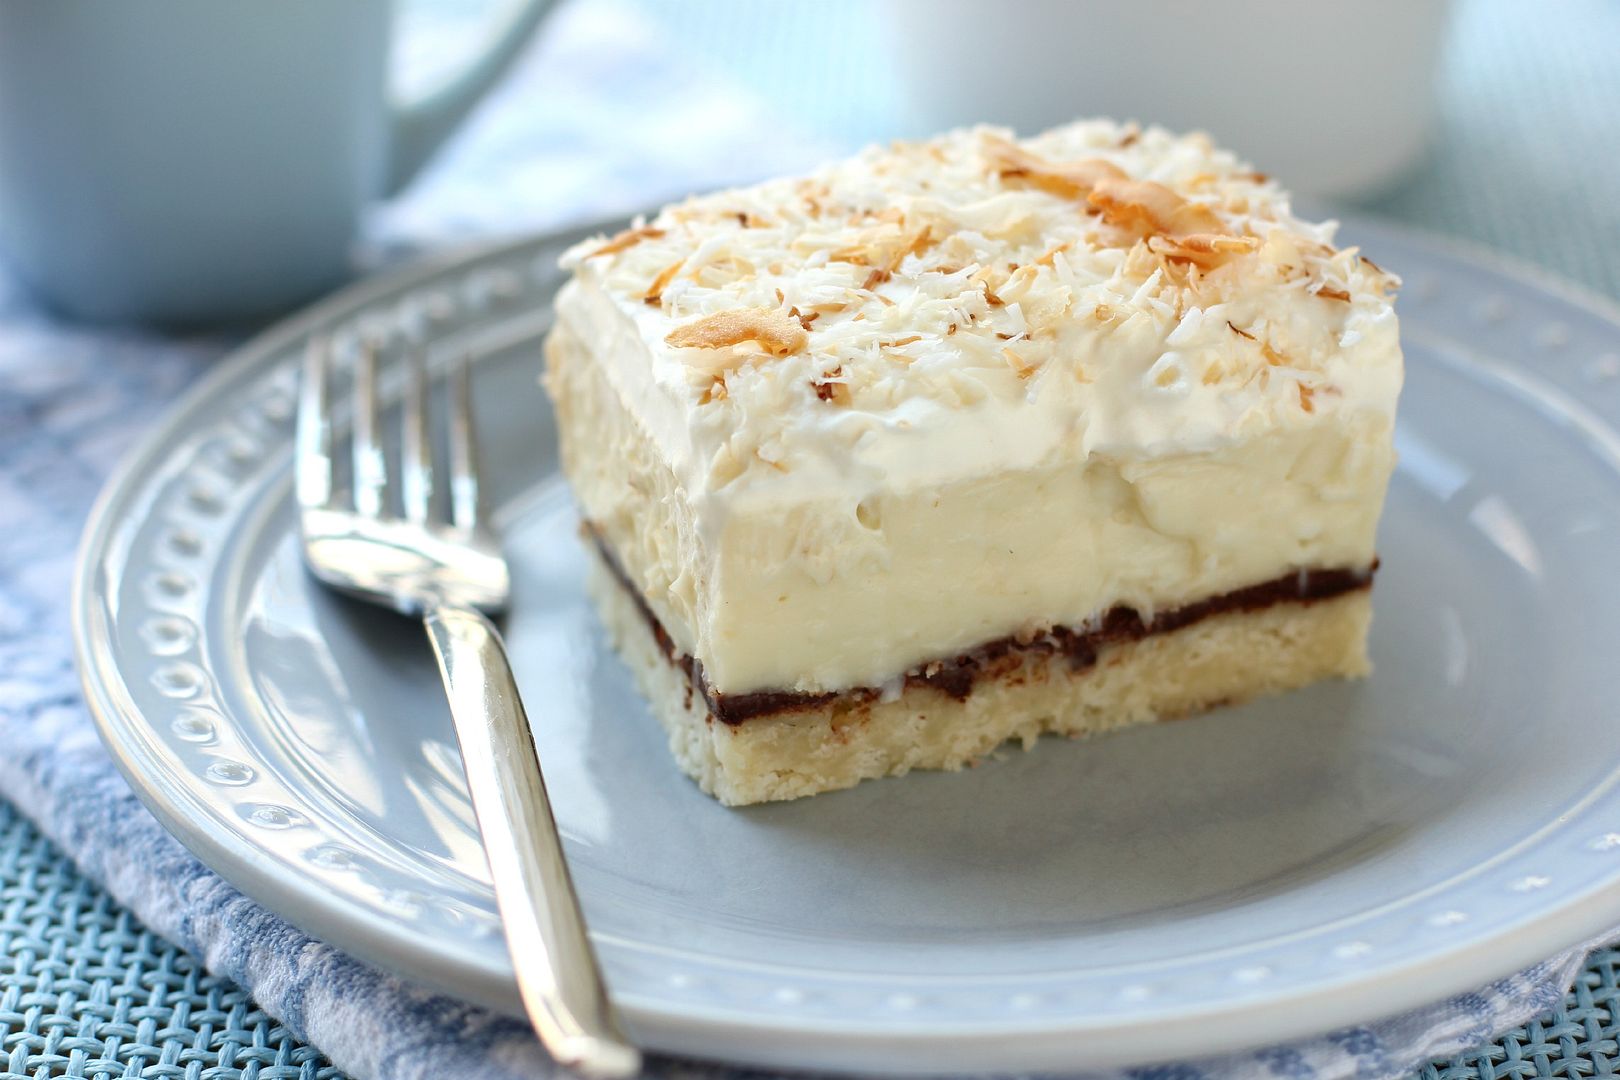
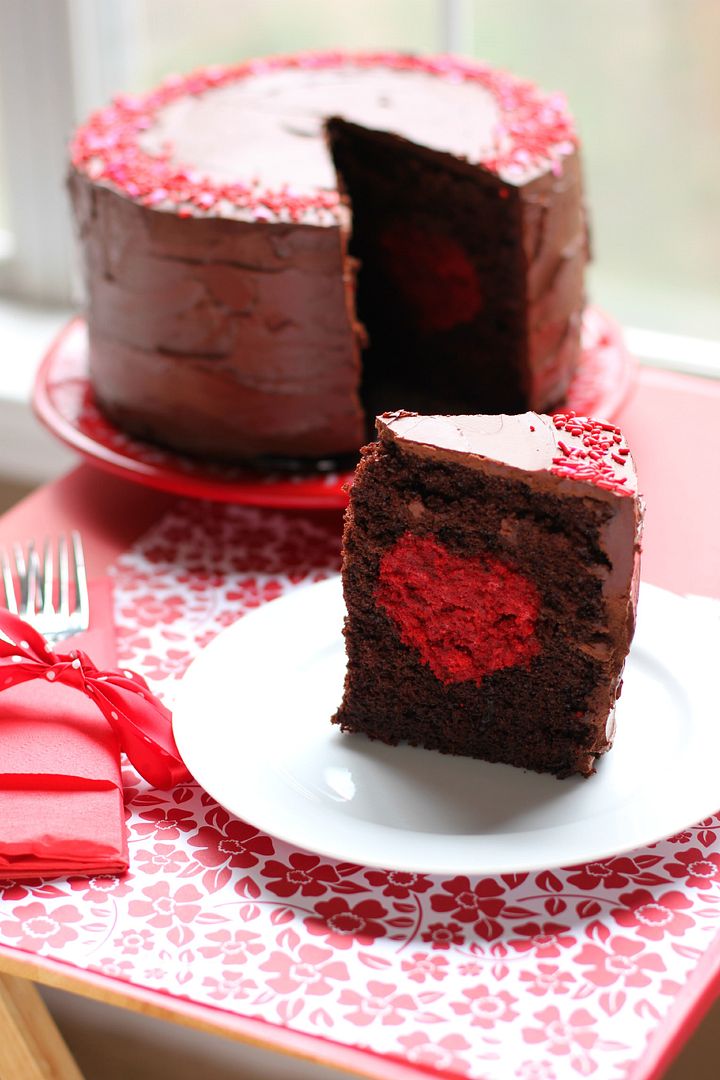
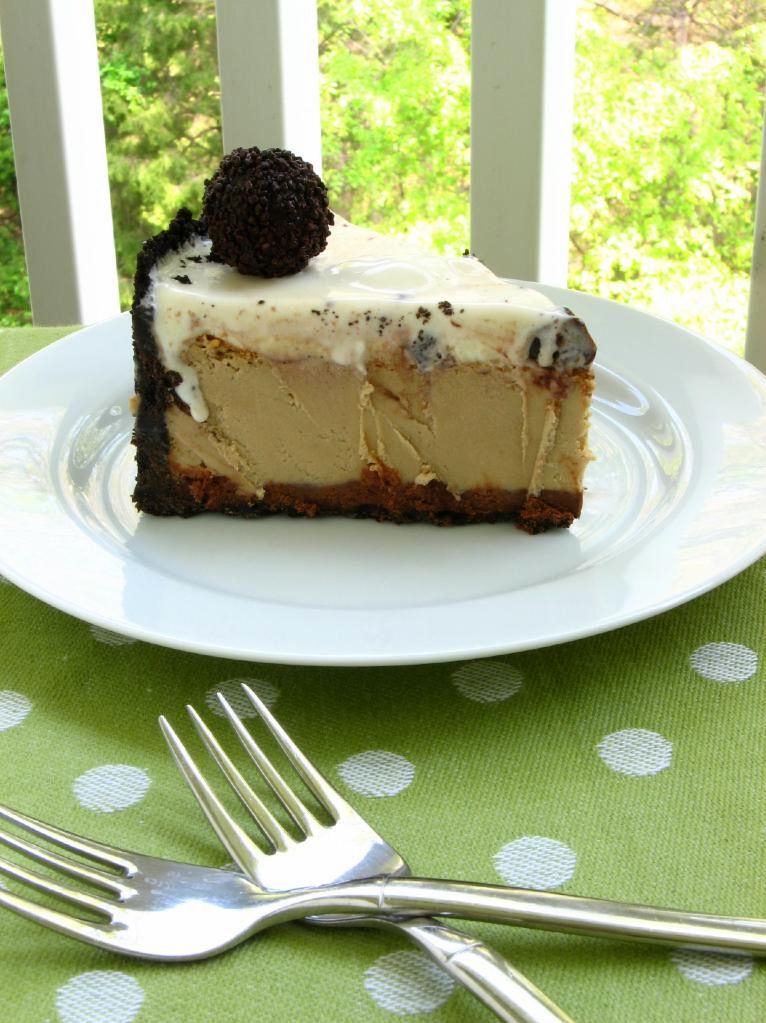
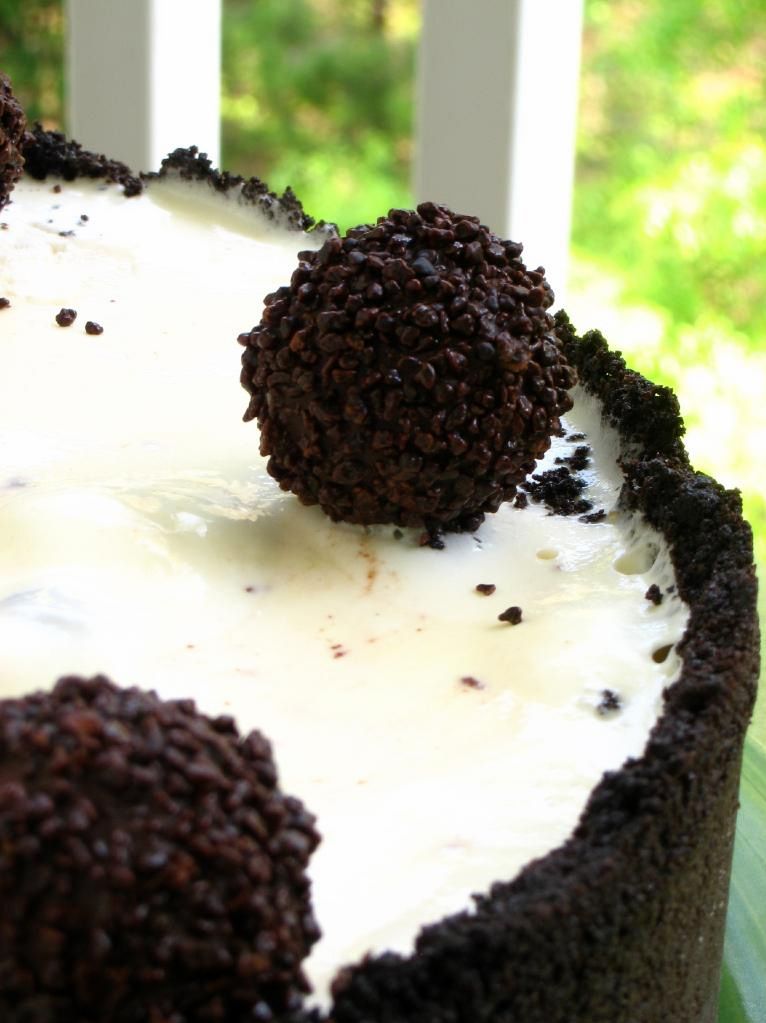
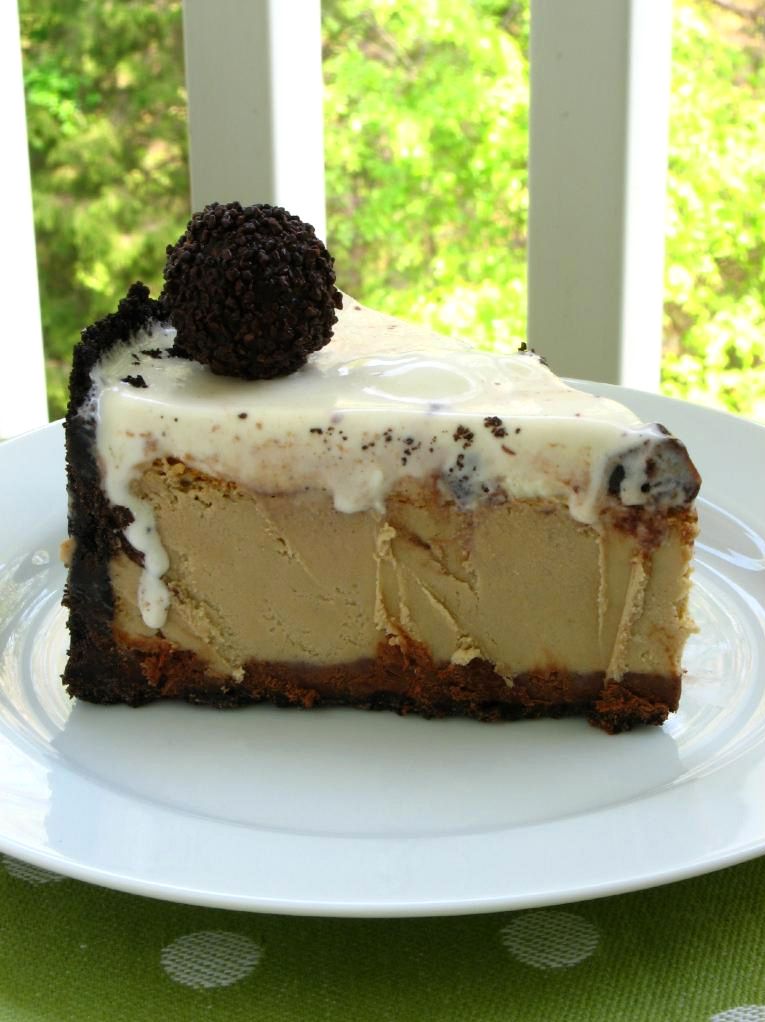
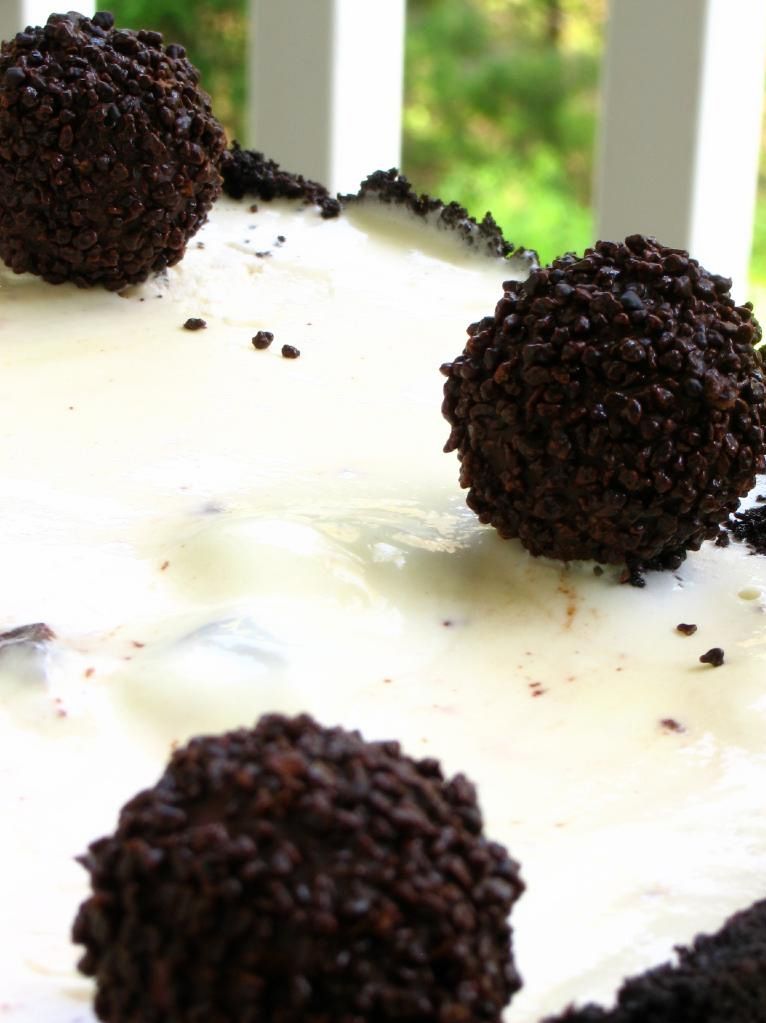
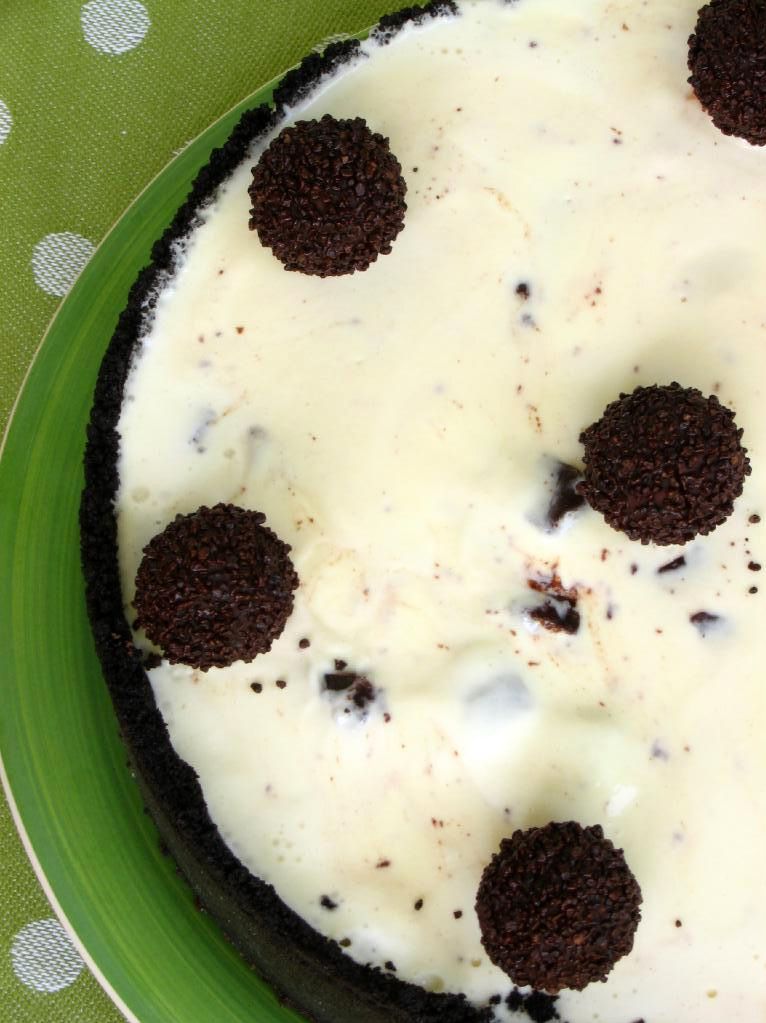
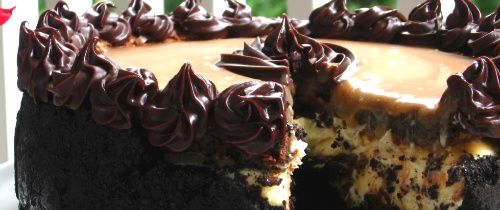
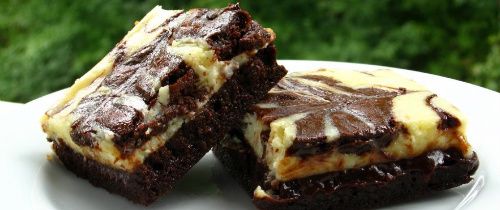
I made these Chocolate & Coconut Cream Pie Bars for a special person who occupies her own shelf in my heart. Martha is Mike’s great-aunt, for all intents and purposes, and she’s truly a crackerjack of a woman. She deserves all sorts of sweet things — video games and cheesy poofs, even! — but I decided on these bars for her birthday because I know she enjoys coconut. The chocolate layer was a whim, but what a great one — the bittersweet ganache is just enough to add a rich background flavor while still allowing the coconut cream to shine.

These bars take a little time and a little arm muscle, but they’re easy to assemble and more than worth the time spent by the stove. If you love a good coconut cream pie, you’ll love them.

Tell me about a moment when you broke one of your own rules.

Chocolate & Coconut Cream Pie Bars


Recipe by: Willow Bird Baking with filling adapted from All Recipes
Yield: 12-16 bars, depending on size

Okay, 30 minutes of stirring sounds like a lot. But now that I know how incredible these bars are, I would stir for an hour if I had to — maybe even two! They combine all the goodness of an old-fashioned coconut cream pie with the perfect amount of rich ganache. In short, these things are amazing. I used stabilized whipped cream on top of my bars, but if you’re serving them immediately and don’t anticipate keeping them long, feel free to just use plain whipped cream.

Crust Ingredients:
1 cup (2 sticks) butter
2 cups all-purpose flour
1/2 cup icing sugar

Ganache Ingredients:
3/8 cups heavy cream
about 3 ounces bittersweet chocolate chips (I love Ghirardelli’s 60% cacao chips)
about 3 ounces semisweet chocolate chips

Coconut Cream Filling Ingredients:
3 cups half-and-half
3 cups coconut milk
4 eggs
1 1/2 cups white sugar
2/3 cup cornstarch
1/2 teaspoon salt
1 1/2 cup flaked coconut
1/2 teaspoon coconut extract
1/2 teaspoon vanilla extract

Whipped Cream Topping Ingredients:
2 cups heavy whipping cream
1 tablespoon cold water (for stabilizing)
1 teaspoon gelatin (for stabilizing)
3-4 tablespoons icing sugar
1/2 cup coconut, toasted

Directions:
Make shortbread crust: Preheat your oven to 350°F. Prepare a 9 x 13 in. baking dish with a parchment paper sling (I use one long sheet across the length of my dish, and two overlapping short sheets across the width of my dish — just arrange it so that it has some overlap and overhang to help you pull the bars out after they’re finished). Cut the butter into the flour and icing sugar and press into the baking dish (I used a food processor to cut the fat into the flour — about 6 pulses — and then the bottom of a glass to press the mixture into the pan). Bake 18-20 minutes or until light brown. Set on a wire rack. Keep oven preheated for coconut toasting.

Make ganache: While the shortbread is baking, place the chocolate in a medium bowl. Bring the cream to a simmer in a medium saucepan (or microwave it for a couple of minutes). Once the cream reaches a simmer, pour the cream over the chocolate and let stand 1-2 minutes. Whisk in small circles until a smooth ganache has formed. Set it aside until your crust is finished and has cooled for a few minutes, and then pour it over the crust (it’s okay if it’s not cooled all the way). Place the chocolate covered crust in the fridge to chill until the ganache is set into a firm layer.

Toast coconut for the topping: Spread about 1/2 cup of the coconut flakes out on a baking sheet and toast for a few minutes, stirring every minute or so, until the coconut is golden brown. Spread it out on a plate to cool completely.

Make coconut cream filling: Combine the half-and-half, coconut milk, eggs, sugar, cornstarch, and salt in a large saucepan and bring it to a boil over medium-low heat, whisking constantly (this can take anywhere from 30-38 minutes. Some folks on All Recipes said you could zap it in the microwave for a minute at a time, stirring after every minute, until it was thickened. It was only supposed to take around 5-10 minutes, but I was too chicken to try. Let me know if you do.) Add coconut and vanilla extracts and the 1 1/2 cups of untoasted coconut and stir. Pour this filling over your chilled ganache and stick the whole thing in the fridge to chill until firm, about 2 to 4 hours.

Make whipped cream topping: Put 1 tablespoon cold water in a small bowl and sprinkle the gelatin evenly over the top. Let it soften for 2 minutes before microwaving it for 30 seconds and whisking to dissolve the gelatin. Using a chilled bowl and beater, whisk the 2 cups of heavy cream and icing sugar together until the cream forms stiff peaks, stopping to add gelatin mixture about halfway through. Dollop the cream over your bars and gently spread it around. Sprinkle on toasted coconut. Chill until ready to serve to let the whipped cream set up. Use the sling to pull the bars out of the dish, slice with a sharp knife, and enjoy!

If you liked this post, please:
Subscribe to Willow Bird Baking
Follow Willow Bird Baking on Twitter
Follow Willow Bird Baking on Facebook
Give this post a thumbs up on StumbleUpon
Pin It


Shareother ways to share this post with friends

Thick Chocolate Cake with a Big Red (Velvet!) Heart

Okay, confession: I’m actually starting this post on Thursday, February 8. At this moment, I haven’t taken any photos of this cake yet, because I haven’t even baked this cake yet. I’ve only just drafted the recipe. It could be a total cake flop (or another trifle?) But hopefully, by the time I’m finished with this post in a few days’ time, there’ll be a great big gorgeous cake staring at you from the photographs.


hi.

I also haven’t driven up to Raleigh for my Valentine’s weekend yet, so I may be totally off-base with the following mushiness (I’m a city girl, so I’m unfazed by your aphoristic “counting-unhatched-chickens” nonsense.)

I’m gonna take a stab at predicting the future and tell you (and hopefully confirm for you later): Mike is the best boyfriend ever.

See, Mike is planning (or, by the time you see this, planned — is this getting confusing?) our Valentine’s celebration this year.

I got him a few presents (this novel, and some astronaut ice cream, because who doesn’t want to eat weird space food?)

I also attempted to paint my toenails for the weekend, but if you follow Willow Bird Baking on Facebook, you know that I actually only managed to make my toes look like they’d been gnawed off by a possum. Romantic?

But other than those little details (and, okay, this gigantic cake), it’s all Mike.

Update, Friday, February 9: Mike just emailed me to tell me to bring something nice to wear to dinner, but that’s my only clue so far. I bought him Reese’s hearts to tuck into his present. And Scooby Doo valentines to hide around his apartment, because I am apparently 5 years old.

I finally baked the cake and filled it with red velvet goodness (spiking the cream cheese frosting with amaretto on the fly was a fantastic choice). Hopefully tomorrow morning will find me frosting, photographing, and hitting the road with Byrd (my smaller, fuzzier valentine).

Update, Saturday, February 10: My suspicions were correct — Mike wins at romantic Valentine’s dinners! He took me to fancy schmancy Coquette in Raleigh, where I had gnocci that tasted just like Thanksgiving (how’d they do that?) and he had a mind-blowing cassoulet. The wind chill might’ve been hovering around negative eleventy billion, but the cockles of my heart were as warm as a . . . well, as a cassoulet. Because I ate a bunch of it.

Update, Sunday, February 11: My suspicions were even more correct — Mike wins at awesome Valentine’s surprises! I’ve been wanting to see Hugo since it came out but haven’t gotten a chance. After Mike and I tried but failed to go see it last time he was in Charlotte, I figured I was going to miss it in theaters entirely. But after church today (and some fantastic pizza), Mike drove me to the movies! Hugo was amazing.

Actually, though, the best thing Mike gave me was a card. He knew it was good when I cried for five solid minutes after reading it (and I’ve read it 3 or 4 times since and cried every time.) The best part: “I love you with all my heart. I’m so glad we’re together this Valentine’s.”

If he thinks he’s glad . . . !

I can now happily report that the cake, also, was a smashing success. It turns out if you combine the best chocolate cake you’ve ever tasted, the best red velvet cake you’ve ever tasted, the best (amaretto!) cream cheese frosting you’ve ever tasted, and the best chocolate frosting you’ve ever tasted, the result will be pretty flippin’ awesome.

What are your Valentine’s plans?

Thick Chocolate Cake with a Big Red (Velvet!) Heart


Recipe by: Willow Bird Baking, using chocolate cake and chocolate frosting recipes adapted from Martha Stewart
Yield: 10-12 slices

This is a capital-D Delicious show-stopper of a fancy schmancy special occasion cake. It’s a labor of love; however, even though it’s a lot of steps, they’re all pretty easy to accomplish! To make this cake (and so many others — it’s been a great investment for me), I used a Wilton Heart Tasti-Fill Pan. You can find this pan online or at Hobby Lobby, Michael’s, and probably AC Moore, if you’re looking for one. Or you can also use this tutorial by Amanda at i am baker to create a heart inside your cake without the pan!

Chocolate Cake Ingredients:
2 1/4 cups all-purpose flour, plus more for pans
2 1/4 cups granulated sugar
1 1/8 cups unsweetened Dutch-process cocoa powder
2 1/4 teaspoons baking soda
1 1/8 teaspoons baking powder
1 1/8 teaspoons coarse salt
3 large eggs, room temperature
1 1/8 cups low-fat buttermilk
1/4 cup plus 3 1/2 tablespoons safflower oil
1 1/8 cups warm water
1 1/2 teaspoons pure vanilla extract

Red Velvet Cake Filling Ingredients:
1/4 cup vegetable shortening
1 egg
1 tablespoon cocoa
1/4 teaspoon salt
3/4 cups sugar
1/2 teaspoon vanilla extract
1/2 cup buttermilk
1 1/4 cups flour
1/2 teaspoon baking soda
1 1/2 teaspoons white vinegar
1 ounce (about 2 tablespoons) red food coloring

Amaretto Cream Cheese Frosting Ingredients:
2 ounces cream cheese, at room temperature
2 tablespoons unsalted butter, at room temperature
1 3/4 cups powdered sugar
1/2 teaspoon vanilla extract
1 tablespoon amaretto or almond liqueur (optional)

Chocolate Frosting Ingredients:
1/4 cup plus 2 tablespoons Dutch-process cocoa powder
1/4 cup plus 2 tablespoons warm water
2 sticks unsalted butter, room temperature
1/2 cup confectioners’ sugar
Coarse salt
1 pound semisweet chocolate chips, melted and cooled
sprinkles

Directions:
NOTE: This cake has a lot of steps, but it’s easy to split up over several days. The cake layers can all be made days in advance (freeze the chocolate ones to make them easier to work with — no need to thaw before you assemble your cake — and stick the red velvet one in an airtight container in the fridge until you’re ready to use it). You can also assemble the cake and refrigerate it the night before you want to frost it (just cover it in the fridge).

Bake red velvet cake: Preheat oven to 350 degrees F and grease a 9-inch square baking pan. Cream together shortening, sugar, and eggs. Mix the cocoa and food coloring to form a paste and add this to the shortening mixture. Add the salt and vanilla extract. Add the buttermilk alternately with the flour, beginning and ending with flour. Mix the vinegar and soda together in a small bowl and immediately fold it into the cake batter. Pour the batter into your prepared pan and bake at 350 degrees for 25-30 minutes, or until a toothpick inserted into the center comes out with just a few moist crumbs. Cool completely. Keep the oven preheated for your chocolate cake.

Make the chocolate cake: Grease the Wilton Heart Tasti-Fill Pan well (You can find this pan at Hobby Lobby or Michael’s, if you’re looking for one, or you can also use this tutorial by Amanda at i am baker to create a heart inside your cake without the pan!). I use Wilton’s Cake Release to grease my pans, but you could also use butter and flour.

Sift the flour, sugar, cocoa, baking soda, baking powder, and coarse salt together in a mixing bowl. Beat the dry ingredients on low until combined before increasing the speed to medium and adding eggs, buttermilk, warm water, oil, and vanilla. Beat about 3 minutes until the mixture is smooth. Divide it among your prepared pans.

Place the pans in the oven and bake until a toothpick inserted in the middle comes out with just a few moist crumbs, about 30-35 minutes. Rotate the pans about halfway through so they’ll bake evenly. Let them cool on a wire rack for about 10 minutes before turning them out onto sheets of wax paper and leaving them to cool completely. Stick them in the freezer so they’ll be easier to work with.

Make the cream cheese frosting: Whip cream cheese and butter until fluffy. Mix in all other frosting ingredients and mix on medium-high speed until combined. When cake is cooled and crumbled, mix the cream cheese frosting in until the mixture has a dough-like consistency.

Make your chocolate frosting: In a small bowl, whisk together the cocoa and warm water. In a separate bowl, beat together butter, confectioners’ sugar, and a generous pinch of coarse salt until pale and fluffy. Gradually beat in the melted chocolate and the cocoa mixture. Let this sit for about 30 minutes before you use it to frost the outside of your cake. (You can assemble the cake while you wait.)

Assemble the cake: Take out your firm-from-the-freezer cake layers and stack them to see if you need to trim the sides with a serrated knife at all. Level them if they need it. Then place them cavity-side up on the counter. Knead your red velvet mixture a bit to make it soft and pliable and pack the cavities of both layers with it, making sure it gets down into the shape of the heart. I smoothed the red velvet mixture level with the back of a spoon.

Spread a touch of chocolate frosting on the middle and outside of the cake layer (not on the red velvet heart) as “glue” and then place the cake layers together (filled sides together, of course). Carefully align your heart. Smooth a very skimpy layer of chocolate frosting (the crumb coat) all over the outside of the cake, brushing away any crumbs, and place the cake in the fridge to harden the frosting and secure the crumbs. After chilling for about 20 minutes, remove the cake and frost completely. Decorate with fantastic sprinkles and lots of love. Serve immediately with ice cream or store, covered, in the fridge. If you store it, zap each slice for 20-30 seconds or let it sit out for 20 minutes or so to let the chocolate frosting soften.

If you liked this post, please:
Subscribe to Willow Bird Baking
Follow Willow Bird Baking on Twitter
Follow Willow Bird Baking on Facebook
Give this post a thumbs up on StumbleUpon
Pin It

Fauxstess Cupcakes

I recently saw a letter written by an experienced teacher to his first-year-teacher self, and it reminded me of all the times I’ve thought, “I wish I’d known this when I started teaching.” Tomorrow is my last teacher workday before the students come back on Monday. What better time than the beginning of a new school year to write my own letter to my past self? So here it goes.

Dear Julie of 2006 (or as you’re about to be known, Ms. Ruble!),

It’s the night before the first day of school. I know you’re scared. I would tell you to get a good night’s rest, but to be honest, you’re not going to sleep much tonight. It doesn’t matter, though. Well-rested or not, you’re about to meet around 150 students who will change your life forever.

You’ll meet D, who you’ll admire for his sense of humor and his dance moves, and who will ask you all year when you’re going to let his beloved mother do your hair. You’ll meet L, who will stand up in class and scream in your face, but who needs you to forgive her and love her about as much as she needs air. You’ll meet H and P, who you will never reach. You’ll meet M, who seems impervious but who will shed surprising tears when you speak to her in anger. You’ll meet D, whose artwork will take your breath away.

You’ll meet K, and Julie . . . K will break your heart. Nothing you do will rescue that little boy from his situation. What can I say? This is going to be a tough year. But you can make it one of the most important years of your life.

You don’t lack fervor. I’m not going to tell you to be fervent. You are meticulous. I’m not going to tell you to perfect your classroom management systems. You are fretting about how students will learn science. I’m not going to advise you on unit plans. I’ve been teaching for 3.5 years now and I’m not an expert, but I’m going to tell you the things I wish you’d known.

1. Teach your students to learn. There are so many standards and concepts that you’ll literally try to pack a new topic in every day this year. I know you can drag the kids along at that pace — you’re good at making things happen — but maybe you shouldn’t. You’re trying to cram little bits of application into a full day of lecturing, and that’s not really how they’re going to learn. Put the importance of teaching them every tiny fact about your subject matter into perspective.

Instead, present new information and then find resources, projects, labs, and other experiences that allow them to apply the information themselves. Let them take ownership in their learning and enjoy the process. Give them more time to read and problem-solve together. Let them come up with creative ways to study. They don’t need to remember every step of the rock cycle for the rest of their lives, but they do need to know how to gather and process information.

I know it will take too long. I know you’ll end up not being able to cover everything. But if they come out of your class with the ability to be a curious, driven learner, that’s more important than all the Earth science facts you could give them.

2. Be humble and open to new ideas. This is a lesson you’ve learned, but that you need to continue to wholeheartedly embrace. We all tend to grow up feeling like we have a good handle on how the world works. In a way, deep down, we believe we know everything and can do everything. Teachers especially can develop a superiority complex when they run their classroom well and start to have great ideas. Rather than being a vessel that accepts and pours out in equal measure, they become a faucet, spewing a thick, opaque blanket of know-it-all over their colleagues.

Apart from alienating the people who can be your greatest allies, you miss out on so much when you think you know everything. Remind yourself constantly that some of your most exciting moments in the classroom have come from trying someone else’s ideas, even when they were outside of your comfort zone. Remind yourself that others are competent professionals, too — indeed, when you move on to a different school after this year, you will be surrounded by some of the most intelligent, innovative people you’ve ever met. Remind yourself that it’s okay to ask for help.

Finally, teach your students that they don’t know everything, either. Model humility, and place them in situations that challenge their worldview.

3. Be an advocate for yourself so that you can be an advocate for your students. You’ve been lectured endlessly on being flexible, rolling with the punches, and sucking up the pain. Those things are important sometimes. But what no one’s told you yet, and what you really need to know to survive this year (and I’m not just being dramatic), is this: you are a valuable professional, and you do not have to let people take advantage of you.

You’re the sweet, young, impressionable, flexible new teacher and this year, others will try to steamroll you to further their own interests. Even if they have their students’ needs in mind, it is not okay for them to hurt you and your class. If someone tells you you have to do something unreasonable, say no. If someone tells you you have to do something that hurts your class, say no. If the administration says they won’t assist you, don’t stop insisting. This isn’t a crusade or a mission for which you have to allow yourself to be victimized. It’s your job — and it’s important for you and your students that you are treated professionally.

4. Let yourself fail, and teach your students that failing doesn’t make you a failure. You are a perfectionist, but masterfully handling dozens of unpredictable, unique children is kind of like orchestrating a synchronized swimming team . . . made up of cats. Some lessons and classroom management plans are going to flop. Someone is going to steal the popcorn you brought in as a reward for the students. Someone is going to cut every one of your students’ bean plants in half. You are going to be unnecessarily harsh to a student and regret it.

Show your students that it’s okay to make a mistake by owning your mistakes. Show them that it’s okay to apologize by apologizing to them. Show them that it’s okay to be disappointed in yourself while still loving yourself — that you can pick yourself up and move on.

There are kids who make a mistake and add it to a list in their brains called, “Reasons I Don’t Deserve to be Loved.” Show them that there’s nothing they can do to make themselves failures as long as they keep moving forward. Tell them to expect “excellence, not perfection,” as one of my coworkers said in a meeting today, and to forgive themselves when they miss the mark.

5. Most importantly, Julie, love your students. I know you think you understand how crucial this is, but you will lose sight of it. You will immerse yourself in creating classroom structure, creating lessons, developing systems. You will prioritize academic achievement without realizing that having a loving, secure environment is the bedrock on which achievement is built.

Your students may not remember the different kinds of earthquake faults, but they’ll remember that they had a 6th grade teacher who loved them. They’ll remember that even when they misbehaved, there was someone in their lives who would not give up on them. They will be changed by the fact that you listened to their ideas and treated them like valuable human beings. Stop and let yourself interact with them in a personal way that lets them know you care about them.

That’s all for now — no words of wisdom on how to organize your files or balance housework and schoolwork, because you’ll figure all of that out. You’re going to be great. And even when you’re not, you’re going to change lives and be changed. Thank God for a job where you can say that!

Love and #2 pencils,
Ms. Ruble of 2011

Fauxstess Cupcakes


Recipe by: Adapted from Annie’s Eats and Hershey’s
Yields: about 15 cupcakes

These “Fauxstess” Cupcakes are homemade knock-offs of the Hostess Cupcakes that might’ve shown up in your lunch boxes during your childhood. They were adorable additions to my elementary school throwback picnic. The tender chocolate cake is filled with a marshmallowy cream and topped with rich ganache. Apart from being cute, these things are seriously easy to make and seriously delicious!

Cupcake Ingredients:
1 cups sugar
7/8 cup all-purpose flour
3/8 cup HERSHEY’S Cocoa
3/4 teaspoon baking powder
3/4 teaspoons baking soda
1/2 teaspoon salt
1 egg
1/2 cup milk
1/4 cup vegetable oil
1 teaspoon vanilla extract
1/2 cup boiling water

Filling Ingredients:
9 tablespoon unsalted butter, softened
2 1/4 cups confectioners’ sugar
1 1/8 cup Marshmallow Fluff
2 tablespoons plus 1 3/4 teaspoon heavy cream

Ganache Ingredients:
3/4 cups heavy cream
5 ounces bittersweet chocolate chips (I love Ghirardelli’s 60% cacao chips)
5 ounces semisweet chocolate chips

Directions:
Make the cupcakes: Preheat oven to 350°F. Line two muffin pans with cupcake liners. In a large bowl, whisk together the sugar, flour, cocoa, baking powder, baking soda and salt in large bowl. Add the eggs, milk, oil, and vanilla. Beat this mixture medium speed for 2 minutes. Stir in boiling water (this will make the batter thin). Fill each well about 2/3 full of batter (be careful to not to overfill them — these cupcakes always bake up a little wonky for me, and if you overfill them, they can overflow the pan). Bake 20 to 25 minutes (I check them early and often, starting around the 15 minute mark) or until a toothpick inserted into the center of a cupcake comes out with just a few moist crumbs. Cool completely.

Make the filling: Beat the butter, confectioners’ sugar, marshmallow fluff and 2 1/4 tablespoons (I eyeballed this measurement) of the heavy cream together until fluffy. Transfer all but 3/4 cup of this mixture into a pastry bag with a narrow tip. Add the remaining 1 1/2 teaspoon of cream to the remaining 3/4 cup of the mixture and beat until smooth. Cover this and save it for decorating the top of the cupcakes later.

Make the ganache: Place the chocolate in a medium bowl. Bring the cream to a simmer in a medium saucepan (or heat it for a couple of minutes in the microwave, keeping a watch that it doesn’t boil. Pour the hot cream over the chocolate and let stand 1-2 minutes. Whisk in small circles until a smooth ganache forms.

Assemble the cupcakes: Insert the tip of the pastry bag full of cream into the bottom of each cupcake and gently squeeze cream out into the cake. It’s hard to tell how much to squeeze and for how long, but I tried to squeeze as much as possible without bursting the cupcake, and to the point where a small bead of the cream poked out of the bottom when I removed the pastry tip (I then scraped off the excess). Dip the top of each cupcake into the ganache (or, if they don’t rise above the cupcake paper, you can gently spoon the ganache on and spread it with the back of a spoon). Grab the reserved filling mixture with the extra cream and use a pastry bag with a small tip (or a plastic zip bag with a small corner cut off) to pipe curls across the top of each cupcake. Refrigerate the cupcakes to set the frosting. Serve immediately or store in an airtight container in the refrigerator.

P.S. Are you thinking up your own filled cupcake for the Willow Bird Baking Cupcake Challenge? Bake your creation and email photos to juruble ‘at’ gmail.com by Wednesday, September 7, 2011. I’ll feature your cupcake on WBB! Find more details and some cupcake inspiration here.

If you liked this post, please:
Subscribe to Willow Bird Baking
Follow Willow Bird Baking on Twitter
Follow Willow Bird Baking on Facebook
Give this post a thumbs up on StumbleUpon


ShareOther ways to share this post with friends!

Rich Ice Cream and Coffee Cheesecake

I don’t love coffee. If I wanted something scalding, bitter, and hard to swallow, I’d google the Carolina Panthers’ season record. Ha ha.

Yeah, that’s one of those jokes that’s kind of more sad than funny. Oh well.

My mother (yes, of cross stitching birthday party fame) used to feel certain that I would acquire an affinity for coffee as I got older. Periodically she would test this hypothesis, urging me to take a sip from her cup or buying me something frothy and caramely at Starbucks, only to find that things weren’t unfolding as she anticipated.

What can I say? Coffee is gross.

I could load it up with sugar and cream (and donuts — can you do that?) and probably choke it down, but if I’m going to ingest that many calories, I’d rather just have some dessert.

Paradoxically, despite my antipathy towards coffee in its beverage form, I’ve always loved coffee-flavored confections. Coffee ice cream was my absolute favorite treat as a little girl, for instance. Coffee also plays an Oscar-worthy supporting role in Coffee Cookie Dough Fudge Cheesecake, one of my current faves. I adore the coffee-brownie combination in my Ice Cream Cupcakes. You get the idea.

And besides all those things, I’m in love with this cheesecake. IN LOVE. Like, buy it a ring, get down on one knee, drag it to the altar kind of love. It might be one of the best cheesecakes I’ve ever made. Basically: swoon.

For one thing, it has the perfect ratio of rich coffee cheesecake to cold ice cream (oh, and did I mention the layer of fudgy ganache in there as well?). For another thing, the ice cream flavor I chose rocked the Casbah.

I considered coffee or chocolate ice cream, but decided that might be too rich. I also knew I wanted brownie chunks. Ben & Jerry’s makes a Cheesecake Brownie ice cream that fit the bill (how perfect is that, seriously?)

Apart from inspiring a matrimonial sort of adoration in me, this cheesecake is one of the easiest I’ve ever put together. It’s as simple as baking and cooling your cheesecake, softening up your favorite ice cream, and spreading it on top. Freeze the whole thing until it’s firm, cut it with a hot knife, and then call up the preacher. That’s about how it goes.

What ice cream flavor would you like to spread all over your coffee cheesecake?

Rich Ice Cream and Coffee Cheesecake


Recipe by: Willow Bird Baking
Yields: 15 servings

Crust Ingredients:
37 chocolate sandwich cookies, finely processed into crumbs
6 tablespoons unsalted butter, melted and cooled
Small pinch of salt

Ganache Ingredients:
3/4 cups heavy cream
10 oz. bittersweet or semisweet chocolate, finely chopped (I combined both)

Filling Ingredients:
3 (8 oz.) packages cream cheese, at room temperature
1 cup sugar
1½ tablespoons all-purpose flour
1 tablespoons instant coffee granules
2 teaspoons vanilla extract
1½ teaspoons mild-flavored (light) molasses
3 large eggs

Topping:
Ice cream of your choice (I used Ben & Jerry’s Cheesecake Brownie ice cream)
dark chocolate candies of your choice for decorating (I used Ferrero Rondnoir)

Directions:
To make the crust, butter a 9-inch springform pan. Combine the chocolate cookie crumbs, melted butter and salt in a small bowl. Toss with a fork to moisten all of the crumbs. Press into a thin layer covering the bottom and sides of the springform pan (at least 3 inches up the sides). I did this using a smooth glass to press crumbs into place.

Bring the cream to a simmer in a medium saucepan. Place the chocolate in a medium bowl. Once the cream reaches a simmer, pour the cream over the chocolate and let stand 1-2 minutes. Whisk in small circles until a smooth ganache has formed. Pour 1.5-2 cups of the ganache over the bottom of the crust (if you have leftover, save it for eating or decorating with later). Freeze until the ganache layer is firm, about 30 minutes.

Preheat the oven to 350˚ F and position a rack in the middle of the oven. In the bowl of an electric mixer fitted with the paddle attachment, beat the cream cheese and sugar on medium-high speed until well blended. Beat in the flour. In a small bowl, combine the coffee granules, vanilla and molasses, stirring until the coffee dissolves. Add to the cream cheese mixture and beat until well incorporated, scraping down the sides of the bowl as needed. Beat in the eggs one at a time, scraping down the bowl between each addition.

Pour the filling over the cold ganache in the crust. Enclose the bottom of the springform pan in tightly wrapped foil and place it in a baking dish. Fill the baking dish with hot water about halfway up the cheesecake pan, careful not to let the moisture touch the cheesecake. Bake until the top is lightly browned, puffed and cracked at the edges, and the center moves only very slightly when the pan is lightly shaken, about 1 hour. Transfer to a wire cooling rack. Let cool at room temperature for at least 30 minutes. Transfer to the refrigerator and let cool at least 3 hours, until completely chilled and set.

Soften ice cream of your choice (I used Ben & Jerry’s Cheesecake Brownie ice cream) for 10-15 minutes or until soft enough to spread. Scoop out a few big scoops onto the top of your cheesecake and spread with an offset spatula or the back of a spoon. Add more ice cream until it’s flush with the top of your crust. Freeze cake until solid (overnight is best). Decorate with dark chocolate candies of your choice (I used Ferrero Rondnoir). Slice with a knife held under hot water to serve. Keep in freezer when not serving — it melts quickly.

If you liked this post, please:
Subscribe to Willow Bird Baking
Follow Willow Bird Baking on Twitter
Follow Willow Bird Baking on Facebook
Give this post a thumbs up on StumbleUpon


ShareOther ways to share this post with friends!

Celebrating Cheesecake — and a challenge for you!

Taylor from Taylor Takes a Taste tweeted me yesterday with a very, very important message: Today is National Cheesecake Day! Well, okay, it’s actually National White Chocolate Cheesecake Day, but I’ve never made a white chocolate cheesecake, so just ignore that part. I’ll add it to my to-do list.

In order to celebrate, I thought I’d compile Willow Bird Baking’s many cheesecake recipes and issue a challenge for you!

My goal is to inspire kitchen confidence in home cooks by encouraging them to tackle fun, challenging new recipes. So I’m challenging you this month! Here’s what you do:

Choose one of the cheesecake recipes below that feels like a challenge to you and make it for friends, family, or coworkers.

– Take a photo and email it to me at juruble ‘at’ gmail ‘dot’ com with a few comments about how it went and a link to your blog (if you have one — if you don’t, that’s okay too!).

– Do this before April 5, 2011. In exactly a month, I’ll post all of your cheesecake masterpieces here on Willow Bird Baking!

– You can also grab the badge at the bottom of this post if you’d like to let your readers know that you’re participating in the Cheesecake Challenge, but it’s optional.

If you’d like to participate, leave me a comment below and let me know! If you’ve already made one of the recipes below, that counts too! Just send me a photo!

Willow Bird Baking’s Cheesecake Recipes:

1. Coffee Cookie Dough Fudge Cheesecake


2. Red Velvet Cheesecake


3. Caramel Fudge Brownie Cheesecake


4. Chocolate Peanut Butter Bliss Cheesecake


5. Blueberry Lemon Cheesecake Cupcakes


6. Chocolate Cheesecake-Stuffed Cupcakes with Ganache


7. Lemon Blueberry Cheesecake Squares with Shortbread Crust


8. Marbled Chocolate Cheesecake Brownies


9. Pumpkin Cheesecake Bread Pudding

And don’t forget to watch my (slightly embarrassing) cheesecake tutorial for great cheesecake pointers!

Finally, here’s the Cheesecake Challenge badge if you want to grab it:

If you liked this post, please:
Subscribe to Willow Bird Baking
Follow Willow Bird Baking on Twitter
Follow Willow Bird Baking on Facebook
Give this post a thumbs up on StumbleUpon


ShareOther ways to share this post with friends!

1 2 3 4 5