decorations

Chocolate Birds’ Nest Cupcake Toppers

Popping in to let you know that my guest post (and recipe for Chocolate Birds’ Nest Cupcake Toppers) is up on Maranda’s lovely blog, Jolts & Jollies! These springy no-bake cookies make the perfect cupcake decorations. Hope you’ll hop over and see how simple they are!

Also, keep your eyes peeled (what does that even mean? ew.) for a new recipe I’m posting tomorrow. It’s gonna do some serious sock-knocking.

If you liked this post, please:
Subscribe to Willow Bird Baking
Follow Willow Bird Baking on Twitter
Follow Willow Bird Baking on Facebook
Give this post a thumbs up on StumbleUpon


ShareOther ways to share this post with friends!

Banana Coconut Cream Easter Cupcakes

Easter and I have a checkered past.

When I was a little girl, there were Easter baskets involved, and that seemed pretty awesome. An entire basket of treats and toys surround by that annoying-but-simultaneously-endearing Easter grass? A chocolate bunny bigger than my head that I’d eat about a quarter of before giving up? Plastic Easter eggs my mom had painstakingly filled with candy? Count me in.

Other Easters, though, were fraught with peril. Well, okay, peril might be a little dramatic. Perhaps fraught with inconvenience.

One Easter, for instance, I woke up and immediately realized that I was sick. I was nauseous, feverish, and definitely not interested in holiday cheer. My big plans of jumping out of bed and searching out the nearest stash of candy were dashed.

It was awful; birds were chirping joyfully in the freshly-bloomed Bradford pear trees outside while inside, little Julie was lying, miserable and a tad melodramatic, in the floor.

My parents brought my big Easter basket in and set it in front of me. They apparently thought the effect of this action would be to motivate me towards wellness. However, the piles of candy that should’ve been appetizing to me actually made me want to puke. I languished for hours before I so much as unwrapped a creme egg.

Maybe that Easter wasn’t the easiest one for me to celebrate, and nowadays I don’t even get an Easter basket, but the holiday is actually my favorite time of the year.

Easter is when Christians celebrate the miraculous resurrection of Jesus Christ. He died in our place, taking the punishment for our sins, and the fact that He then rose from the dead is an unspeakable victory that I will try my best to speak: a triumph over the power of death and the power of sin.

I walk around feeling bound a lot of the time. Bound by sadness, bound by financial worry, or bound by indecision; the truth is, what I have in Christ is the ultimate freedom. This holiday reminds me to rejoice, and to give away my worries — to recommit to living a free life for Him.

To celebrate this year, I made these moist banana cupcakes stuffed with my favorite edible substance in the universe, coconut pastry cream, and topped with my other favorite edible substance in the universe, Swiss meringue buttercream. They’re heavenly, dense little bites of Easter JOY.

I decorated the cupcakes with tiny chickie faces and some ginormous, delicious birds’ nests. The recipe below will tell you how to create the former, and keep an eye on Maranda’s blog in the coming days for instructions on how to create the cute nests!

If you want to know more about Christianity, what Jesus did, and what it means for us, please leave me a comment below and let me know that you’d like me to email you.

Banana Coconut Cream Easter Cupcakes


Recipe by: Willow Bird Baking, adapted from multiple sources including Piggly-Wiggly, Gina DePalma, and Zoë Bakes
Yields: about 32 cupcakes

Cupcake Ingredients:
3 cups all-purpose flour
2 tsp baking soda
1/2 tsp salt
2 sticks (8 ounces) unsalted butter at room temp
2 cups sugar
2 tsp pure vanilla extract
2 large eggs, preferably at room temp
~4 very ripe bananas, mashed (about 1.5-1.75 cups)
1 cup sour cream or plain yogurt

Coconut Pastry Cream Ingredients:*
1 can (14 fluid ounces) unsweetened coconut milk
3/4 cup sugar
1 vanilla bean
pinch kosher salt
3 large egg yolks
2 tablespoons corn starch
2 tablespoons unsalted butter
1 cup sweetened coconut flakes
1/2 cup whipping cream

Swiss Meringue Buttercream Ingredients:
1 cup sugar
4 large egg whites , at room temperature
24 tablespoons (3 sticks) unsalted butter, at room temperature
2 teaspoon vanilla extract
yellow food coloring (I used lots. Just add it slowly until you reach desired color)
mini chocolate chips (optional, for decorating chicks)
candy corn (optional, for decorating chicks)

Directions:
Make the Cupcakes: Preheat the oven to 350. Generously butter a mini-bundt cake pan or cupcake pan.

In a medium bowl, whisk the flour, baking soda and salt together. In a separate, large bowl, beat the butter until creamy. Add the sugar and beat at medium speed until pale and fluffy. Beat in the vanilla, then add the eggs, one at a time, beating for about 1 minute after each egg goes in. Reduce the mixer speed to low and mix in the bananas.

Mix in half the dry ingredients (the mixture may look curdled — just keep mixing), followed by all the sour cream and finally, the rest of the flour mixture. Fill each well of your prepared pan about 1/2 to 2/3 of the way full and rap the pan on the counter to remove bubbles from the batter and smooth the top.

Bake for 25 to 30 minutes, or until a toothpick inserted deep into the center of the cakes comes out clean. Transfer the pan to a rack and cool for 10 minutes before unmolding on the rack. Let cool to room temperature before adding cream filling and glaze.

Make the Coconut Pastry Cream: While cakes are baking and cooling, make coconut pastry cream. Heat the coconut milk, sugar, salt and vanilla bean in a medium saucepan over medium heat. In a bowl, whisk together the egg yolks and corn starch. Once the cream is hot, remove the vanilla bean, scraping out any remaining seeds and returning them to the cream. Add 1/2 cup of the hot cream slowly to the yolks, whisking as you add. Then pour the yolk mixture into the pot of hot cream and whisk. Continue to whisk with heat on medium-high for 3 more minutes. The mixture will turn thick and bubble. You need to continue to whisk for the full 3 minutes or the pastry cream will separate once it is cool. After the 3 minutes, whisk in the butter. Add the coconut flakes. Pour into a shallow dish to cool.

Cover with plastic wrap pressed right against the pastry cream. This will prevent a thick skin from forming on the surface. Refrigerate for at least an hour or freeze for 30 minutes. Once it is cold, stir the pastry cream to loosen. Whip the 1/2 cup cream to medium peaks. Stir in 1/3 to the pastry cream to lighten. Fold in the remaining cream until the pastry cream is nice and light.

To make Swiss buttercream icing: Combine sugar and 1/2 cup water in a small saucepan and bring to a boil over medium-high heat, stirring to dissolve sugar. Boil without stirring until syrup reaches 240° on a digital thermometer, about 5 minutes.

Meanwhile, in a stand mixer with whisk attachment, beat egg whites on medium-high speed until soft peaks form. With mixer on medium speed, gradually pour in hot syrup in a thin stream; avoid pouring syrup on whisk. Increase speed to medium-high and beat until stiff peaks form and mixture is cool, about 8 minutes. Reduce speed to medium and add butter 1 tablespoon at a time, beating after each addition. (If at any time buttercream appears curdled, beat on high until smooth, then reduce speed to medium and continue beating in butter.) Once all butter is added, beat on high speed until buttercream is smooth and fluffy, about 1 minute. Beat in vanilla and food coloring.

To assemble the cakes: When cakes are cool, hollow out the center of each mini-bundt cake (use the cone method). Pipe in as much of the coconut pastry cream as will fit and replace the top of the “cone.”

Use an offset spatula or the back of a spoon to smooth a layer of frosting over the top of the cupcake. Use a star tip to pipe a small circle of frosting in the middle of the cupcake (covering any imperfections). Give it two mini chocolate chip eyes and a candy corn beak (note: the color of these will start to run after a few days in the fridge, so if you aren’t serving these right away, you may want to wait to add them. You’ll have to remove the cupcakes from the fridge for a bit to let the frosting soften and then stick them on). Voila!

*NOTE: This recipe actually makes twice as much coconut pastry cream as you need to fill the cakes. I split my pastry cream and made these with half, and filled donuts with the other half. You can also just double the number of banana cakes you make to fill, or find some other creative use for the excess cream. I suppose you could also try halving the coconut pastry cream recipe, but I didn’t want to fiddle with halving three yolks and a can o’ coconut milk.

If you liked this post, please:
Subscribe to Willow Bird Baking
Follow Willow Bird Baking on Twitter
Follow Willow Bird Baking on Facebook
Give this post a thumbs up on StumbleUpon


ShareOther ways to share this post with friends!

Browned Butter Pumpkin Croquemcake with White Chocolate Chai Mousse (Project Food Blog Round 8!)

Because of YOU, Willow Bird Baking is one of only 24 blogs in Project Food Blog Round 8! I am so beyond grateful for your support and love throughout this process. Challenge #8 was to create a baked good using pumpkin. VOTING IS NOW OPEN! (Thank you for voting! Voting is now closed.) I’d love it if you’d pop over to cast a vote for me by clicking “Vote for this Entry” here. Thank you all!!

I am basically an architect. I know some folks who worked through countless hours of pesky schoolwork to call themselves architects and may disagree with me. But I think I have enough experience to go ahead and claim the title.

See, in 6th grade, my classmates and I were divided into teams and charged with a task of monumental proportions. We were to engineer a bridge out of toothpicks, string, and glue. Each of these “resources” was assigned a cost, and we were given a budget of imaginary money with which to purchase supplies. The team whose bridge could hold the most weight at the end of the competition would win epic bragging rights.


Moist, amazing Browned Butter Pumpkin Cake!

We must have been hyped up on marshmallowy breakfast cereal or something, because as soon as the teachers said GO, it was on.

We were ruthless. We pasted, chopped, measured, quarreled, budgeted, collaborated, and in a move that I’m still not sure was entirely legal, pilfered cast-off supplies from the trash can. Hey, we were just being green, right? Nowadays we’d obtain a high L.E.E.D. certification and get a pat on the back. I’m sure my teachers would’ve seen it that way . . .

I remember waxing intellectual about the structural integrity of domes, lecturing a classmate on how strong the ends of an egg were for this reason. Another peer gave an impromptu diatribe on the virtues of suspension bridges. We ended up with some sort of Frankesteinian hybrid, a bridge held up by suspension and bulky domes underneath. We were still furiously glopping on excess glue in hopes of bolstering the bridge’s integrity when the teachers called time.

We watched breathlessly as the teacher judging the competition picked up a thin book and placed it on our bridge. It held. Another volume was snapped up into her fingers and laid gingerly on our opponents’ bridge. It held.

One by one, she stacked books on top of our lopsided, aesthetically wreck-tastic but apparently strong-as-an-ox toothpick bridge. Every book our bridge held was matched by one on our opponent’s bridge — until the teacher picked up two textbooks. Ours held under the weight. Our opponents’ bridge collapsed — and so did we: we collapsed into cheers and giggles, inebriated with victory. We had done it! We were brilliant engineers! We had won!


Pumpkin profiteroles — with pumpkin in the choux dough itself — were filled alternately with White Chocolate Chai Mousse and ganache.

As the crowd thinned, we stood around and stared in wonder at our messy little Golden Gate. My friend Ashley was not yet satisfied. Sure, our bridge was stronger than the other team’s, but just how strong? With her hands on teammates’ shoulders for balance, Ashley stepped — first one foot, and then the other — onto the bridge.

It held.

I’ll never forget that moment standing in front of my elementary school, seeing Ashley’s huge grin, relishing the easy pulse of victory through our already-marshmallow-filled veins. So, yeah, I’m basically an architect. Right?

At least, it was this (misguided?) confidence that led me to believe that I could construct what I’ve officially dubbed the croquemcake.

I wanted to pull out all the stops for Project Food Blog Round 8 (do I say that every round? It’s definitely true every round!) The challenge was to create a baked good using pumpkin, and I was torn between building pumpkin profiteroles (made from pâte à choux) into a lovely croquembouche (mounted cream puff tower) or baking a pumpkin chai cake. Suddenly, it hit me. When in doubt, do both.


I may or may not have tweeted my desire to bathe in luxurious Swiss buttercream.

Thus, the croquemcake was born: a browned butter pumpkin cake filled with a comforting white chocolate chai mousse heart, frosted with velveteen Swiss buttercream frosting, and topped with a croquembouche of pumpkin profiteroles filled with chai mousse and ganache. The cake is served in slices accompanied by a few plucked cream puffs, and is essentially the embodiment of all things autumn.

At first I was panicky about trying to stack a tall, leany thing on top of a tall, frosted thing, but it turned out to be super easy, and it produced a ravishing effect.


The White Chocolate Chai Mousse is incredamazing, y’all. Even if you put off making the whole shebang until Christmas, you should make some bowls o’ mousse ASAP!

. . . oh, and it just might be my new favorite dessert ever. Every bite had an insanely satisfying combination of textures and flavors. This beautiful croquemcake would be the rockstar of any holiday table.

Don’t be scared of the length of the recipe. True to Willow Bird Baking’s mission, this dessert is also surprisingly easy to make. Let me qualify that: it takes three days and has tons of steps, but the steps themselves are simple and manageable. Use my note below on timing to space out the recipe steps into manageable chunks. It is so worth the effort.

What’s your favorite childhood memory?

Browned Butter Pumpkin CroquemCAKE with White Chocolate Chai Mousse


Recipe by: Willow Bird Baking, compiled and adapted from sources including Fine Cooking, Annie’s Eats, America’s Test Kitchen, Cookin’ Canuck, Martha Stewart, Gina DePalma, Alone and Unobserved
Yields: 15-20 servings, depending on your size o’ cake slices. You’ll have the topping croquembouche plus about 30 other cream puffs to serve alongside.

Pumpkin Puree Ingredients: (or use canned pumpkin puree)
about 7 pounds worth of sugar pumpkins (or pie pumpkins)
2-3 cups water

Browned Butter Pumpkin Cake Ingredients:
1 1/2 cups of your pumpkin puree
3/4 cup unsalted butter; more for the pans
2 cups unbleached all-purpose flour; more for the pans
1 1/2 teaspoon baking soda
1 1/2 teaspoon ground cinnamon
1 teaspoon ground ginger
3/4 teaspoon table salt
1/4 teaspoon ground cloves
1 1/2 cups granulated sugar
2/3 cup firmly packed light brown sugar
2 large eggs
1/3 cup buttermilk

White Chocolate Chai Mousse Ingredients: (I had a lot of leftover mousse; you could probably get by with 2/3 of this recipe)
2 1/4 teaspoons powdered gelatin
3 tablespoons water
18 ounces white chocolate chips (see note)
4 1/2 cups cold heavy cream
heaping 1/2 teaspoon ground cinnamon
heaping 1/2 teaspoon ground cardamom
1/4 teaspoon ground nutmeg
1/4 teaspoon ground ginger
1/4 teaspoon ground allspice
1/4 teaspoon ground pepper (white or black)
dash cayenne powder

Swiss Buttercream Frosting Ingredients:
1 cup sugar
4 large egg whites , at room temperature
24 tablespoons (3 sticks) unsalted butter, at room temperature
2 teaspoon vanilla extract

Profiterole (Cream Puff) Ingredients:
1 1/8 cups water
9 tablespoons unsalted butter
3/8 teaspoons salt
1.5 tablespoons sugar
1.5 cups all-purpose flour
6 large eggs
3/4 cup pumpkin puree
Egg wash (1 egg yolk and 1/2 cup heavy cream, lightly beaten)

Ganache Ingredients:
10 ounces bittersweet and semisweet chocolate chips
3/4 cup heavy whipping cream


Directions:
Note on timing: This dessert is easy to create, but involves many steps. For this reason, I divided the work over three days. On day 1, I roasted and pureed my pumpkins (you can nix this day if you use canned pumpkin). On day 2, I baked my cake and froze it, baked my profiteroles and froze them, and made my chai mousse. I also piped out white chocolate snowflake decorations to dry overnight. On day 3, I made my frosting, assembled and frosted my cake, made ganache, filled my profiteroles, and constructed my croquembouche.

To make pumpkin puree: Preheat oven to 350 degrees F. Cut the tops off of above 7 pounds worth of sugar pumpkins (also called pie pumpkins). Cut the pumpkins in half and scrape out the seeds and innards. Place the pumpkin halves peel-up, cut-side-down in a baking dish and fill the dish 1/4 inch deep with water (about 2-3 cups). Roast pumpkins for 60-90 minutes, or until flesh is fork tender. Allow them to cool for a bit before scooping all flesh out of the peel and placing it in a food processor. Puree for 2-3 minutes until completely pureed, then drain in a paper towel-lined colander for about an hour. Store your pumpkin puree in the fridge for up to 5 days or freeze it in 1-cup increments for later use. Alternatively, you can use canned pumpkin puree for this recipe.

To make browned butter pumpkin cake: I baked my cake in a pan that allows you to fill your cake with a heart-shaped tunnel of mousse (please comment if you’d like the details). If you don’t have one of these pans, you can still create the tunnel effect! You can use this technique by the fabulous Amanda, or this tunnel technique featured previously on my blog.

Preheat oven to 350 degrees F. Butter and flour two cake pans (either the heart-tunnel pan or regular 9-inch cake pans) very thoroughly. Melt the butter in a saucepan over medium heat and cook it, swirling occasionally, until it’s golden brown with a nutty aroma, around 4 minutes. Remove it from heat and pour it into a bowl to cool for about 15 minutes.
Whisk or sift together flour, baking soda, cinnamon, ginger, salt, and cloves in a small bowl. In a separate, large bowl, whisk together 1 1/2 cups of pumpkin puree, granulated sugar, brown sugar, eggs, and buttermilk until well combined. Use a spatula to stir in the dry ingredients until just combined, and then whisk in the browned butter. Pour batter evenly into prepared cake pans.

Bake the cakes until a toothpick inserted in the center comes out with just a few moist crumbs, around 28 minutes. Let cakes cool in their pans until mostly cool before turning them out onto wax paper to wrap and freeze. Freeze at least 30 minutes or until firm.

To make white chocolate chai mousse: Mix spices (cinnamon, cardamom, nutmeg, allspice, ginger, pepper, cayenne) together in a small bowl. Set aside.
Place 3 tablespoons of water in a small bowl and sprinkle the gelatin over top to dissolve and soften for at least 5 minutes. Place white chocolate in a medium bowl. Combine 1 1/2 cups of cream and spice mixture in a saucepan over medium heat and cook until simmering. Remove from heat, add gelatin, and stir to dissolve. Pour gelatin mixture over white chocolate and whisk in small circles until smooth. Cool completely to room temperature, stirring occasionally, around 5 to 8 minutes.

In a separate bowl, beat remaining cream to soft peaks. Use a whisk to fold about 1/3 of the whipped cream into white chocolate mixture to lighten. Then fold the rest of the whipped cream in until no streaks remain. Refrigerate your mousse until set, then stir slightly to break up before using.

To make profiteroles: Combine water, butter, salt and sugar in a saucepan over medium heat. Bring to a boil and stir occasionally. At boil, remove from heat and sift in the flour, stirring to combine completely.

Return to heat and cook, stirring constantly until the batter dries slightly and begins to pull away from the sides of the pan. Transfer to a bowl and stir with a wooden spoon 1 minute to cool slightly.

Add 1 egg. The batter will appear loose and shiny. As you stir, the batter will become dry-looking like lightly buttered mashed potatoes. It is at this point that you will add in the next egg. Repeat until you have incorporated all the eggs. Stir in pumpkin puree.

Pipe the batter using a pastry bag and a plain tip. Pipe choux about 1 inch-part in the baking sheets. Choux should be about 1 inch high about 1 inch wide. Using a clean finger dipped in hot water, gently press down on any tips that have formed on the top of choux when piping. You want them to retain their ball shape, but be smoothly curved on top. Brush tops with egg wash while trying not to drip the wash down the puffs onto the pan (which could somewhat inhibit rise).

Bake the choux at 425 degrees F until well-puffed and turning lightly golden in color, about 10 minutes. Lower the temperature to 350 degrees F and continue baking until well-colored and dry, about 20 minutes more. Remove to a rack and cool (tip from a pro: poke each puff with a toothpick while cooling to release the steam inside. It shouldn’t cause your cream to leak, but will help the puffs stay crisp). Can be stored in a airtight box overnight, but I recommend, if you aren’t using them right away to create your croquembouche, that you freeze them. When you’re ready to use them, bake them at 350 degrees F for 5-6 minutes to refresh and recrisp them.

To make ganache: Bring the cream to a simmer in a medium saucepan (or just stick it in the microwave for 2 minutes in a microwave-safe bowl). Place the chocolate in a medium bowl. Once the cream reaches a simmer, pour the cream over the chocolate and let stand 1-2 minutes. Whisk in small circles until a smooth ganache has formed. Let ganache stand at room temperature until fully cooled, then whip to frosting-like consistency for piping into cooled profiteroles.

To make Swiss buttercream frosting: Combine sugar and 1/2 cup water in a small saucepan and bring to a boil over medium-high heat, stirring to dissolve sugar. Boil without stirring until syrup reaches 240° on a digital thermometer, about 5 minutes.

Meanwhile, in a stand mixer with whisk attachment, beat egg whites on medium-high speed until soft peaks form. With mixer on medium speed, gradually pour in hot syrup in a thin stream; avoid pouring syrup on whisk. Increase speed to medium-high and beat until stiff peaks form and mixture is cool, about 8 minutes. Reduce speed to medium and add butter 1 tablespoon at a time, beating after each addition. (If at any time buttercream appears curdled, beat on high until smooth, then reduce speed to medium and continue beating in butter.) Once all butter is added, beat on high speed until buttercream is smooth and fluffy, about 1 minute. Beat in vanilla extract.

To assemble your cake: Line up cake layers and trim sides as needed with a long serrated knife. No need to thaw before you do this — it’s actually easier with frozen layers. Spoon white chocolate chai mousse into heart-shaped wells in your cake layers (if applicable — or spoon it into whatever shaped cavity you’re using). Carefully position the top layer on the bottom. Apply a thin coating of frosting all over as a “crumb coat” and refrigerate the cake for a half hour or so. Then frost the cake generously with the remaining frosting.

To assemble your croquembouche: Fill cooled profiteroles with leftover chai mousse and ganache as desired. Melt white chocolate bark and dip tops of each profiterole into the chocolate, lining up on wax paper to dry. Cover a plate with wax paper — this is where you’ll build your croquembouche. Start with bigger, broader profiteroles and use the white chocolate as “glue” to piece together a sturdy base. I refrigerate my croquembouche after the construction of each new layer, to harden the chocolate and avoid any toppling incidents! Continue building a cone, fitting the profiteroles together according to their shape. Use white chocolate to pipe snowflakes on wax paper, and to “glue” them onto your croquembouche once they’re dry. Refrigerate your croquembouche until you’re ready to assemble your final product.

To assemble your final croquemCAKE: Carefully ensure that your croquembouche isn’t sticking to your wax paper. Gently lift it onto the center of your cake. Surround your cake with leftover cream puffs for serving. Enjoy!


Roasting pumpkins! While there’s not a huge taste difference from using this process versus the canned stuff, it’s a fun, satisfying thing to try!

If you liked this post, please:
Subscribe to Willow Bird Baking
Follow Willow Bird Baking on Twitter
Follow Willow Bird Baking on Facebook
Give this post a thumbs up on StumbleUpon


ShareOther ways to share this post with friends!

Chocolate Peanut Butter Bliss Cheesecake and Project Food Blog

I have something important to tell you.

In a world that boasts thousands upon thousands of food blogs, I have to tell you what makes my little corner of the web something special.

Foodbuzz is hosting Project Food Blog, a competition to crown the next food blog star. Willow Bird Baking is a contestant, and the first challenge isn’t a challenge for me at all. It’s simply to tell you why I’m here, and what I stand for — something I’ve been convicted of over and over again.

Listen, I cook accessible food. I try to take lovely photos. I write in tune with my personal life — sometimes laughing, sometimes crying, always eating. Those things are special, but they’re not what makes me unique.

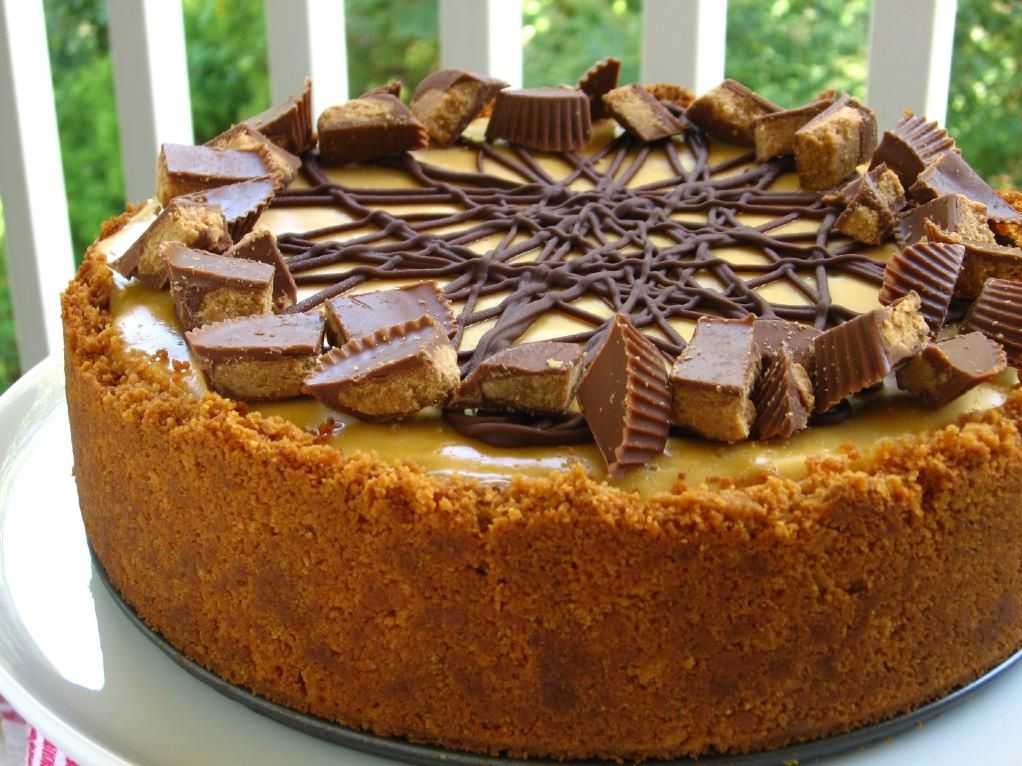
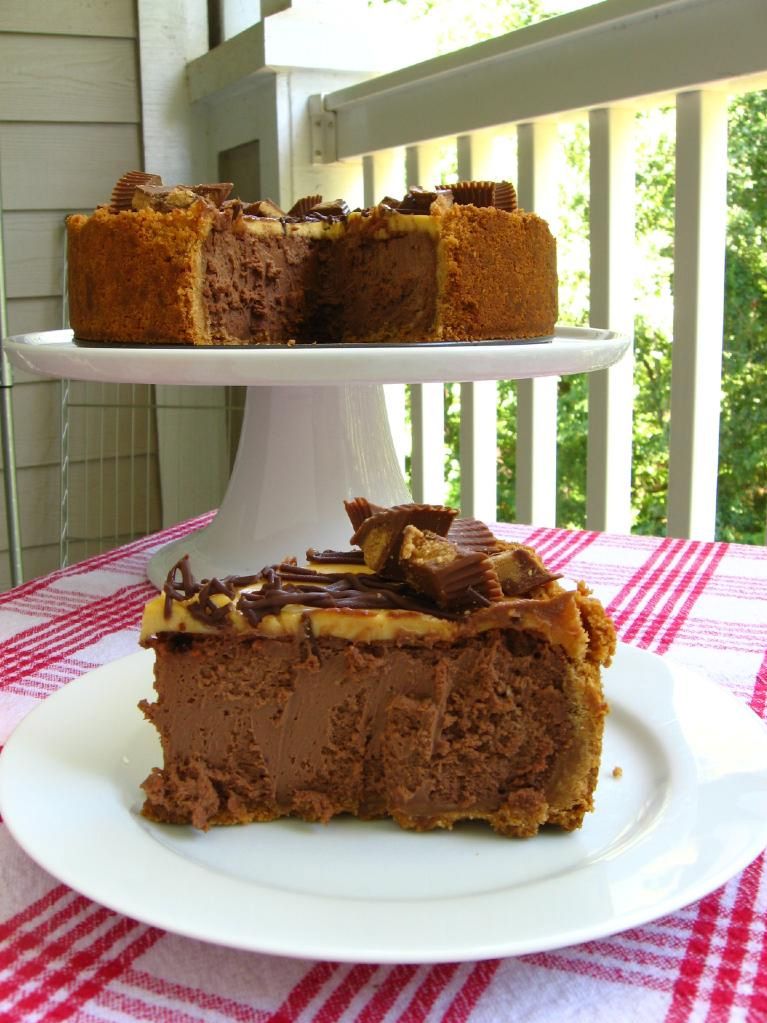
What really makes me unique are two things: Chocolate Peanut Butter Bliss Cheesecake, and a stranger’s 91-year-old grandfather.

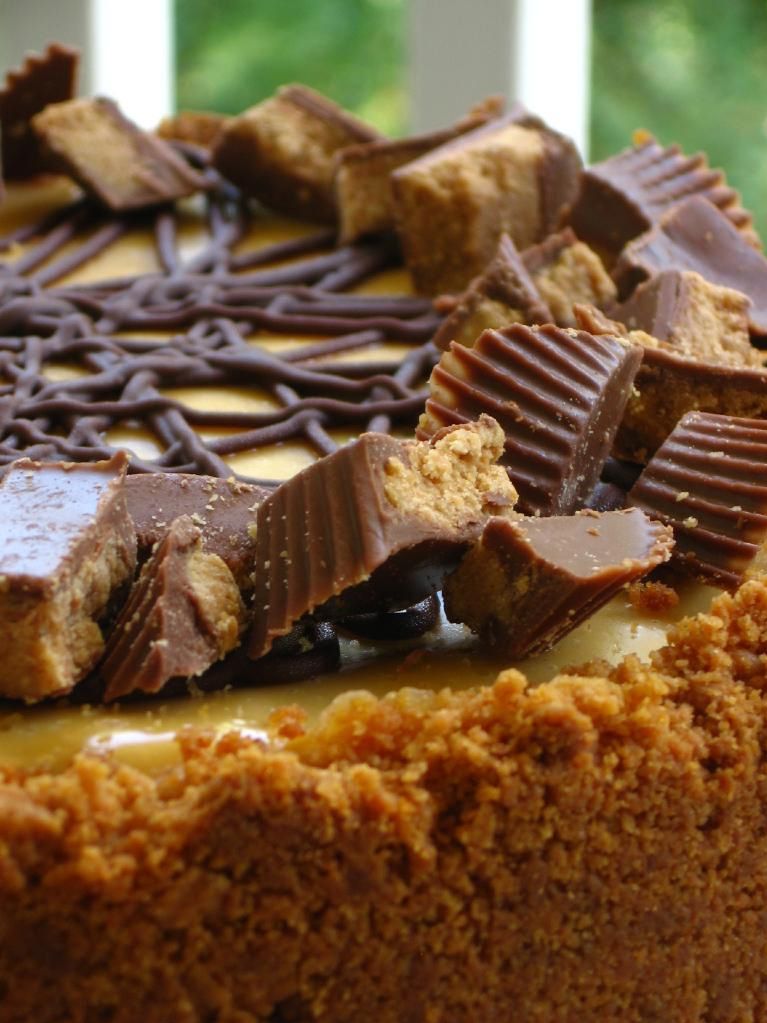
This rich cheesecake was more than just a cheesecake. It was an experiment. It was a gift. It was an experience. It embodies what makes Willow Bird Baking unique:

1. I believe in creativity. I dream of combining individual desserts into super desserts, mixing dessert with breakfast, and drizzling caramel all over everything. Maybe a few dollops of cookie dough, too? I’m constantly creating and improving food. Over the past year, it’s been so rewarding to see photos and read accounts of how your creativity was sparked by a recipe here!

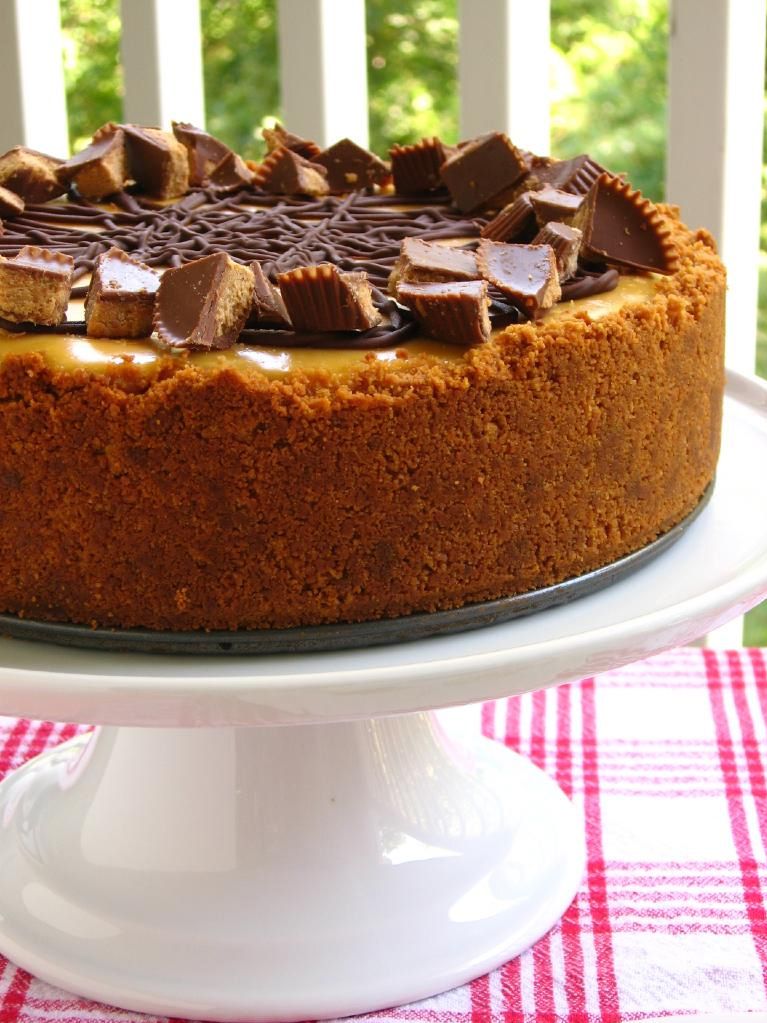
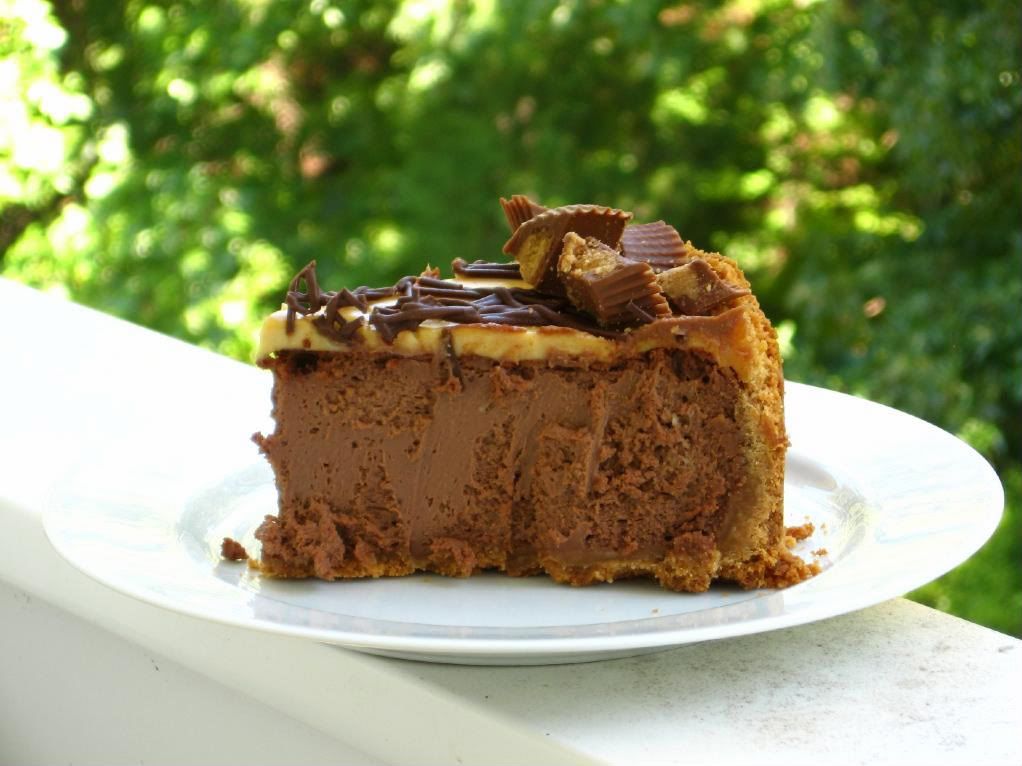
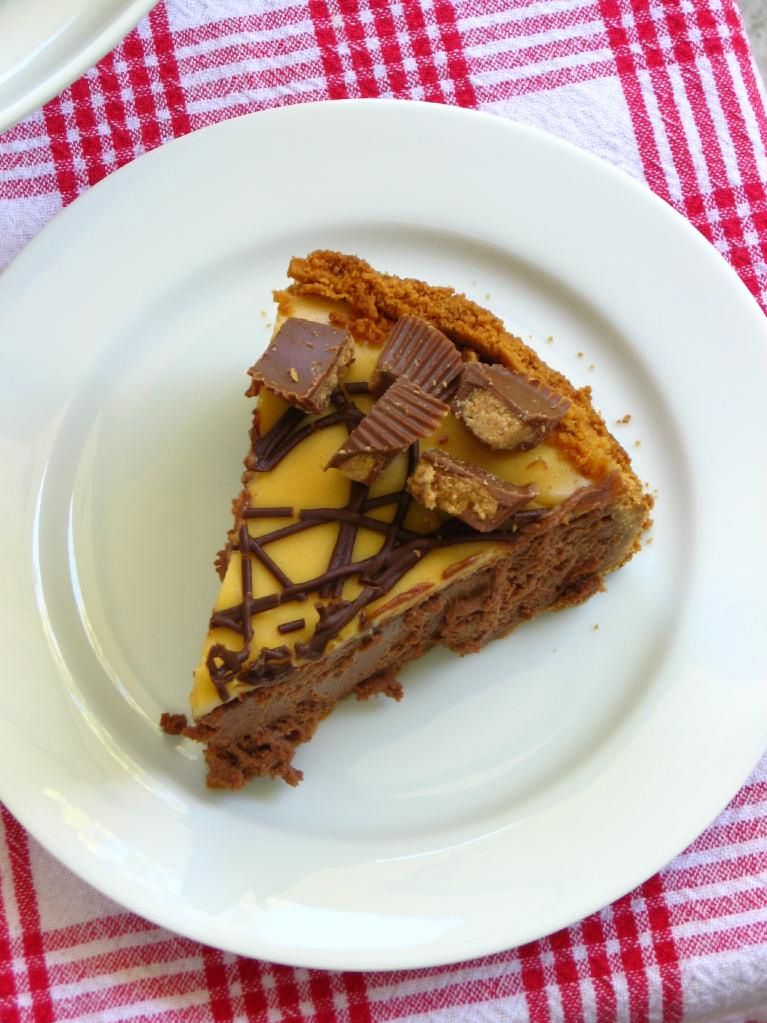
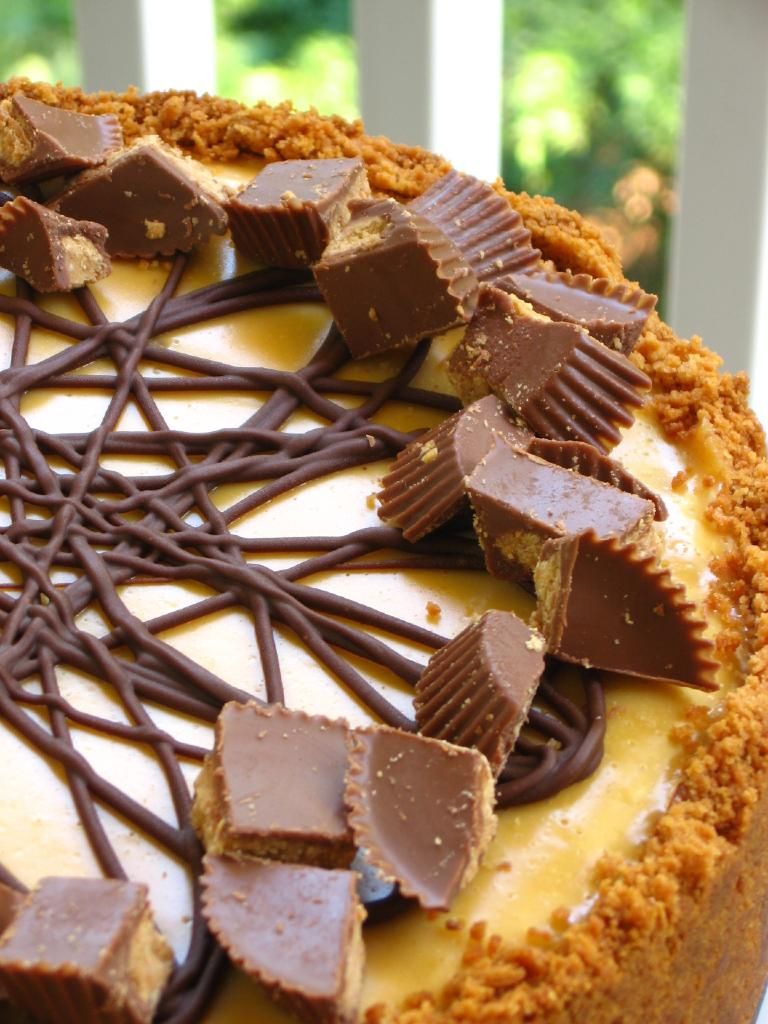
This cheesecake was born of my desire to innovate. A peanut butter sandwich cookie crust instead of an chocolate sandwich cookie crust? Sure! I’m smitten with fun ideas. Sure enough, with a creamy chocolate cheesecake slapped into that crust and a cool, soft peanut butter mousse spread on top, it was the best peanut butter and chocolate dessert combo I’d ever tasted.

2. I believe in challenging yourself. Like any home cook, I have family recipes I love to make, but I’m also adamant about the value of trying new things. Especially fancy things that make you want to say, “Oh, that’s lovely, but I could never do that.”

My culinary journey was one of continually tackling challenging recipes, and with every puffy puff pastry or foot-ed macaron, I felt proud of myself. It’s an incredible feeling to know that by encouraging you to take on these challenges as well, I can give you that sense of pride and accomplishment. For instance, the Croissant Challenge on Willow Bird Baking inspired 17 readers to make homemade croissants in their own kitchens for the very first time — and many more have committed to do so! I have never had a prouder blogging experience than seeing those beautiful croissant pictures roll in.

3. I believe in cooking impressive meals for those you love. This Chocolate Peanut Butter Bliss Cheesecake was made on a whim. Mike was coming to visit and I knew I wanted to make him dessert, but having just started teaching with a heavier load than usual, I was exhausted. I decided to make some simple bar cookies and began gathering supplies in the grocery store.

Somewhere near the butter aisle, though, I realized that we only get so much time to show our love to the special people in our lives. After imagining his face upon seeing a ridiculous surprise cheesecake in the fridge, I replaced the bar cookie ingredients and set about gathering cheesecake supplies. I worked all evening to create this recipe for him. It was so worth the effort to see him enjoying each bite, and I think it did more for my heart than it did for his.

You can have take-out days. We all do that. But every now and then, you need a recipe that you can set in front of your family to say, you are so important to me. I’ve got those for you.

Speaking of sharing love through food, there’s one last story to tell: the story of how a stranger’s 91-year-old grandfather reminded me of my blogging purpose.

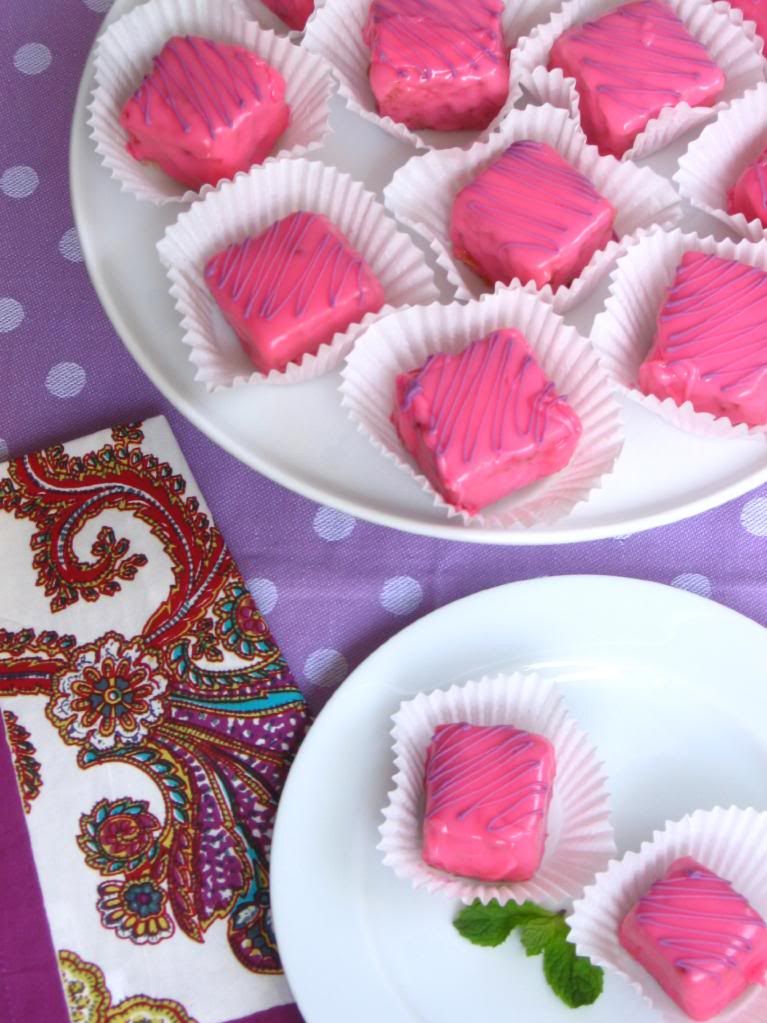
Almost a month ago, I went to explore a blog post that had linked to my Peach Cobbler Cupcakes.

What I found was Songs of the Self, a blog by Jessica, a mom from Georgia. The post recounted how she’d made the Peach Cobbler Cupcakes for her grandfather’s 91st birthday party. As I read about her experience, I saw a photo that gave me pause — one of her husband helping her to sprinkle streusel on each cupcake and smiling for the camera.


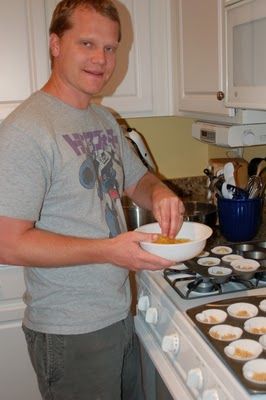
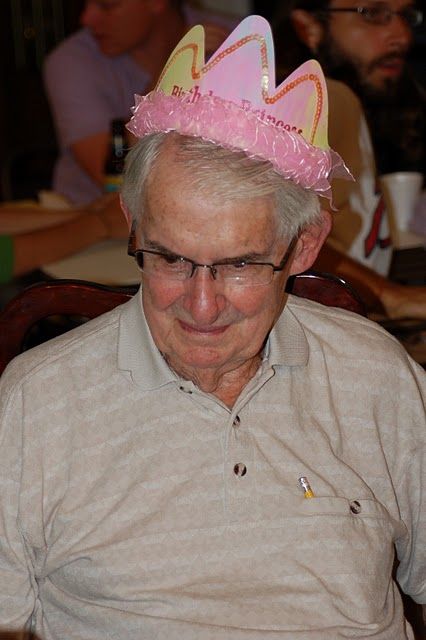
photos used with permission by Jessica

I don’t know why it hit me like it did, but suddenly I was reading through tears. I realized that this was a family somewhere, working together to make a recipe that I created, following each little direction. The post from the next day shows the birthday party: her sweet grandfather in a silly party hat blowing out candles, her grandmother laughing, her tiny daughter Olivia representing the youngest generation.

At the end of her post, Jessica noted, “My cupcakes were beyond a hit! Everyone ranted and raved about them! …Yippee for crafty me!” Being able to participate in her special occasion in some meaningful way, and especially knowing that my recipe had a part in making her feel proud of herself reminded me of why I blog. As I closed her post with a filled heart, I thought of my friend Maranda’s proud post after making her first batch of homemade croissants — a post that inspired a similar effect in me.

The truth is, I blog to create a virtual communal table. Come sit, bake, eat, learn, and enjoy. Come try new things within a comfortable web of support. Come forgive yourself for your flaws, laugh at your kitchen flops, and ponder your life with a popsicle in hand.

Perhaps most of all, come and eat some Chocolate Peanut Butter Bliss Cheesecake. I saved a piece just for you.

Please take a look at my Project Food Blog profile and consider voting for Willow Bird Baking on September 20, 2010. Thank you so much for your support — you are precious to me!

Chocolate Peanut Butter Bliss Cheesecake


Recipe by: Willow Bird Baking, pieced together from Jerome Chang (peanut butter mousse), Joelen (chocolate cheesecake)
Yields: 15-20 pieces

Crust Ingredients:
1 pack (32) of peanut butter sandwich cookies, processed into crumbs
5 and 1/3 tablespoons butter, melted

Cheesecake Ingredients:
4 packages (8 oz. each) of cream cheese, room temperature
1 cup sugar
1 teaspoon of vanilla extract
4 eggs, room temperature
3 (1oz) squares semisweet bakers chocolate (melted and cooled)

Peanut Butter Mousse Ingredients:
1/2 teaspoon powdered gelatin
2 tablespoons cold water
1 cup heavy cream
2 large egg yolks
1 1/2 tablespoons sugar
3 tablespoons salted smooth peanut butter

Optional decorations:
Reese’s cups
melted chocolate
whipped cream

Directions: Preheat the oven to 350 degrees. For the crust, mix the crust ingredients together and press into bottom and up the sides (about 3 inches) of a springform pan. Set aside.

For the cheesecake: Mix cream cheese and sugar in a large bowl until well blended and creamy. Add the eggs and continue mixing until combined. Add chocolate and continue mixing until combined. Pour mixture into prepared crust and smooth top with a spatula.

Bake for 55 minutes or until center of cake is almost set. The top may crack, but it doesn’t particularly matter, since you’ll be covering it anyway. Let the cake fully cool. When almost cool, place it in refrigerator to chill while you prepare peanut butter mousse.

For peanut butter mousse, dissolve the gelatin over the water in a small bowl and let stand for 5 minutes. In a saucepan over moderate heat, cook the cream until it bubbles around the edges. In another bowl, whisk together egg yolks and sugar. Temper the eggs: pour about 1/2 cup hot cream into the egg yolks slowly while whisking vigorously. Then slowly pour the egg mixture into the saucepan of cream (whisking constantly). Cook over low heat, stirring constantly, until thickened, about 3 minutes. Remove from the heat and whisk in the peanut butter and the gelatin. Place mixture into a wide bowl to allow it to cool for a bit, then chill it for just a little while — not until set, but until it’s not so runny. Pour the mixture onto the top of the pie and refrigerate at least one hour or overnight. You can pipe on melted chocolate and decorate with chopped Reese’s cups, if desired.

When completely chilled, loosen the cake from rim of springform pan by wrapping the pan in warm dishtowels. The remove the springform pan. Refrigerate the cheesecake for one day or overnight before serving. Garnish with fresh whipped cream if desired.

If you liked this post, please:
Subscribe to Willow Bird Baking
Follow Willow Bird Baking on Twitter
Follow Willow Bird Baking on Facebook
Give this post a thumbs up on StumbleUpon


ShareOther ways to share this post with friends!

Secret Garden Recipe: Pink Ice Petit Fours

Want to have a tea party?

We’re going to find a garden enclosed in cool, moss-covered stone walls. We’ll lay out delicate china on a wrought-iron table with ivy growing up each leg. Arrayed in sweet sundresses and sandals, we’ll carry in platefuls of hot buttered scones, pitchers of raspberry and strawberry lemonade, and pots of fragrant orange tea. Every sip will be accompanied by a staunch pinky point. Twilight will find us still laughing, unwilling to let the summer daylight slip away.

Oh, and of course there’ll be petit fours. The dainty, sweet little cake squares will be the jewels of the tea table.

What a fantasy. In actuality, I’ve just finished my first week of teacher meetings. The past few days have been filled with book shelving, furniture moving, copy making, curriculum planning, sweet student meeting, and lots of teacher giggling. I’ve left with a headache nearly every day, relieved that headache with a nap nearly every day, and even still . . . gotten a ton of work done nearly every day!

We can still have petit fours, though, right? Petit fours are sweet little tea time desserts that seem to specialize in being adorable. Any number of miniature desserts can be classified as petit fours (literally “small ovens” in French), but for my sister’s surprise garden party earlier this summer, I knew I wanted dense, fruity cake squares. Petit fours are sometimes filled with jams, and then are covered in poured fondant or chocolate.

Now, before I gush, these bite-sized cakes were not perfect. More specifically, the poured fondant was not perfect. In fact, instead of “poured,” let’s call it glopped fondant. Shall we?

The thing is, fondant is going to be super sweet. There’s a cavity-inducing amount of confectioner’s sugar in it, not to mention the corn syrup. The only hope of this stuff covering your petit fours and not ending up with a cloying mess is making sure the poured fondant is heated enough to be very thin, so only a thin layer sticks to the outside of the cake square. This proved to be impossible with the recipe I used. It was warmed in a double boiler for gentle heating, but as soon as I started to pour, I was only able to cover a couple of cake squares before it was glop. Even when it was fully heated, it never really got thin enough to cover the squares in a reasonable way. As a result, they were too sweet.

Oh, and that color? That was not the color I was going for. I had a pale, rose petal pink in mind. Um, that’s all I’ll say about that.

While the petit fours weren’t perfect, the taste itself (beyond the fondant) was so wonderful. The cake was deliciously moist, cool, and dense with a gorgeous buttery almond flavor. The raspberry jam covering was the perfect complement to the almond (one of my favorite flavor combinations!) and was simple to brush on, though it never dried completely. Really, if you use poured white chocolate or a different poured fondant recipe (how about trying this one, which looks great?), these would be fantastic (and they’d probably look a little less “gloppy” as well). Even in their overly sweet state, I ate a ton of them due to their brilliant flavorings.

This is also one of those recipes that ends up looking fancy despite being relatively easy to make — and you know I love those. A few key steps (like freezing the cake before cutting it up and making sure your fruit glaze is very thin) ensure that the process is relatively simple.

Go have a tea party!

Pink Ice Petit fours


Recipe by: Adapted from Diana’s Desserts
Yield: 60 1-inch petit fours, or about 16 2-inch petit fours

NOTE: This recipe does not include the poured fondant recipe or instructions due to the aforementioned difficulties. If you want to try poured fondant, I’d recommend looking at this post on Cakes and Cupboards, which looks promising. Nevertheless, poured fondant might still be too sweet for you. Another option is a poured chocolate. You’ll probably need two coats if you use white chocolate. If you want completely smooth petit fours, I recommend using a thin layer of rolled marzipan under your icing, or the buttercream procedure outlined on Cakes and Cupboards, above.

Cake Ingredients:
1/4 cup butter, melted
1/4 cup shortening
1 cup sugar
1 teaspoon vanilla extract
1 teaspoon almond extract
1-1/3 cups all-purpose flour
2 teaspoons baking powder
1/2 teaspoon salt
2/3 cup milk
3 egg whites

Fruit Glaze:
12 ounces raspberry preserves (or heated jelly)
3 tablespoons water

Directions:
Prepare the cake. Preheat oven to 350 degrees F. Grease and flour a 9-inch baking pan, or use Wilton’s Cake Release.

Cream butter, shortening, and sugar together in a large bowl. Beat in vanilla and almond extracts. In a separate bowl, combine flour, baking powder, and salt. Add dry ingredients to the creamed mixture alternately with the milk. In another bowl, beat egg whites to soft peaks. Gently fold the egg whites into the batter.

Pour the batter into the cake pan and bake for 20-25 minutes, or until a toothpick inserted in the center comes out clean. Remove from oven and let cool in pan for 10 minutes. Turn cake out onto a cooling rack. When cooled, chill cake in refrigerator for a bit before freezing it for at least 1 hour.

Right before removing the cake from the freezer, prepare fruit glaze. In a medium saucepan, heat preserves with the 3 tablespoons water on low heat. If using jelly, judge whether or not you need any of the water to make it a thin consistency.

Remove cake from freezer. Using a long, serrated knife, cut a thin slice off each side of chilled cake. Cut cake into squares of desired size (for me, about 1.5-inch squares). Place squares 1/2 inch apart on a cooling rack over a sheet pan. Use a pastry brush to spread a thin layer of heated preserves over tops and sides of petit fours before icing. Allow excess to drip off. Let dry (I put them in the fridge and let them set up a bit — they never really “dry”). Repeat if necessary to thoroughly coat squares.

Prepare your desired poured fondant or chocolate and pour over the petit fours. Decorate the tops with different frostings, chocolates, sprinkles, candy, sugar flowers, etc. as you wish. Refrigerate until ready to eat — eat within a day or two.

If you liked this post, please:
Subscribe to Willow Bird Baking
Follow Willow Bird Baking on Twitter
Follow Willow Bird Baking on Facebook
Give this post a thumbs up on StumbleUpon


ShareOther ways to share this post with friends!

1 2 3 4 5 6