Croissant Masters Round 3

Know what makes me happy? Croissants. Know what makes me happier? Homemade croissants. Know what makes me happiest?! HOMEMADE CROISSANTS YOU MADE!

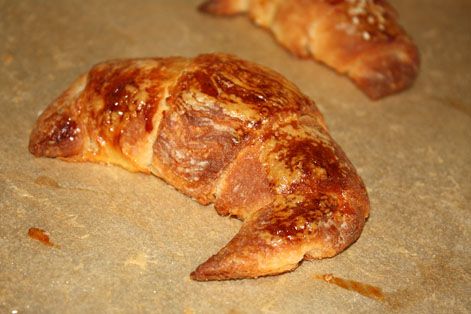
These amazing home cooks have battled the butter, lassoed the lamination, dominated the dough, wrestled the rolling pin, and flung the flour. They committed to croissant in the Willow Bird Baking Croissant Challenge — and arose victorious (pun intended)!

Seriously, all puns aside (how long can this possibly last?), I am flooded with pride and joy every time I open my email to a new batch of readers’ freshly made croissants. If you don’t think you can make these golden pastries, think again. Below are four home cooks just like you, and they’ve all conquered the process. Will you commit to croissant? Go get the recipe for yourself! You can also see the first or second round of Croissant Masters.

Time to show off the latest Croissant Rockstars!


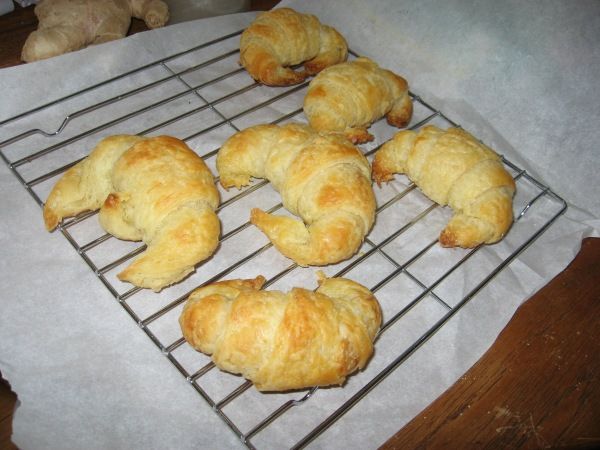
Clair: “They turned out really great. Buttery and flaky, a bit crisp on the outside but still soft on the inside . . . All in all, a good amount of work, something you really have to commit your day (or morning) to, but totally worth the effort.”


[see more of Clair’s croissants here.]


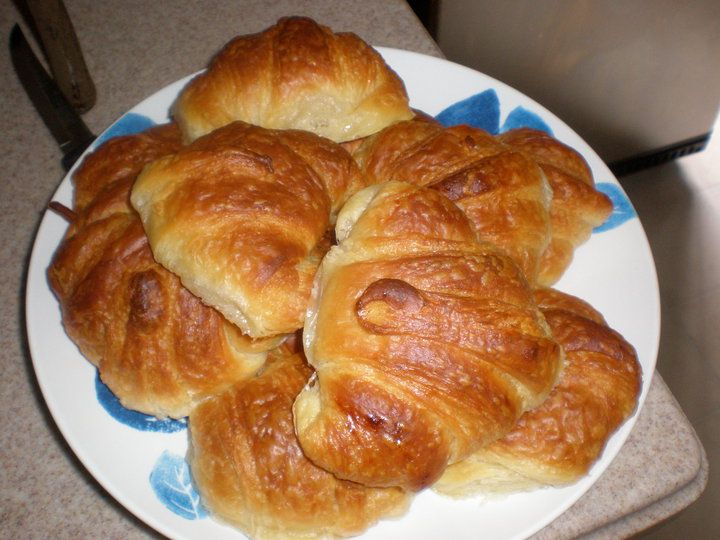
Amanda R.: “I never liked croissants until I tried homemade ones from your recipe, and I LOVED them. My mom kept saying that they tasted like rolls my great grandmother used to make, so it was especially meaningful to have her share that memory, all thanks to your encouragement and amazingly clear instructions for croissant making.”


Joanna: “I made some croissants today (it’s my first try) and they are delicious! Plus the video you provided was very helpful . . . my family loved them.”


Abbey C.: “I went into making these not considering that it involved two of the things I am worst at — using a rolling pin and cutting straight lines. But they were truly delicious, and I was even getting a bit better at shaping them by the end. Thanks so much for this challenge . . . I probably would never have considered making them otherwise.”


If you liked this post, please:
Subscribe to Willow Bird Baking
Follow Willow Bird Baking on Twitter
Follow Willow Bird Baking on Facebook
Give this post a thumbs up on StumbleUpon


ShareOther ways to share this post with friends!

Bittersweet Marbled Chocolate Cheesecake Brownies

Sometimes it’s easier to skip the hard stuff. Maybe you know what I mean. Maybe you never read Marley and Me because you saw your friends (or in my case, students) feeling weepy towards the end. Maybe you switch off the sad songs, avoid the poignant movies. Maybe you make a joke in the difficult moments to defend yourself from the truth of your emotions, but also keep a secret stash of tissues in your purse for when it doesn’t work.

Some things you can’t skip, though. Some trials are ordained for you. God has known them — and you — since before the foundation of the world, and when He says you’re going through and not around, it’s the right path. Go.
One of the things I can’t skip is the fact that Mike is no longer a Charlottean. Wonderfully and sadly, he moved to Raleigh at the beginning of August to start his graduate program in math.

Mike and I have been together for 11 and a half years now. He saw me complete my first year of high school, get my license, graduate, enroll at Davidson College. He sat with me the morning before my Teach for America interview, picked up the pieces with me as I quit my first real job and moved on to my second real job, and shared my joy when I found Woodlawn, where I teach now. He saw the demise of my first website, the beginning of my blogs, the constant ebb and flow of my poetry. He’s been there.

During my difficult high school years, I’d sometimes drive straight to his apartment after school and play housewife, making Hamburger Helper and eating it on the couch with him while watching Star Trek. On a trip to Charleston in 2003, he bought me flowers that I still have dried in my closet. I saw him eat his first funnel cake in Gatlinburg. During our relationship, I’ve been the girlfriend of a cable guy, a dental technician, a programmer, a mathematician, a college student, a college grad, and now a graduate student. I can’t explain how his transition has inspired me.
What with all that “being there” we’ve done for over a decade, it was particularly difficult to see him pack up his things and move at the beginning of August. While I haven’t been able to ignore the fact that he now lives three hours away and can’t pop over as needed, I have been able to skip talking about it much, so instead I’ve been talking about popsicle molds and Piers Morgan. I know you understand.

The week before he moved, Mike came over and we made going-away brownies. He loves brownies, but I’d never made him any — something I felt I had to remedy before he moved. We mixed and baked together, another thing I’d always meant to do with him, and the final product was sweeter for it.

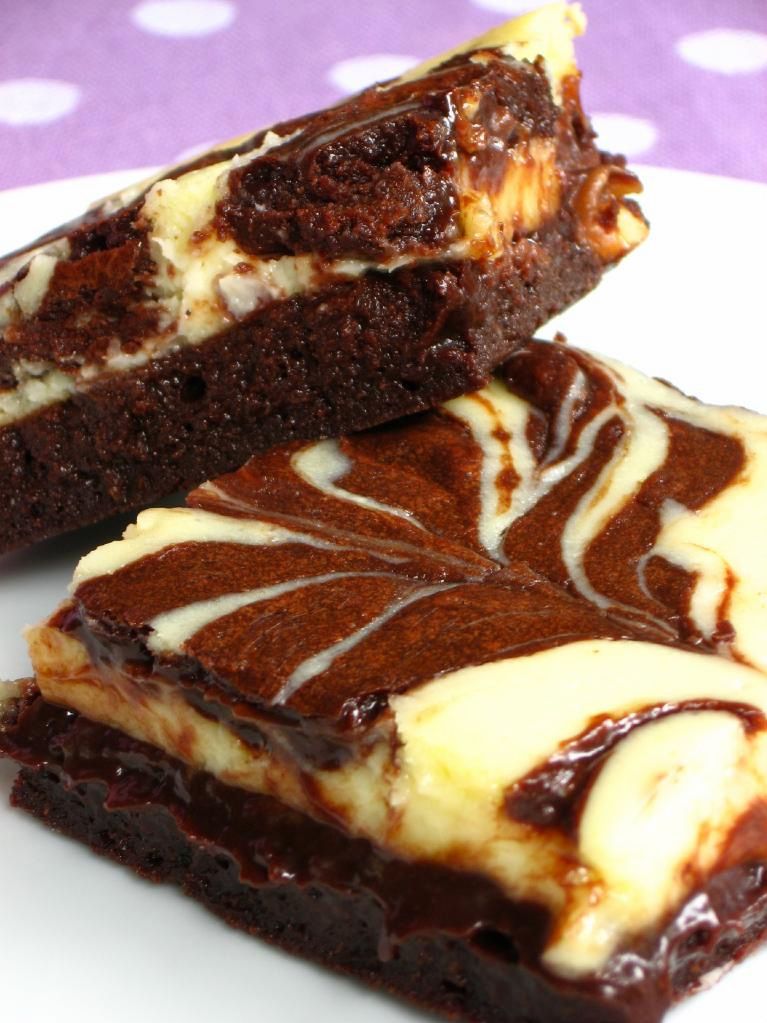
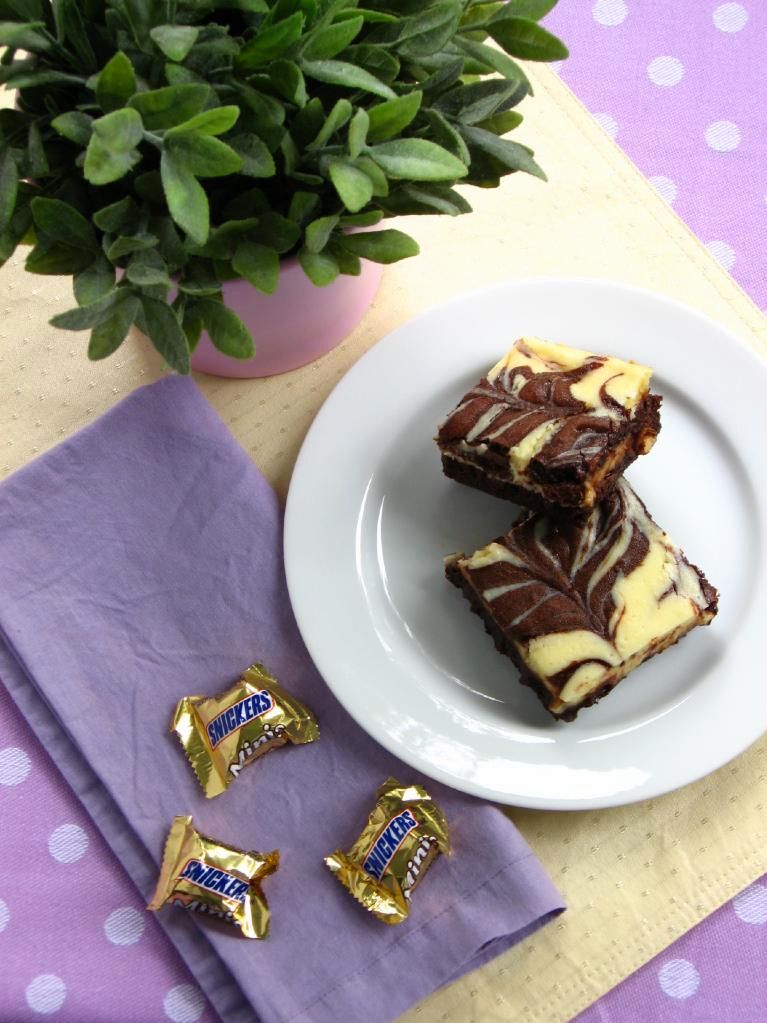
These brownies were a great choice — they’re indulgent and fudgy, with the gorgeous tang of cream cheese that I love. The marbling on top looks fancy, but is extremely easy to accomplish. In half the pan, we embedded funsize Snickers in the batter, which added a superb nutty, caramelly crunch to the brownie base. Naturally, knowing he was moving in a week made each bite a bittersweet experience, but the brownies themselves were the perfect treat for us to enjoy together.

Marbled Chocolate Cheesecake Brownies


Recipe by: adapted from Joy of Cooking
Yield: 9 large or 16 smaller brownies

Brownie Layer Ingredients:
1/2 cup (113 grams) unsalted butter, cut into pieces
4 ounces (115 grams) unsweetened chocolate, coarsely chopped
1 1/4 cups (250 grams) granulated white sugar
1 teaspoon pure vanilla extract
2 large eggs
1/2 cup (65 grams) all purpose flour
1/4 teaspoon salt
funsize Snickers (optional)

Cream Cheese Layer Ingredients:
8 ounces (227 grams) cream cheese, at room temperature
1/3 cup (65 grams) granulated white sugar
1 teaspoon pure vanilla extract
1 large egg

Directions: Preheat oven to 325 degrees F (160 degrees C) and place the rack in the center of the oven. Prepare a 9-inch square baking pan: Spray pan with nonstick cooking spray. Create a foil sling for the pan by cutting two 16-inch lengths of foil and fold them to widths of 5 inches each. Fit foil pieces into baking dish, one overlapping the other, pushing them into corners and up sides of pan; allow excess to overhang pan edges. This creates a sling that will help you remove the brownies after baking and cooling. Spray foil lightly with nonstick cooking spray.

Place a heat-proof stainless steel bowl over a saucepan of simmering water to create a double-boiler. Place the butter and chocolate in the bowl to melt. Remove from the heat and stir in the sugar and vanilla extract. Add the eggs one at a time and beat well with a wooden spoon after adding each. Add the flour and salt and continue stirring with the wooden spoon until the batter is glossy, smooth, and pulls away from the side of the bowl (about one minute). Reserve 1/2 cup of brownie batter for topping. Pour the rest of the batter carefully into prepared pan (here, you can stud the batter with rows of funsize Snickers if desired.

In a separate bowl, use a hand mixer to blend the cream cheese until smooth. Add the sugar, vanilla extract, and egg and blend just until smooth. Spread this mixture carefully over the brownie layer, and then place dollops of the 1/2 cup reserved brownie batter at even intervals over the top. Use a table knife or wooden skewer to carefully marble the dollops through the cream cheese, careful not to mix the batters.

Bake for about 25 minutes or until the brownies just begin to pull away from the sides of the pan and are just starting to brown. Remove from the oven and cool on a wire rack until almost cool. Then, chill the brownies in the refrigerator for about two hours, until they’re firm enough to cut into squares. Once chilled, remove the brownies from the pan by lifting the ends of the foil sling carefully. Transfer to a cutting board and cut into 9 or 16 squares as desired, cleaning the knife with a warm, damp cloth between cuts. You can store leftovers in airtight container in the refrigerator for several days.

P.S. – Some people are experiencing even greater trials right now. Erika of Ivory Hut just lost her house and all her possessions in a horrific house fire. Would you consider donating to help her through this difficult time?

P.S. 2 – In the midst of a trial, there is great blessing. We received news recently that my dad is still cancer-free!

If you liked this post, please:
Subscribe to Willow Bird Baking
Follow Willow Bird Baking on Twitter
Follow Willow Bird Baking on Facebook
Give this post a thumbs up on StumbleUpon


ShareOther ways to share this post with friends!
Snack Attack #2: Chili-Lime Roasted Chickpeas

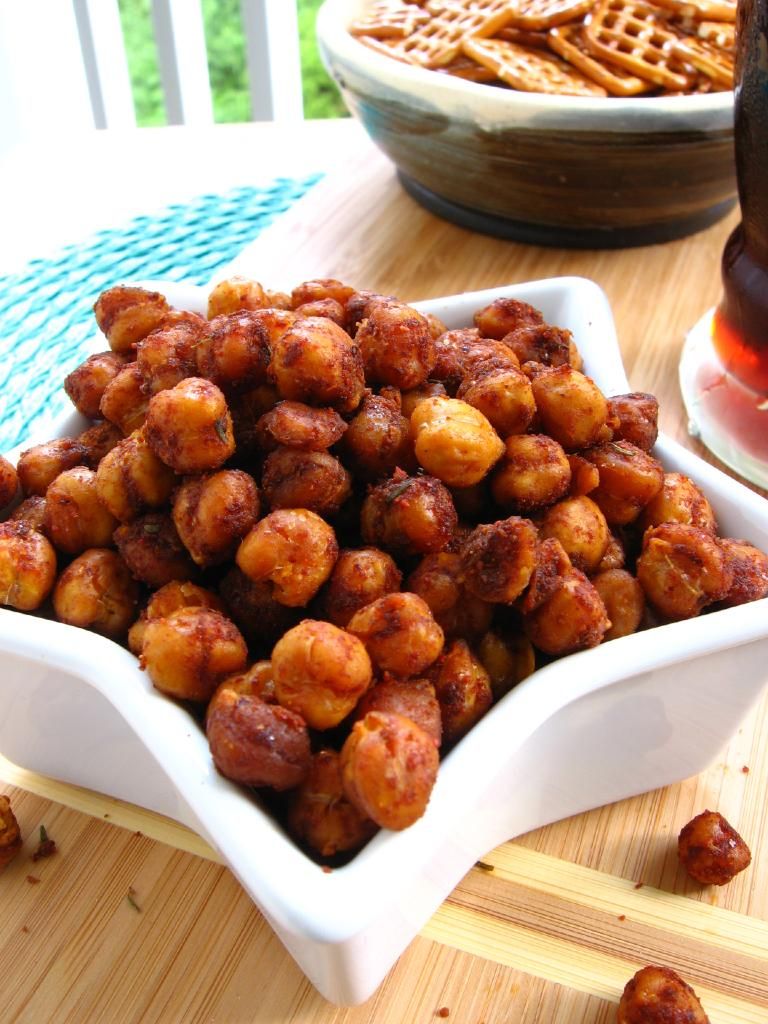
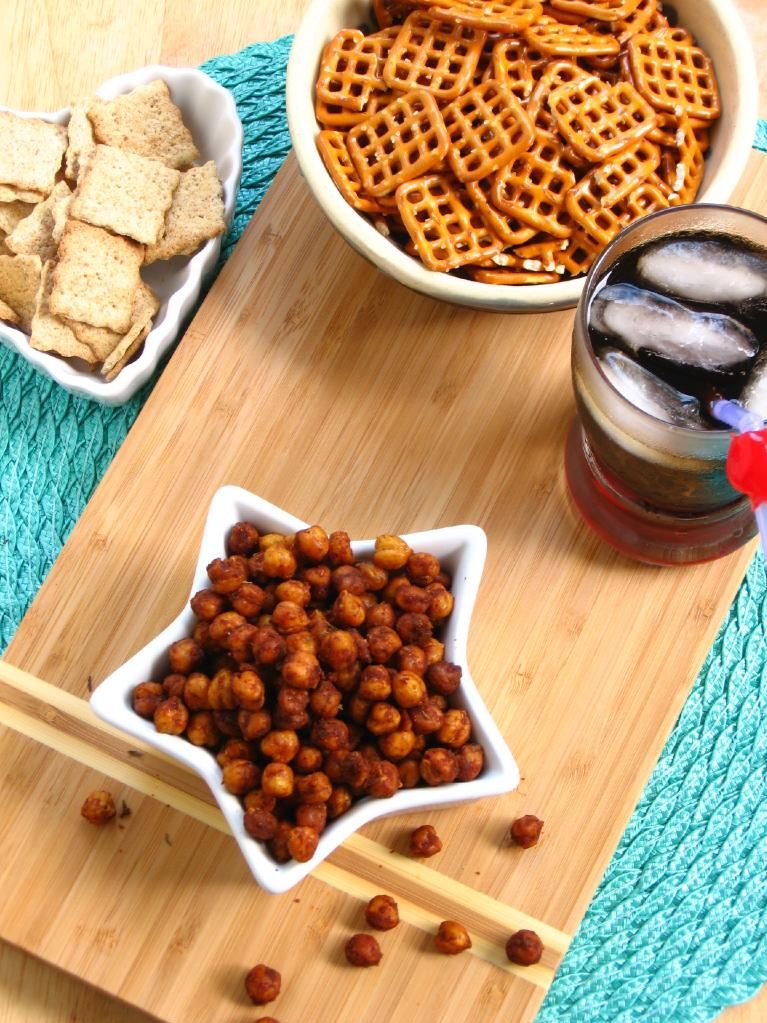
You’ve had sweet (with a little tart thrown in for good measure). Now it’s time for the other side of the snacking coin: salty. Salty, spicy, tangy, bright, crunchy, provocative. Wait, can food be provocative?

I think so. Especially if the words chili-lime are involved.

I’ve seen roasted chickpeas cropping up all over the interwebs and have been all in a tizzy wanting to try them. They just look so scrumptious and snackable. I headed over to The Kitchn where there are about a billion (okay, fifteen) seasoning suggestions for roasted chickpeas. I needed some inspiration.

And oh, did I find inspiration! The Kitchn lists Garlic, Pepper, Rosemary chickpeas; Soy Sauce, Sesame Oil, Chili Powder chickpeas; and Brown Sugar, Rosemary, Cayenne Pepper chickpeas, just to name a few.

Chili powder, cumin, and lime all seemed like popular seasoning components, though I couldn’t seem to find a recipe that put them all together. They’re a match made in tex-mexy heaven, though, so I threw them all in my chickpea seasoning mix. Sure enough, the finished product tasted exactly like I’d imagined — spicy and addictive. I crunched down chickpea after chickpea while watching the first few episodes of America’s Got Talent on Hulu (no spoilers, please — except one. Feel free to tell me if anyone knocks Piers Morgan’s block off after a particularly snotty critique).

Are you in a snacky mood? These are so simple to make and they taste better than those greasy potato chips. The spice flavoring would also be wonderful on popcorn. What’s your go-to salty snack?

Chili-Lime Roasted Chickpeas


Recipe by: Adapted from chowmama
Yields: about 1.5 cups roasted chickpeas

Ingredients:
2 15-ounce cans chickpeas (also called garbanzo beans), drained, rinsed, and blotted dry
3-4 teaspoons chili powder*
2 tablespoons olive oil
1 tablespoon + 1 teaspoon lime juice
3/4 teaspoon sea salt
1-2 teaspoons cumin*
Pinch of dried herbs of your choice (I used a little rosemary and thyme) OR chopped fresh cilantro

*Note: start with the lowest amount of spice, then add more to taste.

Directions:
Preheat oven to 400 degrees F. Line a baking sheet with aluminum foil and spray it with cooking spray. Spread chickpeas out in a single layer over the foil. Once oven is preheated, bake chickpeas for 45-50 minutes, stirring and flipping every 15 minutes or so. Chowmama includes a note saying that the cooking times can very; the way she looked for (and thus the way I looked for) doneness is taking a few chickpeas out, letting them cool for a minute, and then biting into them. Take them out when they’re really crunchy.

Near the end of the chickpeas’ cooking time, combine oil, chili powder, lime juice, sea salt, and cumin in a medium bowl. Whisk to mix. When chickpeas are done, let them cool for just a minute before pouring them into the oil mixture. Stir to coat all the chickpeas well. Eat immediately, or store in an airtight container (after cooling completely) to eat later.

If you liked this post, please:
Subscribe to Willow Bird Baking
Follow Willow Bird Baking on Twitter
Follow Willow Bird Baking on Facebook
Give this post a thumbs up on StumbleUpon


ShareOther ways to share this post with friends!
Snack Attack #1: Strawberry Lemonade Popsicles

Did you see Joy the Baker’s recent popsicle post? The one where she mentioned that her popsicle molds come from the dollar store?

What?

You mean I don’t have to win one of those fancy $50 molds (because there’s no way I’m buying something that expensive) to make popsicles?! You mean I can make them with a mold that costs a dollar?! Or even WITHOUT A MOLD AT ALL?!

Have you ever had one of those moments where you realize you’ve been lulled into some weird advertising-induced hypnosis? You start wondering how you could possible make ice cream without purchasing a hundred-dollar KitchenAid attachment. How in the world people wash their floors without the latest souped-up super mop. How people subsist without a dishwasher. How people can brave the harsh elements without a trendy coat in this year’s style. How people made pasta before pasta machines, bread before bread machines, pie crusts before food processors.

This dude calls it “lifestyle creep,” where luxury items slowly start to seem like necessary components of a happy life. And of course companies don’t mind — they want it that way!

This other dude talks about how companies have created a “culture of unnecessaries” (thanks to Dena for these links).

I think those dudes are right on. It doesn’t mean I’ll stop buying Coke Zero or eating out every now and again, but it is a call to step back and examine.

Maybe it has to do with being really poor right now (I’m really poor right now, y’all), but I’ve been waking up and noticing these assumptions I’ve fallen into over time. Maybe I don’t need to eat out so much. Maybe I can do without new dishes and props for photos, and instead just rearrange the ones I have. Maybe I don’t need to buy the fancy shampoo. Maybe now is not the time to cook with Gruyère (cry).

And maybe I don’t need the $50 popsicle mold before I can have some good ol’ fashioned summertime snacking fun.

Sure enough, my dollar store had mini popsicle molds. The sticks that came with the mold were kind of useless, but the store also sold regular old craft sticks. Popsicles for $2? Count me in.

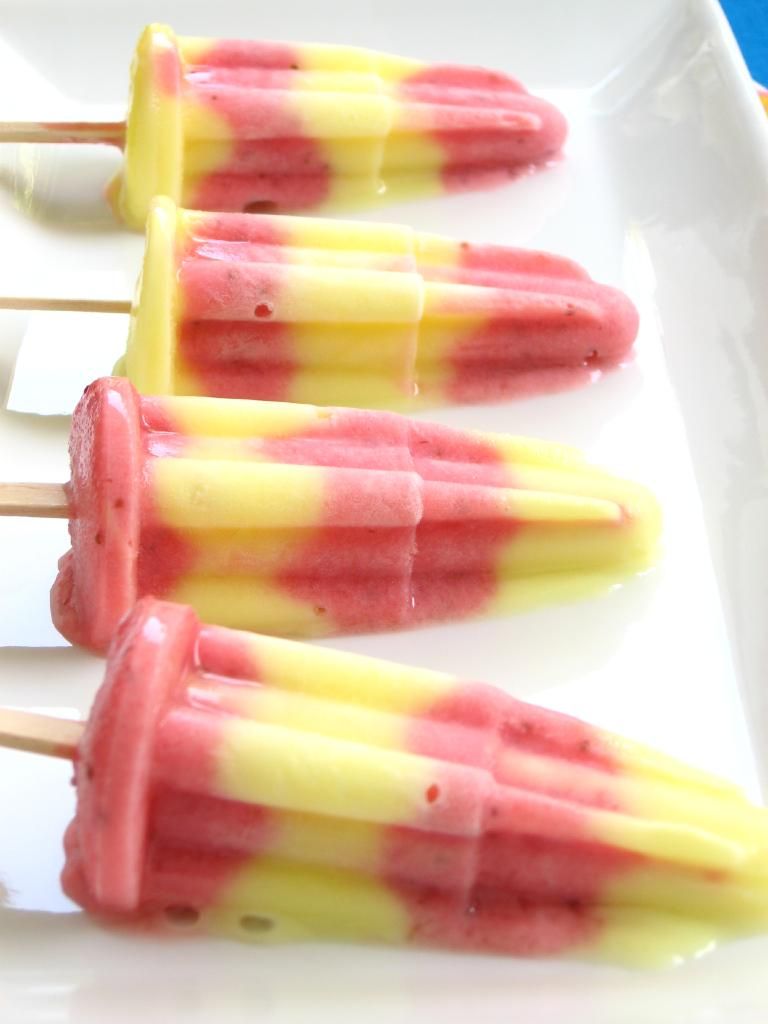
I decided to create some Strawberry Lemonade Popsicles because I love the tangy, sweet mix of berries and lemon. These are yogurt pops, so they’re creamy and indulgent. It’s still about as hot as the surface of the sun in Charlotte (I decided this while sweating through my church clothes and trying to put air in my tires last Sunday), so icy treats are still welcome even as September approaches.

Want a salty snack to go along with these sweet pops? Stay tuned for Snack Attack #2! So delectable!

I have two questions to end with today: What’s your current favorite snack? and What unnecessary things have you been lulled into feeling like you “need”?

Strawberry Lemonade Popsicles


Recipe by: Adapted from Our Best Bites and The Kitchn
Yields: about 18 of my mini-popsicles, and probably about 9 regular sized popsicles

Lemonade Layer Ingredients:
1 1/3 cups lowfat yogurt, plain or vanilla
1/4 cup fresh lemon juice
5 tbsp sugar

Strawberry Layer Ingredients:
1 pint strawberries, cored and quartered
1/4 cup sugar
2 tablespoons water
1 teaspoon lemon juice
1 cup plain yogurt

Directions:
First, make the lemonade layer mixture. Heat the lemon juice in a small, microwaveable bowl for around 45 seconds (give or take, depending on your microwave) and dissolve all the sugar into it. Pour this mixture into a medium bowl with the yogurt and whisk until smooth. Refrigerate until ready to assemble popsicles.

Make strawberry layer mixture. Place the strawberries, water, and sugar in a medium saucepan and bring to a bowl. Simmer for around five minutes until the strawberries are soft. Pour this mixture and the lemon juice into a food processor and pulse until almost pureed, but not liquefied. Chill in the refrigerator until cool, and then whisk the yogurt into the strawberry mixture until well combined.

Assemble the popsicles. Use a teaspoon or tablespoon (depending on the size of your molds) to carefully spoon alternating layers of lemon and strawberry mixture into your molds. If you typically like your lemonade more sweet than tart, use more strawberry layers than lemon. If you prefer more tart than sweet, use more lemon layers than strawberry. Freeze overnight. To unmold, dip molds into warm water and gently pull popsicles out. Serve immediately (or wrap in wax paper and place in ziplock bag to store in freezer).

P.S. You know what’s funny? No one ever makes apple popsicles, pumpkin popsicles, cinnamon crumble pops. I think at some point in my life, I need to make fall popsicles. We’ll sit by the fire in our parkas and enjoy them together. Who’s with me?

P.S. 2 — A bonus for you: my tweets during this popsicle endeavor. You should follow me on Twitter for fun behind the scenes play-by-plays!


If you liked this post, please:
Subscribe to Willow Bird Baking
Follow Willow Bird Baking on Twitter
Follow Willow Bird Baking on Facebook
Give this post a thumbs up on StumbleUpon


ShareOther ways to share this post with friends!
Secret Garden Recipe: Pink Ice Petit Fours

Want to have a tea party?

We’re going to find a garden enclosed in cool, moss-covered stone walls. We’ll lay out delicate china on a wrought-iron table with ivy growing up each leg. Arrayed in sweet sundresses and sandals, we’ll carry in platefuls of hot buttered scones, pitchers of raspberry and strawberry lemonade, and pots of fragrant orange tea. Every sip will be accompanied by a staunch pinky point. Twilight will find us still laughing, unwilling to let the summer daylight slip away.

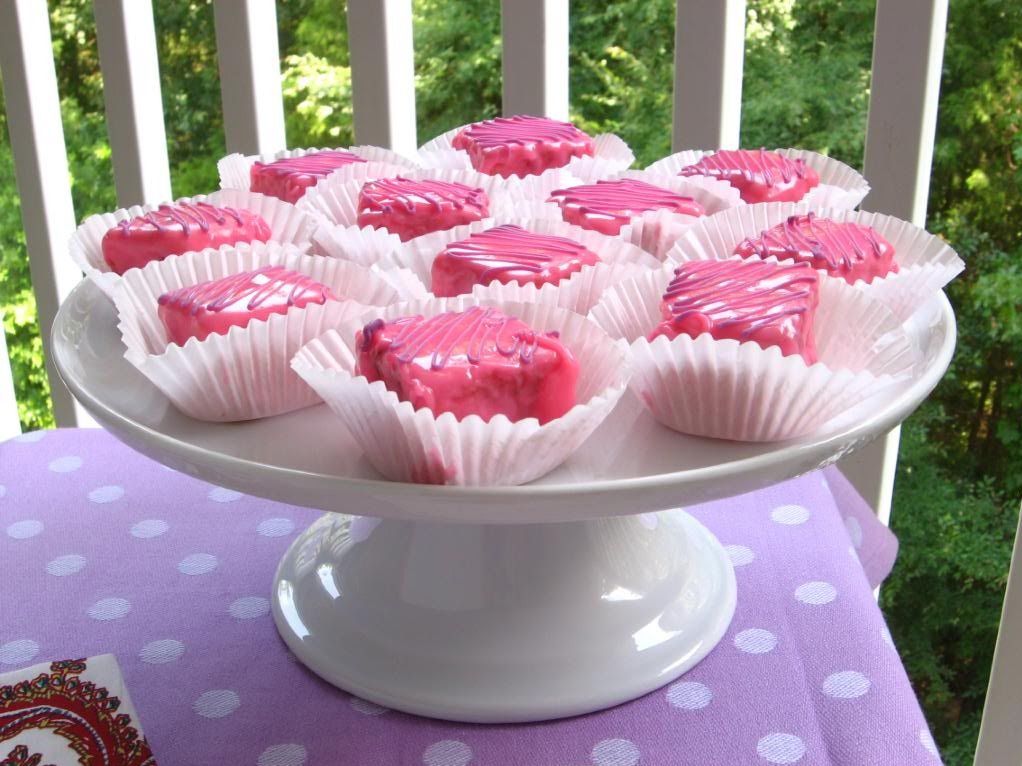
Oh, and of course there’ll be petit fours. The dainty, sweet little cake squares will be the jewels of the tea table.

What a fantasy. In actuality, I’ve just finished my first week of teacher meetings. The past few days have been filled with book shelving, furniture moving, copy making, curriculum planning, sweet student meeting, and lots of teacher giggling. I’ve left with a headache nearly every day, relieved that headache with a nap nearly every day, and even still . . . gotten a ton of work done nearly every day!

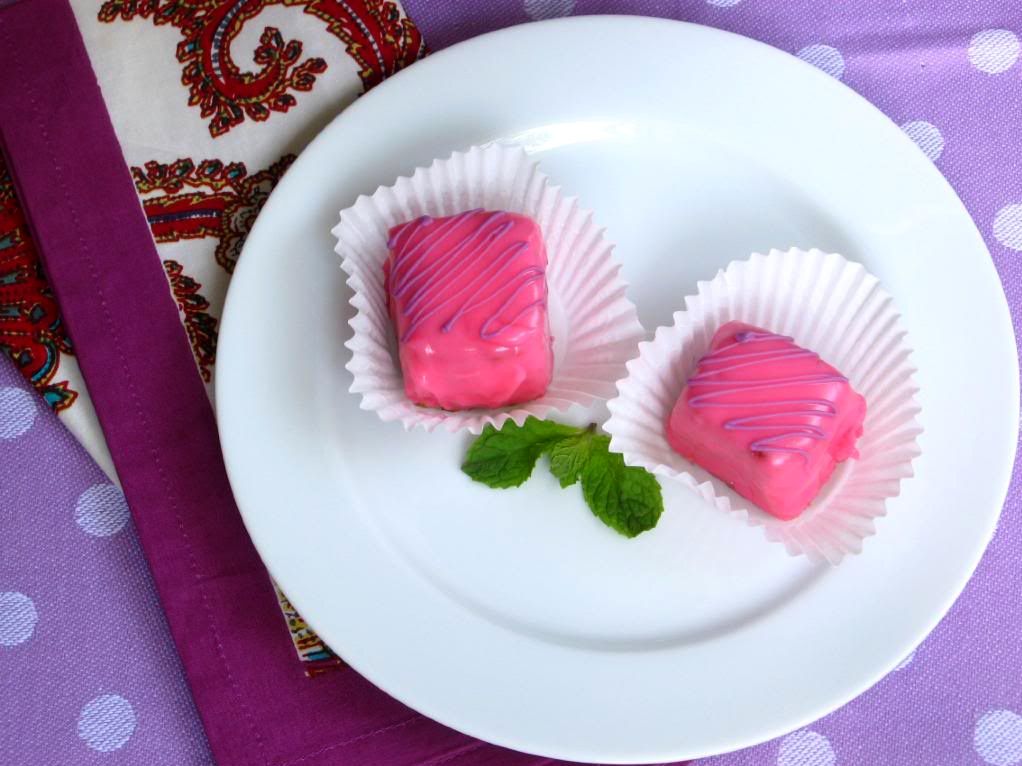
We can still have petit fours, though, right? Petit fours are sweet little tea time desserts that seem to specialize in being adorable. Any number of miniature desserts can be classified as petit fours (literally “small ovens” in French), but for my sister’s surprise garden party earlier this summer, I knew I wanted dense, fruity cake squares. Petit fours are sometimes filled with jams, and then are covered in poured fondant or chocolate.

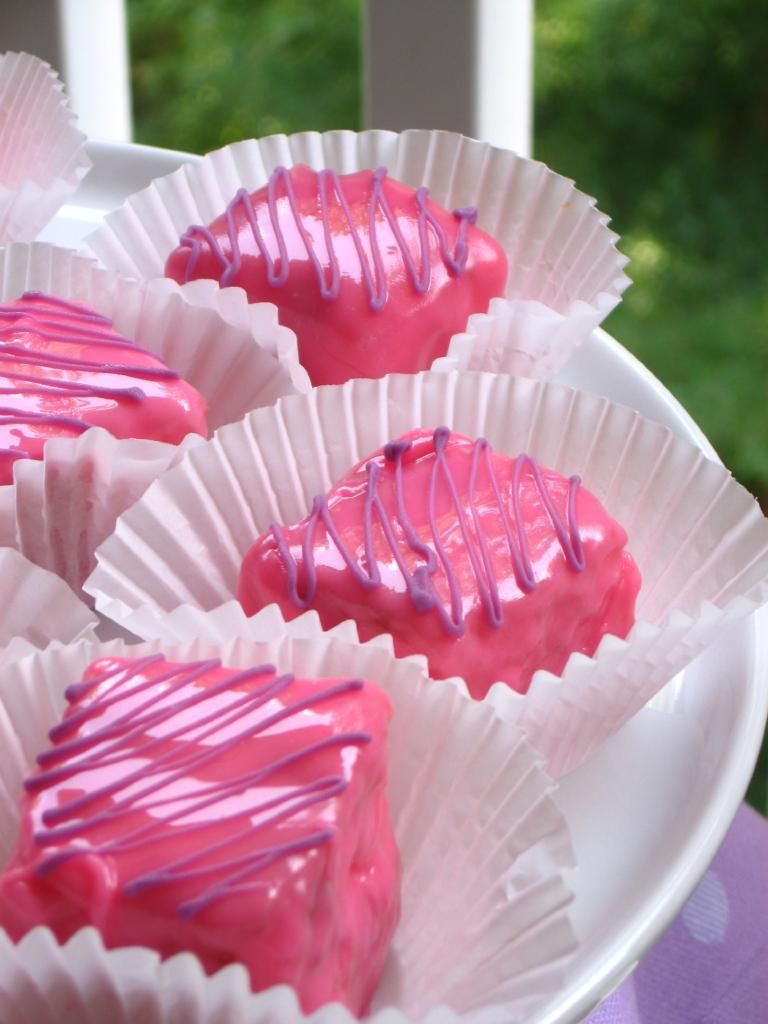
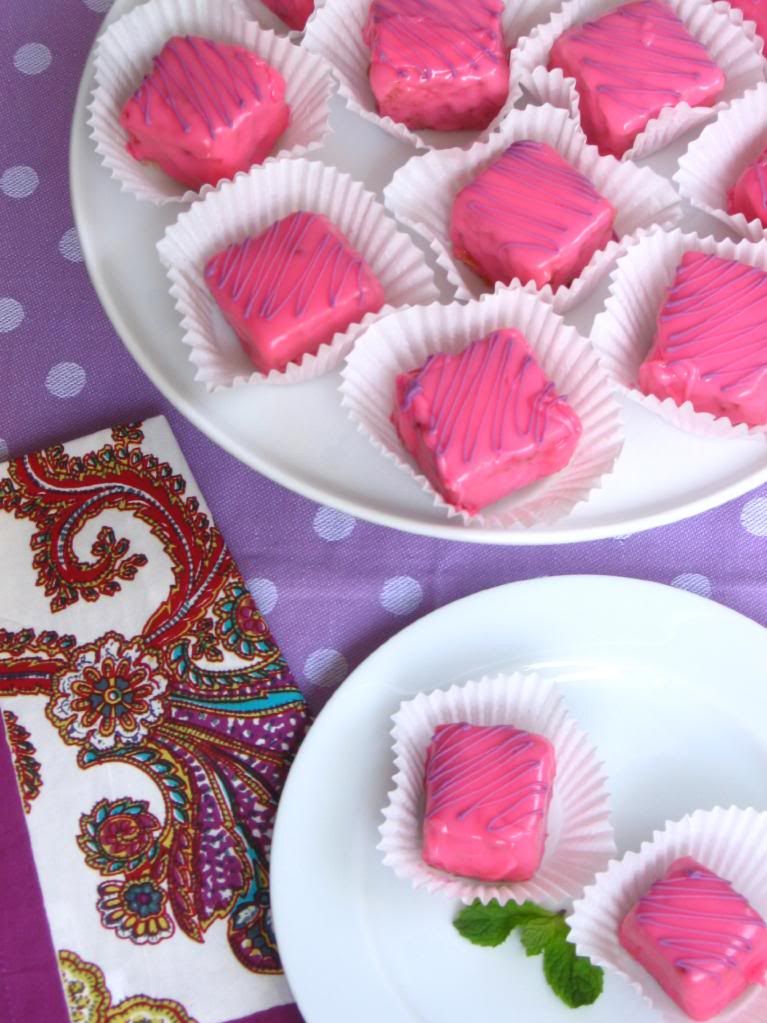
Now, before I gush, these bite-sized cakes were not perfect. More specifically, the poured fondant was not perfect. In fact, instead of “poured,” let’s call it glopped fondant. Shall we?

The thing is, fondant is going to be super sweet. There’s a cavity-inducing amount of confectioner’s sugar in it, not to mention the corn syrup. The only hope of this stuff covering your petit fours and not ending up with a cloying mess is making sure the poured fondant is heated enough to be very thin, so only a thin layer sticks to the outside of the cake square. This proved to be impossible with the recipe I used. It was warmed in a double boiler for gentle heating, but as soon as I started to pour, I was only able to cover a couple of cake squares before it was glop. Even when it was fully heated, it never really got thin enough to cover the squares in a reasonable way. As a result, they were too sweet.

Oh, and that color? That was not the color I was going for. I had a pale, rose petal pink in mind. Um, that’s all I’ll say about that.

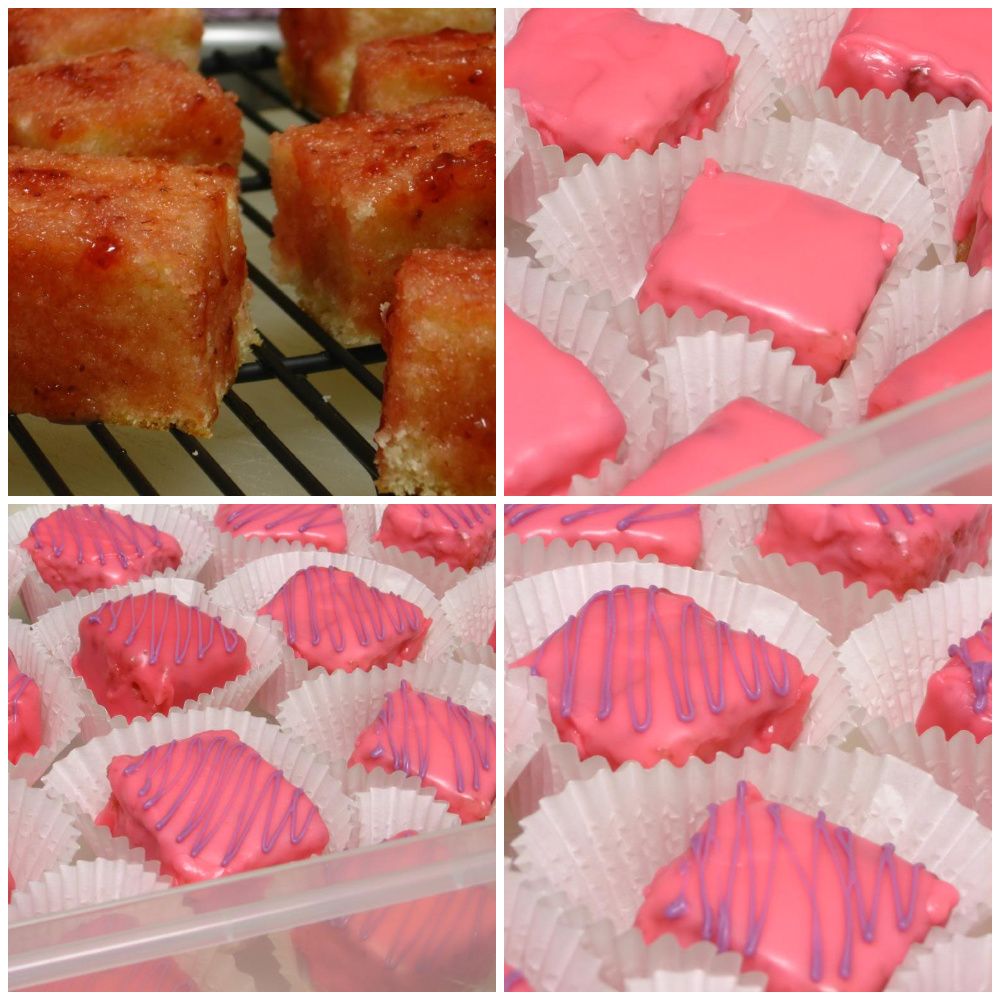
While the petit fours weren’t perfect, the taste itself (beyond the fondant) was so wonderful. The cake was deliciously moist, cool, and dense with a gorgeous buttery almond flavor. The raspberry jam covering was the perfect complement to the almond (one of my favorite flavor combinations!) and was simple to brush on, though it never dried completely. Really, if you use poured white chocolate or a different poured fondant recipe (how about trying this one, which looks great?), these would be fantastic (and they’d probably look a little less “gloppy” as well). Even in their overly sweet state, I ate a ton of them due to their brilliant flavorings.

This is also one of those recipes that ends up looking fancy despite being relatively easy to make — and you know I love those. A few key steps (like freezing the cake before cutting it up and making sure your fruit glaze is very thin) ensure that the process is relatively simple.

Go have a tea party!

Pink Ice Petit fours


Recipe by: Adapted from Diana’s Desserts
Yield: 60 1-inch petit fours, or about 16 2-inch petit fours

NOTE: This recipe does not include the poured fondant recipe or instructions due to the aforementioned difficulties. If you want to try poured fondant, I’d recommend looking at this post on Cakes and Cupboards, which looks promising. Nevertheless, poured fondant might still be too sweet for you. Another option is a poured chocolate. You’ll probably need two coats if you use white chocolate. If you want completely smooth petit fours, I recommend using a thin layer of rolled marzipan under your icing, or the buttercream procedure outlined on Cakes and Cupboards, above.

Cake Ingredients:
1/4 cup butter, melted
1/4 cup shortening
1 cup sugar
1 teaspoon vanilla extract
1 teaspoon almond extract
1-1/3 cups all-purpose flour
2 teaspoons baking powder
1/2 teaspoon salt
2/3 cup milk
3 egg whites

Fruit Glaze:
12 ounces raspberry preserves (or heated jelly)
3 tablespoons water

Directions:
Prepare the cake. Preheat oven to 350 degrees F. Grease and flour a 9-inch baking pan, or use Wilton’s Cake Release.

Cream butter, shortening, and sugar together in a large bowl. Beat in vanilla and almond extracts. In a separate bowl, combine flour, baking powder, and salt. Add dry ingredients to the creamed mixture alternately with the milk. In another bowl, beat egg whites to soft peaks. Gently fold the egg whites into the batter.

Pour the batter into the cake pan and bake for 20-25 minutes, or until a toothpick inserted in the center comes out clean. Remove from oven and let cool in pan for 10 minutes. Turn cake out onto a cooling rack. When cooled, chill cake in refrigerator for a bit before freezing it for at least 1 hour.

Right before removing the cake from the freezer, prepare fruit glaze. In a medium saucepan, heat preserves with the 3 tablespoons water on low heat. If using jelly, judge whether or not you need any of the water to make it a thin consistency.

Remove cake from freezer. Using a long, serrated knife, cut a thin slice off each side of chilled cake. Cut cake into squares of desired size (for me, about 1.5-inch squares). Place squares 1/2 inch apart on a cooling rack over a sheet pan. Use a pastry brush to spread a thin layer of heated preserves over tops and sides of petit fours before icing. Allow excess to drip off. Let dry (I put them in the fridge and let them set up a bit — they never really “dry”). Repeat if necessary to thoroughly coat squares.

Prepare your desired poured fondant or chocolate and pour over the petit fours. Decorate the tops with different frostings, chocolates, sprinkles, candy, sugar flowers, etc. as you wish. Refrigerate until ready to eat — eat within a day or two.

If you liked this post, please:
Subscribe to Willow Bird Baking
Follow Willow Bird Baking on Twitter
Follow Willow Bird Baking on Facebook
Give this post a thumbs up on StumbleUpon


ShareOther ways to share this post with friends!

1 102 103 104 105 106 127