fruit

Chocolate Pavlovas with Chocolate Mascarpone Mousse

Don’t laugh.

You’re going to laugh, aren’t you? You’re already laughing, AREN’T YOU?! Okay, clearly I’m a little sensitive about this, but . . . I’ve been going to Jazzercise classes. I know, I know . . . cue the comments about leg warmers, sideways ponytails, and off-shoulder Mickey Mouse t-shirts. Perhaps you’ve conjured up a picture of me in gigantic, neon hoop earrings with poofy bangs dancing around a la Flashdance. It’s okay. I can take it.

Because I love Jazzercise. I LOVE IT. It’s a dance exercise class that includes cardio, small weights, and stretching. I’ve been to two classes, and the pattern seems to be rocking out for 30 minutes (i.e. until I feel like I’m about to die), making the small weights and stretching exercises that last for about 15 minutes a total relief.

Before this, I was a sedentary lump (albeit a lump that did eat healthily throughout the week), so it’s no surprise that I’m the least coordinated person on the planet. Like, less coordinated than your Great Aunt Ida who uses a walker to get around and can’t really see anymore. Like, she would laugh me off the dance floor. So I’m typically the one flailing around in the back of the Jazzercise class two steps behind everyone else and sashaying in the wrong direction. I only wish I were joking!

The good news is, I still love it. I laugh at myself the whole time, sweat a lot, and wonder with slight discomfort if I’m jiggling in an unattractive way. As one of the instructors told me after my first class, “We’re all moving the wrong way at some point!” I just keep jabbing and kicking and pliéing and sashaying and wriggling and whatever else I’m supposed to do until the class is over and I feel like a champ. Albeit a champ with poofy bangs.

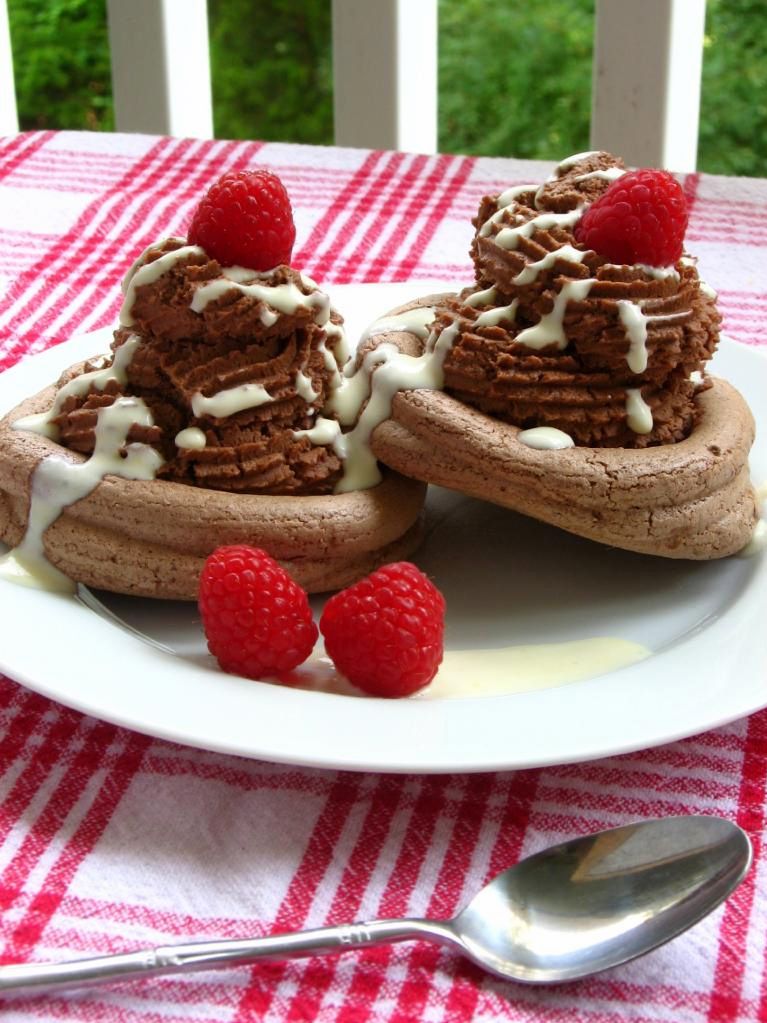
Another reason to love my new foray into the exercise world is being able to reflect upon my healthy movement while eating things like rich Chocolate Pavlovas with Chocolate Mascarpone Mousse and Mascarpone Cream. I can now make comments to myself like, “Oh yeah, I totally Jazzercised this off. No problem,” or, “I’m sure we’ll be sashaying these calories off tomorrow.”

With so much Secret Gardening going on, you may have assumed the Daring Bakers challenge fell by the wayside this month. Fortunately, that was not the case! The June 2010 Daring Bakers’ challenge was hosted by Dawn of Doable and Delicious. Dawn challenged the Daring Bakers’ to make Chocolate Pavlovas and Chocolate Mascarpone Mousse. The challenge recipe is based on a recipe from the book Chocolate Epiphany by Francois Payard.

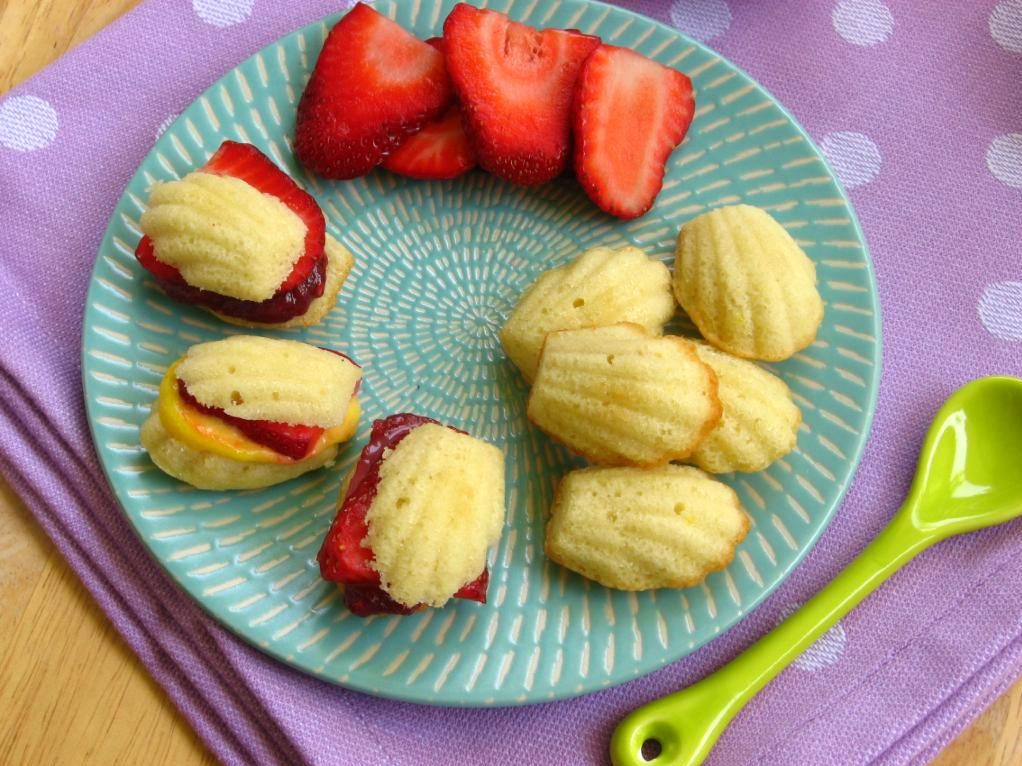
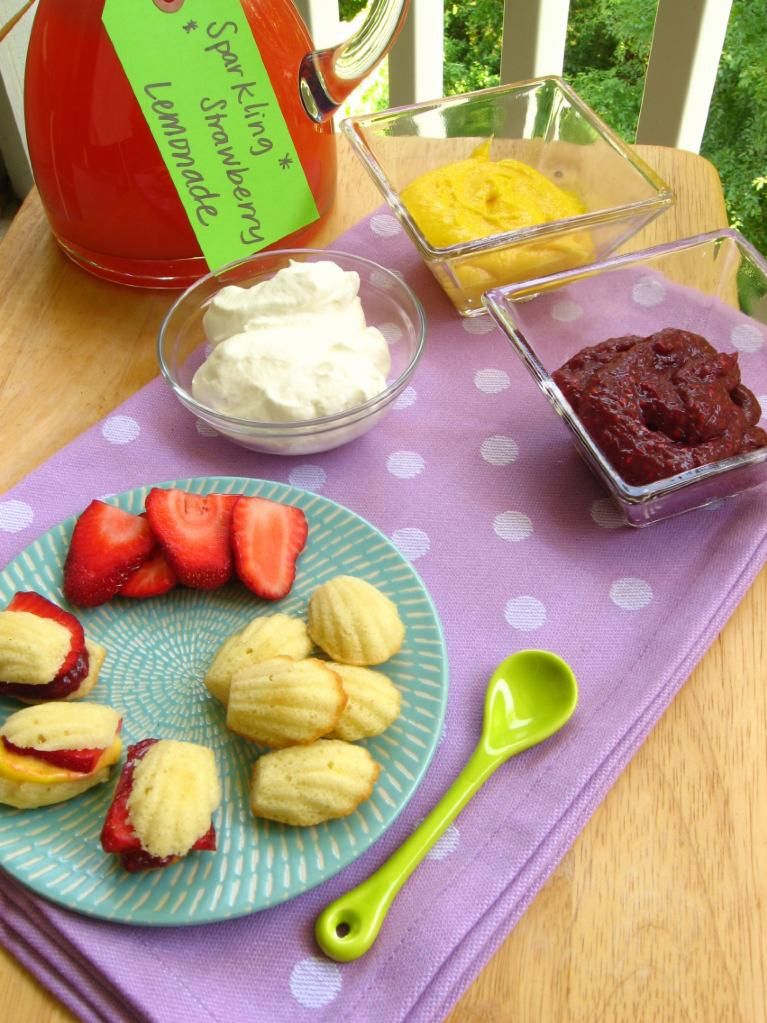
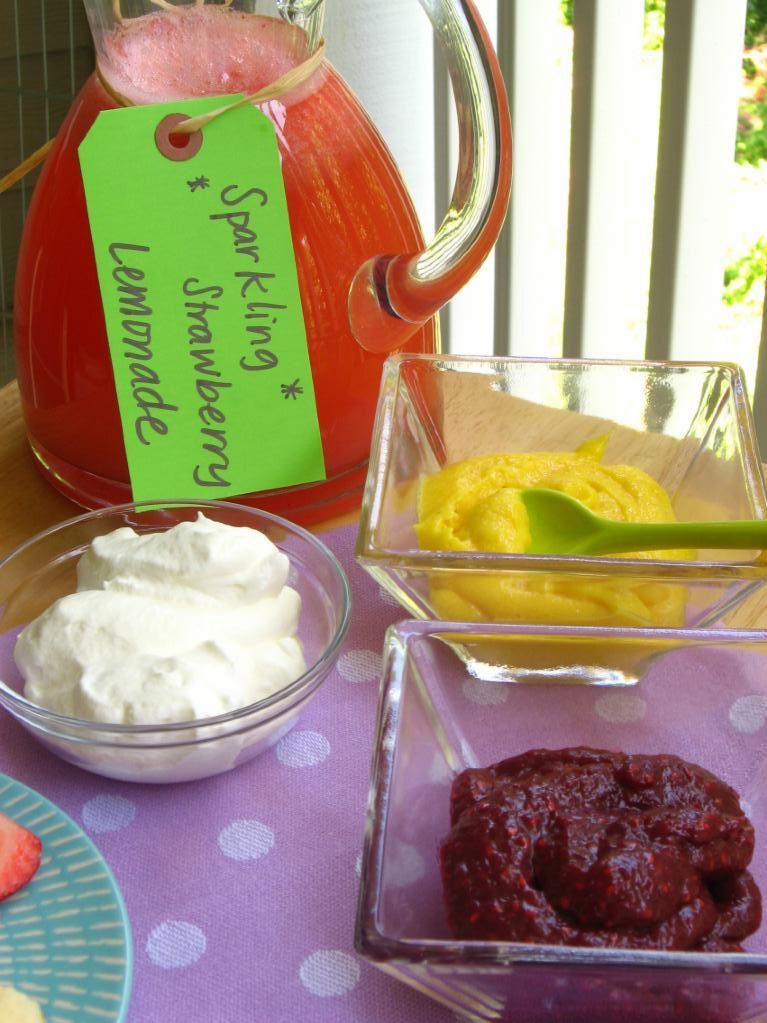
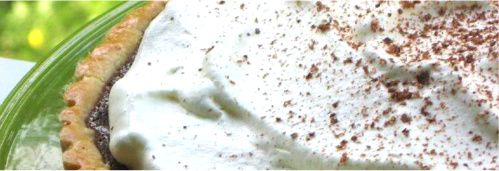
These pavlovas are not the sort with the marshmallowy interior, but are more crisp throughout, like meringue cookies. They’re topped with a decadent, fluffy chocolate mascarpone mousse and a drizzle of mascarpone cream made with heavenly Crème Anglaise. I opted to leave out orange flavorings suggested by the original recipe, because I typically don’t like citrus meddling with my chocolate. The result was perfect. Make your pavlovas small, because these components all together make for an extremely rich, luscious dessert. You’re going to need a glass of milk. And a nap. And some Jazzercise.

But it’s worth it! Mike and I loved this dessert. The combination of crisp and smooth textures was fantastic. It was messy to eat, but simple to make, and a joy to taste! As Daring Bakers challenges go, this challenge had very few, “Uh-oh, this recipe’s about to fail!” moments — a huge plus for me in this busy month. I made my chocolate pavlovas look like little Soda Shop ice cream sundaes for added fun. Scrounge up your best chocolate and enjoy the cool mousse and crisp pavlova on a hot summer evening.

In the meantime, tell me, what’s your favorite exercise routine? Jazzercise? Zumba? Treadmill? Channel surfing?


Gorgeous flowers from a student’s parents’ garden.

Chocolate Pavlovas with Chocolate Mascarpone Mousse


Recipe by: Adapted from Chocolate Epiphany by Francois Payard
Yields: About 8-10 servings depending on the size of your pavlovas

Chocolate Pavlova Ingredients:
3 large egg whites
½ cup plus 1 tbsp (110 grams) white granulated sugar
¼ cup (30 grams) confectioner’s (icing) sugar
1/3 cup (30 grams) cocoa powder

Chocolate Mascarpone Mousse Ingredients:
1 ½ cups (355 mls) heavy cream
9 ounces (255 grams) good chocolate, chopped (I used bittersweet Ghiradeli chocolate chips)
1 2/3 cups (390 mls) mascarpone
pinch of nutmeg

Mascarpone Cream Ingredients:
1 recipe crème anglaise (see below)
1/6 cup (120 mls) mascarpone
1/6 cup (120 mls) heavy cream

Crème Anglaise Ingredients:
1/3 cup whole milk
1/3 cup heavy cream
1/3 vanilla bean, split or 1 teaspoon pure vanilla extract
2 large egg yolks
2 tablespoons sugar

Directions:
Make chocolate pavlovas: Place a rack in the center of the oven and preheat to 200º F (95º C) degrees. Line two baking sheets with silpat or parchment and set aside.

Put the egg whites in a bowl and whip until soft peaks form. Increase speed to high and gradually add granulated sugar about 1 tbsp at a time until stiff peaks form (the whites should be firm but moist.) Sift the confectioner’s sugar and cocoa powder over the egg whites and fold the dry ingredients into the white (this looks like it will not happen. Fold gently and it will eventually come together.)

Fill a pastry bag with the meringue. Pipe the meringue into whatever shapes you desire. Alternatively, you could just free form your shapes and level them a bit with the back of a spoon. Bake for 2-3 hours until the meringues become dry and crisp. Cool completely. You can make these ahead of time and store in an airtight container for up to 3 days.

Make the Crème Anglaise: While the pavlovas are baking (unless you made them ahead of time), whisk together the egg yolks and sugar until the mixture turns pale yellow.

Combine the milk, cream and vanilla in a saucepan over medium high heat, bringing the mixture to a boil. Take off the heat. Pour about ½ cup of the hot liquid into the yolk mixture, whisking constantly to keep from making scrambled eggs. Pour the yolk mixture into the pan with the remaining cream mixture and put the heat back on medium. Stir constantly with a wooden spoon until the mixture thickens enough to lightly coat the back of a wooden spoon. Do not overcook.

Remove the mixture from the heat and strain it through a fine mesh sieve into a bowl. Cover and refrigerate until the mixture is thoroughly chilled, about 2 hours or overnight.

Make the chocolate mascarpone mousse: While the pavlovas are baking or cooling, put ½ cup (120 mls) of the heavy cream in a saucepan over medium high heat. Once warm, add the chocolate and whisk until melted and smooth. Transfer the mixture to a bowl and let sit at room temperature until cool.

Place the mascarpone, the remaining cup of cream and nutmeg in a bowl. Whip on low for a minute until the mascarpone is loose. Do not overbeat, as the mascarpone will break. Mix about ¼ of the mascarpone mixture into the chocolate to lighten. Fold in the remaining mascarpone until well incorporated. Refrigerate until you’re ready to assemble your pavlovas.

Make the mascarpone cream: Slowly whisk the mascarpone into the Crème Anglaise. Put the cream in a bowl and beat with electric mixer until very soft peaks are formed. Fold the cream into the mascarpone mixture.

Assemble your pavlovas: Pipe the mousse onto the pavlovas and drizzle with the mascarpone cream over the top. Dust with confectioner’s sugar and add fresh fruit if desired.

P.S. – Now that I’ve posted my Daring Bakers challenge, check back soon for Secret Garden recipes!

P.S. 2 – Make sure to stop by and see other Daring Bakers’ creations!

If you liked this post, please:
Subscribe to Willow Bird Baking
Follow Willow Bird Baking on Twitter
Follow Willow Bird Baking on Facebook
Give this post a thumbs up on StumbleUpon


ShareOther ways to share this post with friends!

Blueberry Walnut Bread

I’m responsible for little Byrd’s post-knee-surgery physical therapy. For the first week, it involved icing her knees, which she wasn’t thrilled about. But since then it’s involved warm compresses, massages, and gentle exercises. Essentially, my dog is getting the spa treatment. My roommate can’t hold back her laughter when she walks in on me caressing Byrd’s little shaved-bare-bottom.

Today I thought I’d mix it up a little bit. My post-surgery info said that Byrd might enjoy light swimming to exercise her knees. The bath tub looked like the perfect size; she’s only 8 pounds, after all. Maybe she’d love it.

Reality check: Byrd does not love swimming. She is terrified of swimming. The bathtub is not the perfect size. Her thrashing requires at least a lake-sized body of water, and preferably an ocean. After about 10 minutes of trying in vain to convince her that swimming was a jolly pastime that she was bred for, for goodness’ sake, my bathroom, my nightgown, my dog, and my spirits were all soaked.

Both of us ended up on the balcony, soaking wet, shivering, and snuggling for warmth and reassurance. I needed reassurance that I wasn’t the worst mother ever. She needed reassurance that she was, indeed, on dry land and not drowning.

Pups can be wonderful for reassurance, comfort, warmth . . . they love you even when you’ve just tossed them in a bathtub (disclaimer: there was no actual tossing involved, and I held onto her the whole time, despite what her sheer panic might imply). Another amazing summer comfort (and one that I sure wish I still had on hand after that bathtub fiasco) is a hearty fruit-n-nut quickbread. Fruity quickbreads are a favorite of mine when slathered with butter or maybe even torn up over a bowl of fresh oatmeal. Mmm, banana nut bread, delicious pumpkin bread, or in this case . . . blueberry bread!

I made this bread awhile back for a bake sale, but kept a slice to enjoy myself. I accidentally underbaked one loaf (and secretly enjoyed the doughy gooeyness), but once perfectly baked, the bread has a fantastic, moist crumb. It’s full of plump blueberries, nuts, and oats. It inspired me so much, I wrote a poem (what, you don’t write sonnets about your food?):

Blueberry Bramble

Bush awkward, lopsided with purple fruit –
Bountiful harvest sprung from tired roots.
Rapt is the quiet bird who nestles thus
beneath the branches, feathers plush and fluffed,
beak sky-stained with the blood of nature’s yield,
breast full of warm air drawn from o’er the field
in which I lie with you now, and we too
consume, until aching, handfuls of blue.
Later half the basket will find its way,
indoors and in the fading light of day,
into batter, the oven, between teeth,
I’ll steal your crumbs for my oatmeal, a thief
willing to be caught, bird in a briar,
hands bright blue, stained now, and throat on fire.

Karly at Buns In My Oven has posted a healthier version of this bread that substitutes some apple sauce and lowers the sugar, if you’re interested! I went all out for maximum enjoyment. Serve this in a bowl with a splash of cream or ice cream for a lovely, fresh summer dessert, or bake up a loaf for breakfast!

Blueberry Walnut Bread


Recipe by: Adapted from Betty Crocker
Yields: one loaf

Ingredients:
2/3 cup packed brown sugar
3/4 cup milk
1/2 cup vegetable oil
2 eggs
2 1/4 cups all-purpose flour
1 cup quick-cooking or old-fashioned oats
3 teaspoons baking powder
1 teaspoon ground cinnamon
1/4 teaspoon salt
1 cup fresh or frozen blueberries (thawed and drained)
1 cup chopped walnuts

Directions:
1. Heat oven to 350ºF. Grease bottom only of 8- or 9-inch loaf pan.
2. In large bowl, mix brown sugar, milk, oil and eggs with spoon. Stir in remaining ingredients except blueberries and nuts; beat 30 seconds. Fold in blueberries and nuts. Pour into pan. Sprinkle with additional oats if desired.
3. Bake 45 to 55 minutes or until toothpick inserted in center comes out clean (NOTE: this took about 55 minutes or even a little longer for me). Cool 10 minutes. Loosen sides of loaf from pan; remove from pan to wire rack. Cool completely, about 2 hours, before slicing. Wrap tightly and store at room temperature up to 4 days, or refrigerate up to 10 days.


Share Share this post with friends!

Lemon Madeleines with Mango and Raspberry Curd — and a chance to win a mixer!

What does summer taste like?

I know what summer looks like. It looks like trees weighed down with heavy cascades of leaves, thunderheads gathering solemnly in evening heat, steam rising off pavement. Summer sounds like the persistent hum of cicadas, wind rushing through the woods behind my apartment. Summer smells like jasmine, gardenias, and bushels and bushels of honeysuckle. Summer feels like bearing the burden of the sun, carrying its winter secrets on new summer skin . . .

But what does summer taste like? I think it must taste like mango curd, tropical and cool and sweet on your tongue. And of course, it tastes like lemon: fresh and bright. Don’t forget ripe, lush berries, and oh, maybe some freshly whipped cream piled high on top.

The folks at beso.com want to know what you think summer tastes like, and it’s worth a KitchenAid mixer to them! They’re currently holding a Baking Up Summer Sweets contest in which you can tell them about your favorite summer recipe for a chance to win.

Given my own summer tastes, I’m entering beso.com’s contest with a recipe that’s mangoy, lemony, berry-y, creamy . . . full of summer goodness. And since I recently won a mini-madeleine pan from Shortbread NYC, of course it had to involve madeleines! Hence, lemon madeleines with mango and raspberry curd were born.

These lemony bites are the perfect summer treat. I served them with fresh, sliced strawberries. They were light, bright, and so tiny — perfect for sitting on a warm patio in the evening and nibbling one-by-one. Also, I don’t know about you, but I’m a dipper. I love dipping sauces and creams. Dipping each of these golden hunks into various curds and cream was not only delicious, but a fun experience too! Just a note about the texture of the madeleines, though: these were a bit cakey and only had a slight outer shell just after baking, which may displease die-hard madeleine lovers. I’m not sure if it was my silicone pan or the recipe. Nevertheless, I enjoyed the texture.

Speaking of KitchenAid mixers, you will never believe what I got for my birthday. My family all chipped in and bought me the most gorgeous silver professional KitchenAid stand mixer in the world! Bowl-lift, 5 quart bowl, and it came complete with a complimentary KitchenAid timer, four prep bowls, and a free attachment. To say I was shocked would be an understatement. Summer in this house is gonna sound like a whole lotta mixin’ this year! So what would I do with that pretty mixer beso.com is giving away, were I to win? My mama’s mixer is looking a little beat up, so I’m thinking it would be a good belated Mothers’ Day gift. Here’s hoping!

Mix up your own summer treat and enter to win, but don’t forget to mix up some of these madeleines as well! Make mango curd, raspberry curd, or both! You’ll love every summery bite.

Lemon Madeleines with Mango and Raspberry Curd


Recipe by: adapted from Joy of Baking (madeleines), Smitten Kitchen (mango curd), and notes from my food diary(raspberry curd)
Yields: about 80-90 bite-sized mini madeleines, maybe 25 regular size

Madeleine Ingredients:
1/2 cup (113 grams) unsalted butter, melted
1 cup (130 grams) all-purpose flour
1/2 teaspoon baking powder
1/8 teaspoon salt
3 large eggs, at room temperature
2/3 cup (133 grams) granulated white sugar
1/2 teaspoon pure vanilla extract
1/2 teaspoon lemon extract

Mango Curd Ingredients:
1 15-ounce ripe mango, peeled, pitted, cut into 1/2-inch pieces
1/3 – 1/2 cup sugar (depending on your preference for tart vs. sweet)
3 tablespoons fresh lime or lemon juice (lime comes out tangier)
Pinch of salt
4 large egg yolks
1/4 cup (1/2 stick) unsalted butter, cut into small pieces

Raspberry Curd Ingredients:
1/2 cup (1 stick) unsalted butter
Two 1/2-pints ripe raspberries or one 12-ounce package frozen raspberries, thawed
5 large egg yolks, lightly beaten
3/4 cup sugar
Pinch of salt
2 to 3 teaspoons fresh lemon juice

Whipped Cream Ingredients:
2 cups heavy whipping cream
3 tablespoons confectioners’ sugar

Directions:
Make madeleine batter: First, melt the butter and allow it to cool while you make the batter. In a small bowl place the flour, baking powder and salt and whisk until well blended.

In the bowl of your electric mixer, beat the eggs and sugar at medium-high speed until the mixture has tripled in volume and forms a thick ribbon when the beaters are lifted (about 5 minutes).  Add the vanilla and lemon extracts and beat to combine.

Sift a small amount of flour over the egg mixture and, using a large rubber spatula, fold the flour mixture into the beaten eggs to lighten it.  Sift the rest of the flour over the egg mixture and fold in being sure not to overmix or the batter will deflate. 

Whisk a small amount of the egg mixture into the melted butter to lighten it.  Then fold in the cooled melted butter in three additions.  Cover and refrigerate for at least 30 minutes, or several hours, until slightly firm.

While batter is refrigerating, make mango curd: Puree mango, sugar, lime/lemon juice and salt in processor, scraping down sides of work bowl occasionally. Add yolks; puree 15 seconds longer. Strain through sieve set over large metal bowl, pressing on solids with back of spatula to release as much puree as possible. Discard solids in sieve.

Set metal bowl over saucepan of simmering water (do not allow bottom of bowl to touch water); whisk puree until thickened and thermometer registers 170°F., about 10 minutes. Remove from over water. Whisk in butter 1 piece at a time. Cover with plastic wrap (directly on the curd to prevent a skin from forming) and refrigerate for several hours. Note: Freeze excess for up to two months.

Make raspberry curd: Melt the butter in a large saucepan over medium heat. Add the raspberries, egg yolks, sugar, and salt and cook, mashing the berries and stirring frequently at first and them constantly at the end, until thickened, about 10 minutes (this took longer for me — about 15+).

Pour the mixture through a coarse strainer set over a bowl, pressing hard on the solids to extract as much liquid as possible. Cool to room temperature; the curd will continue to thicken as it cools. Stir in lemon juice to taste. Refrigerate. Note: freeze excess for up to 1 month.

To bake madeleines, position a rack in the center of the oven and preheat to 375 degrees F (190 degrees C).  Generously butter two 12-mold madeleine pans.  Dust the molds with flour and tap out the excess.  Alternatively, use Bakers Joy to coat pans. (Make sure the pans are well greased or the madeleines will stick and be hard to remove.)

Drop a generous tablespoonful of the batter into the center of each prepared mold, leaving the batter mounded in the center.  (This will result in the classic “humped” appearance of the madeleines.)

Bake the madeleines for 11 to 13 minutes, until the edges are golden brown and the centers spring back when lightly touched.  Note: If you make miniature madeleines, reduce the baking time to about 7-9 minutes. Do not overbake these cookies or they will be dry.

Remove the pans from the oven and rap each pan sharply against a countertop to release the madeleines.  Transfer the madeleines, smooth sides down, to wire racks to cool.  While they cool, make whipped cream by mixing cream and sugar together until they reach loose whipped cream consistency. Serve madeleines with curds and cream the same day for best taste, or store them in an airtight container at room temperature for 2 to 3 days or frozen, well wrapped, for up to 1 month.


Enjoy!

P.S. – Wondering about that refreshing-looking pitcher of sparkling strawberry lemonade? That summer recipe is coming up soon!

P.S. 2 – My roommate texted me today from her visit to her home state of New York. It snowed there today. Yikes! Buffalo, summer is coming soon, just hang on!


Share Share this post with friends!

3.14159265358979323846…

Happy Pi Day! My math geek boyfriend had never heard of it, so go figure.

Here are my favorite pie recipes (and okay, some tarts for good measure). Whether you’re a math nerd or just want another excuse to eat pie, you have my blessing.


Fresh Blueberry Pie


Red Berry Pie


Mini-Pies! Pumpkin, Sour Cream Apple, Peach Crisp


Raspberry Cream Cheese Tart


Chocolate Tart


Peach Crisp Pie

Apparently there’s also a Pie — er, I mean Pi — Approximation Day in July?! Score!


Share Share this post with friends!

Red Berry Pie — Version 2.0

Once upon a time, there was lovely confection by the name of Little Red Berry Pie. Little Red Berry Pie was tasty and appeared beautiful on the outside, but carried a dark, depressing secret within her shell. You see, in her fruity little pie heart, she was weepy and sad.

Very weepy. Like, soggy. Sort of like a puddle o’ fruit, actually.

She hadn’t been made with the best thickener, hadn’t been stuffed with enough berries, hadn’t cooled before being sliced, and was just an all-around mess. One fateful day, though . . . her prince arrived. No white horse was required, and no sword to slay her enemies — in fact, all she needed was him. His name? Err, well. We’ll call him Granny Smith. What?! Never met a prince named Granny?

Boy, that bright green prince was a harbinger of happiness! Little Red Berry Pie was reborn — a better version of herself!


Version 2.0

This Sweetie Pie followed the grand tradition of all fairy tales and definitely lived happily ever after. Until she was digested by gastric juices, that is. Oh, don’t look so surprised. Fairy tales are full of kidnapping, cannibalism, and violence!

You’ll have to forgive me. I spent weeks reading fairy tales to my adorable sixth grade students and discussing the elements of fiction — characters, plot, setting, theme, point of view. We marveled together that these “child-friendly” tales contained the kid-eating witch; the parents who left their kids in the middle of the woods; the multiple attempts to curse, poison, or slay enemies. And that’s not even considering the clueless, helpless, victimized princesses just waiting for a Man-with-a-capital-M to save their beautiful bustles. But I digress! I think we all agree pie is more pressing than fairy tales at the moment.

. . . But biting into this pie did feel a bit like living happily ever after. Let’s just say I’ve finally perfected my Red Berry Pie recipe with a little help from America’s Test Kitchen. In their blueberry pie, they use a brilliant thickening agent: tapioca plus a big ol’ grated Granny Smith apple, which releases its natural pectin while baking. It worked so well for the blueberry, I decided to use it to tweak my previously flawed Red Berry filling.

To say it worked perfectly is an understatement. This is the best pie I’ve ever had! The best pie I’ve ever eaten, y’all! Are you listening?! That’s saying a lot — I’ve eaten and swooned over some amazing pies (Peach Crisp Pie, for instance). The proportion of strawberries to raspberries was ideal: the raspberries lent their rich, deep fruity flavor to the brightness of the strawberries. The filling was thick, juicy, and hearty. The crust . . . well, okay, it was still difficult to work with, but practice must make perfect, because it was a little simpler than last time (hence the not-as-hideous pie, perhaps?) And of course it was tender and flaky.

Serve each piece with a dollop of freshly whipped, lightly sweetened cream for a true fairy tale dessert — minus the cannibalism. Or grab the vanilla bean ice cream, if that’s your style! Regardless of the accompaniments, make this pie.


Mmm, hello, big ol’ juicy berry!!

Red Berry Pie


Recipe by: Adapted from America’s Test Kitchen‘s Blueberry Pie
Yields: one 9-in, double-crust pie

Crust Ingredients:
2 1/2 cups unbleached all-purpose flour (12 1/2 ounces)
1 teaspoon table salt
2 tablespoons sugar
12 tablespoons cold unsalted butter (1 1/2 sticks), cut into 1/4-inch slices
1/2 cup chilled solid vegetable shortening, cut into 4 pieces (I use butter flavor)
1/4 cup vodka, cold
1/4 cup cold water
1 large egg, lightly beaten with 1 teaspoon water

Red Berry Filling Ingredients:
3 cups frozen raspberries*
3 cups frozen whole strawberries*
1 Granny Smith apple, peeled and grated on large holes of box grater
2 teaspoons juice from 1 lemon
3/4 cup sugar (5 1/4 ounces)
2 tablespoons quick-cooking tapioca, ground*
Pinch table salt
2 tablespoons unsalted butter, cut into 1/4-inch pieces

Directions:
1. For The Pie Dough: Process 1 1/2 cups flour, salt, and sugar in food processor until combined, about two 1-second pulses. Add butter and shortening and process until homogenous dough just starts to collect in uneven clumps, about 15 seconds; dough will resemble cottage cheese curds and there should be no uncoated flour. Scrape bowl with rubber spatula and redistribute dough evenly around processor blade. Add remaining cup flour and pulse until mixture is evenly distributed around bowl and mass of dough has been broken up, 4 to 6 quick pulses. Empty mixture into medium bowl.

2. Sprinkle vodka and water over mixture. With rubber spatula, use folding motion to mix, pressing down on dough until dough is slightly tacky and sticks together. Divide dough into 2 even balls and flatten each into 4-inch disk. Wrap each in plastic wrap and refrigerate at least 45 minutes or up to 2 days.

3. Remove 1 disk of dough from refrigerator and roll out on generously floured (up to 1/4 cup) work surface to 12-inch circle, about 1/8 inch thick. Roll dough loosely around rolling pin and unroll into pie plate, leaving at least 1-inch overhang on each side. Working around circumference, ease dough into plate by gently lifting edge of dough with one hand while pressing into plate bottom with other hand. Leave dough that overhangs plate in place; refrigerate while preparing filling until dough is firm, about 30 minutes.

4. For The Filling: Adjust oven rack to lowest position, place rimmed baking sheet on oven rack, and heat oven to 400 degrees. Place 2 cups frozen whole strawberries and about 1 cup frozen raspberries in medium saucepan and set over medium heat. Cook, stirring frequently, until many of the raspberries have broken down and mixture is thickened and reduced to 1 1/2 cups, about 12-15 minutes. Let cool slightly.

5. Place grated apple in clean kitchen towel and wring dry. Transfer apple to large bowl. Add cooked berries, remaining 3 cups uncooked berries, lemon zest, juice, sugar, tapioca, and salt; toss to combine. Transfer mixture to dough-lined pie plate and scatter butter pieces over filling.

6. Roll out second disk of dough on generously floured (up to 1/4 cup) work surface to 11-inch circle, about 1/8 inch thick. Using 1 1/4-inch round biscuit cutter, cut round from center of dough. Cut another 6 rounds from dough, 1 1/2 inches from edge of center hole and equally spaced around center hole. Roll dough loosely around rolling pin and unroll over pie, leaving at least 1/2-inch overhang on each side.

7. Using kitchen shears, trim bottom layer of overhanging dough, leaving 1/2-inch overhang. Fold dough under itself so that edge of fold is flush with outer rim of pie plate. Flute edges using thumb and forefinger or press with tines of fork to seal. Brush top and edges of pie with egg mixture. If dough is very soft, chill in freezer for 10 minutes.

8. Place pie on heated baking sheet and bake 30 minutes. Reduce oven temperature to 350 degrees and continue to bake until juices bubble and crust is deep golden brown, 30 to 40 minutes longer. Transfer pie to wire rack; cool to room temperature, at least 4 hours. Cut into wedges and serve.

*I made this recipe using unthawed frozen berries, but fresh would probably work as well if the berries in step 4 were mashed and cooked only for 8 minutes. I used whole strawberries which made the pie so succulent! Grind the tapioca to a powder in a spice grinder or mini food processor. If using pearl tapioca, reduce the amount to 5 teaspoons. Vodka is essential to the texture of the crust and imparts no flavor; do not substitute.


Best wishes for your happily ever after!


Share Share this post with friends!

1 30 31 32 33 34 35