fruit

Ina Garten’s Lemon Loaf Cake and Raffaldini Vineyards

So what have you been up to this summer? As you know, up until this past weekend, I had not fulfilled my summer quota of fun sunshiney activities — no beach, no pool, no picnic. With school looming ahead of me (teacher meetings start tomorrow), something had to be done. Quickly.

My friend Vada saved the day (er, the season?). We Jazzercise together and she invited me to join her and a group of her fun friends for a road trip. It was her friend Lori’s birthday and they were headed to Raffaldini Vineyards in Ronda, NC.

When she first suggested it, I wasn’t sure. I don’t drink, so what would I do at a vineyard? Would I end up counting grapes in the corner as everyone else played wine pong (that’s what they do at vineyards, right)? As it turns out, though, Vada doesn’t drink either, and she was certain it would still be fun. I’m up for fun! I told her to count me in.

Vada and Luca

I’m so glad I went, because it was fun. Turns out, vineyards are beautiful — or at least Raffaldini Vineyards certainly were! We drove about an hour out of Charlotte and suddenly it felt like we were in Italy. Vada’s friend Luca, our resident Italian, agreed that it reminded him of home — a nice stamp of authenticity. As promised, fun ensued.
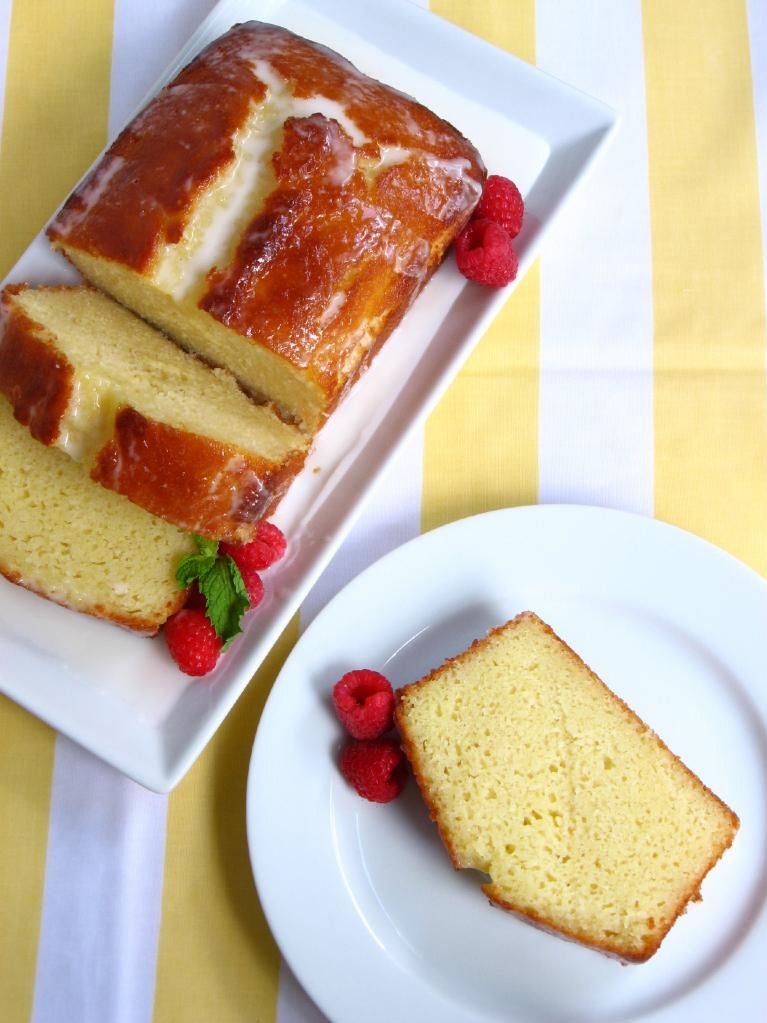
First, we ate a lovely picnic on an outdoor patio overlooking the vineyards and mountains in the distance. The vineyards offered a whole menu of food you could purchase on-site, but I brought a little packed lunch to save money. I also brought this bright, summery Lemon Loaf Cake, which was moist and traveled so well. Vada, who is an absolutely extraordinary cake decorator, brought cupcakes along. We had quite a feast!

After our picnic, we took a brief tour of the vineyard, learning about the soil, growing practices, and types of grapes grown. While others enjoyed a wine tasting, Vada and I took a walk around the grounds and had a photo shoot. Finally, we took a tour of the winery and learned how the wines were made. It was so informative — not being a drinker, I tend to think of grapes as the basis of jelly and “tannin” as something you do at the beach. I learned a lot! The best part? The entire day only cost me $8 — and that included buying a bottled water on-site.
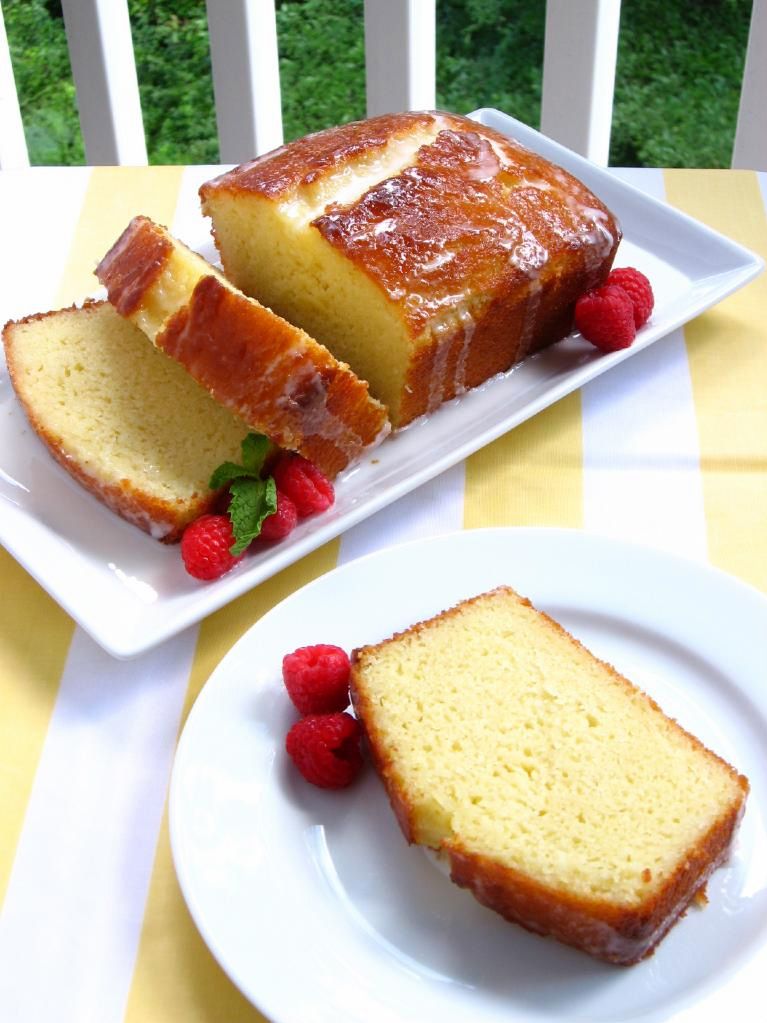
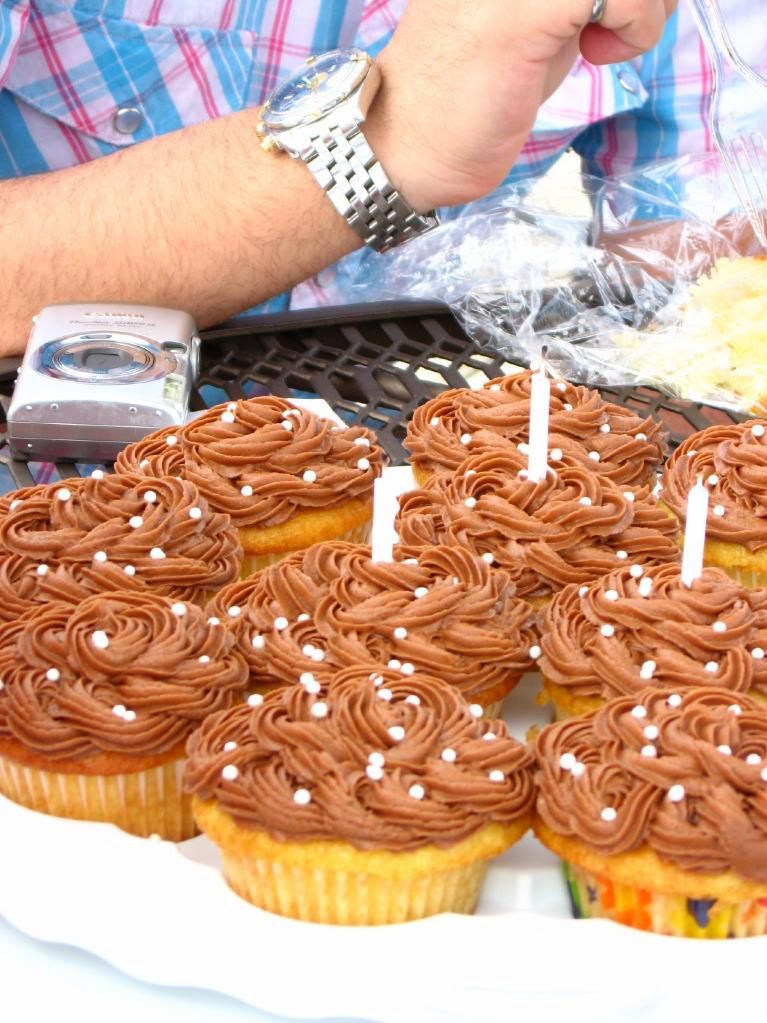
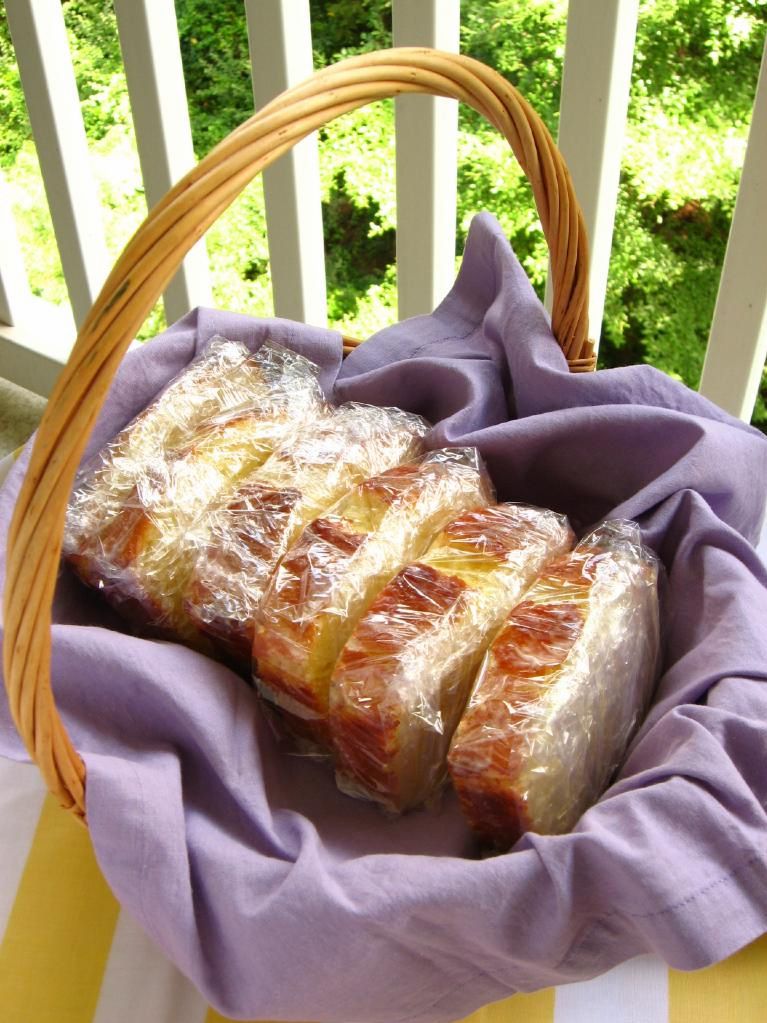
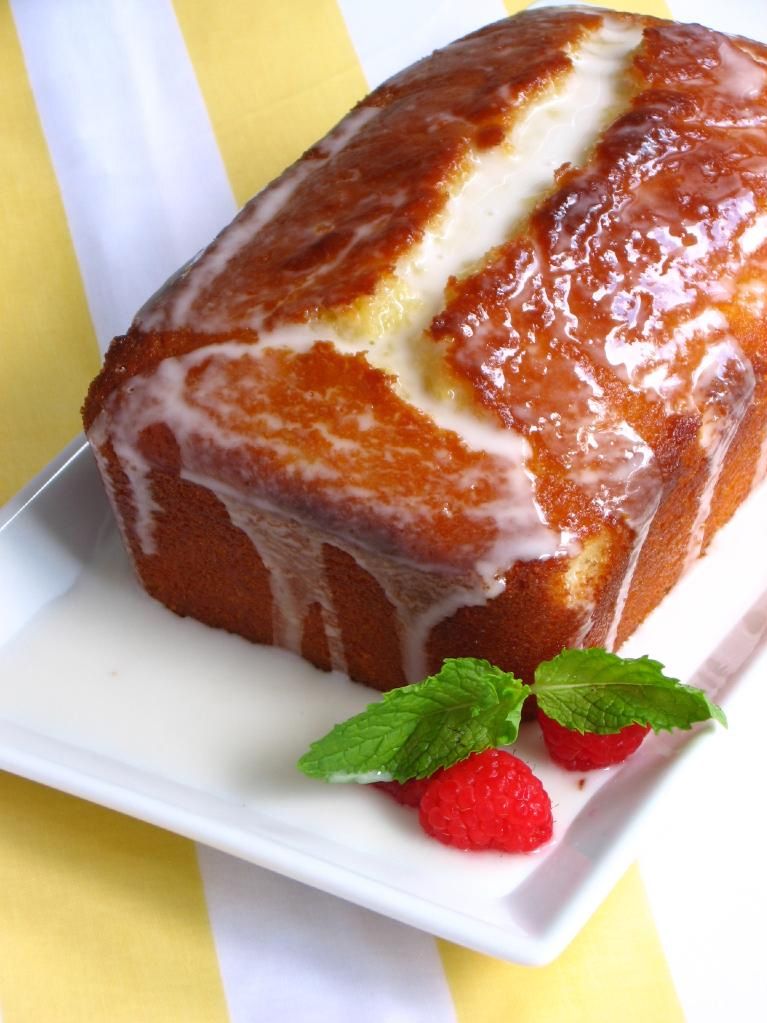
Vada’s gorgeous cupcakes and the quick Lemon Loaf Cake packed for traveling!

This one little day trip kind of made my summer! It was filled with sweet people, good food, beautiful surroundings. How about you? Does one event or activity this summer stand out as your favorite?

You can relive part of my end of summer fun by making this quick, simple loaf cake for yourself. It has a tangy, drenched lemon flavor that will help you kiss the summer days farewell.

5 from 1 reviews
Ina Garten's Lemon Loaf Cake
 
Prep time
Cook time
Total time
 
A delicious, tangy, easy lemon loaf cake. Be careful not to overbake!
Author:
Serves: 6
Ingredients
Cake Ingredients:
  • 1 1/2 cups all-purpose flour
  • 2 teaspoons baking powder
  • 1/2 teaspoons kosher salt
  • 1 cup plain whole-milk yogurt or sour cream
  • 1 1/3 cups sugar, divided
  • 3 eggs
  • 2 teaspoons grated lemon zest or 2 teaspoons lemon extract
  • 1/2 teaspoons pure vanilla extract
  • 1/2 cup vegetable oil
  • 1/3 cup freshly squeezed lemon juice
Glaze Ingredients:
  • 1 cup powdered sugar
  • 2 tablespoons freshly squeezed lemon juice
Instructions
  1. Preheat the oven to 350 degrees F. Grease an 8 1/2 x 4 1/4 x 2 1/2-inch loaf pan (I use Wilton’s Cake Release). Line the bottom with parchment paper and butter and flour the entire pan.
  2. Sift the flour, baking powder, and salt together into a medium bowl. In a large bowl, whisk together yogurt, 1 cup of the sugar, eggs, lemon zest or extract, and vanilla. Slowly add the dry ingredients into the wet, whisking to combine (I did this in 2-3 additions). Use a rubber spatula to fold the vegetable oil into the batter until it’s fully incorporated. Pour into the prepared pan and bake for about 50 minutes, or until a cake tester stuck in the center of the loaf comes out clean.
  3. While the cake is baking, combine the 1/3 cup lemon juice and remaining 1/3 cup sugar in a small saucepan over medium heat and cook until the sugar dissolves and the mixture is clear. Set aside.
  4. When the cake is done, allow it to cool in the pan for 10 minutes before removing it and placing it on a baking rack over a sheet pan. Use a cake tester, wooden skewer, or toothpick to carefully pierce holes throughout the cake (I used a toothpick so the holes wouldn’t be too obvious, but a skewer might have made deeper holes in the cake, allowing more syrup to get through). While the cake is still warm, pour the lemon-sugar mixture over the cake and allow it to soak in. Cool completely.
  5. In a small bowl, combine the powdered sugar and lemon juice, whisking to form a smooth glaze. Pour over the cake. Slice and serve with fresh berries, whipped cream, or ice cream.


Quick Tip: How to Freeze Strawberries

Summer’s coming to a close, but your strawberry frenzy doesn’t have to. This quick tutorial demonstrates how to freeze fresh strawberries for later use.

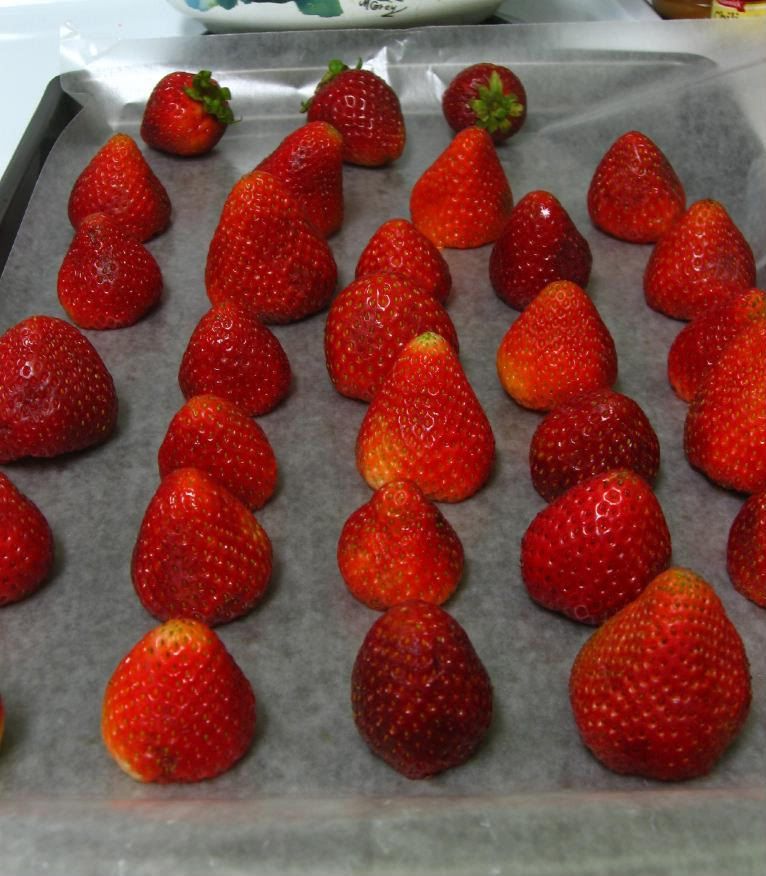
1. Wash, hull, and dry strawberries. Cover a baking sheet with wax paper and set each strawberry, point up, on the wax paper without letting them touch. Firmer strawberries fare better in this process than very ripe or soft ones. This gives you the perfect excuse to eat any of the particularly juicy berries that cross your path. You’re welcome.


That one in the next-to-back-row leaning wayyy over to the right is my favorite. He’s just begging to be chomped — and several strawberries did suffer that fate in the making of this tutorial.

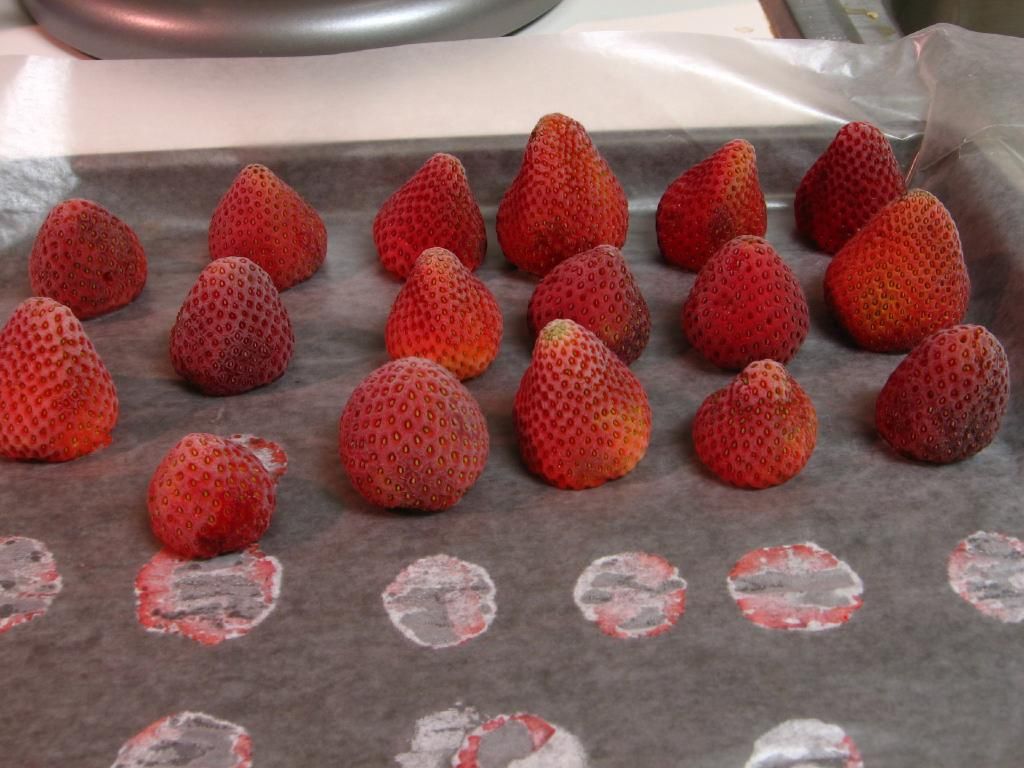
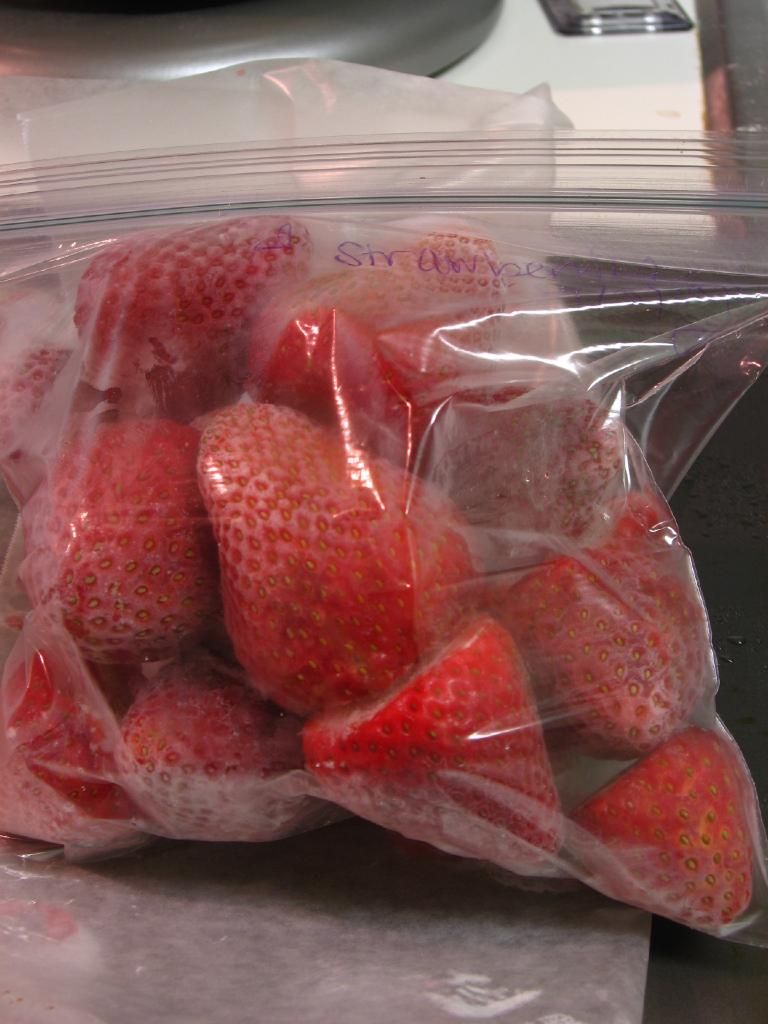
2. Freeze the strawberries for a few hours until hard, and then place them in an airtight plastic zipper bag. Make sure to squeeze out all the air. Label with the date and contents.

3. To thaw, set strawberries in the fridge overnight or out at room temperature for a few hours.

If you liked this post, please:
Subscribe to Willow Bird Baking
Follow Willow Bird Baking on Twitter
Follow Willow Bird Baking on Facebook
Give this post a thumbs up on StumbleUpon


ShareOther ways to share this post with friends!

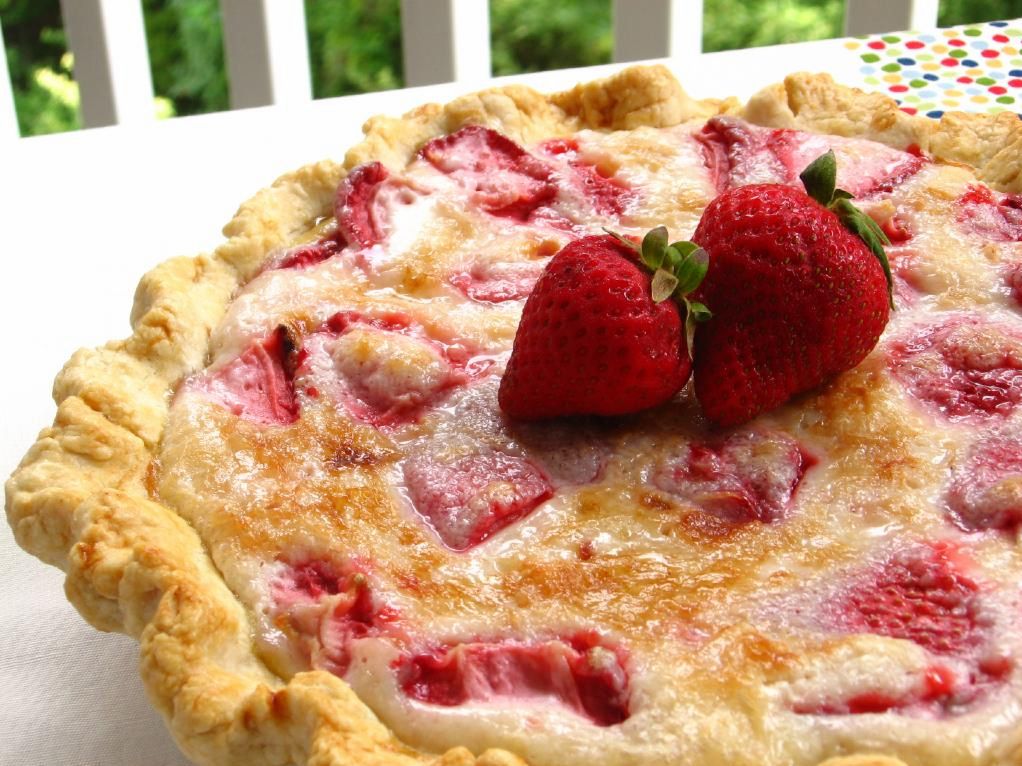
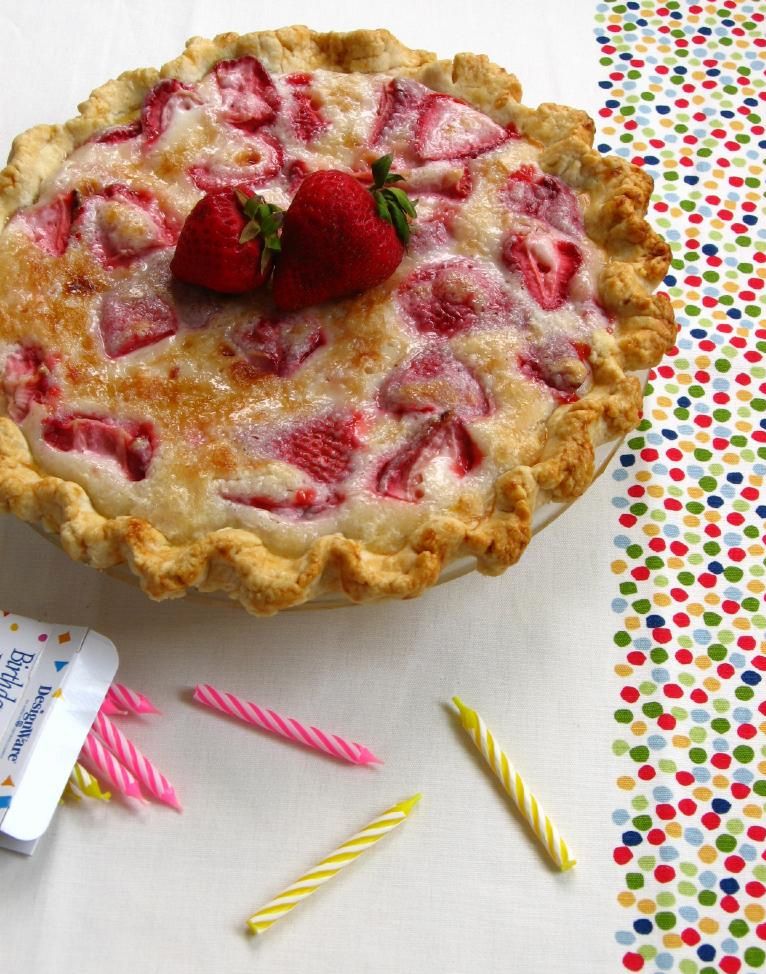
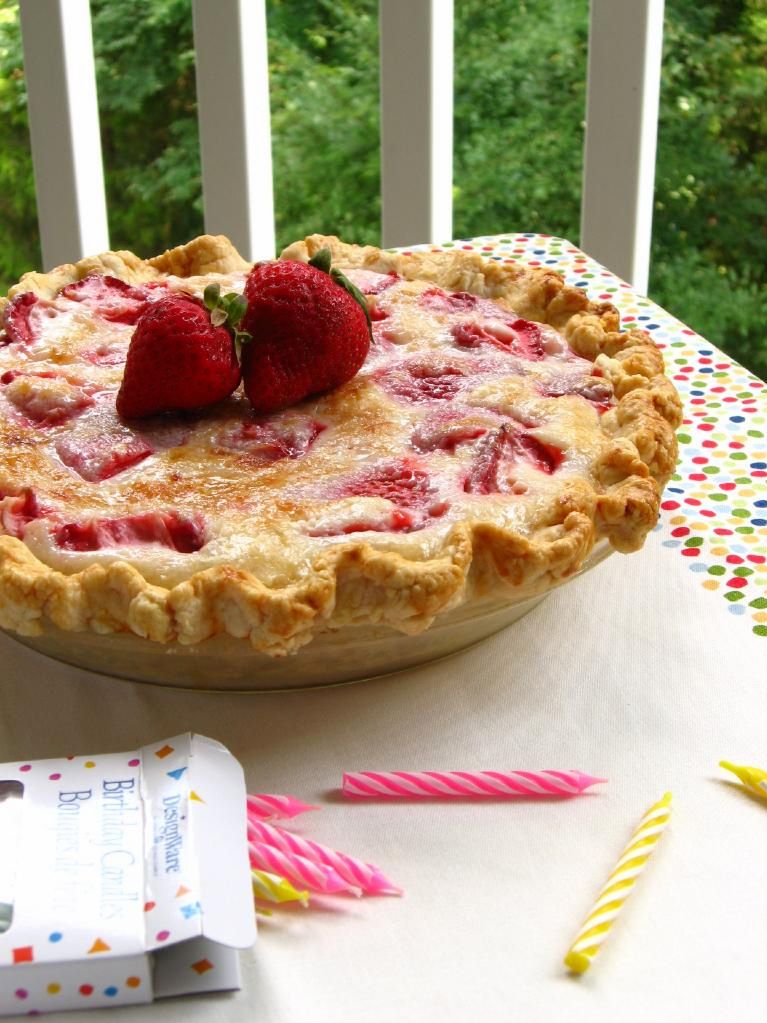
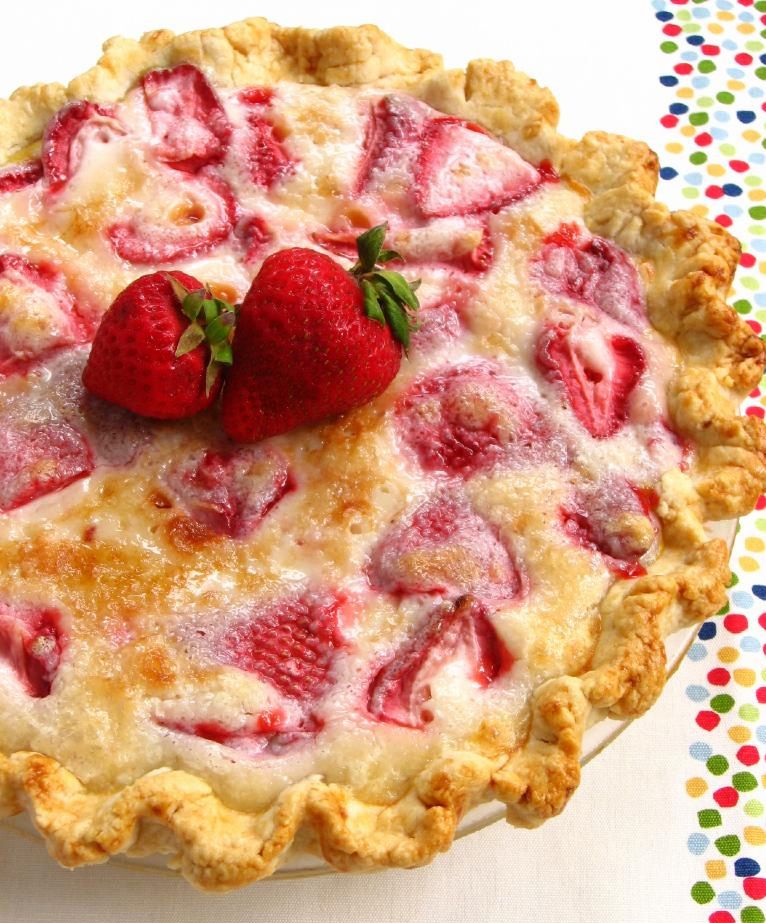
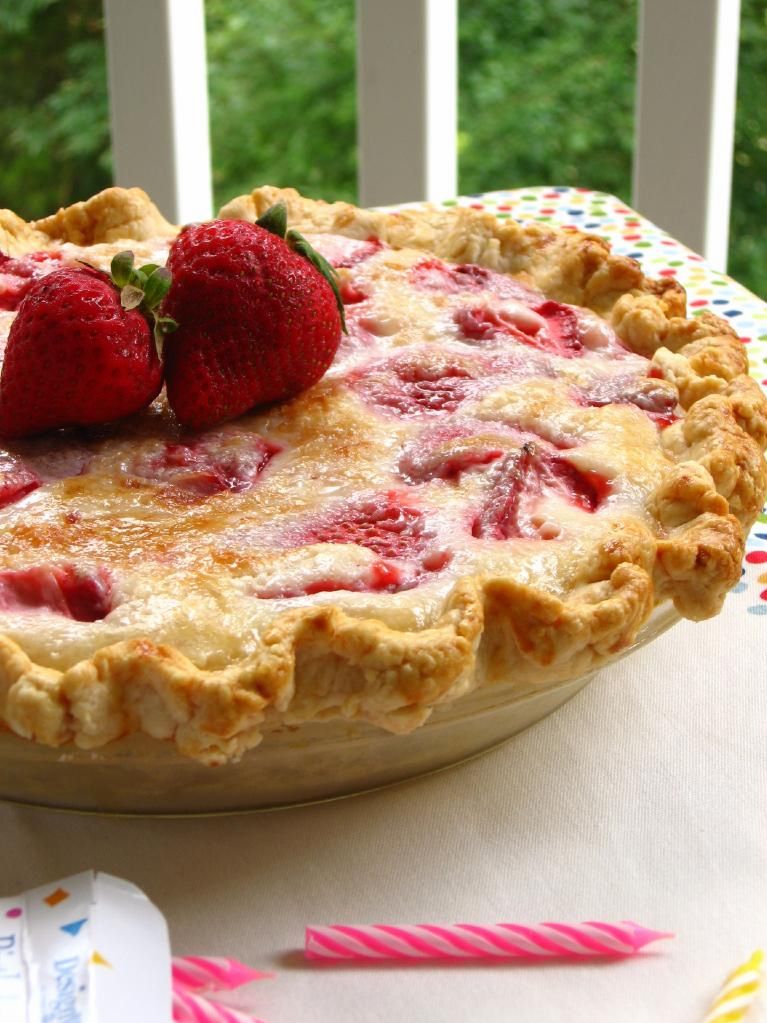
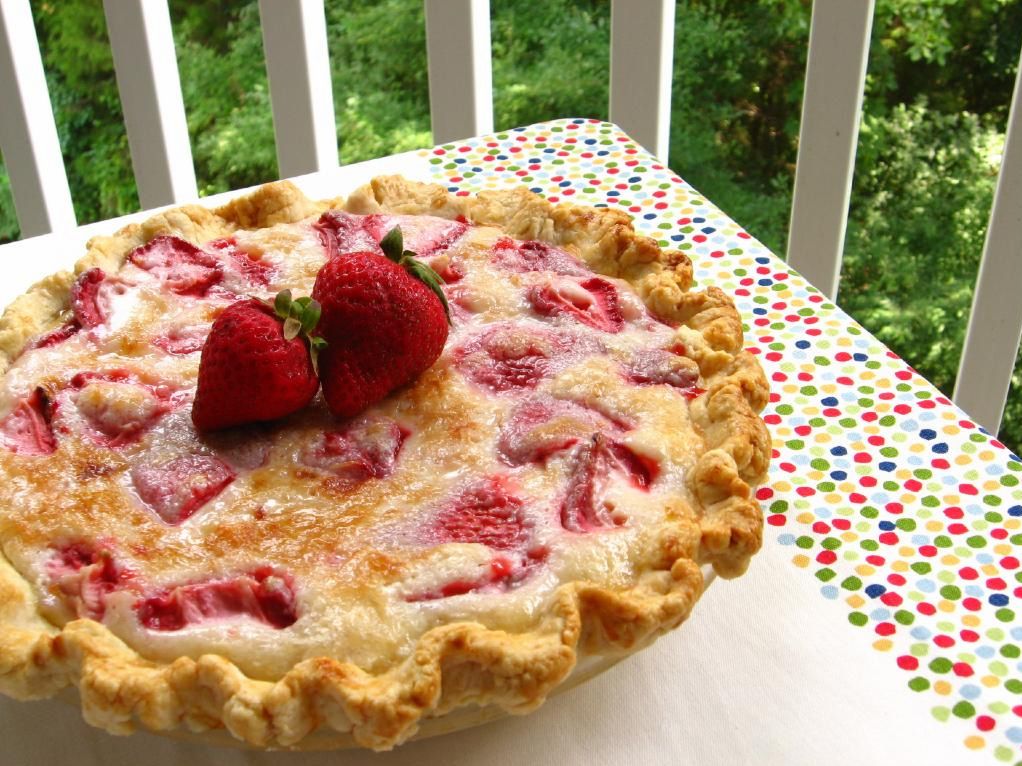
Summer Strawberry Sour Cream Pie

I have a love-hate relationship with Twitter. Twitter is related to this big ol’ Strawberry Sour Cream Pie, I promise.

On one hand, I hate Twitter. Twitter moves at the speed of light during prime tweeting hours. My OCD urge to not “miss out” on what’s going on slams head-on into a wall built with millions of 140-character bricks. Suddenly, I realize I’ve been watching my twitter feed for the better part of an hour. My eyes glaze over, my back hurts, and my brain starts translating each thought into its shortest possible expression. At this point, I need to tweet myself:

@julieruble Time 2 get off twitter immediately #beforeyoureyeballsfallout

That hashtag’s gonna catch on, just you wait and see.

But I love Twitter. I’m connected to hundreds of great people — other bloggers, Willow Bird Baking readers, the occasional celebrity chef. I keep in touch with an extended web of lovely folks that I might not have time to call or write a lengthy email to. There’s a level of casual interaction that brooks folks jumping into a conversation that pertains to their interests. You can easily meet fabulous new people, keep up with the dynamic blogosphere, and support fellow writers. Cool.

Even more cool? Sometimes twitter magic happens, and someone amazing (cough cough Jaden Hair of wonderful Steamy Kitchen) finds your blog and drools over some S’mores Cereal. Now that’s cool.

Like most things, there’s a twitter balance — for me, it involves checking in a few times a day, and that’s it. Thankfully, during one of my forays into the land of tweets, I found a gem. Lovely Patti at Worth the Whisk posted that one of her pies had been chosen as Pie of the Day by KCRW Radio’s Good Food Blog: Strawberry Sour Cream Pie.

Listen, you don’t scroll past an award-winning Strawberry Sour Cream Pie. You just don’t.

You stop, you ogle, you marvel, you salivate a little (in a classy way, of course), and then you go pick up some sour cream.

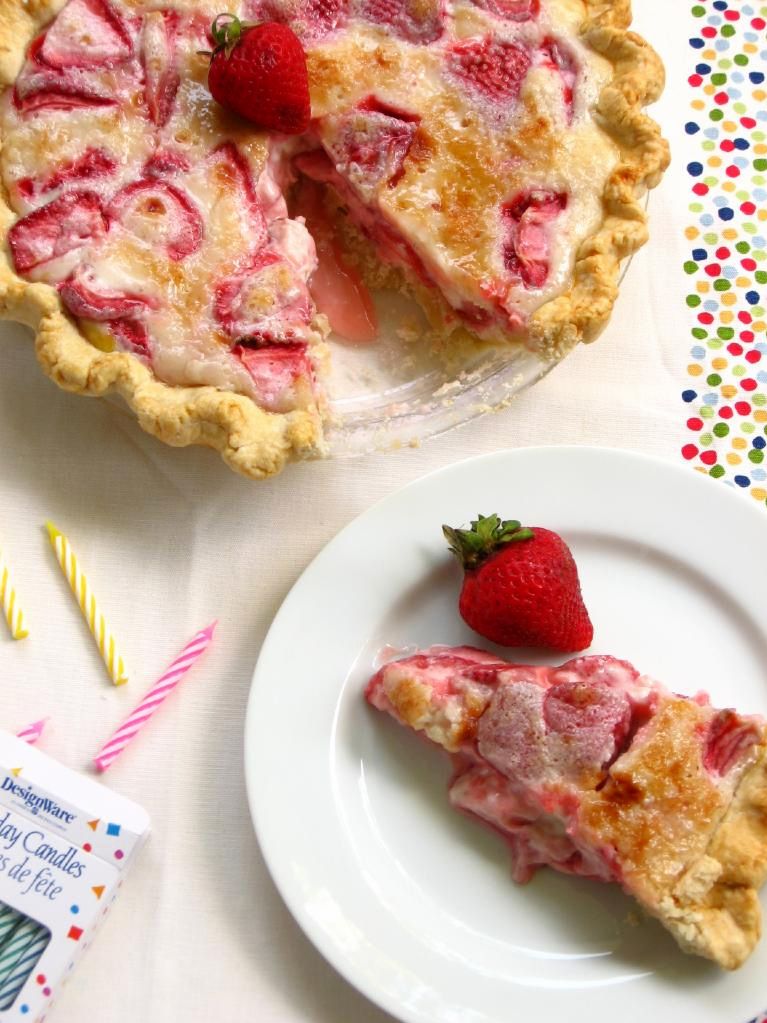
I knew while baking that this pie, along with the heavier Chocolate Mousse Pie, would be the perfect treats to take in for my dear Sunday school leader Joyce’s birthday.

I love the combination of fruit and sour cream, and it really sings in this gorgeous, lazy-day treat. The strawberries stay juicy, and the tangy-sweet fruit is delicious against the buttery crust. And pies like this are the reason people started saying things were “easy as pie.” You don’t need to blind bake the crust, pre-cook the filling, or any other fussy stuff. You roll out your dough, fill it, bake it, cool it, eat it . . . lick the plate.

If you’ve never made a pie before, this is a lovely place to start. It’s a single crust pie and simple as can be. Tell me: what’s your favorite pie to eat during sweltering summertime?

Summer Strawberry Sour Cream Pie


Recipe by: Worth the Whisk
Yields: one 9-inch pie, serves 6-8

Pie Crust Ingredients: (or you can use an unbaked, prepared crust)
2 cups flour
1 teaspoons salt
1/4 cup cold lard (non-hydrogenated if available)*
1/2 cup cold butter, chopped
3-4 tablespoons ice cold water
1 egg and 1 teaspoon heavy cream for egg wash
*you can substitute vegetable shortening here if you wish, but I highly recommend the lard!

Filling Ingredients:
1 quart fresh strawberries
1 cup flour
1 1/4 cup sugar, reserve 1 tablespoon
Dash salt
1 cup sour cream (not fat-free)

Directions:
Preheat oven to 450 degrees F. To make the crust, pulse flour and salt together to combine. Add scoops of lard and pulse into the mixture has the texture of coarse sand, about 10 seconds. Add in chunks of butter and pulse until butter pieces are no larger than small peas, about 10 pulses. Add minimum amount of water and pulse on low. If dough remains crumbly and doesn’t come together, add another tablespoon of water. Add as little as is required to enable the dough to be rolled into a ball. Form the dough into a disk, wrap in plastic, and refrigerate for 20-30.

Roll disk of dough out to around 2 inches larger than your pie plate and transfer it, situating it in the plate. Fold the excess dough around the edges and crimp, trimming where necessary.

Hull and wash the strawberries and slice them in half. Set aside. Sift flour, sugar, and salt into a large mixing bowl. Add sour cream, blending until creamy. Gently fold in the berries without overmixing. Pour fruit into pie shell and spread to edges without packing down — there should be spaces throughout the filling. Sprinkle the top with the last 1 tablespoon sugar.

Bake the pie for 10 minutes, then reduce the heat to 350 degrees F (I leave the oven door open a minute during this period to let the temperature drop a little) and bake an additional 30 minutes or until crust is golden brown.

Broil the pie for 2-3 minutes to brown up the top. Allow to cool completely (4-5 hours in the fridge, I’d say) before cutting, and serve with fresh whipped cream or ice cream.

If you liked this post, please:
Subscribe to Willow Bird Baking
Follow Willow Bird Baking on Twitter
Follow Willow Bird Baking on Facebook
Give this post a thumbs up on StumbleUpon


ShareOther ways to share this post with friends!

48 Homemade Breakfast Cereals

I like variety. Sure, sometimes during the week I can get on a kick and eat the same thing every night for dinner (hellooo, lima beans, I’m lookin’ at you), but I also really appreciate mixing it up every now and then.

That’s why a few months ago when I decided I wanted some breakfast cereal, I went to the store and bought about 8 different boxes of the stuff. Each morning needed to have its own flavor — as long as the nutrition facts were acceptable. What? Don’t look at me like that. Sure, I may be the same girl who posted the Coffee Cookie Dough Fudge Cheesecake, but I do try to eat reasonably during the week!

The store-bought cereal was okay. At least, I thought it was okay at the time. But then something happened — I had one of those thunderous BIG IDEAS.

It all started when I was perusing one of my favorite blogs, Not So Humble Pie, and saw her (you’re not going to believe it) S’mores Candy Bar. I know. Insane.

The premise of her post was that she didn’t understand the excitement over this new company that makes customizable candy bars, since it’s so easy to make them at home. Having been excited about the customizable candy bar company, I felt admonished. And inspired.

Because even more than I had been excited about customizable candy bars, I was excited about customizable cereal. There’s this company on the web (I won’t link to them, since I’m about to tell you it’s silly to pay for their product) that allows you to choose all the ingredients you want in your own personal box of cereal — and even lets you pick a name for your new creation! Too fun!

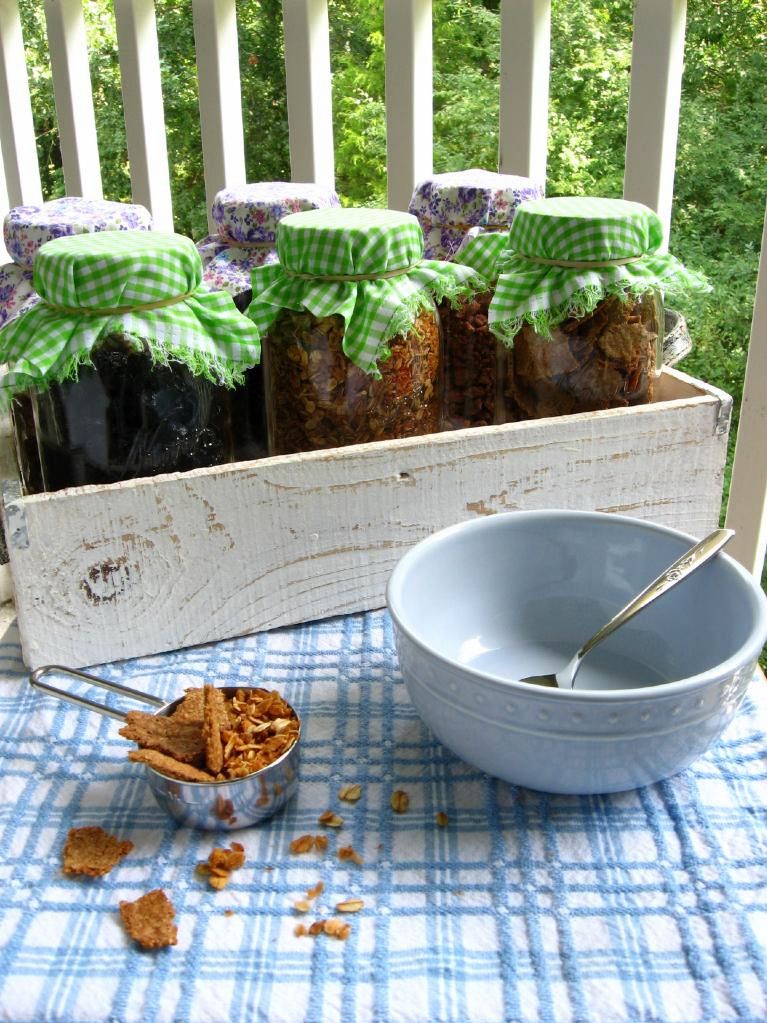
BUT. I realized when I read Mrs. Humble’s candy bar post that it didn’t make any sense to pay for one kind of customized cereal (that was just like going to the grocery store), or even for eight kinds of customized cereal . . . what would really make sense is to make your own fully customizable cereal buffet — one that would allow you to have a different flavor every day if you wanted to!

A dream was born. I scrounged up recipes for homemade granola and nutty bran flakes (I’ll gush about these in a minute). And as if to emphasize that making homemade cereal was indeed my destiny, the folks at Oh! Nuts emailed to ask if I’d like to review some of their products. Uh, YES, NUT PEOPLE, YOU READ MY MIND. Pounds of nuts and dried fruits later, I was in the cereal-makin’ biz.

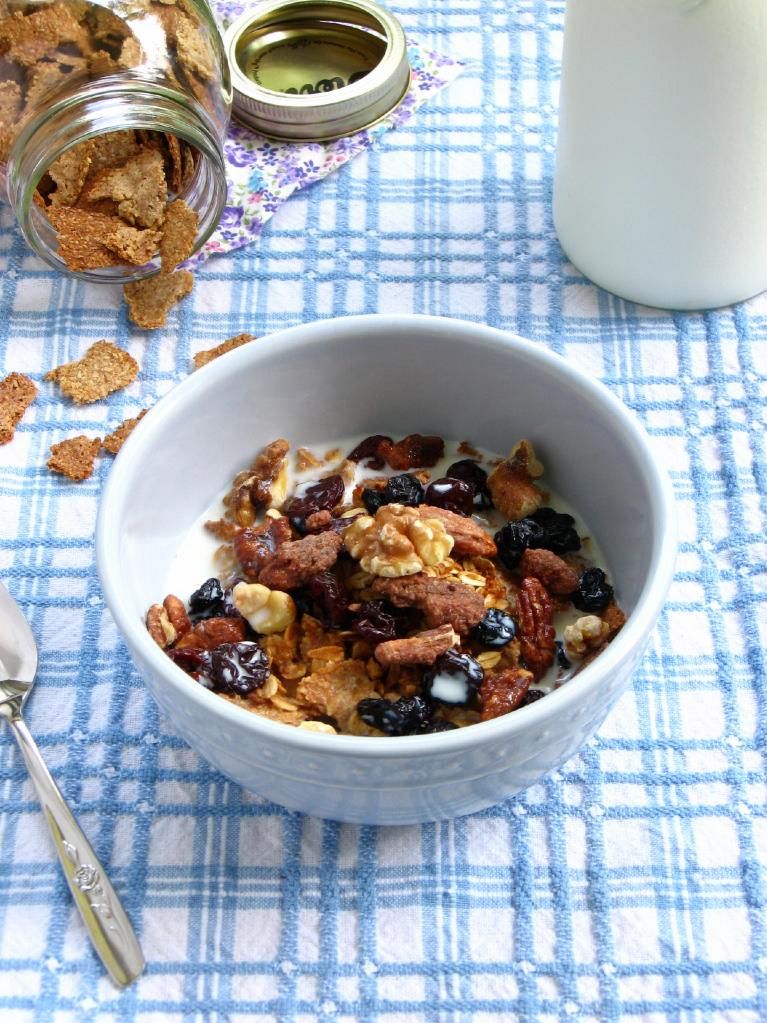
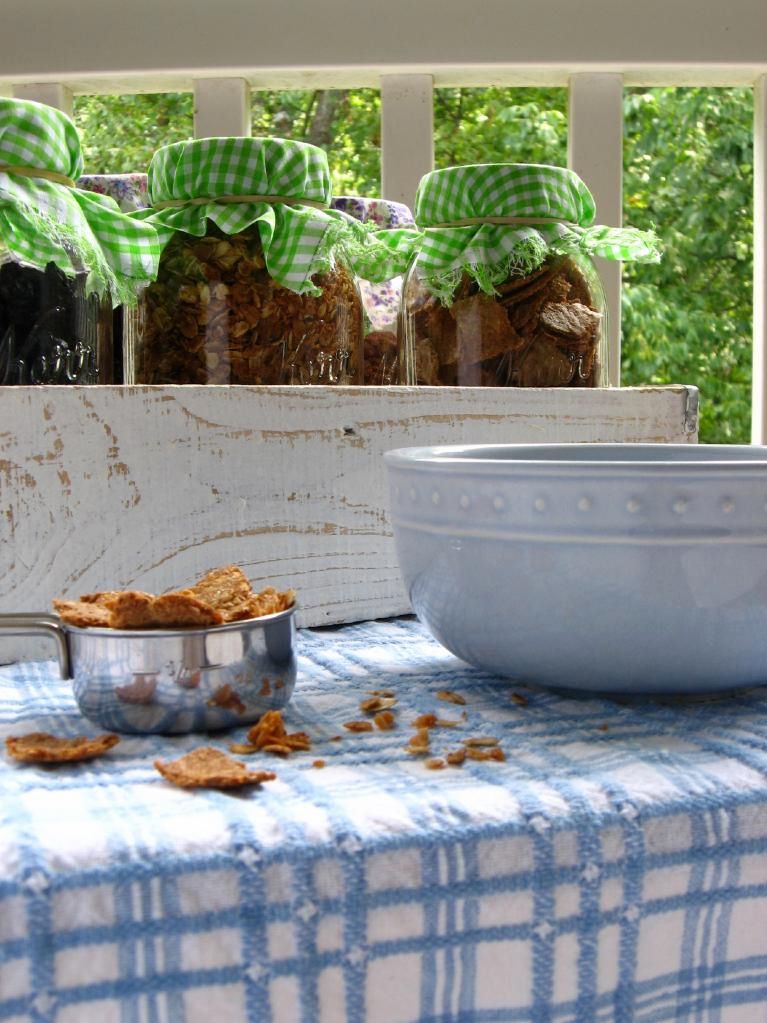
If you’re about to post a comment calling me a hippie for making my own bran flakes, hold it right there. This recipe is super easy, super cool, and super rewarding. You feel like a superhero (who makes their own cereal?! I MAKE MY OWN CEREAL! I AM CEREAL WOMAN!), you know exactly what healthy ingredients went into said cereal, and — this is the best part — you have bran flakes that don’t taste like a cardboard box. Every time I opened the jar they were stored in, I got a whiff of delicious nuttiness. They had texture! They had taste! Yes!

The granola is the flavor that really carries the cereal, though. I chose a Double Coconut Granola from Opera Girl Cooks that I’d heard a ton about. Once it cooled, it lived up to the hype — buttery, slightly sweet, coconutty, with a hint of salt to really amp it up.

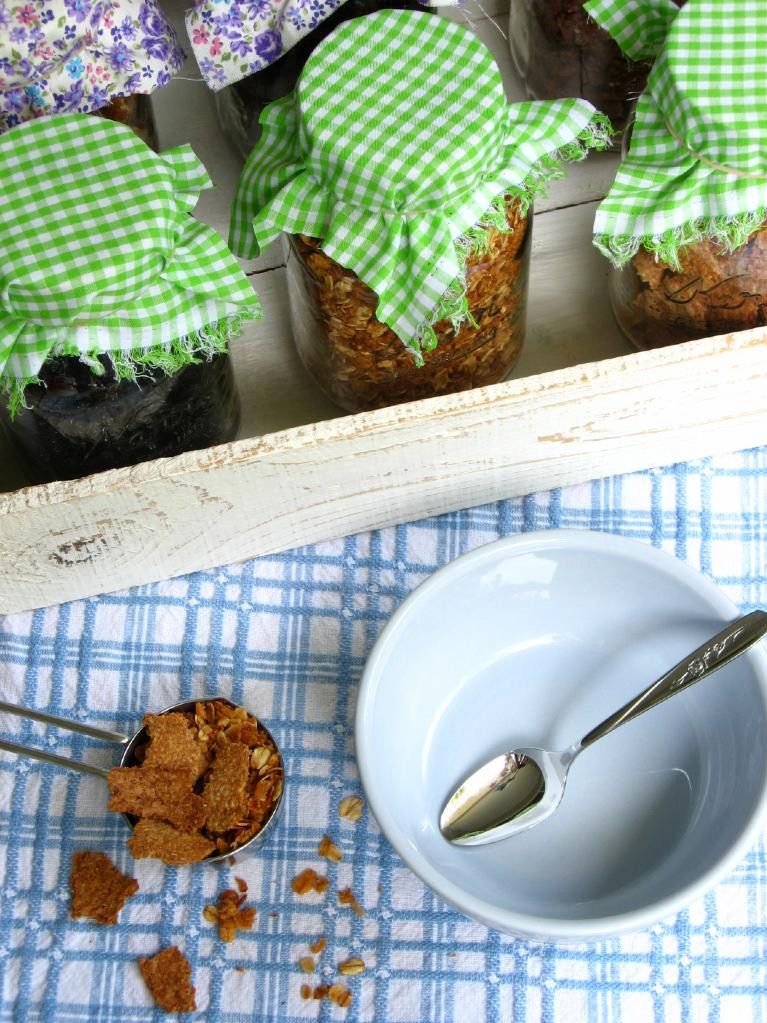
Once you’ve made some flakes and granola, the fun starts. Possible add-ins are endless: dried fruits, fresh fruits, toasted nuts (do make sure to toast them — MUCH more flavor), seeds, chocolate chips, peanut butter or cinnamon chips, candy, marshmallows . . . be creative! Add a little, add a lot.

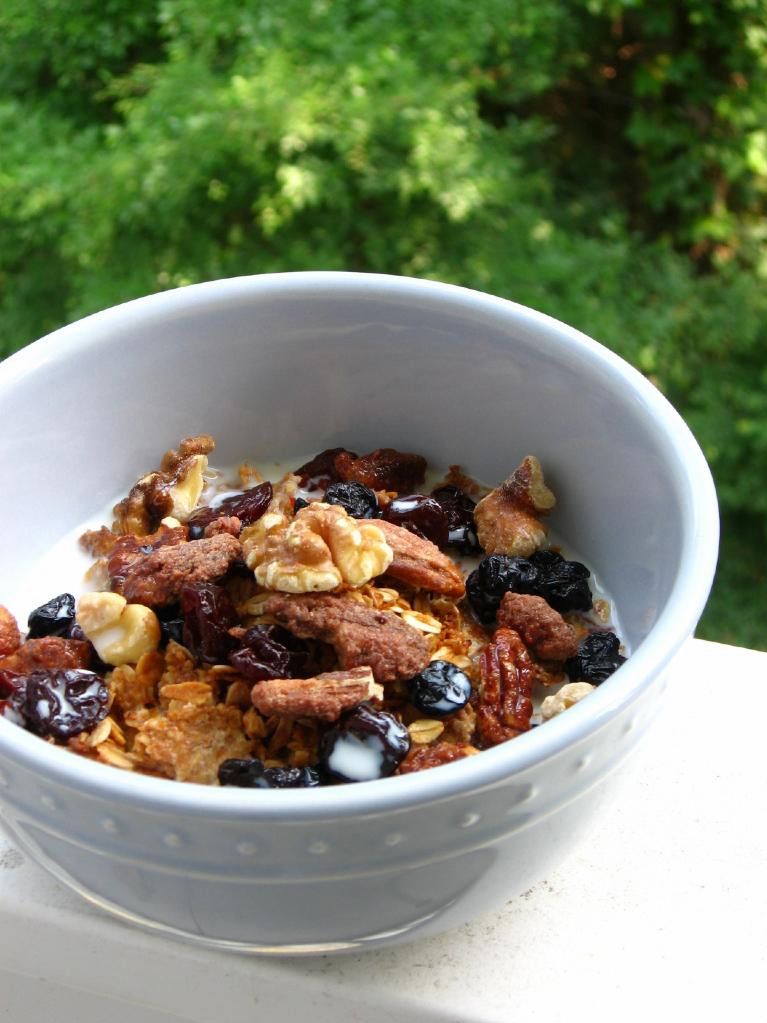
My favorite bowl was a straight-up combination of all my options: bran flakes, double coconut granola, dried cherries, dried blueberries, cinnamon pecans, and toasted walnuts. If you have just 2 dried fruits and two nut options along with your flakes and granola, you’ll have 48 possible breakfast cereal varieties — that’s a lot of options!

The Oh! Nuts products were a success in terms of taste — the blueberries had a pronounced, wonderful blueberry flavor, and the cinnamon pecans were so addictive that I almost ate my stash before I got my cereal made! The sour cherries did have an odd, slightly fishy flavor (I know, weird), but I still enjoyed eating them. Maybe a flavor compound of the cherries came out that isn’t as pronounced when they’re not dried?

To be honest, including the price of shipping, I probably wouldn’t spend the extra money to buy regular nuts or fruit from Oh! Nuts, but would just head to the grocery store. That being said, for specialty items or rare nuts/fruits/candies, they’re the place to go. The selection is huge, and the products are high quality.

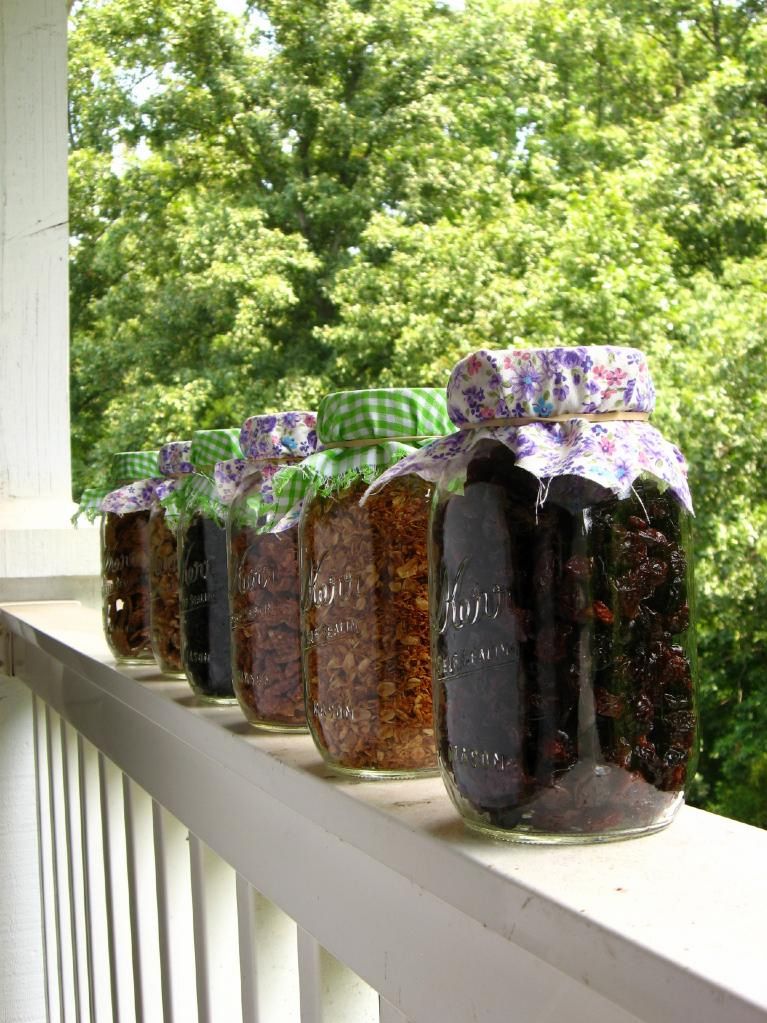
If you, like me, love a big ol’ bowl of hearty, nutty, earthy, crunchy, chewy, flavorful, delicious breakfast cereal — and one that can change with whatever mood you’re in — I hope you’ll make your own personal cereal buffet! Or perhaps fix a cereal buffet in pretty jars as a gift for a friend. Even better, have a breakfast party: set up a cereal buffet for family and friends where each person can make their own cereal combination, perhaps supplemented with juice and muffins on the side. Have fun!

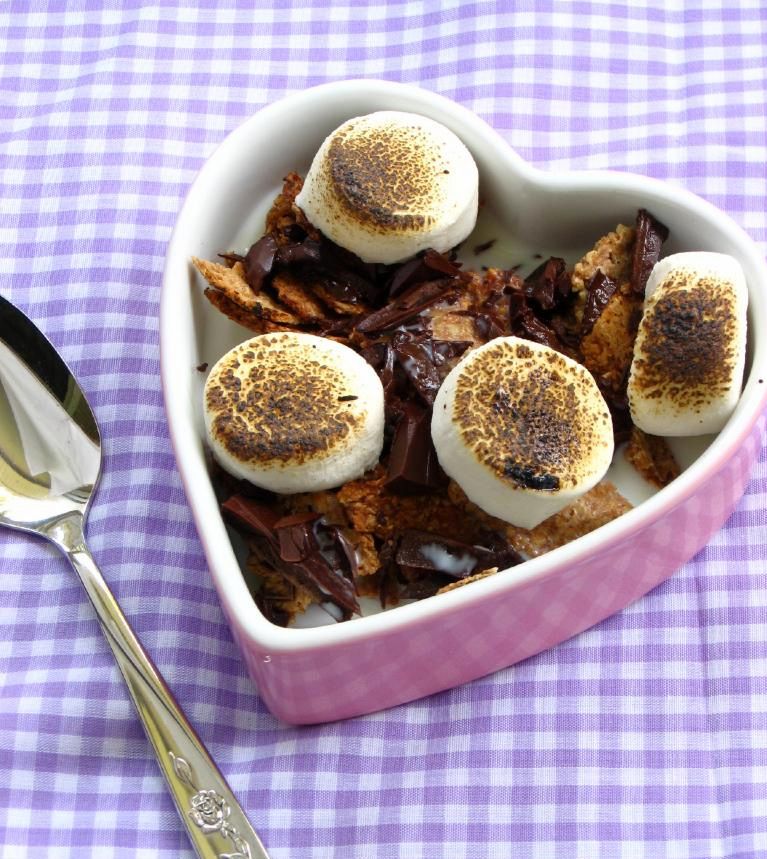
Oh, by the way, I did have to branch out a little in homage to my original inspiration. How about some S’mores Cereal?

Below you’ll find the recipes for granola and nutty bran flakes. I even included nutritional info so you can make healthy breakfast choices! Round up some of your favorite add-ins and place all the components in separate jars for storage. Enjoy!

5 from 1 reviews
Homemade Nutty Bran Flakes
 
Prep time
Cook time
Total time
 
These flakes are SO MUCH BETTER than the stale boxed kind, you'll be amazed. The only downside is that this recipe uses two full baking sheets and only makes 3-4 bowls of cereal. If you have the stamina for an all-day baking project, I'd grab out all your baking sheets and make a day of it, doubling or tripling the recipe. They really are delicious!
Author:
Serves: 3-4
Ingredients
  • 1/2 cup bran
  • 1/2 cup whole wheat flour
  • 1/3 cup almond flour (or other finely ground nuts)
  • 2 tablespoons sugar
  • 1/4 teaspoon baking powder
  • 1/4 teaspoon salt
  • 1/3 cup milk
  • 1/4 cup water
Instructions
  1. Preheat oven to 350 degrees. Sift all dry ingredients into a large mixing bowl and add milk and water. Stir to mix well. The resulting mixture will be a very wet “dough” (so wet, you can hardly call it a dough). Cut two sheets of parchment paper to fit two baking sheets, and set one sheet of parchment paper on the counter where you’ll be rolling — you won’t be able to transfer it without this!
  2. Glop half of the “dough” out onto the sheet of parchment paper and flatten it by hand. Place a piece of plastic wrap over the dough and “roll” it out (your rolling pin will almost just be smooshing it out into place) EXTREMELY THIN, almost transparent in some places. It will look like a giant bran flake — super fun!
  3. Remove the plastic wrap and transfer the parchment carefully to a baking sheet. Cook for 10 minutes, but check often after just 5, because such a thin dough can easily burn. You’re looking for a thin, leathery cracker that is crunchy at the edges. When it’s done, remove it and allow it to cool completely. While it cools, repeat the process with the other half of the dough.
  4. After both giant bran flakes have finished their first bake, reduce the oven temperature to 275 degrees. Tear the first, cooled bran flake into regular bran flake-sized pieces (about 3/4 of an inch), spreading them out on the parchment-covered baking sheet.
  5. Bake at the reduced temperature for 20 minutes, flipping and stirring the flakes around every 5 minutes. Repeat process with the second cooled, giant bran flake. Then allow all bran flakes to cool completely. Store well in a sealed container for up to two weeks.


Now that I’ve shared my favorites with you, I’m anxious to know: What sort of breakfast cereal would you make for yourself? Piña colada cereal with toasted coconut and dried pineapple? Cherry crumble cereal with dried cherries and cinnamon granola? A luscious combo of dates, coconut, and chocolate chips?

5 from 1 reviews
Double Coconut Granola
 
Prep time
Cook time
Total time
 
An absolutely delicious granola to supplement your bran flakes. Again, don't be shy about doubling this recipe!
Author:
Serves: 6
Ingredients
  • 3 cups rolled oats
  • 1 scant cup unsweetened shredded coconut
  • 1/4 cup clover honey
  • 1/6 cup virgin coconut oil (half of a 1/3 cup measure)
  • 1 tablespoon vanilla extract (I used almond because I was out of vanilla)
  • 1 teaspoon kosher salt
  • optional: I toasted another 1/2 cup of sweetened shredded coconut to add in for sweetness, but that was before I’d tasted the cooled batch. It’s probably unnecessary.
Instructions
  1. Heat oven to 300 degrees F. Combine oats and shredded coconut in a large bowl. In a small saucepan over medium heat, cook honey, coconut oil, vanilla, and salt until just simmering.
  2. Pour honey mixture over the oat mixture, stirring well with a wooden spoon until fully combined. Spread this mixture out over a large sheet pan, place in oven, and bake for 10 minutes before stirring the granola. Repeat 10 minute baking time, followed by stirring, until granola is well-toasted (takes about 4 cycles, or about 40 minutes).
  3. Cool the granola on the baking sheet, stirring occasionally. When cooled, you can store granola in an airtight container in the refrigerator for a few weeks, or at room temperature for two.


Other delicious breakfast ideas floating around the internet right now: Beer Waffles with Cinnamon Cardamom Apples, S’mores Oatmeal, Oatmeal Pancakes, Pecan Sticky Buns, and of course, from yours truly, Carrot Cake Waffles.

Note: I received the above mentioned products from Oh! Nuts free of charge to create these recipes.


Angelic Cherry Mousse Cloud Cake with Mascarpone Whipped Cream

What do you think about at night as you fall asleep? Lately, my thoughts during those last few moments of wakefulness have been occupied by vampires (of a non-sparkly variety), since I recently began Elizabeth Kostova’s premiere novel, The Historian. It’s good so far, but may ruin me for the first Twilight book, which I have coming in the mail. I teach 6th and 7th grade Language Arts — how have I not already read the Saga everyone’s either raving or raging about?


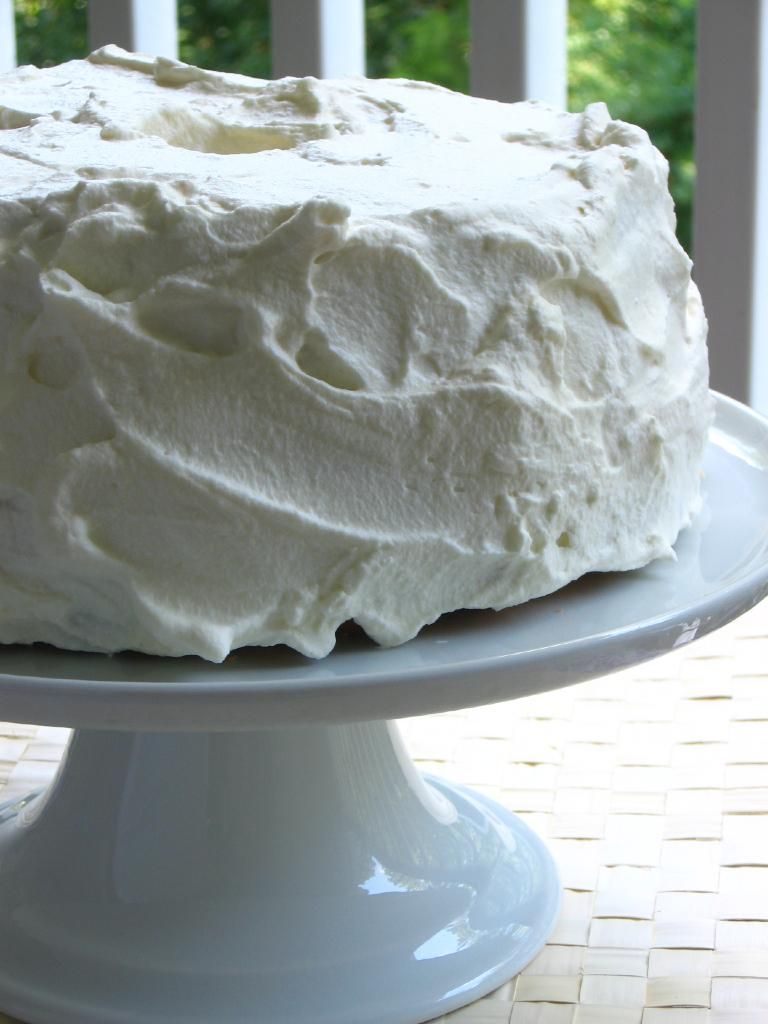
Don’t let that charming, pillowy exterior fool you — there’s a sultry surprise inside.

Though my bedtime thoughts have been rather sanguine of late, I usually try to dwell on something happy and hopeful before I drift off. More often than not, this tends to be baking related. Instead of counting wooly ruminants, I develop ideas for new desserts, visualize the photo styling of my next dish, and ponder new flavor combinations.

It was during this twilight of consciousness a few weeks ago that I first developed an inexplicable craving for angel food cake with cherry cream. (That’s one thing I can already say I dislike about the Twilight Saga — it’s taken a lovely word out of commission. The phrase “twilight of consciousness” probably afflicted over half of you with visions of Taylor Lautner’s werewolflike scowl or Robert Pattinson’s, uh, vampirical eyebrows?)

Perhaps the sudden onset of a cake-n-cherry-cream craving seems normal to you, but it was surprising to me. I haven’t had a cherry in literally years. I haven’t had an angel food cake in even longer. Why all of a sudden did I want to combine the two in a big creamy cherry-rific sandwich o’ love? Ah, the ways of the heart are mysterious — and in this case, spot on. Go heart!


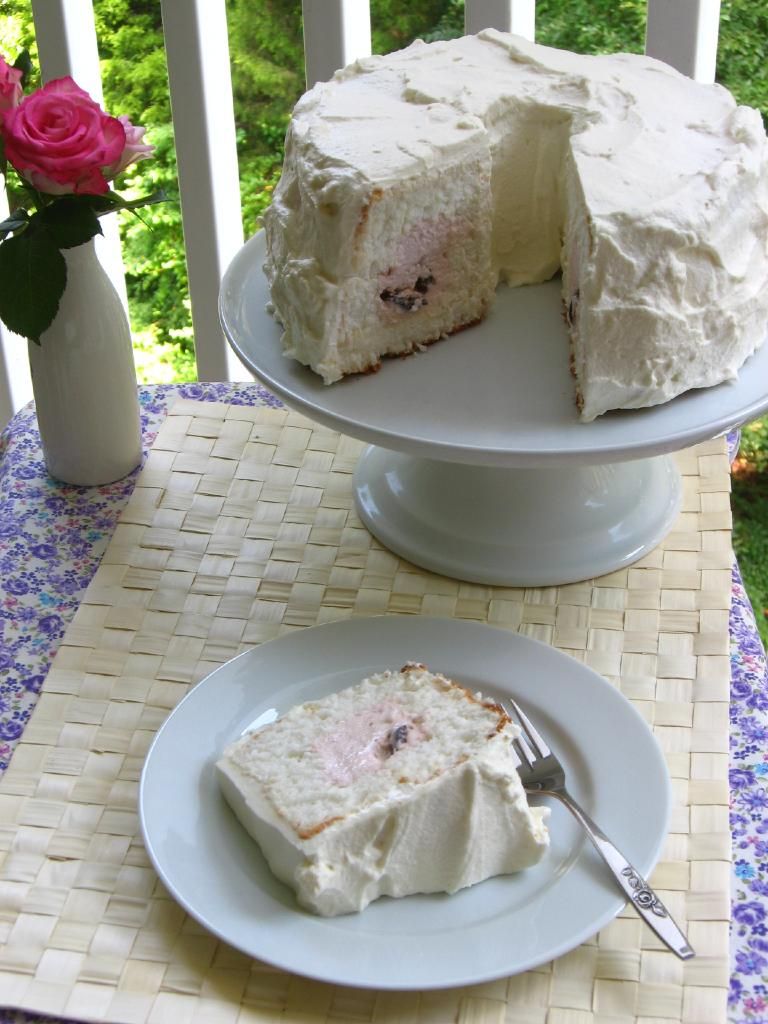
Surprise! A tunnel of love.

My previous experiment with a heart-shaped tunnel of lemon mousse inside a cake left me wanting to tunnel some more, so I decided to use that presentation here, too. It’s relatively simple to do. It also seemed like more fun than simply dolloping a swoosh of mousse on top of a piece of cake, but you’re welcome to do that instead, if you’re not the tunneling sort. Personally, my mole-like tendencies took over.

After cutting the freshly baked and cooled angel food cake in half using ye old dental floss trick, I used a 1-inch square cookie cutter and a serrated knife to mark off the location of my tunnels. I then carefully carved and scooped until I had a tunnel in each layer of the cake. Scooping the luscious cherry mousse into the tunnel, reuniting the layers, and slathering the entire confection with mascarpone whipped cream was a joyful experience.

But not quite as joyful as eating it. The angel food cake is a cloud of toasty, sweet almond flavor — almost like eating airy cotton candy. The tunnel provides the perfect cake-to-cream ratio, so each bite of cloud is accompanied by a tuft of bright cherry mousse. The fluffy mascarpone whipped cream is stable due to the addition of the mascarpone cheese and gelatin, but still has all the subtle sweetness and creaminess of a regular whipped cream frosting.

This cake has it all: it’s creamy, it’s pluffy, it’s moist, it’s fantastic. Mike’s dad commented that it was impressive something so tasty seemed so light, and that really is the magic of both angel food cake and mousse. Putting the two together is a dream.

. . . a dream that I might’ve had 4 slices of, give or take a slice. It’s very easy to keep shoveling forkfuls of this light dessert into your mouth. Pace yourselves, young padawans. I hope you’ll make this angelic summer dessert and serve it cool, right from the refrigerator, some nice, hot evening.

Angelic Cherry Mousse Cloud Cake with Mascarpone Whipped Cream


Recipe by: Adapted from Betty Crocker (Angel Food Cake), Paula Deen (cherry mousse), and Bon Appétit (frosting)
Yields: one angel food cake, or about 10 servings

Cake Ingredients:
1 1/2 cups powdered sugar
1 cup cake flour
1 1/2 cups egg whites (12), room temperature
1 1/2 teaspoons cream of tartar
1 cup granulated sugar
1 teaspoons vanilla
1 teaspoon almond extract
1/4 teaspoon salt

Cherry Mousse Ingredients:
1 envelope unflavored gelatin
1/4 cup cold water
1/3 cup boiling water
2 cup heavy whipping cream
2/3 cup sugar
1/2 cup bing cherries, pitted and chopped
3 tablespoons maraschino cherry juice or cherry pie filling juice

Mascarpone Whipped Cream Frosting Ingredients:
1 8-ounce container mascarpone cheese
2 cups chilled heavy whipping cream
6 tablespoons confectioners’ sugar
2 teaspoons vanilla extract
1 teaspoon gelatin
3 tablespoons cold water
1 tablespoon hot water

Directions:
Make cake: Move oven rack to lowest position. Heat oven to 375ºF. Mix powdered sugar and flour; set aside. Beat egg whites and cream of tartar in large bowl with electric mixer on medium speed until foamy. Beat in granulated sugar, 2 tablespoons at a time, on high speed, adding vanilla, almond extract and salt with the last addition of sugar. Continue beating until stiff and glossy meringue forms. Do not underbeat.

Sprinkle sugar-flour mixture, 1/4 cup at a time, over meringue, folding in just until sugar-flour mixture disappears. Push batter into ungreased angel food cake pan (tube pan), 10×4 inches. Cut gently through batter with metal spatula.

Bake 30 to 35 minutes or until cracks feel dry and top springs back when touched lightly. Immediately turn pan upside down onto heatproof funnel or bottle. Let hang about 2 hours or until cake is completely cool. Loosen side of cake with knife or long, metal spatula; remove from pan.

Make the mousse while cake is cooling: In a small bowl, soften gelatin in 1/4 cup cold water. Let stand 2 minutes. Add 1/3 cup boiling water, stirring until gelatin dissolves. Let this cool almost entirely.

In a medium bowl, beat whipping cream with an electric mixer until foamy; gradually add sugar, beating until soft peaks form. Gently stir in gelatin mixture, cherries, and juice. Cover and chill until cake is ready to fill.

Make frosting: Sprinkle teaspoon of gelatin over the cold water. Let stand for 2 minutes. Add hot water and stir to dissolve. Let cool while you mix the other ingredients.

Place mascarpone, whipping cream, vanilla, and confectioners’ sugar in a bowl and mix to soft peaks (do not overbeat or mixture will curdle). When gelatin mixture is cool, add it to the cream mixture and mix until combined. Place frosting in refrigerator until you’re ready to frost the cake.

Assemble the cake: Trim brown outside crust off of cake if you prefer. Use unflavored dental floss to slice the angel food cake in half. Use a serrated knife and spoon to gently cut a tunnel in the top and bottom of the cake (see photos below). I measured here and there to ensure that these would line up. Be sure to leave a 1-inch cake border on all sides of the tunnel. Fill the tunnel with cherry mousse and place top layer face down on bottom layer. Frost cake as usual. Keep refrigerated. Will hold up nicely for 2 days in refrigerator. Use a large, serrated knife to carve this cloud-like cake.

P.S. Many more Secret Garden recipe and craft posts coming soon!

If you liked this post, please:
Subscribe to Willow Bird Baking
Follow Willow Bird Baking on Twitter
Follow Willow Bird Baking on Facebook
Give this post a thumbs up on StumbleUpon


ShareOther ways to share this post with friends!

1 29 30 31 32 33 35