fruit

Make-Ahead Gingerbread Coffee Cake with Cranberry Pecan Streusel

“Hey Barb,” I chirped into the phone, hoping I sounded nonchalant. “You know our security deposit? Well. We’re, uh . . . we’re not getting that back.”

It was my first call to my roommate since we’d gotten the keys to our new apartment. I was standing in the living room surveying the debris field. Chaotic stacks of moving boxes littered the floor, as you might expect, but in front of me, the front doorframe lay in splinters on the floor. The door itself hung agape, swaying in the wind: a boat without a moor.

The tone of her voice took on a preparing-for-the-worst quality as she replied. “Uh-oh. What happened?” Do you want to know what happened, dear reader? I’ll tell you what happened.

It all started about an hour earlier, when I’d arrived in the parking lot of my new apartment complex with my dad and my brother, Alex, to begin moving in. We walked up the stairs and I began digging through my gigantic purse in search of my apartment key. I dug past lip gloss, receipts, gift cards, candy, my flashlight, my checkbook, my hippopotamus change purse, tampons, medicine, tissues, letters, my phone, several key rings . . .

I dug through that purse like an paleontologist for what seemed like an hour, uncovering months’ worth of fossilized garbage instead of cool dinosaur bones. And instead of, um, my apartment key.

Suddenly the awful realization dawned on me: I’d left the key at my parents’ house. I admitted this to my dad and we stared unhappily at the moving boxes we’d just hauled across town. We walked downstairs to consider our options.

We needn’t have worried, though, because Alex came down a few minutes later and relayed some “good” news: “The door’s open.”

“Wait, what?” I asked, thinking perhaps the apartment folks had left it unlocked for us. But you know where this is going. Alex didn’t mean that the door was unlocked. No. You know what Alex meant?

Alex meant that on my first day moving into my brand new apartment, he had just broken down my front door.

(Even better is that I don’t think he saw anything strange about this. He had kind of a, “Well, we had to get in, right?” attitude about the whole thing.)

As I stood in the living room relaying to Barbara that our new apartment had just been broken into (by, uh, my kid brother), I felt more than just my bank account plummet. The apartment didn’t feel so new and exciting anymore. My spirits fell. I’d been anxious about moving across town, moving in with a new roommate, and starting a new job; now it seemed my new living situation was already going poorly.

My dad returned the next day and fixed the door frame. A few nails, some spackle, and some paint and it was good as new. As for my morale, it took a little longer to improve. Barb is a magnets-on-the-refrigerator and tchotchkes-on-the-mantle person and I am not. The huge windows, while gorgeous, let in lots of cold air. The faucet in the kitchen was too low to fit a stock pot under.

Really, though, none of this was the issue. The issue was that I was in a new place and it just wasn’t home yet.

It’s been 3 years since I stood in front of my busted up doorway and broke the news to Barbara. I still don’t know if we’ll get our security deposit back. And as I mentioned to Kaitlin recently, I still don’t know that this is truly “home.”

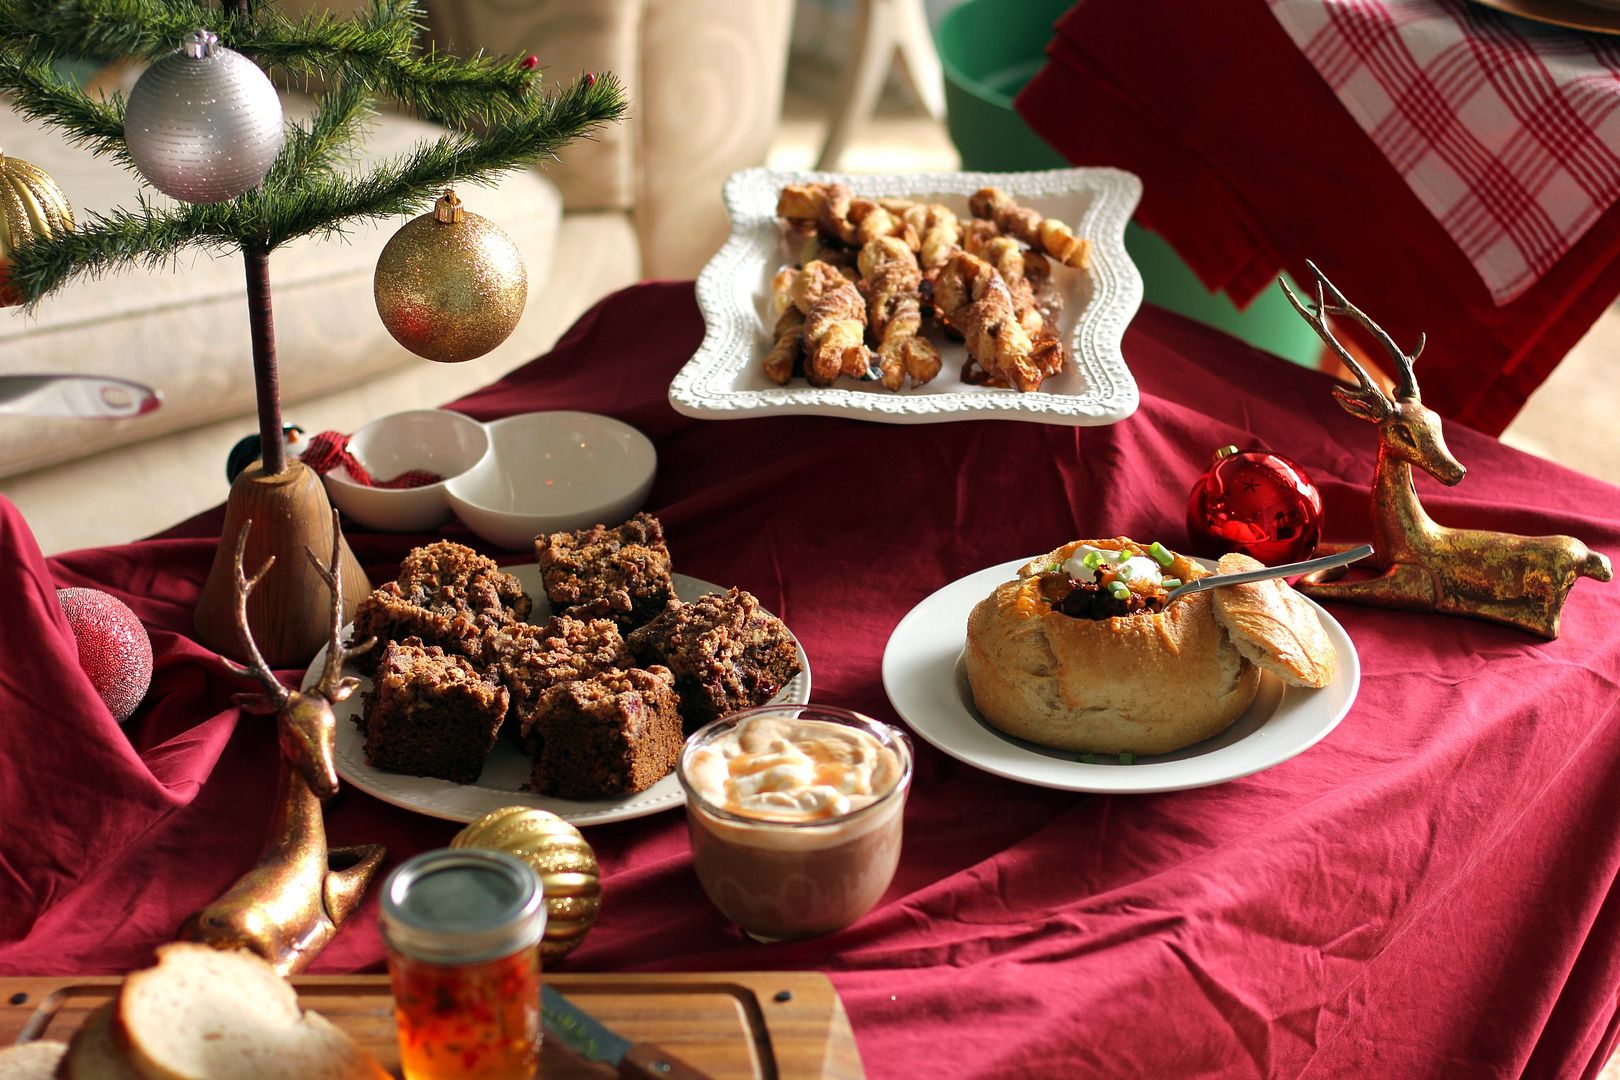
But there have been plenty of moments that felt like “home” in this apartment. There was the time Mike walked in and saw the Valentine’s feast I’d prepared as a surprise for him. There was the time Barbara, Mike and I all decorated her Christmas tree together. There was the time I sat out on the balcony in the middle of a summer night all alone, writing poetry in the company of fireflies.

And there was the Make-Ahead Holiday Breakfast Party — Mike and I eating in our PJs by the fire, with little Byrd eating her breakfast between us.

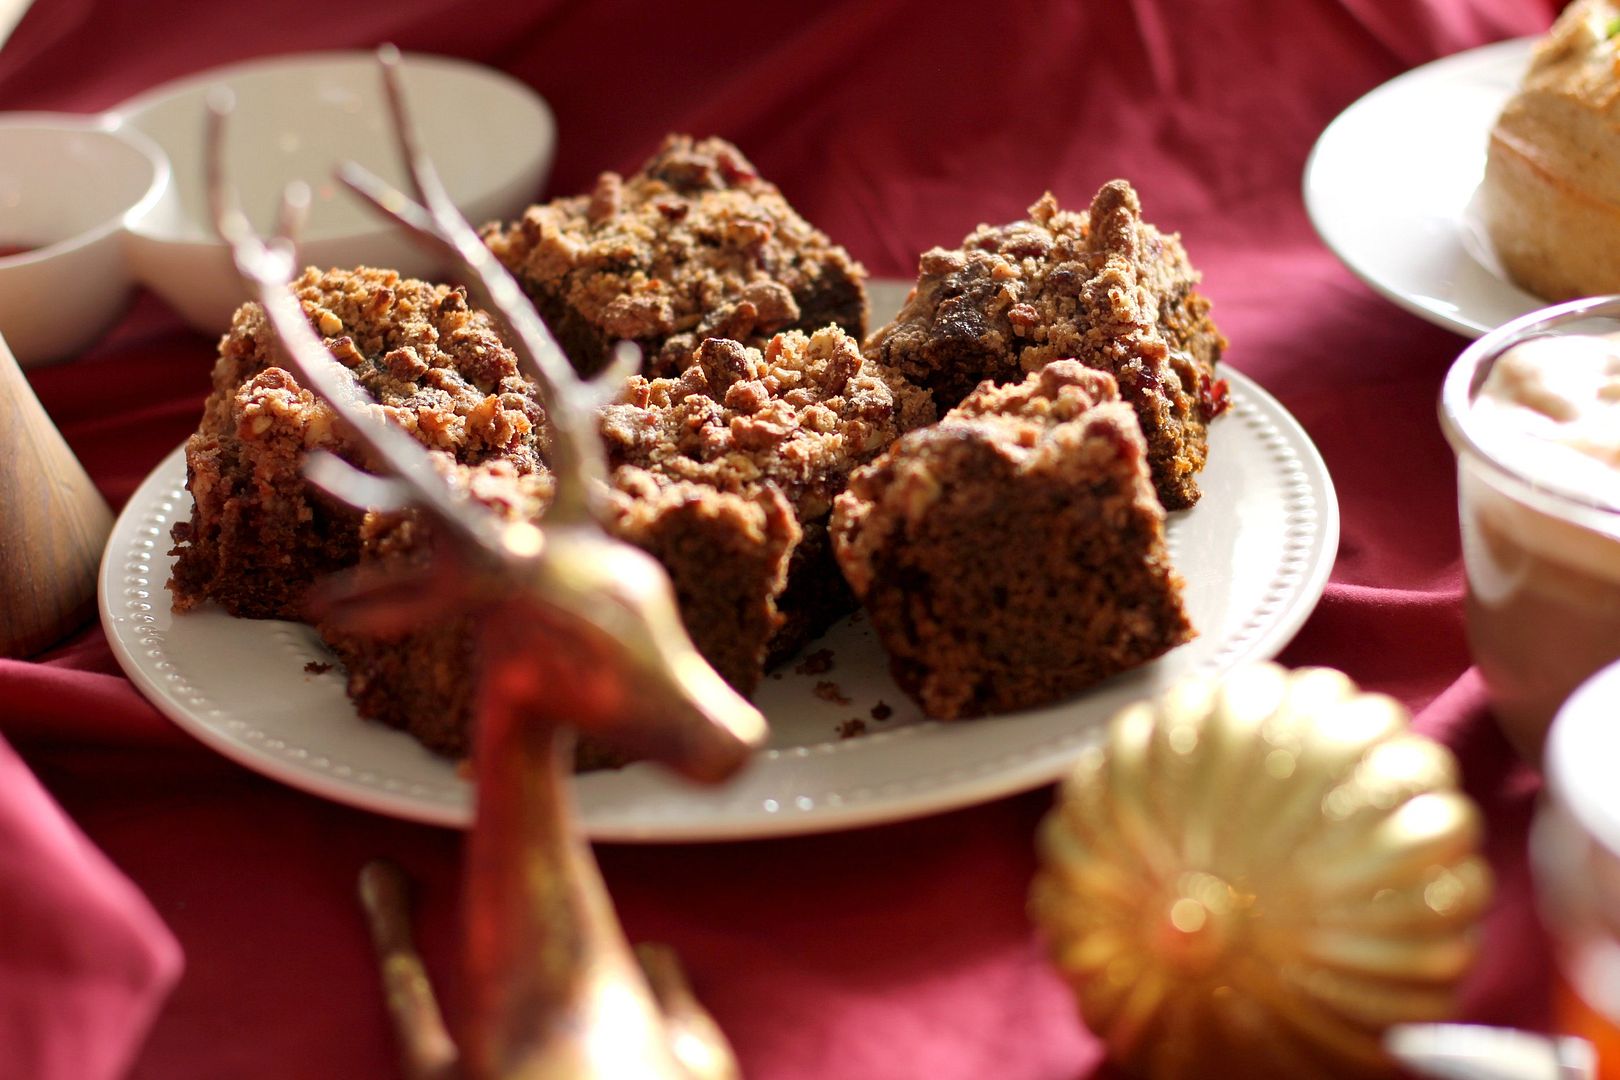
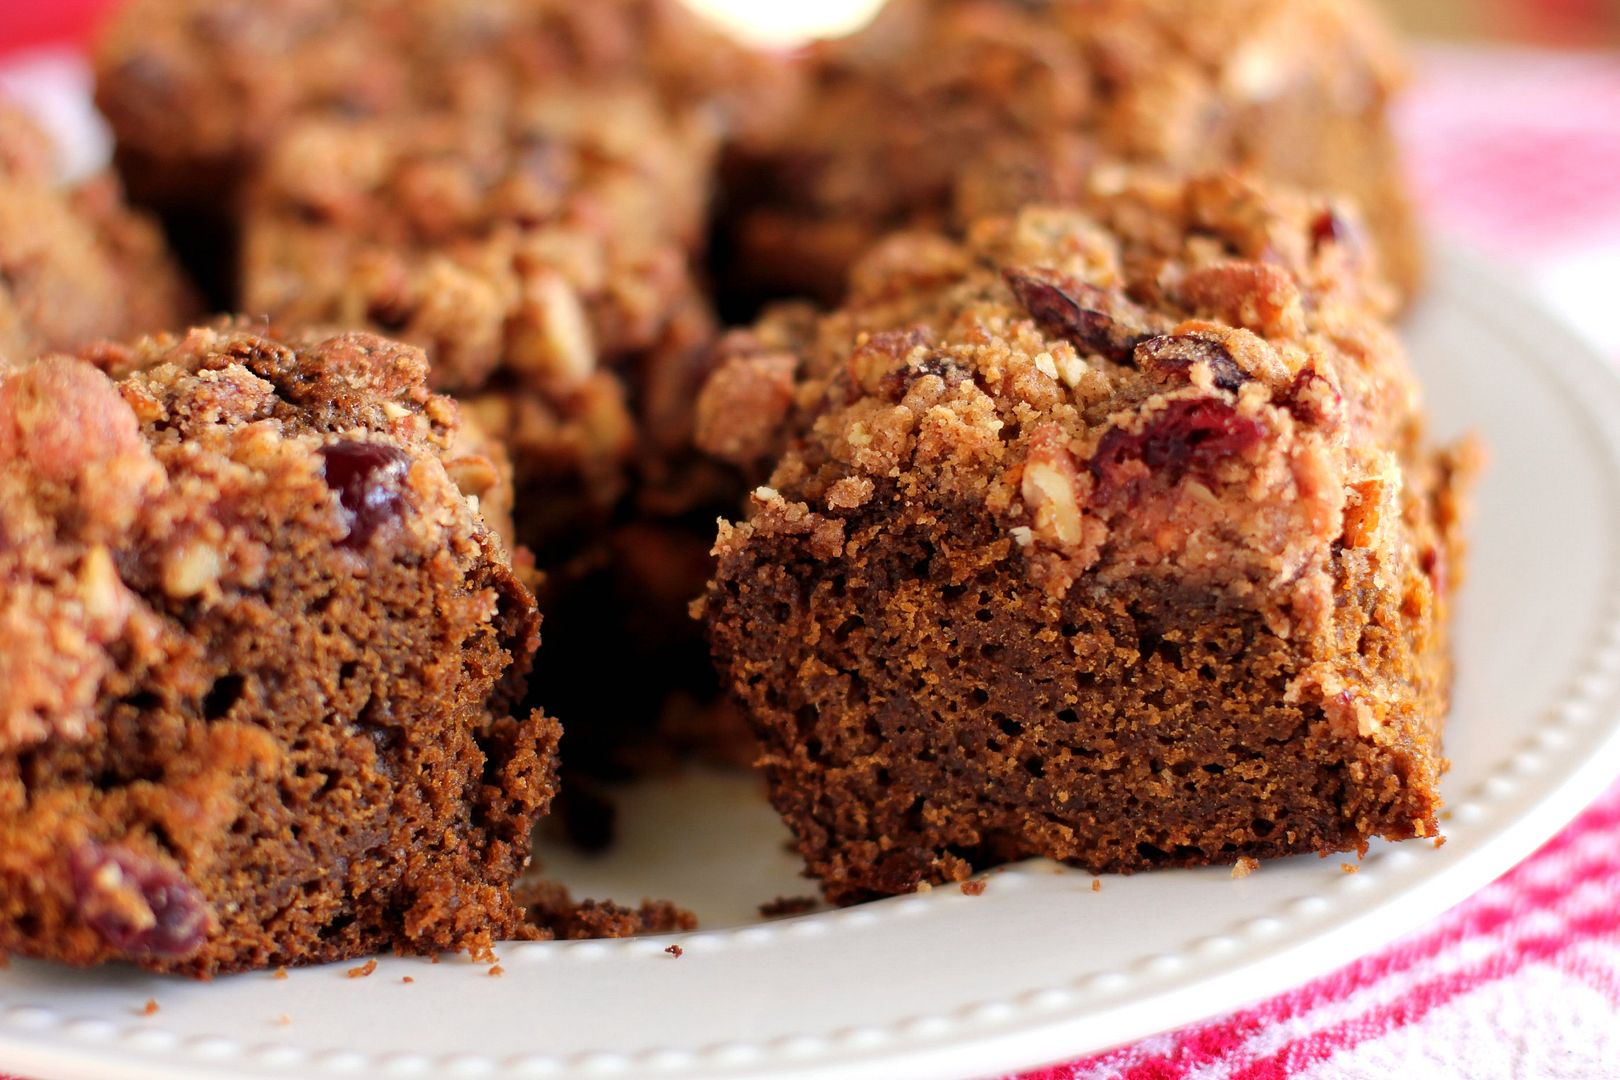
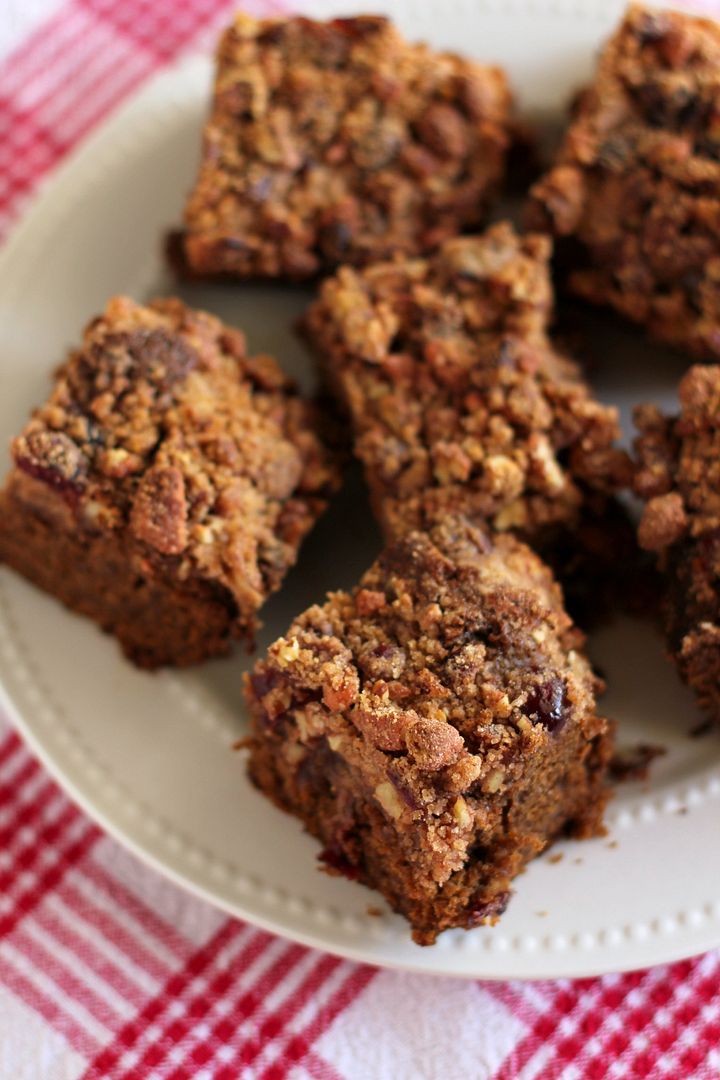
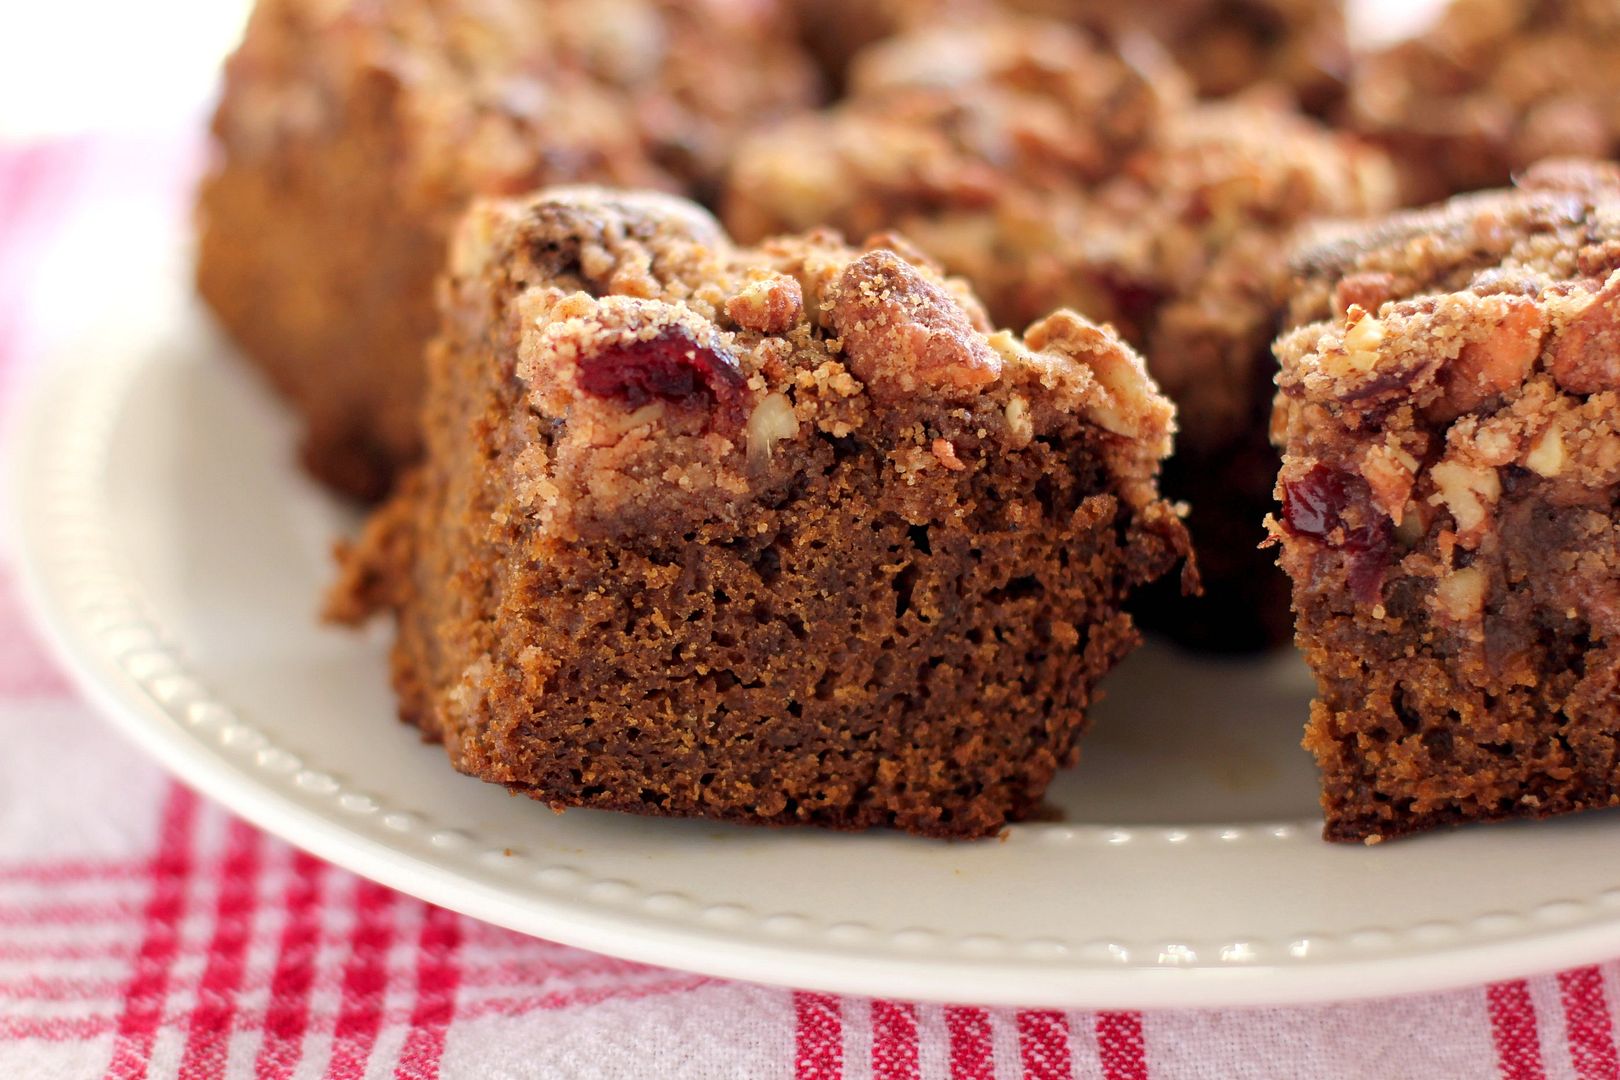
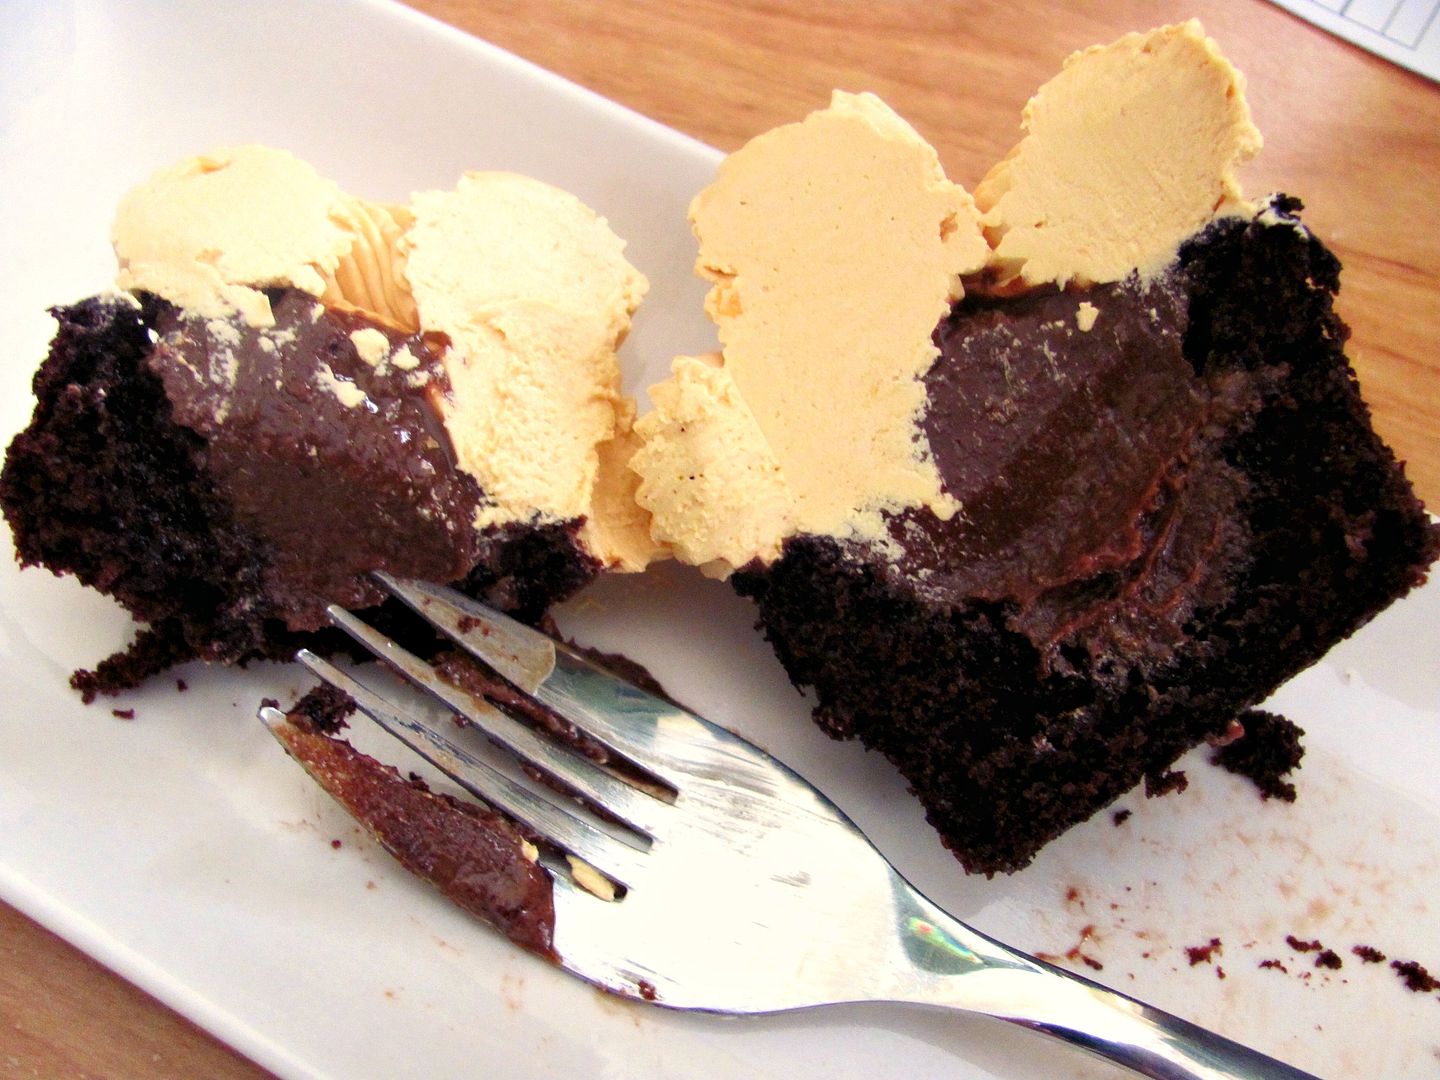
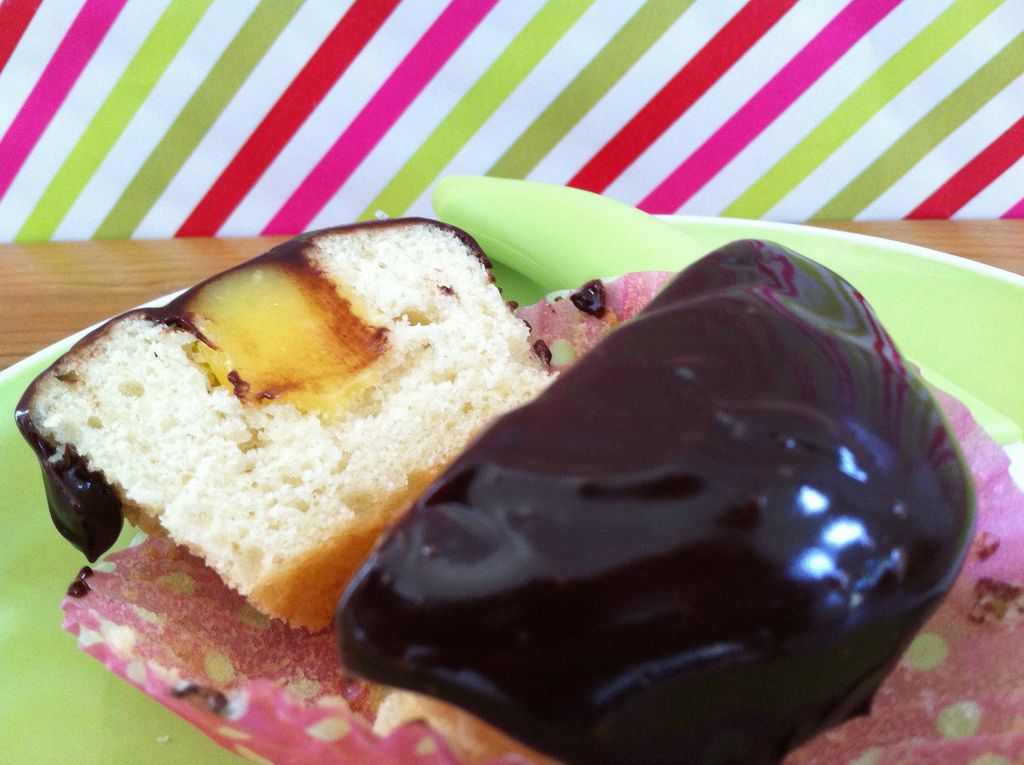
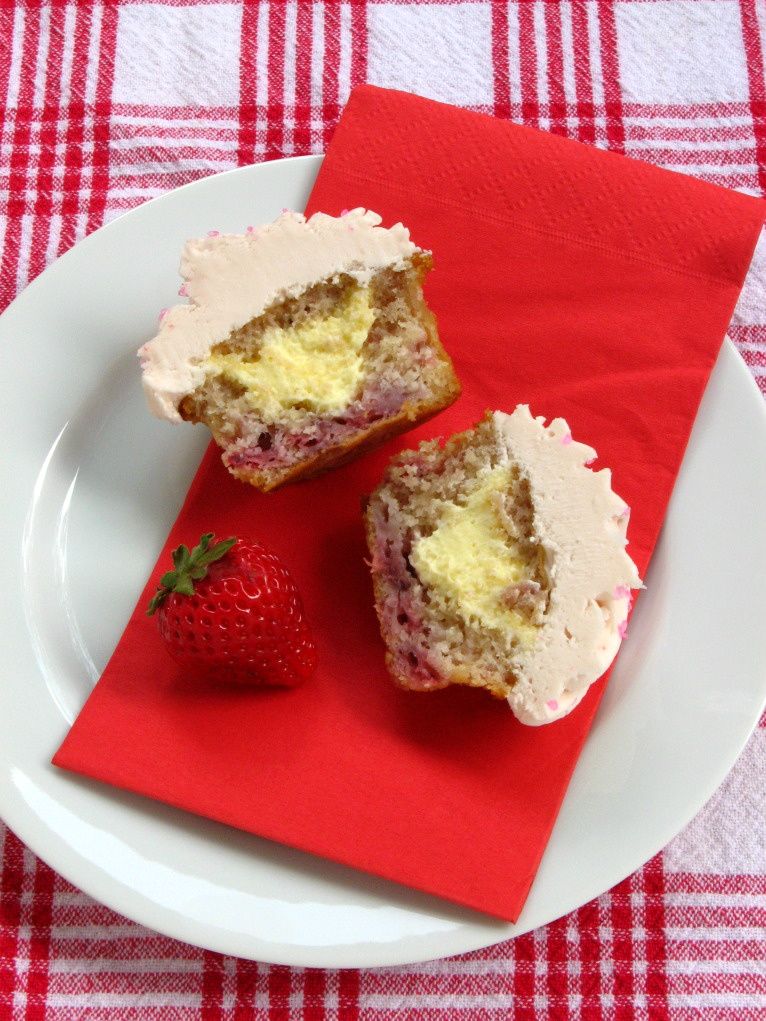
This Gingerbread Coffee Cake was probably the easiest dish to prepare and also Mike’s favorite of the morning. The recipe began life as a regular gingerbread cake, but I revised it to include sour cream, cake flour, and a healthy dose of streusel on top to turn it into a coffee cake. It’s certainly Christmas-worthy! I hope you can find a little bit of “home” in it just like I did.

Gingerbread Coffee Cake with Cranberry Pecan Streusel


Recipe by: Willow Bird Baking, heavily adapted from Joy of Baking
Yields: 9-12 servings

This moist, gorgeous Gingerbread Coffee Cake is the perfect combination of sweet, spiced, crunchy, and comforting. The best part (besides the taste!) is that it can be made in advance and refreshed in the oven for just a few minutes before serving. You can even divide the preparation over a few days to ensure it fits into your holiday schedule. This was Mike’s favorite dish on our holiday breakfast table.

Coffee Cake Ingredients:
1 1/2 cups cake flour
1/2 cup all-purpose flour
1 1/2 teaspoons baking soda
1 1/2 teaspoon ground ginger
1 1/2 teaspoon cinnamon
1/2 teaspoon salt
1/4 teaspoon ground cloves
1/8 teaspoon nutmeg
1/4 cup unsalted butter, room temperature
1/2 cup light brown sugar
2 large eggs, room temperature
1/2 cup unsulphured molasses*
1/2 cup milk
1/2 cup sour cream
*Tip from Joy of Baking: To prevent the molasses from sticking to the measuring cup, first spray the cup with a non-stick vegetable spray.

Cranberry Pecan Streusel Ingredients:
3/4 cup firmly packed light brown sugar
3/4 cup all-purpose flour
1 tablespoon cinnamon
6 tablespoons cold butter
1 cup chopped pecans (Oh Nuts! sent me Cranberry Pecans and they were so awesome for this!)
1/2 cup dried cranberries
1/4 cup apple cider

Directions:
NOTE: If you wanted to make this cake way in advance, you could complete this recipe up to the point of wrapping and refrigerating the cake. Instead, you’d double wrap it and freeze it. Then you could just thaw it overnight in the fridge before warming it through in the oven and serving it.

2 days in advance: Place the cranberries and apple cider for the streusel into a small bowl and cover. Refrigerate to rehydrate the berries.

1 day in advance: Make the streusel. First, drain the cranberries. Combine the flour and brown sugar in a medium bowl and using two knives or a pastry cutter, cut in the cold butter until you have crumbly streusel. Mix in the pecans and drained cranberries. Cover and refrigerate until ready to use.

Make the cake: Preheat the oven to 350 degrees F and make a foil sling for a 9-inch square baking pan: tear off 4, 16-inch long pieces of aluminum foil and fold them in half. Situate two side-by-side in the pan, covering the bottom of the pan to the edge (they will overlap). Situate the other two strips in the same manner, but perpendicular to the first. The overhanging foil of the sling will make it easy to remove the cake from the pan after baking and cooling. Butter and flour the sling.

In a medium bowl, whisk together the flours, baking soda, salt, cinnamon, ginger, cloves, and nutmeg. Set aside. In a separate large bowl, beat the butter and sugar with an electric mixer until pale and fluffy (at least 2-3 minutes). Add the eggs one at a time, beating after each addition. Beat in the molasses, pausing to scrape down the sides of the bowl when you need to. Gently mix the sour cream and milk in a measuring cup. Add the dry ingredients and milk mixture alternately, starting and ending with the dry ingredients. Beat until just combined.

Pour the batter into the buttered and floured baking pan and smooth the top with a spatula. Bake for about 25 minutes before sprinkling the streusel evenly over the top of the cake (and kind of pressing it on). Continue baking for 20-25 minutes, or until a toothpick inserted into the middle of the cake comes out with just a few moist crumbs. Remove the cake from the oven and let it cool completely. Remove it from its pan using the foil sling and wrap it tightly with plastic wrap (I wrap the foil sling and all so I can just pop it back in the pan to refresh later on) and stick it in the fridge.

The morning of: Let the cake sit out and come to room temperature while you preheat the oven to 350 degrees F. Pop it back in its pan and into the oven for a few minutes until warmed through. Let it cool for about 10 minutes.

P.S. Oh Nuts! sent me Cranberry Pecans to try free of charge. My opinions are always my own and always thoughtfully prepared with consideration for my readers — and I loved ’em!

If you liked this post, please:
Subscribe to Willow Bird Baking
Follow Willow Bird Baking on Twitter
Follow Willow Bird Baking on Facebook
Give this post a thumbs up on StumbleUpon
Pin It


ShareOther ways to share this post with friends!

Presenting . . . Your Amazing Cupcakes!

Well, color me impressed. One month ago I issued a challenge here on Willow Bird Baking. Because I know how inspiring it can be to create your own dish, I asked you to come up with a fun cupcake combination all your own.

Some of these fantastic bakers were mamas baking with their kids (Sarah let her son, Jonathan, help out) while some of them were kids themselves (Erica’s in 7th grade this year). Some of them went the decadent route — chocolate, peanut butter, and beer, oh dear! — while some of them stayed bright and fruity — summery strawberries, blackberries, and citrus. Across the board, though, the one thing you all have in common is kitchen creativity. You came up with plans for a fantastic dessert for your family and friends, and you made it happen! Now it’s time to show off your handiwork!


Faygie the Fantastic

Faygie Made: Chocolate Cupcakes with Guinness-Chocolate Pudding and Caramel Buttercream
Comments:“I had a lot of fun doing this challenge! It took a while to find a combination that was not only unique, but also complemented each other well. The chocolate cupcake recipe is fantastic. The pudding was also very good, […] and I really thought that the caramel buttercream complemented the chocolate and Guinness really well. Because it is a Swiss meringue buttercream, it’s not too sweet (even with the large amount I piped on). I brought these to a friend’s birthday party and they were a huge hit!” (see more on her blog!)


Just look at those mountains of delicious frosting! These sound so rich and decadent.


LeAndra the Lovely

LeAndra Made: Banana and Choco-Banana Cupcakes with Peanut Butter(cream) Filling and Marshmallow Buttercream Frosting
Comments:“Thank you for hosting this cupcake challenge. I’m really looking forward to seeing everyone’s creations. I baked banana cupcakes with peanut butter buttercream filling and marshmallow buttercream icing. The baking itself went well, but I was concerned the banana cake and the peanut butter filling were too similar in coloring. So, I mixed some cocoa powder into the remaining batter for chocolate-banana cupcakes.” (see more of her fun cupcakes on her blog!)


Peanut butter, banana, and marshmallow sound like a match made in fluffernutter heaven. Yum!


Erica the Energetic

Erica Made: Yellow Cupcakes with Lemon Filling and Orange Icing
Comments:Erica is my youngest challenge entrant this time around — she just started 7th grade (in my class)! Aren’t these citrusy cupcakes adorable? Way to go, Erica!


Erica came straight out of my cupcake camp this summer and completed the cupcake challenge! So impressive!


Corisa the Creative

Corisa Made: Tandy Kake Cupcakes
Comments: “I made a ‘Tandy Kake’ cupcake, because Tandy Kake is one of my most loved desserts. I enjoy the combination of peanut butter and chocolate a whole lot! I started with a butter cake and filled it with Ina Garten’s peanut butter frosting. Then I topped it off with a simple chocolate frosting! Thanks so much for this opportunity. I’m so excited to see all the fabulous cupcakes!”


It doesn’t get better than peanut butter and chocolate. I want about 5 of these!


Sophia the Sophisticated

Sophia Made: Butterbeer Cupcakes
Comments: Sophia took two of my cooking classes last year — we had so much fun! She says, “I made the Butterbeer cupcakes. They were awesome! I used some techniques that I learned in your class when I made them, so that was great! They tasted a lot like cream soda and butterscotch (surprise!) I had so much fun! I don’t think I would have been able to make them as well if it hadn’t been for your cooking class…so thanks again.” Aww, what a sweet thing to say. Those kids were naturals in the kitchen, though!


I love butterscotch, and these cute cupcakes make me want to drive my broom straight to Harry Potter world in Florida, licking my fingers all the way.


Diana the Daring

Diana Made: Chocolate-Covered Banana Cupcakes
Comments: “I’m sending you my creation, a Chocolate-Covered Banana Cupcake. I was inspired by our trip to King’s Island (an amusement park in Cincinnati, Ohio) this summer. This was a fun challenge. Thanks for putting it together.”


These are so gorgeous, and I love that they’re a play off such a classic dessert.


Annie the Artistic

Annie Made: Red Velvet Cupcakes with Chocolate Monograms
Comments: “I love reading your blog for inspiration! Here’s a link to my red velvet cupcake with monograms recipe. It was quite a disaster the first two times — the recipe I had didn’t specify to add the vinegar and baking soda together before putting them in the mixture and, as I’m sure you know, red velvet cupcakes are a little tricky! Anyways, it was an overall success and the knitting ladies loved it.” Way to try, try, try again, Annie! (see more on her blog)


The monograms make these red velvet cupcakes unique and special.


Sarah the Sensational

Sarah Made: Champagne Cupcakes with Strawberry Puree Filling and Strawberry Buttercream
Comments: “I modified this Paula Deen recipe because my husband is crazy and doesn’t like peaches. I made a strawberry version.”


I love all things strawberry, and these cupcakes look like heaven. Look at the cute frosting squiggles!


Susan the Sweet

Susan Made: Blackberry Merlot Cupcakes
Comments: “This is my Blackberry Merlot Cupcake!
It’s a dark chocolate cupcake with blackberry preserve filling and a country buttercream made with a fresh blackberry & Merlot reduction. I came up with it when my niece was trying to decide which vice — chocolate, cake, or wine — to partake in. I decided to come up with a way for her to have all three at once!”
(see more on her website)


These sound so decadent and delicious — what a way to “have your cake and eat it too!


Erin the Elegant

Erin Made: Boston Creme Pie Cupcakes
Comments: “I couldn’t help but join in the fun and bake a cupcake! I’m an avid reader of your site and am always inspired to bake after looking at the delicious food you’ve made. Thanks for the opportunity to create something new! I baked a yummy Boston Creme Pie Cupcake with vanilla cake, vanilla cream filling, and dark chocolate ganache topping. To really make the cupcake shine, I added macaroon coconut as a garnish on top of the ganache.” (see more on her blog)


These came out so cute, and I love the addition of coconut! This is the perfect way to eat Boston creme pie — in adorable single portions.


Cathy and Kevin the Courageous

Erin Made: Bananas Foster Cupcakes
Comments: “We made Bananas Foster cupcakes! We used a banana cake recipe, caramel filling, and a cinnamon-madagascar bourbon vanilla bean cream cheese frosting (long enough for you?) topped with vanilla wafer crumbs and butterscotch caramel sauce. These babies were to die for!! (Not for the faint of heart-if you don’t like rich banana-y goodness these are not for you!) Thanks for a great challenge to make us come up with these goodies; we will be making these again.” (see more on their blog)


All I can say is oh my goodness, yum. I need to try these!


As always, I’ve been totally inspired by you — thank you for plunging in and taking the cupcake challenge! If you didn’t get to join in this time around, don’t worry — there are always more WBB challenges coming up to build your kitchen confidence.

If you liked this post, please:
Subscribe to Willow Bird Baking
Follow Willow Bird Baking on Twitter
Follow Willow Bird Baking on Facebook
Give this post a thumbs up on StumbleUpon


ShareOther ways to share this post with friends!

Sweet and Spicy Pickled Grapes with Goat Cheese

First, I just want to take a moment to send love to Jennifer Perillo of In Jennie’s Kitchen who lost her husband Mikey this past week, and Kristen Doyle of Dine & Dish, who lost her brother after his struggle with cancer. I can’t begin to imagine the unthinkable heartbreak each woman is trying to navigate. I hope the huge wave of love their loss has inspired across the internet (have you seen the peanut butter pies? Mine’s coming next week) is just one tangible way God is embracing them during this time.

These tragedies come in the same year that Mara (I Made Dinner) lost her father and father-in-law and Erika (Ivory Hut) lost her home in a fire. This has been a hard year for so many blogger friends. The whole blogging community is grieving with and praying for these ladies, who deserve every ounce of the outpouring they’re receiving — and more. May God bless and keep you during your hard times.

I sat in a coffee shop last night with a friend chatting about submarines (what?) and drinking Pomegranate Hibiscus Ginger Ale. It was unfiltered, and the ginger burned my throat with spice every time I took a sip. The burning reminded me of eating rum cake, each bite of which is literally heartwarming. I love that sensation.

The ginger prickle in my throat also reminded me of pickled grapes. This intriguing recipe boasts a surprising flavor combination. I know the words “pickled grapes” may initially conjure up visions of dilly, sour grapes and the urge to upchuck one’s lunch (can I say that kind of thing on a food blog?), but hear me out.

As Deb said in the original recipe, these are a desserty sort of pickle. The brine itself is spicy with peppercorns, mustard seed, and cinnamon, and the grapes take on a deep, sweet warmth that the vinegar doesn’t overpower.

I served these in a little dish with wells for the grapes, goat cheese hunks, and toothpicks. Friends at my elementary school throwback picnic would grab a toothpick, skewer a grape, skewer a cheese hunk (that sounds like the kind of guy I want to meet — a cheese hunk. ha ha), and devour. Pairing the grapes with creamy goat cheese grounded their tangy flavor and, for me, made them the perfect appetizer.

As you might expect, these meet mixed reviews. I have a friend who tried the recipe with green grapes and didn’t love them. Some folks can’t get past the idea of a pickled fruit. But I really enjoyed the ease of preparation, their convenience as an appetizer, and the taste! If you like trying new things and have an open mind (and palette), give ’em a shot!

What kinds of things do you pickle?

Sweet and Spicy Pickled Grapes with Goat Cheese


Recipe by: Adapted from Smitten Kitchen
Yields: about 3 cups of pickled grapes

Ingredients:
1 pound red or black seedless grapes, washed and with stems removed
1 cup white wine vinegar
1 cup granulated sugar
1 1/2 teaspoons mustard seeds
1 teaspoon whole black peppercorns
1 (2 1/2-inch) cinnamon stick
1/4 teaspoon salt
goat cheese for serving (optional)

Directions:
Cut off the very end of each grape, exposing a bit of the inner flesh (which will help the pickling solution infiltrate the grapes). Place the grapes in a clean mason jar.

Bring the remaining ingredients to a boil in a saucepan over medium heat. Either pour the hot brine over the grapes and let them cool together or let the brine cool and then pour it over the grapes (Deb notes the difference: “The original recipe has you pour the bring mixture over the grapes and let them cool together. I personally prefer a cold brine on certain foods, not wanting to wilt the fresh fruit, so I cool the brine completely before pouring it over. The former will yield a more tender pickle, and it will pick up the brine’s flavor faster. The latter will take a bit longer to souse, but the grapes will stay more firm.”) I chose to mostly cool my brine first.

Once your grapes and brine are cool, chill in the jar for at least 8 hours or overnight. Serve cold with hunks of goat cheese.

P.S. Are you thinking up your own filled cupcake for the Willow Bird Baking Cupcake Challenge? Bake your creation and email photos to juruble ‘at’ gmail.com by Wednesday, September 7, 2011. I’ll feature your cupcake on WBB! Find more details and some cupcake inspiration here.

If you liked this post, please:
Subscribe to Willow Bird Baking
Follow Willow Bird Baking on Twitter
Follow Willow Bird Baking on Facebook
Give this post a thumbs up on StumbleUpon


ShareOther ways to share this post with friends!

Apple Cinnamon Cream Cupcakes: NOT Back-to-School Cupcakes!

It’s Cupcake Week on Willow Bird Baking! Cupcake Capers was a 5-day summer camp I conducted last week wherein 5 middle school girls learned to bake, fill, and frost cupcakes. We eschewed pedestrian cupcake flavors in favor of creative combinations that I now get to share with you! Every day this week I’ve been posting fun memories and recipes from Cupcake Camp.


No really, they’re not Back-to-School Cupcakes.

Like all good things, Cupcake Camp had to eventually come to an end. Day 5 arrived and so did the campers, eager to pack in one last day of cake pops and cupcakes. At the end of the day they would finally carry home their aprons, recipe notebooks, and colorful bakery boxes filled with the cupcakes we’d made all week (the ones they hadn’t already devoured, that is) to share with their families.

But first, we sat down to complete the cutest decorating job of the week: turning cupcakes into apples! We baked these apple cupcakes in bright red liners to begin creating the effect. Once they were cooled and frosted, we dipped the tops in red sanding sugar, used bits of pretzel for their “stems,” and cut “leaves” from green fruit roll-ups.

These cupcakes weren’t just adorable, though — they were also one of the girls’ favorite recipes all week long. The spice cake, creamy cinnamon mousse, and brown sugar buttercream frosting melded into a delicious preview of fall flavors. Bright smiles broke out all around as the campers first tasted one of their “apples.” Even though they had already ranked their favorite cupcakes, several of them went back and added Apple Cinnamon Cream Cupcakes right at the top of their lists!

After tasting, we sat back and admired our handiwork. Meticulous Mary Rood made the comment that these looked like Back-to-School cupcakes. She’s right, of course. Isn’t it funny how just as soon as August peeks around the corner, stores everywhere roll out the red plaid, apples, mini chalkboards, and school supplies in an array of primary colors? These cupcakes fit right in.

Her comment sunk in for a moment before our summer spirit rebelled. We still have a few weeks of freedom! The temperature still climbs to 100 degrees each day! We still have beach trips, pool trips, and sprints through the sprinkler planned!

I don’t care what the stores might have you believe, it’s still SUMMER! We’ll go back to school when our parents drag us, kicking and screaming, and not one second before!

(Okay, I guess I can’t quite wait until my parents drag me . . . )

So these may look like Back-to-School cupcakes. They may taste like Back-to-School cupcakes. I may have gotten carried away and photographed them surrounded by a bunch of the brightly colored school supplies I just made fun of.

But these are NOT Back-to-School cupcakes. These are IT’S-STILL-SUMMER-AND-I-DON’T-CARE-WHAT-YOU-SAY-LA-LA-LA cupcakes.

Now that we’re clear on that, you should go make them and eat about twenty.

What summer plans do you still have to accomplish before summer ends? Or, for readers on the tail end of winter, what exciting things do you have lined up for the spring?

Apple Cinnamon Cream Cupcakes


Recipe by: adapted from Baked Bree
Yields:about 24-28 cupcakes

Cupcake Ingredients:
2 cups flour
2 teaspoons ground cinnamon
1 teaspoon baking soda
3/4 teaspoon salt
1/2 teaspoon fresh nutmeg
1/8 teaspoon ground cloves
2 sticks butter at room temperature
1 cup sugar
1/2 cups brown sugar
4 large eggs
1 1/2 cups applesauce
1 cup toasted pecans, chopped (optional)

Cinnamon Mousse Ingredients:
1 cup milk
1 cup heavy cream
1 (4 serving) package vanilla Instant Pudding Mix (not Cook & Serve)
1 1/2 teaspoons cinnamon
3/4 teaspoon nutmeg

Brown Sugar Buttercream Frosting Ingredients:
1 stick room temperature butter
1/4 cup shortening
1/3 cup brown sugar
1/2 teaspoon cinnamon
3 cups of powdered sugar (depends on consistency desired)
3 tablespoons of heavy cream (depends on consistency desired)

Directions:
*Note: This recipe makes twice as much mousse as you need for filling the cupcakes. If you want to use half the pudding pack and save the rest for later, just measure it out and do so. Or use the extra mousse for another project (you know, like eating it with a spoon).

Make cupcakes: Line two muffin tins with paper liners. Preheat oven to 350°F. In a medium bowl, whisk together dry ingredients. In a separate, large bowl, cream together butter, sugar, and brown sugar until light and fluffy (several minutes). Add the eggs in one at a time, beating after each addition, and then mix in the applesauce. Finally, mix in the dry ingredients until just combined.

Fill each cupcake liner about 3/4 full of batter. Bake for 15-20 minutes and let cool completely.

Make mousse: To make the cinnamon mousse, combine milk, cream, and pudding mix, and spices in a medium bowl. Beat with a mixer until you reach soft peaks, or a thick whipped cream consistency (this takes a few minutes). Refrigerate mousse until you’re ready to use it.

Make frosting: To make the frosting, beat butter and shortening together until light and fluffy. Add the brown sugar and cinnamon and mix. Gradually add the powdered sugar, 1/2 cup at a time, and alternately add the cream. Adjust these items until desired consistency is reached.

Assemble cupcakes: To fill the cupcakes, use the Cone Method: cut an upside-down cone out of the top of each one. Cut off the tip of the cone (and eat it, if you wish) leaving just the “lid.” Fill the cavity with mousse using a piping bag or zip-top bag with the corner cut off, and then replace the “lid” to give you a relatively smooth surface to frost. Don’t overfill these, or they’ll be hard to frost.

Use the back of a spoon, a knife, or an offset spatula to cover the cupcakes with a layer of frosting. To ensure you don’t accidentally shift your “lid,” use a pretty thick layer of frosting and just gently pull it out toward the sides of the cupcake to achieve full coverage — that way you’re never pulling your spoon/spatula straight up and pulling the lid off. Dip frosted cupcakes into a bowl of red sanding sugar or sprinkles. Add a piece of a pretzel stick for a stem. Add a leaf cut from a green fruit roll up (I made a little indentation in my frosting with the tip of a knife to stick the tip of the leaf into). Enjoy!

All Cupcake Week Recipes:
Day One: Chocolate Pistachio Cream Cupcakes
Day Two: Banana Split Cupcakes and Cake Pops
Day Three: Creamsicle Cupcakes
Day Four: Strawberry & Cream Cupcakes and Cake Pops
Day Five: Apple Cinnamon Cream Cupcakes

If you liked this post, please:
Subscribe to Willow Bird Baking
Follow Willow Bird Baking on Twitter
Follow Willow Bird Baking on Facebook
Give this post a thumbs up on StumbleUpon


ShareOther ways to share this post with friends!

Strawberry & Cream Cupcakes and Cake Pops

It’s Cupcake Week on Willow Bird Baking! Cupcake Capers was a 5-day summer camp I conducted last week wherein 5 middle school girls learned to bake, fill, and frost cupcakes. We eschewed pedestrian cupcake flavors in favor of creative combinations that I now get to share with you! Every day this week I’ll be posting fun memories and recipes from Cupcake Camp.

On Day 4 of Cupcake Camp, things got a little silly. I’ve talked before about the moment toward the end of the school year when teachers realize they’ve controlled their classes as long as they can, and that the powder keg of summer frenzy is about to blow. Turns out cupcake camp has that moment, too!

On Day 4, everyone went a little crazy in their own personal ways. Energetic Erica played the Carrot Song until I felt sure I was going to throw a cupcake at someone. Elbow Grease Ella decided she was going to decorate her cupcake with polka dots and then wash every bowl by hand (okay, so her particular method of going crazy happened to be awesome).

Meticulous Mary Rood and I convinced everyone to watch the YouTube video of the sneezing baby panda (no seriously, go watch it). And then there were Pistachio Peyton and Elaborate Elizabeth.

They decided to become architects.

Measuring powdered sugar can get messy. Like, whole-cups-of-powdered-sugar-spilled-on-the-counter messy. Instead of cleaning this up like ordinary children, Pistachio Peyton and Elaborate Elizabeth decided to be extraordinary. They carefully constructed a perfect block of powdered sugar that they then manipulated with a table knife into various shapes and messages. Because, you know, that’s what you do at Cupcake Camp, right?


They may have gotten a little territorial.

I finally convinced the girls to clean off the counters despite their insistence that the powdered sugar sculpture should remain as an eternal (ahem) monument to Cupcake Camp. And believe it or not, in between watching crazy YouTube videos and playing with our food, we actually made some cupcakes!

These Strawberry & Cream Cupcakes were the perfect cool, sweet treat for summer. Tender strawberry cakes were filled with easy vanilla mousse and topped with a creamy, delicious strawberry cream cheese frosting. We had leftover cupcakes, too, so can you guess what we did?

We made cake pops! We crumbled the cupcakes up and mixed them with some of the frosting, rolled them into balls, chilled them overnight, and dipped them in pink candy melts.

If you’ve ever made cake pops, you know that dipping them is the hardest part (see my video tutorial at the bottom of the recipe). I loved watching the girls develop their own dipping techniques as they got the hang of it.

Pistachio Peyton dipped her pops and then rolled them in the spoon to get full coverage. Elbow Grease Ella used the spoon to drizzle candy melts over her cake pop. Elaborate Elizabeth was a pro at turning cake pops into cake balls if they fell off of their pretzel sticks (I love using these instead of lollipop sticks) by draining them on a couple of forks.

Despite a few inevitable cake pop missteps, the campers all successfully rolled, dipped, and ate! The cake pops were a tasty addition to our cupcake picnic.

With Day 4 complete, the girls dropped off their aprons and recipe notebooks and headed home. I’m pretty sure that I went home and collapsed into a cupcake coma (or maybe just a long nap). One more day left of cupcake camp!

What’s your favorite funny YouTube video?

Strawberry & Cream Cupcakes


Recipe by: adapted from Annie’s Eats
Yields: 18-24 cupcakes

Cupcake Ingredients:
2 ½ cups cake flour
1 teaspoon baking soda
¼ teaspoon salt
½ cup unsalted butter
1 ½ cups sugar
2 eggs
1/3 cup buttermilk
¼ cup oil
1 teaspoon vanilla extract
2 cups chopped strawberries

Vanilla Mousse Filling Ingredients:
1 cup milk
1 cup heavy cream
1 (4 serving) package vanilla Instant Pudding Mix (not Cook & Serve)

Strawberry Cream Cheese Frosting Ingredients:
½ cup strawberries
1 (8-ounce) package cream cheese, at room temperature
1 ½ sticks unsalted butter, at room temperature
4-5 cups powdered sugar, sifted
½ teaspoon lemon juice
1 tablespoon vanilla
pink sanding sugar, if desired

Directions:
*Note: This recipe makes twice as much mousse as you need for filling the cupcakes. If you want to use half the pudding pack and save the rest for later, just measure it out and do so. Or use the extra mousse for another project (you know, like eating it with a spoon).

Make cupcakes: Line two muffin tins with paper liners. Preheat oven to 350°F. Onto a sheet of parchment or wax paper, sift flour, salt and baking soda. Set aside. In a large bowl, cream butter and sugar until light, fluffy, and pale yellow (several minutes). Add eggs one at a time, mixing after each. Scrape down the sides of the bowl as needed. Mix in buttermilk, oil and vanilla. Pick up both ends of the parchment/wax paper and use it to add dry ingredients into the bowl and stir until just combined. Fold in the chopped strawberries (you could toss these with a few tablespoons of the dry ingredients first, if you were worried about them sinking to the bottom).

Fill each liner about 3/4 full of batter and bake for 15-20 minutes, or until a toothpick inserted into the center of several cupcakes comes out with just moist crumbs. Let cool completely.

Make mousse: To make the vanilla mousse, combine milk, cream, and pudding mix in a medium bowl. Beat with a mixer until you reach soft peaks, or a thick whipped cream consistency (this takes a few minutes). Refrigerate mousse until you’re ready to use it.

Make frosting: To make the frosting, puree the strawberries in food processor and then strain them through a fine mesh sieve to remove the seeds. In a separate bowl, beat the cream cheese and butter until fluffy and smooth before adding the lemon juice, vanilla, and sugar (start on the low side with the sugar and add more until the frosting reaches your desired consistency). Add the amount of puree needed to achieve your desired consistency and color (I do this before I’ve added all the sugar, so I can adjust both as needed). This is a loose frosting and benefits from sitting in the fridge for awhile after you make it with a damp cloth covering it.

Assemble cupcakes: To fill the cupcakes, use the Cone Method: cut an upside-down cone out of the top of each one. Cut off the tip of the cone (and eat it, if you wish) leaving just the “lid.” Fill the cavity with mousse using a piping bag or zip-top bag with the corner cut off, and then replace the “lid” to give you a relatively smooth surface to frost. Use a piping bag or zip-top bag to pipe on the frosting. Dust with pink sanding sugar if you wish.

Strawberry & Cream Cake Pops


Recipe by: adapted from Annie’s Eats
Yields: probably around 40-50 cake pops

Cupcake Ingredients:
2 ½ cups cake flour
1 teaspoon baking soda
¼ teaspoon salt
½ cup unsalted butter
1 ½ cups sugar
2 eggs
1/3 cup buttermilk
¼ cup oil
1 teaspoon vanilla extract
2 cups chopped strawberries

Strawberry Cream Cheese Frosting Ingredients:
1/4 cup strawberries
4 ounces cream cheese, at room temperature
6 tablespoons unsalted butter, at room temperature
2-2 1/2 cups powdered sugar, sifted
1/4 teaspoon lemon juice
1 1/2 teaspoons vanilla

Other Cake Pop Ingredients:
pretzel sticks
pink candy melts or candy bark
sprinkles or pink sanding sugar, if desired

Directions:
*NOTE: We made our cake pops with leftover cupcakes, so I’m printing instructions for making them with cupcakes here. I’m not sure how this recipe would work if you tried baking this as a cake to save liners, so I don’t want to recommend that, but let me know if you try it.

Make cupcakes: Line two muffin tins with paper liners. Preheat oven to 350°F. Onto a sheet of parchment or wax paper, sift flour, salt and baking soda. Set aside. In a large bowl, cream butter and sugar until light, fluffy, and pale yellow (several minutes). Add eggs one at a time, mixing after each. Scrape down the sides of the bowl as needed. Mix in buttermilk, oil and vanilla. Pick up both ends of the parchment/wax paper and use it to add dry ingredients into the bowl and stir until just combined. Fold in the chopped strawberries (you could toss these with a few tablespoons of the dry ingredients first, if you were worried about them sinking to the bottom).

Fill each liner about 3/4 full of batter and bake for 15-20 minutes, or until a toothpick inserted into the center of several cupcakes comes out with just moist crumbs. Let cool completely, and then crumble your cupcakes into a large bowl. Set aside.

Make frosting: To make the frosting, puree the strawberries in food processor and then strain them through a fine mesh sieve to remove the seeds. In a separate bowl, beat the cream cheese and butter until fluffy and smooth before adding the lemon juice, vanilla, and sugar (start on the low side with the sugar and add more until the frosting reaches your desired consistency). Add the amount of puree needed to achieve your desired consistency and color (I do this before I’ve added all the sugar, so I can adjust both as needed).

Make cake balls: Mix about 3/4 cup of frosting into your crumbled cake, adding more frosting if the mixture is still too crumbly. You want it to reach a sort of stiff play-dough texture so you can shape it into balls. Prepare a sheet pan with a sheet of wax paper on it. Shape your banana mixture into balls and line them on the wax paper. Chill these in the refrigerator overnight. I don’t freeze mine like some sites suggest, because I find chilling them in the fridge instead reduces cracking after I dip them.

Mount and dip cake balls: After cake balls have chilled overnight, melt your candy melts or chocolate bark according to the package directions. I keep my bowl of candy melts situated in a bigger bowl of hot water to keep them warm and fluid, but be careful no water gets into the melts! To mount each cake ball, take a pretzel stick and dip the end in candy melts. Gently but firmly push the end of the pretzel stick into the cake ball. Put these back on their silicone mat or wax paper to chill. Repeat until all cake balls are mounted and chill for about 30 minutes.

After chilling, you’re ready to dip! Dip each cake ball into the candy melts, using a spoon to help coat them. After dipping, hold your cake ball over the bowl and gently bounce to drain the excess off. Turn the pop as you drain. When well-drained, sprinkle some sprinkles on top and gently place the pop in a foam block to continue drying. I placed mine in the fridge to reduce drying time. Once they’re dry, you’re ready to eat them! These keep great in an airtight container in the fridge.

Never made cake pops before? I made this video tutorial to show you some techniques involved.

All Cupcake Week Recipes:
Day One: Chocolate Pistachio Cream Cupcakes
Day Two: Banana Split Cupcakes and Cake Pops
Day Three: Creamsicle Cupcakes
Day Four: Strawberry & Cream Cupcakes and Cake Pops
Day Five: Apple Cinnamon Cream Cupcakes

If you liked this post, please:
Subscribe to Willow Bird Baking
Follow Willow Bird Baking on Twitter
Follow Willow Bird Baking on Facebook
Give this post a thumbs up on StumbleUpon


ShareOther ways to share this post with friends!

1 25 26 27 28 29 35