fruit

Lemon Raspberry Squares

I know I said that sometimes you need to settle in and let the hard times wash over you like waves. And that’s true. You need to do this the most when you’ve been running like a hamster in a wheel, trying by virtue of your own power to get somewhere.

Other times, though — those times when you’re exhausted and overwrought — it’s okay to build a boat.

Not a canoe. I’m talkin’ a big, sturdy boat. And it’s okay to get in that boat and put on some headphones. And a blindfold. It’s okay to sing at the top of your lungs, to willfully drown out the sight, sound, and persistent pressure of the waves until you forget they exist altogether. We both know that someday you have to get out and face the ocean. But it doesn’t have to be today.

I recently asked you on Facebook to help me build a boat and distract myself from the waves. We shared funny stories on a hard day, and oh dear, you are a witty bunch! I thought I’d share my own funny story in more detail here, in case you need a distraction today. I present to you The Tale of The Wayward Underwear.

(Did I just lose my sponsors? Oh well. Anyway…)

Back in college, I had a sweet apartment above my professor’s garage (hi, Dr. Peroni). It didn’t have a full kitchen, but I hadn’t really started baking yet anyway. I made chili in my electric skillet, hot dogs in my microwave, and that was all I needed. That and The Fresh Prince of Bel-Air on television. And my blue couch from Goodwill, which had no back legs and thus reclined. Awesome.

The washer and dryer downstairs was icing on the cake. I did laundry about once a week, but was usually too busy to bother putting the clean clothes away. Instead, I grabbed things straight from the dryer and threw them on before class.

One day I was late to my American Lit class and I did just that. I absentmindedly tugged on a pair of jeans and a t-shirt before hopping on my bike and pedaling furiously to my class. I made it in time, slid into my seat, and adroitly navigated the discussion of a text I hadn’t actually had time to read (ah, college). Everything seemed fine . . . until I began the ride back to my apartment.

About halfway there, I noticed something lying in the middle of the sidewalk. As I approached the object, it started to look familiar. Too familiar. Unacceptably familiar. I stopped a few feet away and stared at it, aghast.

There, lying in the middle of the sidewalk of one of the busiest streets in Davidson, was a pair of my underwear.


I know it’s traumatic. Just try to think of lemon raspberry squares.

My brain could not process the visual information it was receiving. Instead, it was cycling through myriad half-formed thoughts: Wha–? How in the world–?

I finally pieced together that my underwear must have been clinging to my jeans when I grabbed them out of the dryer. The fact that they fell off in the middle of the sidewalk was bad enough, but it was nothing compared to the realization that they might not have fallen off — that I might’ve worn them straight into class!

Just to make sure you have a clear picture in your brain, these were not my nice, normal underwear. They were my cute underwear, with little purple trim all over them. And they were lying about 100 feet from a college campus. This situation had no doubt been conjuring up images of drunken debauchery in passersby’s minds for the past hour while I’d sat in class, blissfully unaware.

And if there’s anything I was not, it was drunken, debauched, or scandalous in any way. I was as straight-laced as a new sneaker.

Standing there, staring at this pair of underwear on the sidewalk for way too long to seem inconspicuous, I tried to get a handle on my racing thoughts. However improbable, the idea that someone could link this undergarment to me and misunderstand how it arrived on the sidewalk made me flush with embarrassment.

Also, what was I supposed to do about this situation? I began to debate: could I possibly pick them up? They were some of my favorite underwear, after all. But if anyone saw me picking up a pair of underwear off the flippin’ street and taking them home, what would they think? Could I possibly leave them there? And let more people see them? And who would eventually have to pick them up?! I almost died.

After several minutes of standing with my mouth agape, I finally got myself together and rode home — without my wayward underwear. They were gone the next day and I don’t ever, ever want to know where they went or how they got there.

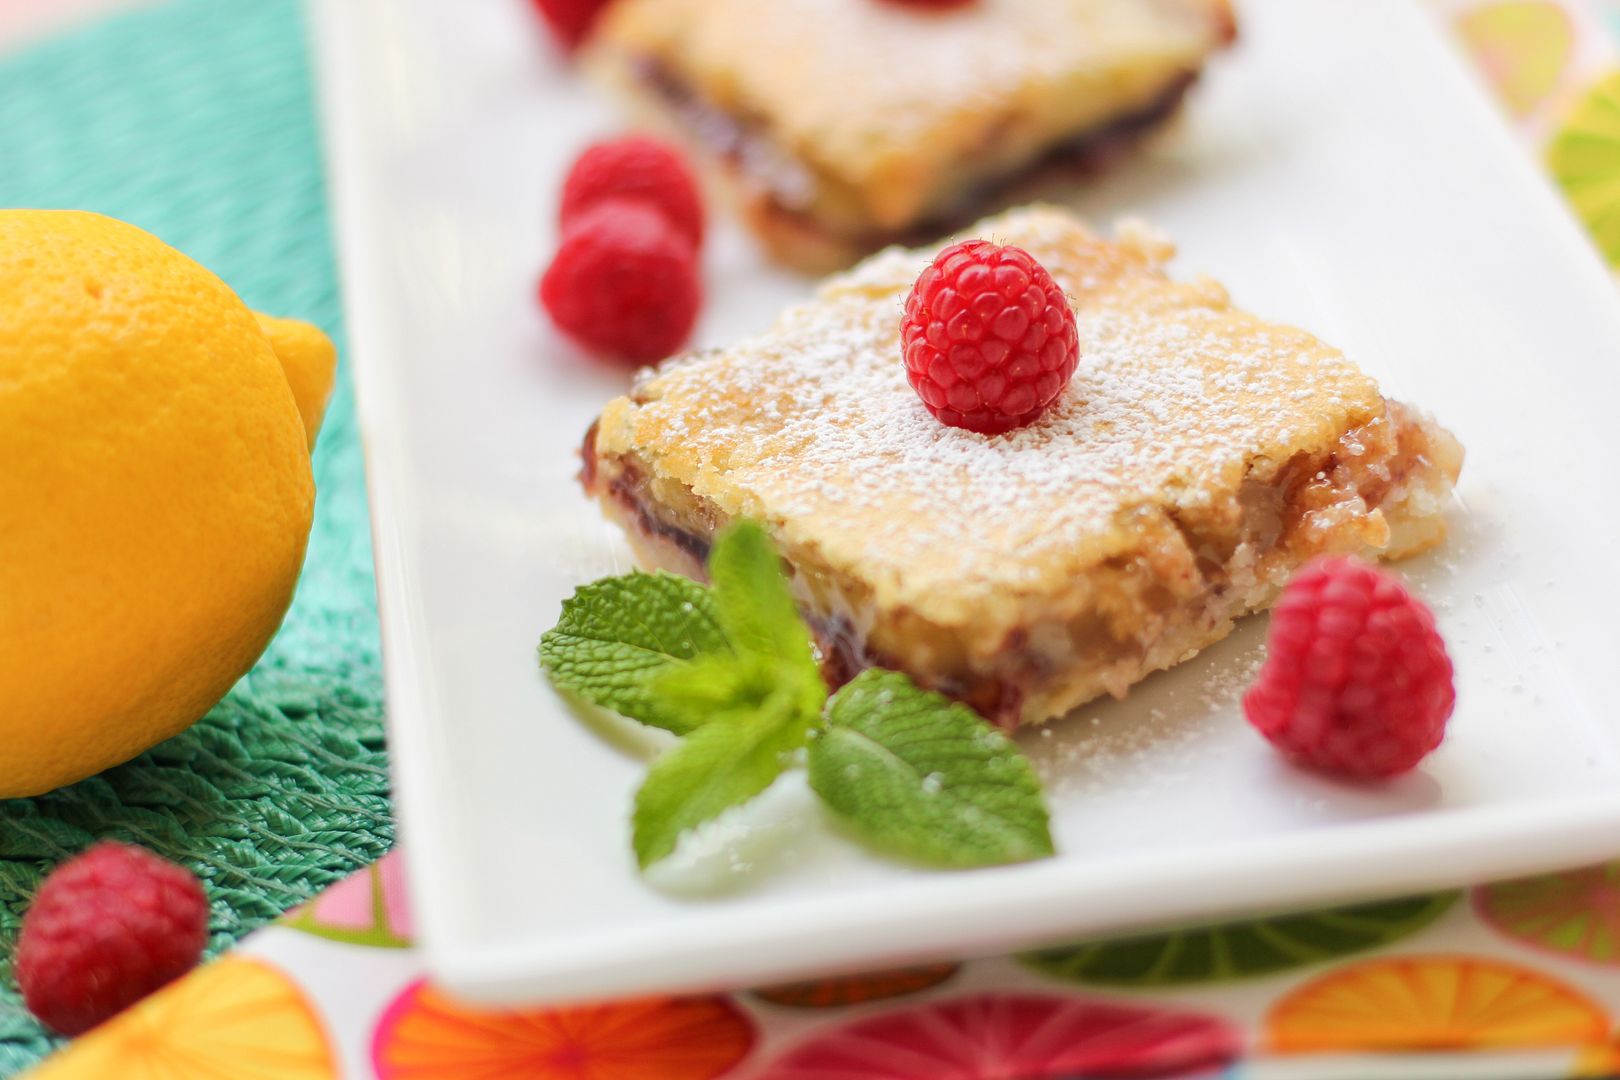
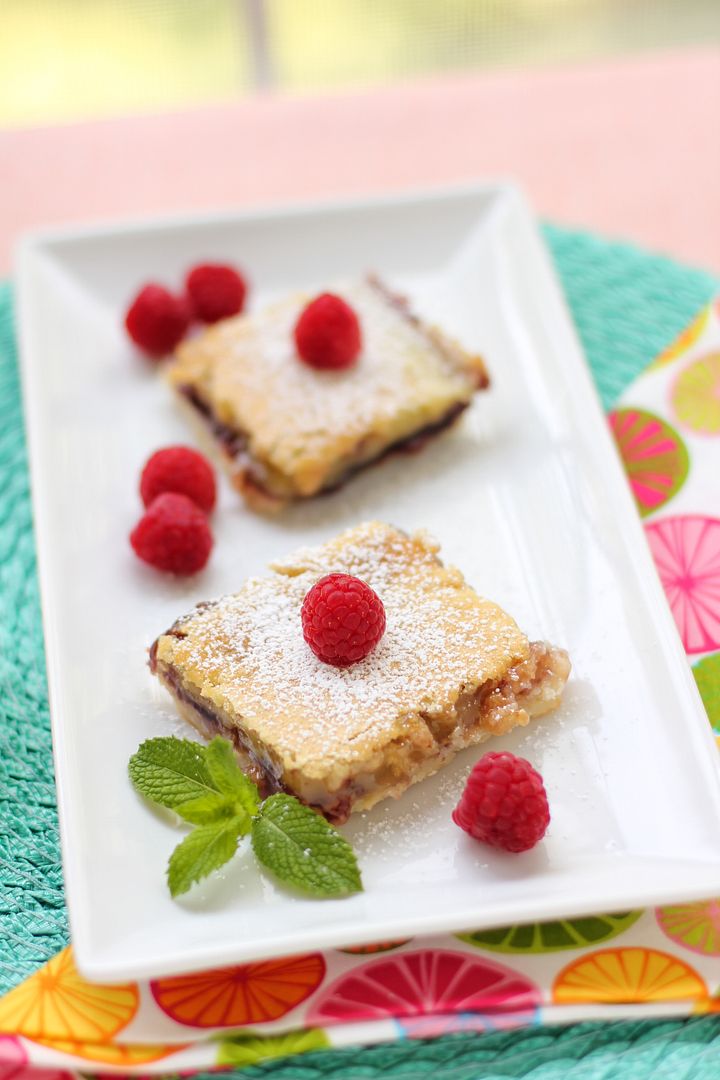
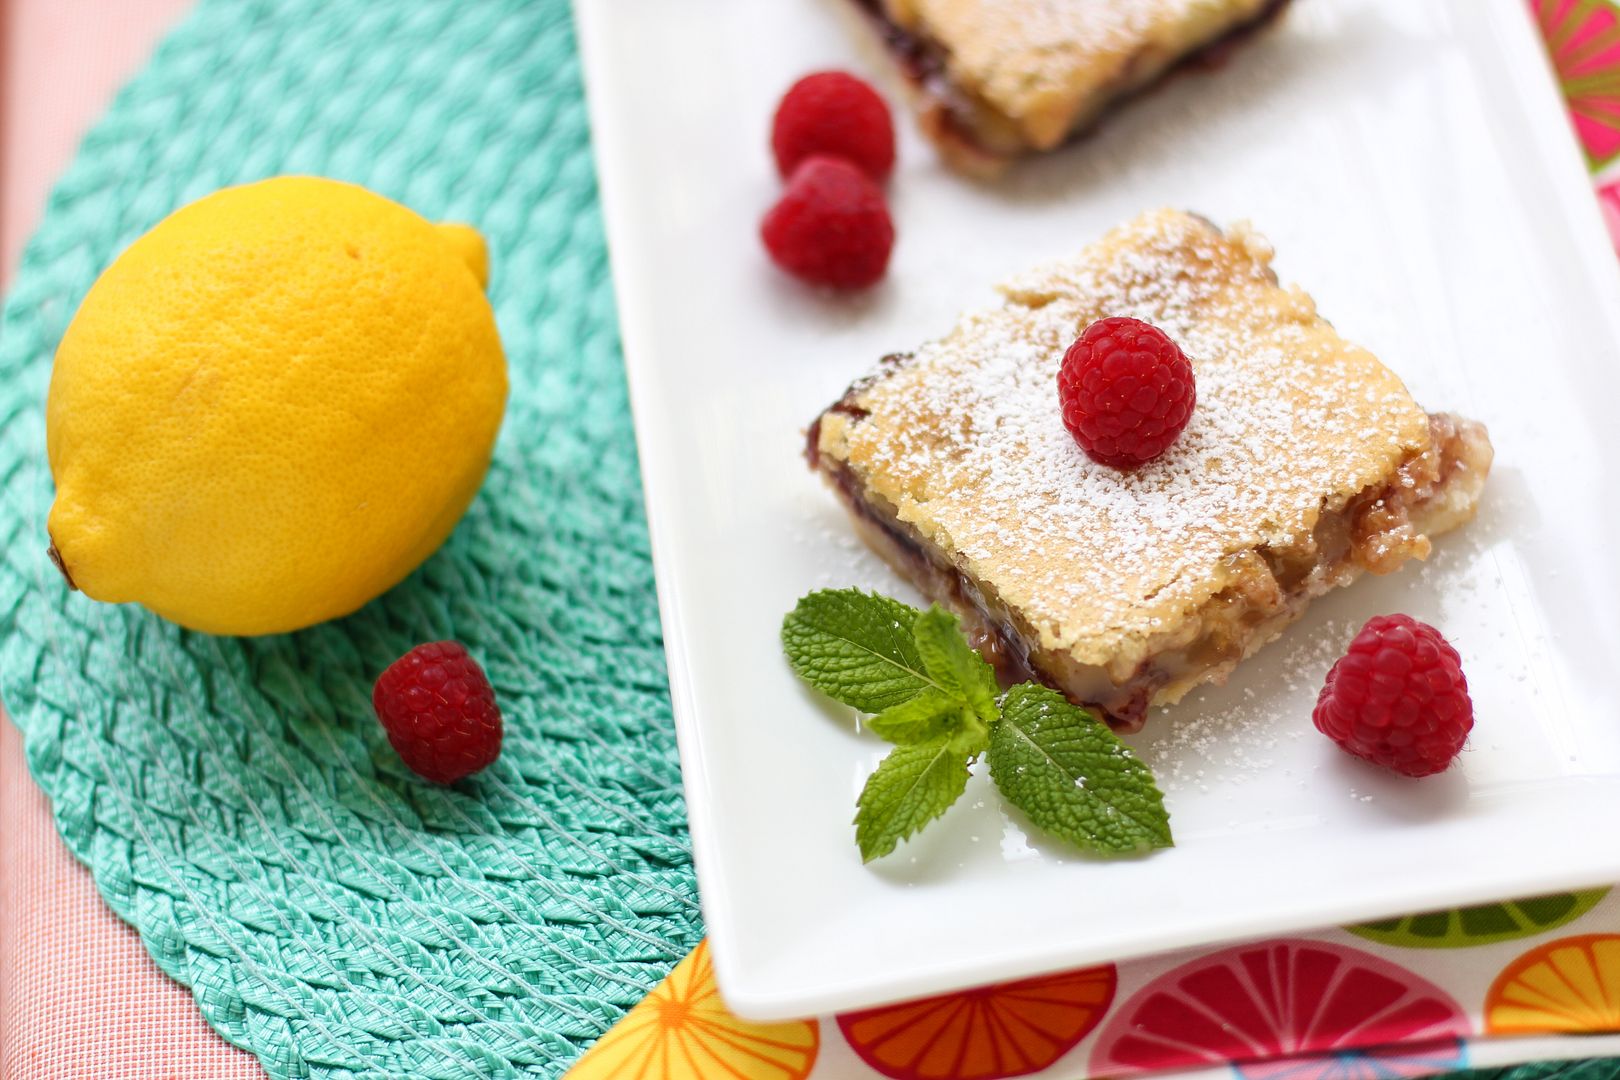
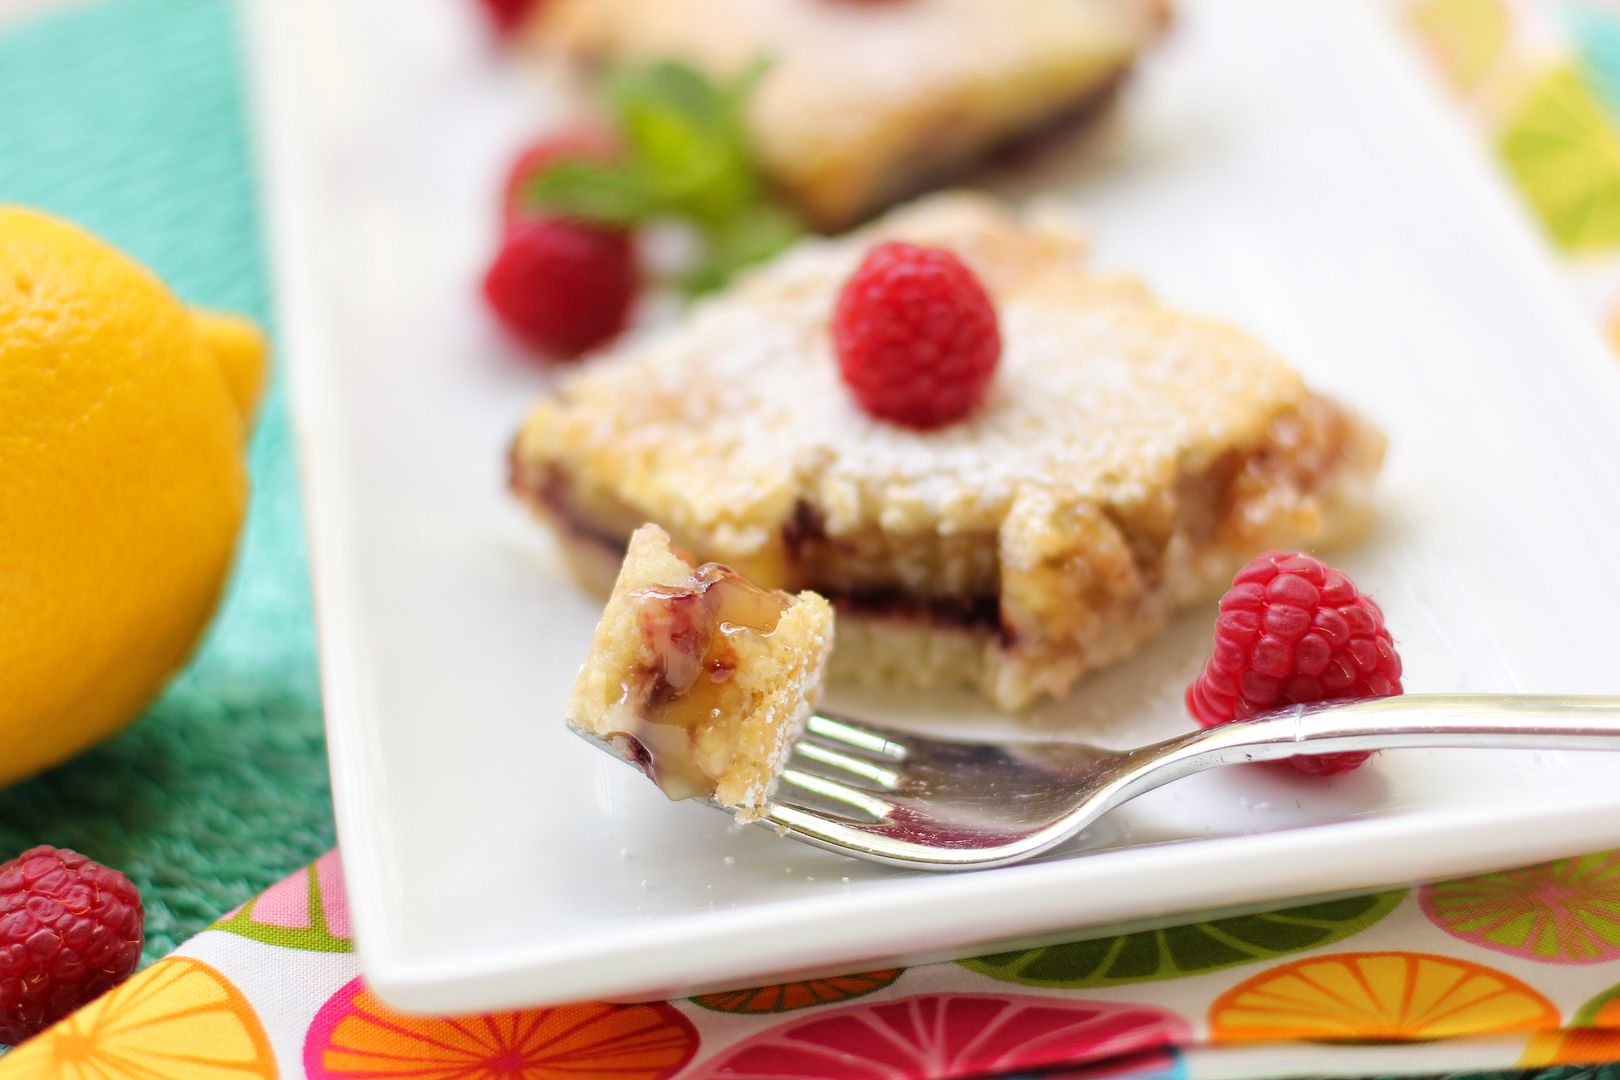
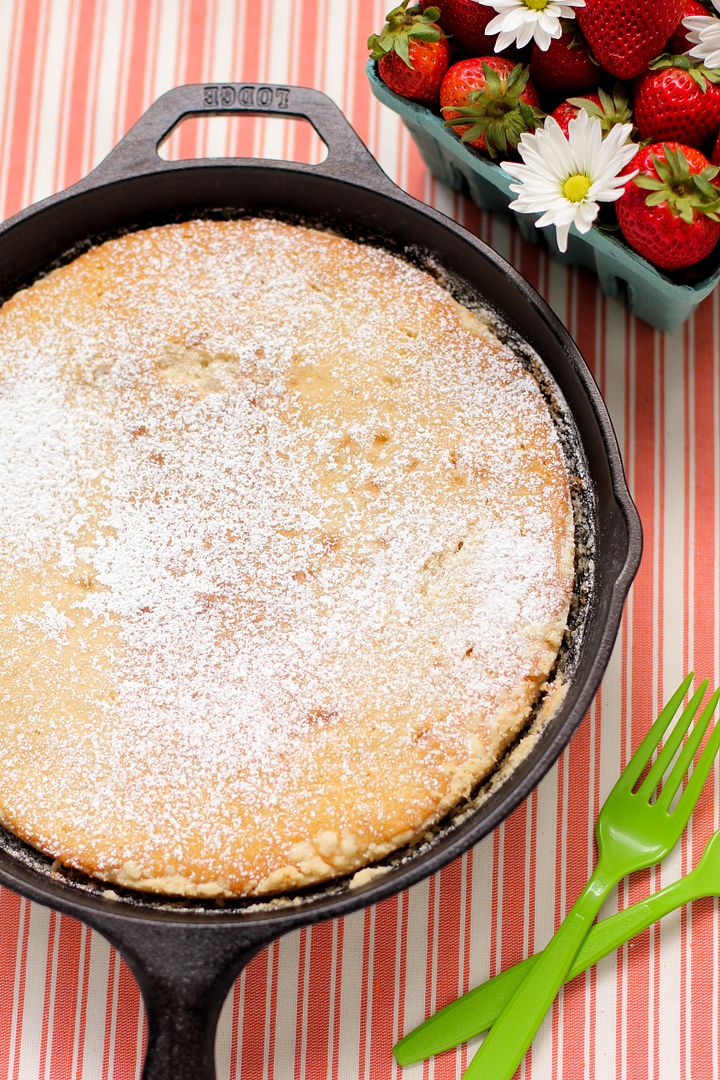
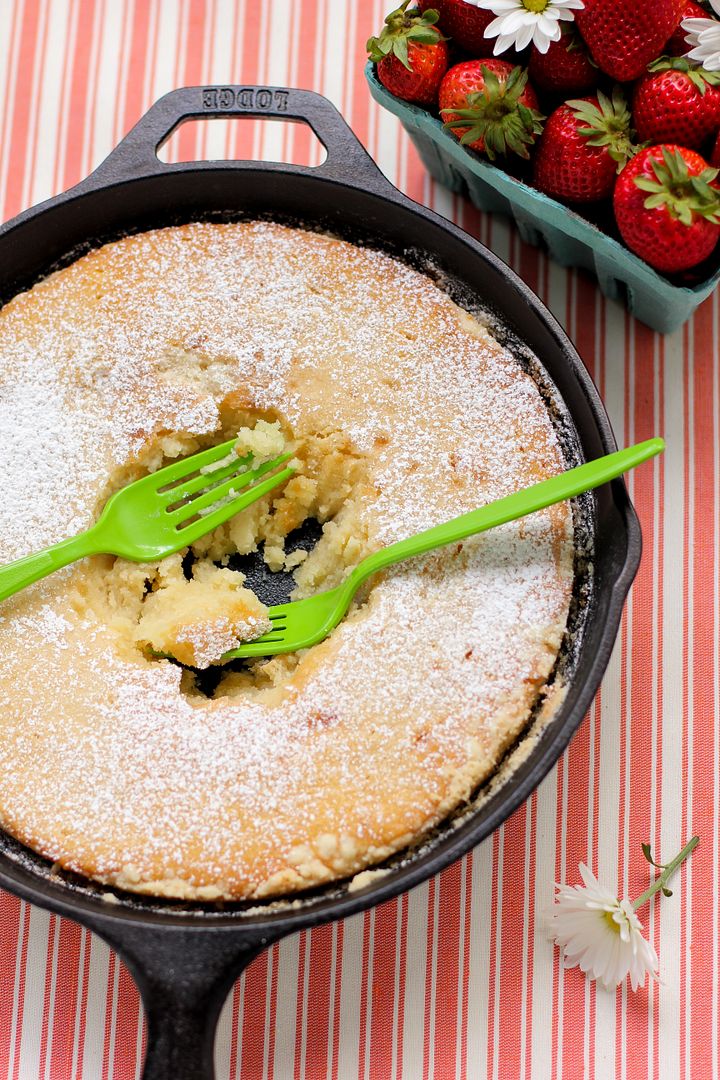
If you’re in need of even more fun after that humiliating tale, don’t worry. I have another distraction for you: Lemon Raspberry Squares. Think of your typical gorgeous, sweet-tart lemon squares on a buttery shortbread crust. Now mentally slather a layer of raspberry jam right down the middle. Now eat about 50 of them.

See? All better.

What’s your favorite way to get your mind off of troubles?

One year ago: Soft Sugar Cookies
Two years ago: Secret Garden Craft: Simple Luncheon Napkins

Lemon Raspberry Squares


Recipe by: Slightly adapted from Heather Christo Cooks
Yield: 12-15 bars

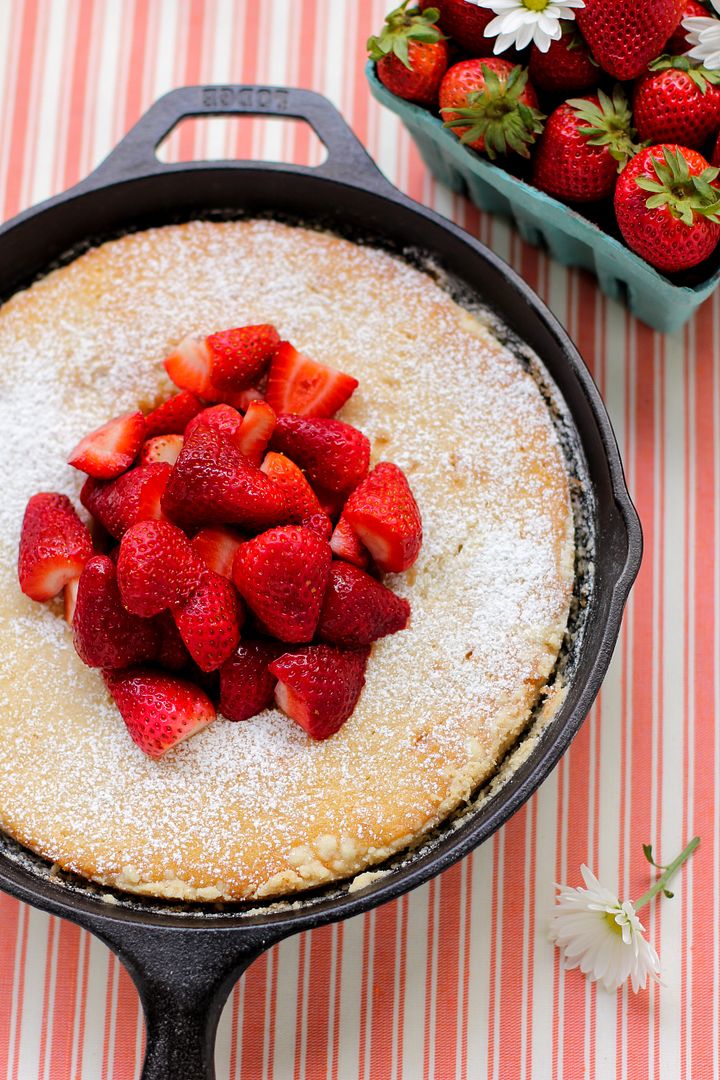
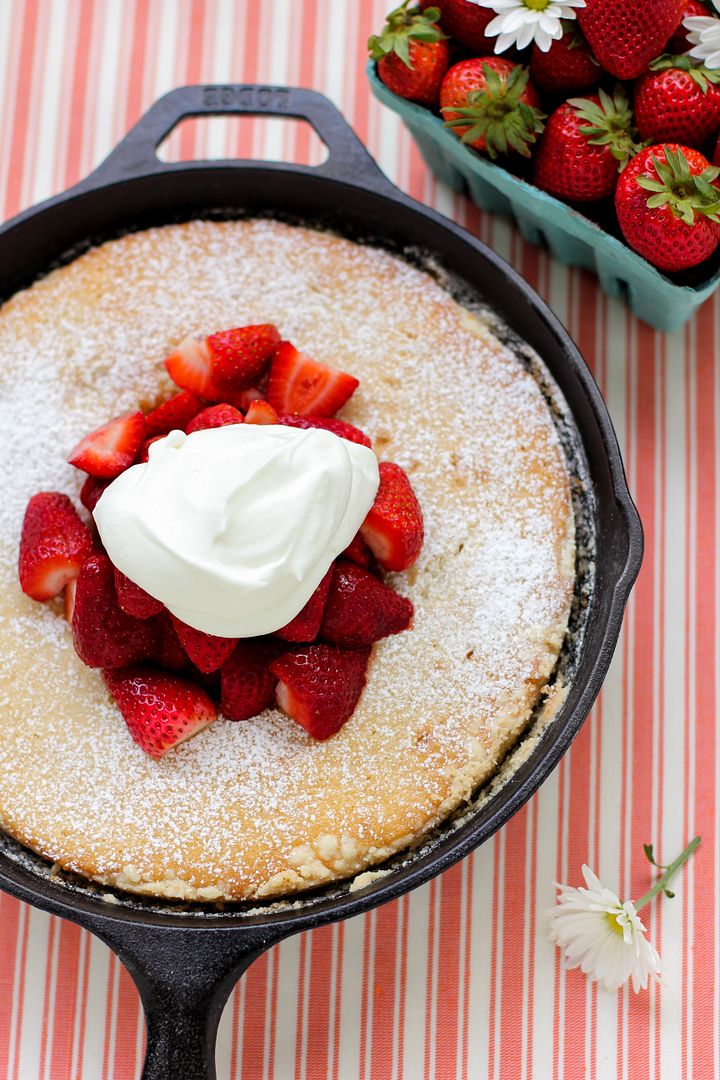
This is a dessert for folks who have a sweet-tooth! They’re sweet, buttery, tart, and downright delicious. They taste like sunshine.

Ingredients:
2 cups all-purpose flour
1 cup powdered sugar
1 cup cold butter, cut into small pieces
1/2 teaspoon salt
4 eggs
2 cups white sugar
1/3 cup flour
1/2 cup fresh lemon juice
raspberry jam (I think I used about a cup — just eyeball enough for a thin layer), room temperature

Directions:
Note: You want your jam at room temperature here because in regular lemon squares, the lemon mixture is poured onto a hot crust. If you pour it onto cold jam instead, it takes longer for the middle to cook (don’t ask me how I know this.) I think having the jam at room temperature will help the whole dish cook more evenly.

Preheat the oven to 350 degrees F and spray a 9 x 13-inch baking dish with cooking spray. You could also place parchment paper in the dish to form a sling if you’d rather — this will make the bars easier to remove.

Pulse the flour, powdered sugar, and salt together in a food processor to combine. Add the cold butter chunks and pulse about 10-12 times until you have the texture of coarse sand (you can also use a pastry cutter or two knives to accomplish this if you don’t have a food processor). Pour this mixture into the prepared dish and use a spatula or the bottom of a glass to press it down into an even layer. Bake it for about 15 minutes or until it’s lightly browned.

While it’s baking, stick a spoon in your jam so it’s ready to spread on quickly. In a medium bowl, whisk the eggs until fluffy before adding sugar while whisking constantly (if you stop whisking here, the sugar will “cook” the eggs, and you don’t want that!) Once the sugar and eggs are combined, add in the flour and the lemon juice, continuing to whisk. Spread the jam in a thin layer over the entire hot crust. Then pour the lemon mixture over the jam.

Stick the entire dish back into the oven and bake 15-25 minutes (this is such a wide range because the temperature of my jam might’ve made my baking time longer — it took my bars around 25 minutes to get pretty set.) Start checking at 15 minutes by giving the pan a little jiggle. The lemon mixture should be about set (slight jiggle only) and a light golden brown. If it starts to get too dark before it’s set, cover the pan with foil as it finishes baking.

When the bars are done, remove the dish to a cooling rack to cool completely before cutting (if you don’t cool them completely, I’m betting they’ll be runny, so be patient!) Use a sharp knife to cut the bars and serve them. You can sprinkle powdered sugar from a sifter over the top for decoration, but the bars are very sweet already, so go easy!

If you liked this post, please:
Subscribe to Willow Bird Baking
Follow Willow Bird Baking on Twitter
Follow Willow Bird Baking on Facebook

Thyme Orange Cranberry Shortbread Cookies

“But I also wondered if he wasn’t right, that we were designed to live through something rather than to attain something, and the thing we were meant to live through was designed to change us.”
A Million Miles in a Thousand Years, Donald Miller

I don’t know about you, but I generally feel like I’m right about things. I don’t mean that I’m always right, and I’m not a know-it-all; I’ve just spent a lot of time forming my beliefs and I’m a thoughtful person, so I usually don’t feel like my worldview is too far off base.

I think most people probably feel this way. There aren’t very many of us, I’ll wager, who walk through life feeling totally insecure in our ideas and worldview. We believe what we believe for reasons — sometimes good reasons, sometimes misguided ones — and we walk through life feeling pretty certain. Open to change, we hope, and open to learning, but pretty settled.

Every now and then, though, you hit a wall that sends your worldview reeling. Firm ideas you had about your life’s purpose, how to weather different circumstances, and how the world works suddenly seem a lot more fluid. In my own life, I feel like I’ve recently run into the Great Wall of China, not to be melodramatic or anything, and I’m scrambling to find confirmation or revision of my worldview. I won’t bore you with the gory details, but I’d like to share some of my revelations with you over the coming weeks.

The first one is that life is not about checking off boxes. Donald Miller, a writer who had to “edit” his life into a screenplay and discusses the process in his book, A Million Miles in a Thousand Years, realized that inasmuch as life is a story, there are certain elements that are necessary to make it a meaningful one. One of those elements is character transformation.

We sometimes imagine that attaining our goals in life is what makes us successful: finding a husband, having kids, finding a house, finding a job. Have you ever wondered why we never seem to arrive? If we never seem to be finished with achieving, maybe it’s because the achievement itself isn’t the goal, but how we change during the pursuit.

Everyone always says, “the journey is the destination,” but then when we’re faced with health crises, relationship problems, job frustrations, and uncertainty about our future, that ideology falters. We want solutions. We want to be on the other side. It’s hard to rest in the storm, knowing God is using every strong wind and bolt of lightning to transform us in the exact way we need to be transformed. That idea can even evoke hostility in people in the midst of their greatest trials — the idea that God would, even while holding us and loving us in the ultimate sacrificial way, allow us to endure seemingly insurmountable trials is difficult to swallow.

Moreso even than others, I can have trouble resting in a trial. I don’t fault God for letting me go through the hard times, but I do inadvertently try to make myself my own savior, scrambling to fix it fix it fix it! My anxiety gets the better of me, and I flail through all different “solutions,” some of which do more harm than good. Lately I’ve been practicing, instead, letting the trouble wash through me like waves. Maybe they’re strong waves, and maybe they’ll move me. Maybe they’ll even knock me off my feet for a bit. But ultimately they’ll flow past and disappear against the shore.

If you’re in the middle of a trial, practice thinking of each new difficulty like a wave and let it come. Then let it go. And in the meantime, maybe make some cookies. Cookies never hurt.

One year ago: Straw-Raspberry Basil Fruit Leather
Two years ago: Homemade Buttery Croissants and Pains-au-Chocolats

Thyme Orange Cranberry Shortbread Cookies


Recipe by: Willow Bird Baking
Yield: two logs of about 15 cookies each

These are some amazing cookies. Buttery, delicate shortbread is already delicious, but the addition of orange zest, cranberries, and thyme make these shortbreads particularly special. They’re not too sweet, but a drizzle of white chocolate sweetens them up. They’d be perfect for tea, snacking, or a dessert. It’s also easy to bake a log of them and keep the second log in the freezer for unexpected company!

Ingredients:
2 cups all-purpose flour
1/4 teaspoon salt
2 1/2 teaspoons crushed dried thyme
3/8 cup powdered sugar
1 cup (2 sticks) butter, at room temperature
1 1/2 tablespoons finely grated orange zest (about the zest from one orange)
1/4 cup freshly squeezed orange juice
1/2 cup dried cranberries, finely chopped
about 1/2 cup white chocolate chips

Directions:
In a large bowl, whisk together the flour, salt, and dried thyme. In a separate large bowl, cream together the butter, orange zest, and powdered sugar 2-3 minutes or until pale, light, and fluffy. Mix in the orange juice. Beat in the flour mixture and then stir in the cranberries by hand to be sure everything is combined.

Use a sheet of wax paper to roll the dough into a 1 1/2-inch wide log (if you’re having trouble, chill the dough for a bit in the fridge before rolling it). Wrap plastic wrap or foil around the logs and freeze them for 20 minutes until firm (you can also double-wrap them and leave them frozen for up to 3 weeks at this point. When you’re ready to bake, just use a serrated knife to cut the cookies and bake as usual. It make take a few minutes longer since they’ll be baking from frozen, but just keep an eye on them.) While they cookies are freezing, preheat the oven to 350 degrees F and place the rack in the center. Prepare a baking sheet with parchment paper or a silicone baking mat.

Use a serrated knife to slice each log into 1/4-inch slices and place these about 1 inch apart on the prepared baking sheet. Bake until golden, about 8-10 minutes, rotating once halfway through baking. Let the cookies cool for a couple of minutes on the pan before transferring them to a cooling rack to cool completely. In the meantime, melt white chocolate according to package instructions (usually half-power, in small increments, stirring often) and spoon it into a plastic zip-top bag with a tiny corner cut off. Set cookies on wax or parchment paper and squeeze the melted chocolate from the zip-top bag over them in a zig zag design. Let them dry. Store them in an airtight container separated by leaves of parchment or wax paper for up to a week.

If you liked this post, please:
Subscribe to Willow Bird Baking
Follow Willow Bird Baking on Twitter
Follow Willow Bird Baking on Facebook

Gooey Butter Strawberry Shortcake

At one of my first jobs, I’d get so bored that getting up to refill my water was the highlight of my day. It was even better when the ice machine on our floor was broken, because then I got to go on a little mid-afternoon odyssey, if you will. The quest for ice was full of exciting choices: should I try the break room upstairs or head down to the cafeteria? Should I take the stairs or elevator?

Yep, it was straight out of Indiana Jones.

I finally started doing this thing where around 1 o’clock, I’d think to myself: “It’s 1 o’clock! Which is almost 2 o’clock! And that’s almost 3 o’clock. And 3 o’clock is basically 4 o’clock. So essentially, it’s time to go home.” My absurd time logic got me through the day. That and paperclip art projects.

Thankfully, I love my current job and don’t have a spare moment to count down the hours of the day. I do occasionally find myself counting down with the students towards summer, though, in spite of myself. And right now I’m thinking, “It’s finally May! Which means it’s almost the end of May! Which means June is basically here! Which means it’s essentially summer!”

Really, though, I need summer told hold off a bit while I finalize my summer to-do list. This summer I have a lot of very important plans. For instance:

1. Find an entire day to set aside for painting my nails so that, for once in my life, I can let them fully dry instead of immediately smearing them all over everything.

2. Convince Byrd that going for a walk is not some unique form of doggie torture. What kind of a dog doesn’t like walks? (I ask her all the time, and she has yet to provide a reasonable response.)

3. Drink lots of berry or lemon water, preferably while wearing a ridiculous floppy hat.

4. Go to the gym. And maybe even exercise there instead of getting nervous and awkward and deciding to run back out the door before anyone notices me. I bought a Groupon, so I have to do it now, right? Groupons are like little mini contracts I make with myself: “Here, self, you have to go to the gym for a month,” or the less productive, “Here, self, you have to go buy $30 worth of Mexican fare at this taqueria.”

5. Continue the chronological reading of the Bible that I’m doing with my church.

6. Bake all the things, photograph all the things, post all the things! Blog blog blog.

7. Drive to the beach with Mike with the windows rolled down and the 80s pop music turned up. Note to self: This will probably require convincing Mike that he likes the beach, driving with the windows down, and 80s pop music.

8. Cart my laptop (!!) all over creation, and do fancy things on the internet anywhere I can find some wi-fi and a fountain soda. Fancy things include (but are not limited to) posting witty Facebook statuses, pinning ridiculous baked goods, and checking my email obsessively.

9. Lead a Cupcake Capers summer camp for middle schoolers that will end in a cupcake picnic every single day (if you know of a middle schooler in Charlotte who might want to join in, get in touch!)

10. Eat berries. Eat cake. Eat berries with cake!

I’ve always loved strawberry shortcake, but this Gooey Butter Strawberry Shortcake is a new take on the summery dessert. Gooey Butter Cake itself is a super-moist, almost custard-like buttery cake that hails from St. Louis. By most accounts, it began life as a happy culinary accident, but it’s now a well-beloved local quirk in the Lou.

My fear is that you’re going to immediately deem Gooey Butter Strawberry Shortcake too sweet for your taste, so let me address that next: this dessert has the perfect balance of sweet cake, tangy berries, and freshly whipped cream that, without sugar added, lends a rich background bitterness. In short, it’s quite a savvy combination and not cloying in the least.

Indeed, it’s one of those desserts where you take the first bite and just have to give yourself a hearty, full-mouthed, back-patting, “Uh-huh!”

It’s rare to find a treat that manages to be so decadent and summery at the same time. Also — a real plus for busy summer days — it’s easy to throw together and (you know me) eat straight from the skillet.

What are your summer plans?

One year ago: Pasta Carbonara
Two years ago: Mini Doughnuts for your coffee cup: a creative use for yeast dough scraps!

Gooey Butter Strawberry Shortcake


Recipe by: Willow Bird Baking, adapted from one provided to St. Louis Today by Fred and Audrey Heimburger of Heimburger Bakery.
Yield: would easily serve 4-6 people

I don’t know if I really need to sell this to you, but just in case: this is gooey butter cake + strawberry shortcake, so basically, it’s perfect. The tart strawberries and soft whipping cream are unsweetened, and the gooey butter cake itself has a surprisingly balanced sweetness (I expected it to lean more towards cloying), so altogether, this dish has the perfect sweetness level. It’s a beautiful, simple harbinger of summer.

Crust Ingredients:
1 cup cake flour
3 tablespoons granulated sugar
1/3 cup butter, softened

Filling Ingredients:
1 1/4 cups granulated sugar
3/4 cup (1 1/2 sticks) butter, softened
1 egg
1 cup all-purpose flour
2/3 cup evaporated milk
1/4 cup light corn syrup
1 teaspoon vanilla
icing sugar

Toppings Ingredients:
1 pound strawberries, quartered
2 cups heavy whipping cream

Directions:
NOTE: If you don’t have a skillet, I believe you can bake this in a greased 9-inch square baking dish (I’d use a glass one if you have it, and check it early and often. Remove when there’s some jiggle left.) Let us know how it goes if you try it this way for all the other skilletless people!

Make the crust: Preheat oven to 350 degrees. Whisk together cake flour and sugar in a medium bowl. Cut in the butter with a pastry cutter or two knives until the mixture resembles fine crumbs and starts to cling together. Press the mixture into the bottom (this step is a lot harder than it sounds, but be patient and use the back of a spoon to help spread/press the mixture down. I also stuck mine in the fridge for a bit to make the butter less sticky) and up the sides of a 10-inch cast iron skillet.

Make the filling: Cream together the butter and sugar until fluffy and pale yellow (about 2-3 minutes). Mix in the egg until just combined. Alternate adding the flour and evaporated milk, mixing after each addition. Mix in the corn syrup and vanilla. Pour the filling into the crust and sprinkle the top with icing sugar (I forgot to do this, and did it afterwards. Oops).

Bake and assemble the cake: Bake for 25 to 35 minutes or until cake is nearly set (mine was probably ready around 30). Some jiggle is fine — do not overcook! It’ll finish setting up as it cools. Let it cool in pan for 2 hours. In the meantime, beat heavy cream to stiff peaks. Pile heaps of fresh strawberries into the center of your cooled, set gooey butter cake, top with a mountain of freshly whipped cream, and serve.

P.S. This lovely background fabric is from a sweet local fabric shop in Cornelius, NC, called Cotton Ginny’s. If you’re in the area, you should stop in — there’s great stuff there and a sweet little canine greeter named Maggie.

If you liked this post, please:
Subscribe to Willow Bird Baking
Follow Willow Bird Baking on Twitter
Follow Willow Bird Baking on Facebook

Brownie-Bottom Coconut Chocolate Cream Cake

I was floored to see that Willow Bird Baking is a finalist for SAVEUR Magazine’s Best Baking & Desserts Blog. Thank you so much for making this happen. If you’d like to vote for Willow Bird Baking (there are only 3 days left), you can do so here. You all are truly wonderful.

I watched the side of the VHS tape disappear into the gaping maw of the VCR, waiting for the whirring confirmation that it was well-received before skipping back to the kitchen. I knew there was plenty of time during the previews to complete my next task, so my haste was more due to my excitement than any real need to hurry.

It was time to prepare a culinary masterpiece. I began opening cupboards and surveying their contents with gusto.

This was my absolute favorite time of day. Or, really, night. Everyone in the house was asleep except the lone insomniac (that would be me, and I didn’t mind a bit). I had probably spent “bedtime” reading delicious horror stories or maybe one of my favorite Lucy Maud Montgomery books. Now, wide awake, I was ready for midnight movies and munchies.

My 10-year-old version of mise en place began collecting on the counter: a jar of salsa, some cheddar cheese, and, for lack of tortilla chips, some sliced bread. I deftly stirred the salsa and cheese together like a chef, microwaving it for a few seconds at a time until I had a passable bowl of queso. After pouring a huge glass of Coke (full sugar! the memory makes me want to brush my teeth!), I set up a chair as my personal table, sat down on the floor, and tuned in to the movie.

(I should mention, since my mother is reading, that I was not sitting in the living room. I’d have been an absolute fool to step foot on that pristine beige carpet with a morsel of food. It was my mom’s anniversary gift from my dad and she kept that rug spotless for over a decade until they put in hard floors throughout the house. So, just so we’re clear, I was watching the living room television from the kitchen doorway.)

I picked the movies I watched based on how many food scenes they included. The Little Princess was a great choice because of the Indian feast scene in the attic. The Secret Garden had some nice garden picnic scenes. My favorite midnight movie, though, was Bedknobs & Broomsticks, which included a scene with a cat eating gorgeous sausages. He smacked and gnawed on each plump link with such satisfaction — I loved to eat along with that one!

No matter how much I’d eaten, whenever a food scene came on, I had to make sure I had something to munch on. I sometimes paused the movie to make another bowl of faux queso or to scavenge through the pantry for a sweet dessert.

I’ve grown up in a lot of ways, but I still love to eat a meal while watching food scenes from a movie or cooking show. I’m also still an incurable night owl, though I have to be more conscientious with my midnight snacks nowadays. And of course, I still love to concoct absurd things in the kitchen. This Brownie-Bottom Coconut Chocolate Cream Cake was my crazy creation for Mike’s birthday party last weekend.

This cake would make Dr. Frankenstein proud. It’s a layer of good stuff on top of a layer of better stuff on top of a layer of insane stuff on top of brownies. Basically. Or, to be more specific: there’s some heavenly chocolate mousse and some decadent coconut cream involved. The best part is that even though it looks intense, my 10-year-old self could’ve whipped this thing up with ease. You can even use a brownie mix for the base if you’re short on time.

But actually, the real best part is the taste. As if the ingredient list didn’t clue you in, this thing is delicious.

How about you? Are you the early bird or the night owl?

5 from 1 reviews
Brownie-Bottom Coconut Chocolate Cream Cake
 
Prep time
Cook time
Total time
 
This “cake” actually doesn’t include a single bit of cake. It does include brownies, coconut cream, chocolate mousse, whipped cream, chocolate bits, and toasted coconut. It’s one of the many desserts on Willow Bird Baking born out of the “more is more!” mentality. This cake sounds complicated, but is remarkably easy! If you can bake a pan of brownies and push some buttons on your microwave, you can make this baby. It’s even easy to divide up the work, since many of the steps can be done on separate days. You can make the brownie and coconut layer one day, make the chocolate mousse layer on day two, and top and serve the cake on day three. Enjoy!
Author:
Serves: 10-12
Ingredients
Brownie Layer Ingredients:
  • 1 recipe of your favorite brownies (baked in a 9-inch springform pan)
Coconut Cream Filling Ingredients:
  • 1 1/2 cup half-and-half
  • 1 1/2 cup coconut milk
  • 2 eggs
  • 3/4 cup white sugar
  • 1/4 cup plus 4 teaspoons cornstarch
  • 1/4 teaspoon salt
  • 3/4 cup flaked coconut
  • 1/4 teaspoon coconut extract
  • 1/4 teaspoon vanilla extract
  • 2 tablespoons bittersweet chocolate chips (I use Ghirardelli 60% cacao)
Chocolate Mousse Layer Ingredients:
  • 2 ounces semisweet chocolate chips
  • 2 ounces bittersweet chocolate chips (I use Ghirardelli 60% cacao)
  • 1/3 teaspoon vanilla extract
  • 1 cup chilled whipping cream
  • 2 tablespoons powdered sugar
  • 1/2 teaspoon gelatin
  • 1 1/2 teaspoon cold water
Whipped Cream Topping Ingredients:
  • 3/4 cup chilled heavy whipping cream
  • 2 tablespoons powdered sugar
  • 3/8 teaspoon gelatin
  • 1 1/8 teaspoon cold water
  • toasted coconut
Instructions
  1. Make coconut cream filling: Combine the half-and-half, coconut milk, eggs, sugar, cornstarch, and salt in a medium microwave-safe bowl. Microwave it for 4-6 minutes, whisking well after each minute, until it’s thickened (I tried this microwave trick for the first time in this recipe, and it does work well if you’re short on time, though I think you might end up with a slightly better creamy texture if you whisk the mixture constantly in a saucepan over medium-low heat; not sure how long it’ll take on the stove with this volume, but just whisk until thickened.) Once the mixture is thickened, add coconut and vanilla extracts and the untoasted coconut and stir. Pour half of this filling over your brownie layer, sprinkle on the 2 tablespoons of bittersweet chips, and then pour the rest of the filling. Stick the whole thing in the fridge to chill until firm, about 2 to 4 hours.
  2. Make the chocolate mousse: Place the bittersweet and semisweet chips in a medium bowl. Bring 1/3 cup cream to boil in heavy small saucepan or in a microwave-safe dish in the microwave. Pour it over the chocolate and let it sit for 2 minutes before gently whisking it to a smooth ganache. Cool to room temperature, stirring occasionally.
  3. Place cold water in a small dish and sprinkle gelatin over it to soften for 10 minutes. Heat it for 30 seconds in the microwave and whisk it with a fork to dissolve the gelatin. In a chilled mixing bowl, beat 2/3 cups cold whipping cream and powdered sugar in to stiff peaks, adding gelatin mixture and vanilla extract halfway through. Fold the cream into the chocolate mixture and pour the mousse onto set coconut filling. Chill until set, about 6 hours or overnight.
  4. Make whipped cream topping: Place cold water in a small dish and sprinkle gelatin over it to soften for 10 minutes. Heat it for 30 seconds in the microwave and whisk it with a fork to dissolve the gelatin. In a chilled mixing bowl, whip the cream and powdered sugar to stiff peaks, adding gelatin mixture halfway through. Top the cake with the whipped cream and sprinkle with toasted coconut.


Pure Insanity: Pumpkin Oatmeal Cake Ice Cream Sundae

Just in case you’re not sure if you want to make the Pumpkin Oat Snack Cake with Broiled Coconut Icing, I thought I’d make up your mind for you.

Maybe I should be embarrassed to show you, but I’m not. This is how I served my cake:

That’s hot Pumpkin Oat Cake couched in heaps of vanilla bean ice cream with hot caramel sauce drizzled all around. It was probably one of the best things I’ve ever eaten.

I think you should go for it.

If you liked this post, please:
Subscribe to Willow Bird Baking
Follow Willow Bird Baking on Twitter
Follow Willow Bird Baking on Facebook
Give this post a thumbs up on StumbleUpon
Pin It


Shareother ways to share this post with friends

1 21 22 23 24 25 35