breakfast

Banana Nut Bread Waffles

I have a ton of different nicknames for my little poodle, Byrd, and I can’t really explain any of them. Who knows why we call her Byrdle-bee (or Byrdle-bee Tuna, Willow Byrd, Sweetie Wheatie, Little One, Wittle Byrd, Willa Byrd, Bog, or Mike’s favorite, Dyrb)? One day we’ll just be staring at her sweet little face and our tongues will get all twisty and coo-y and she’ll end up with another moniker. And I know I’m not alone in this: my parents’ toy poodle, Abbey, was at one point called Abbey-Jo Louisiana Lewinsky Lorax. Unfortunately, I’m not kidding.

At any rate, regardless of what you call her, Byrd has gotten into the spring spirit with a fresh new haircut. Isn’t she sweet?


Look at her big puppy grin after getting a new toy for being such a good girl at the groomer! Note to Charlotteans: her pretty ‘do is from The Dog Salon, which I love.

My turtle (who has not made any appearance changes for the spring weather besides shedding a few scutes) also has some fun nicknames. He’s Squirt, Squirtle-bee, Mommy’s Little Sandwich, Little Bear, and Squirtle the Myrtle Turtle. Mike tried for awhile to make Bowser stick, but it just never caught on. I don’t see him as the demon turtle type.

I could go on (and on) about how adorable my creatures have been lately, but I know y’all are here for some WAFFLES, and neither animal was allowed to partake. I promise they had their own entertaining breakfast (kibble and meat pellets sound good too, right?) Byrd did look on adoringly as we took every waffly bite, trying her best to make me feel like a bad mother for not indulging her. Somehow I managed to enjoy my breakfast regardless.

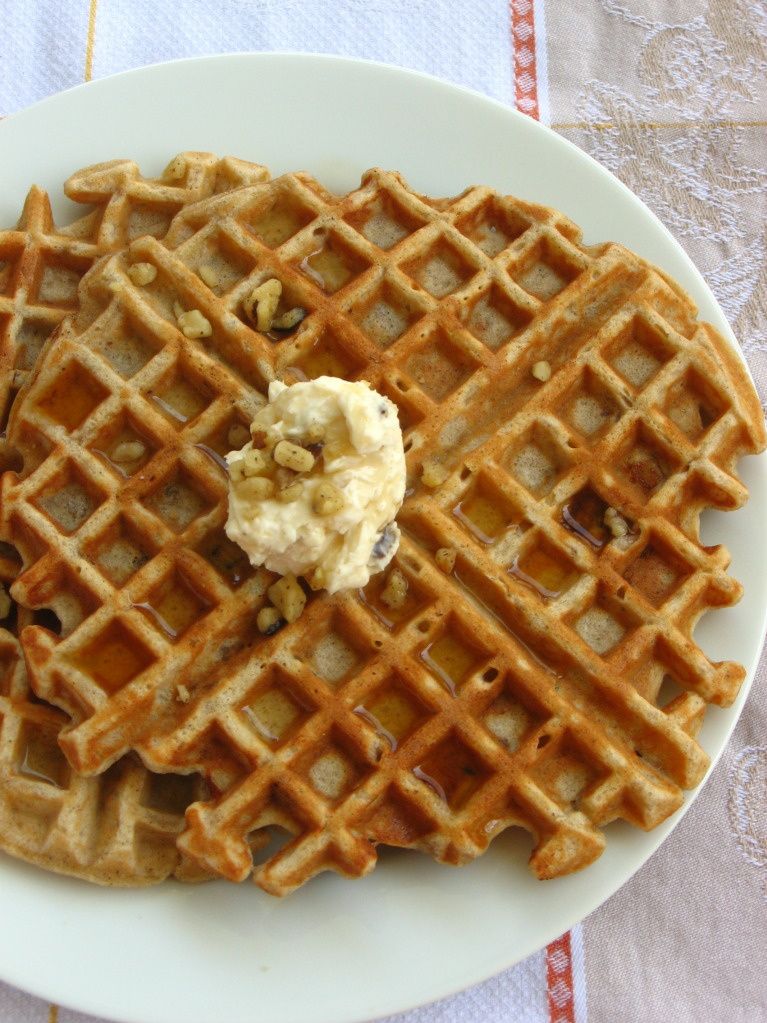
Okay, so with golden waffles staring you in the face, you could probably enjoy breakfast while someone repeatedly threw darts at your noggin.

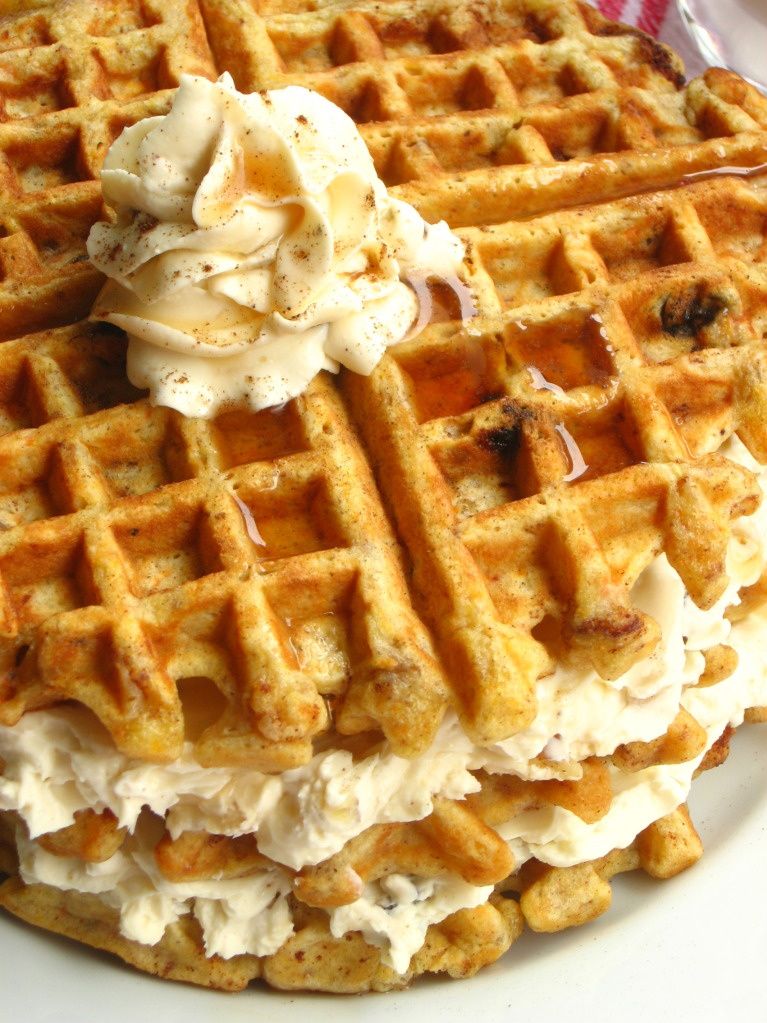
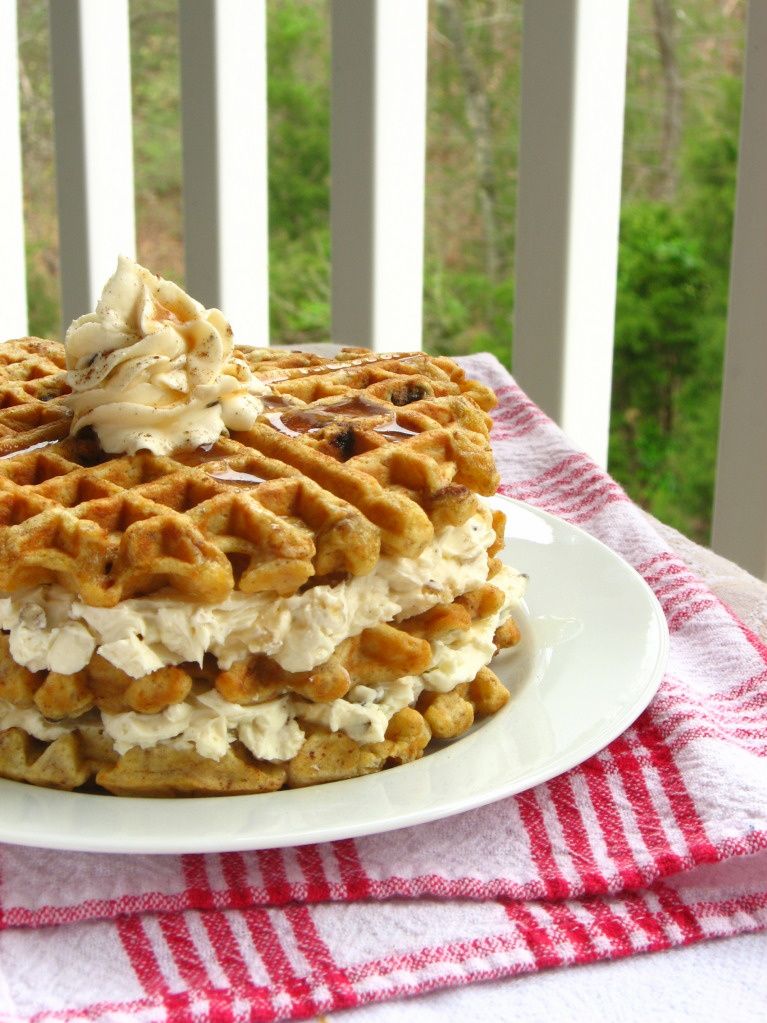
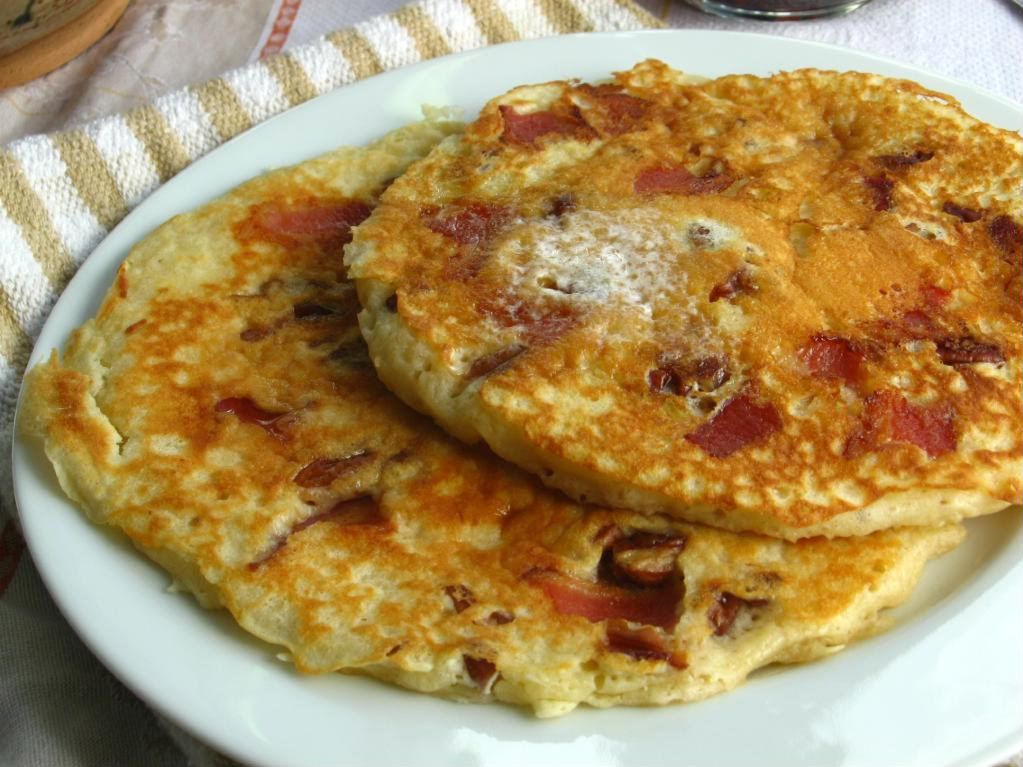
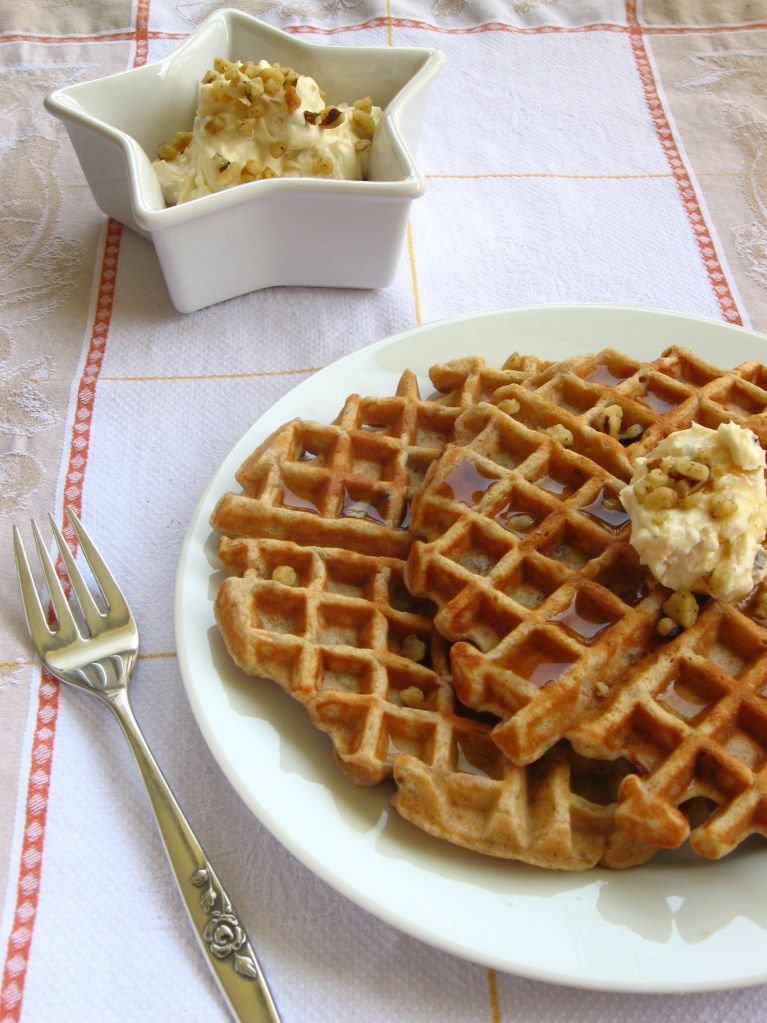
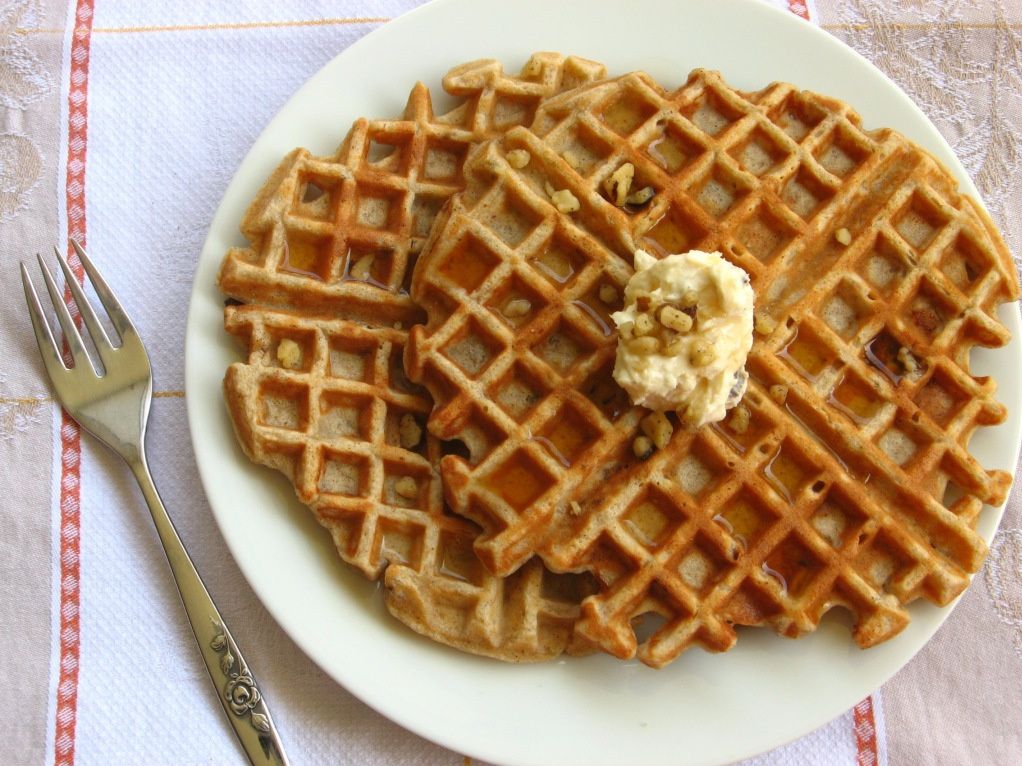
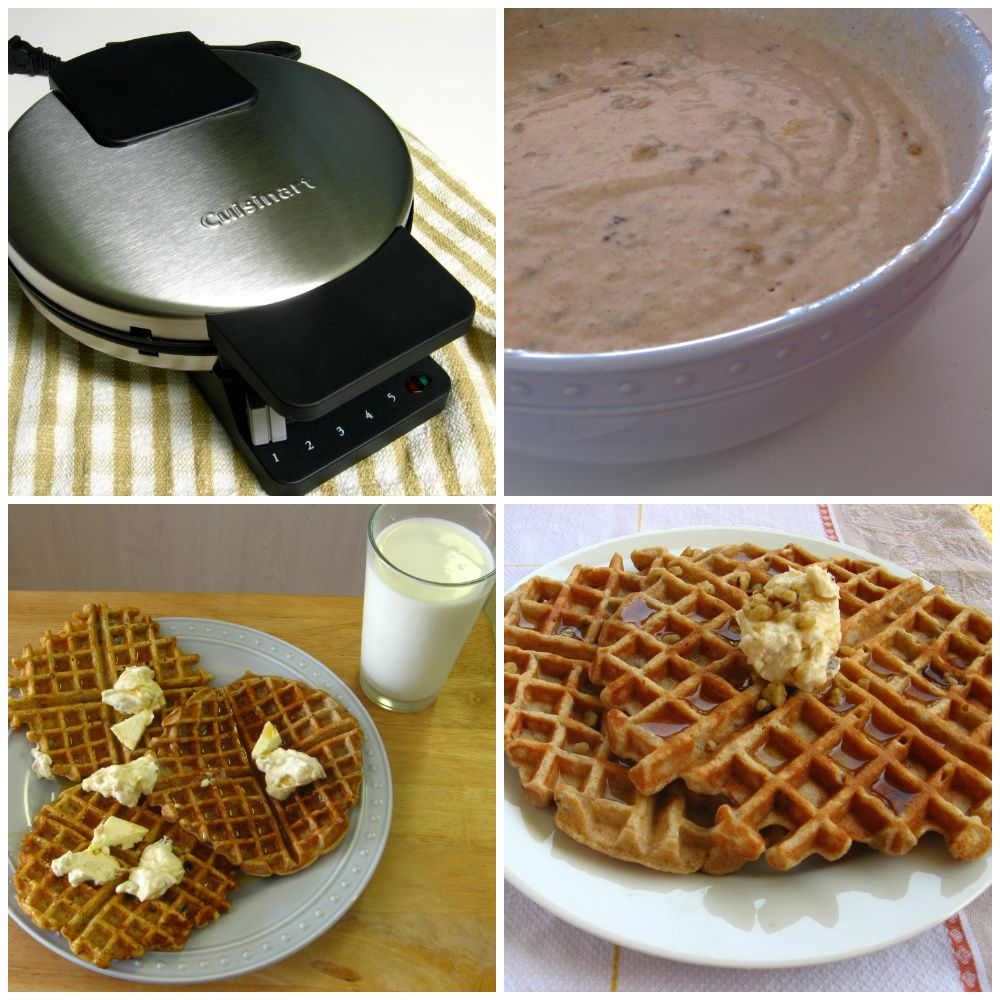
I know you guys are just as excited about fun waffles as I am, since my post on Carrot Cake Waffles was my most popular yet! I promised in that post that another waffle creation was coming up, so here you go (drumroll): Banana Nut Bread Waffles. And if you can believe it, we liked these even better than their carrot cake cousins! They were amazing!

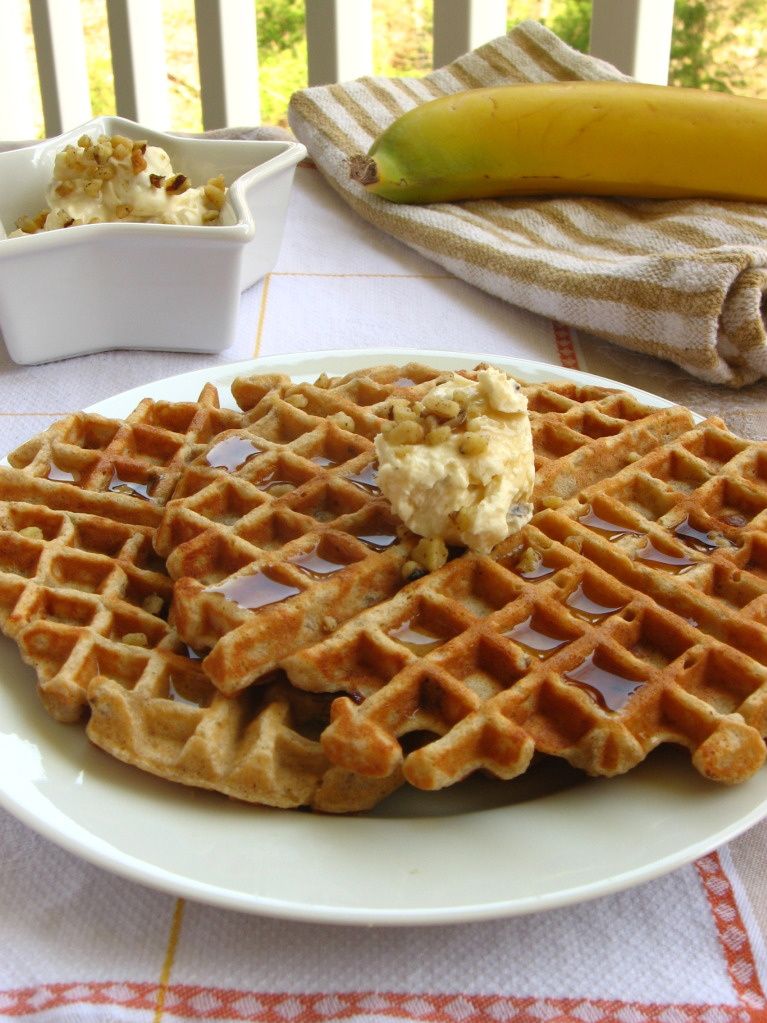
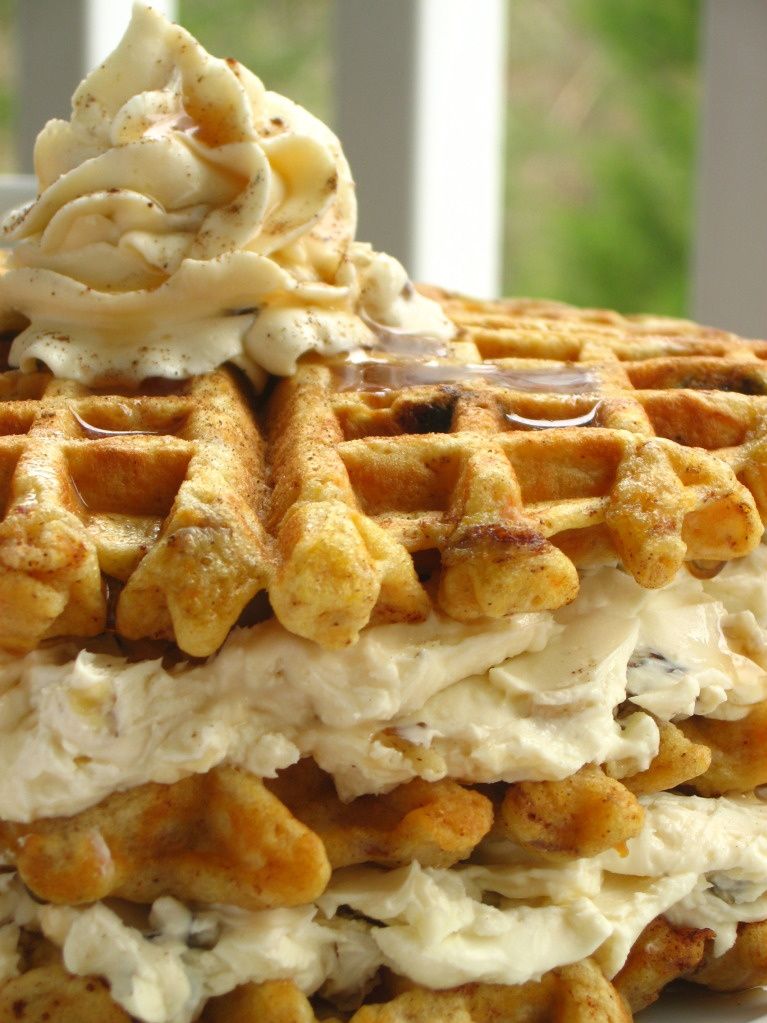
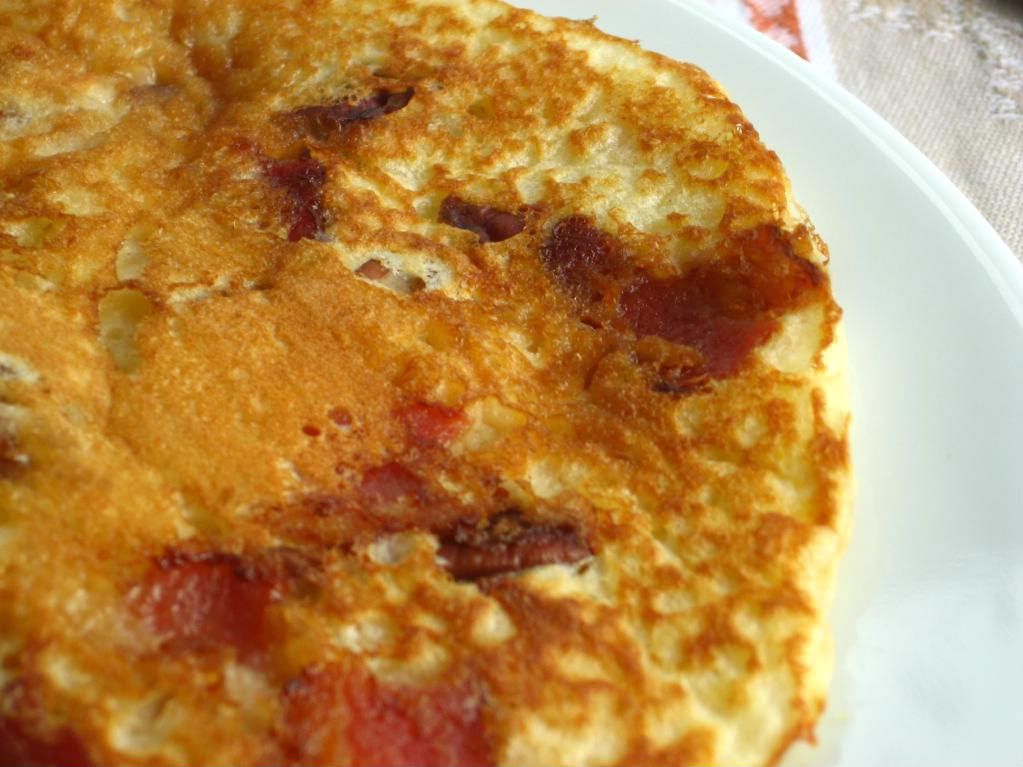
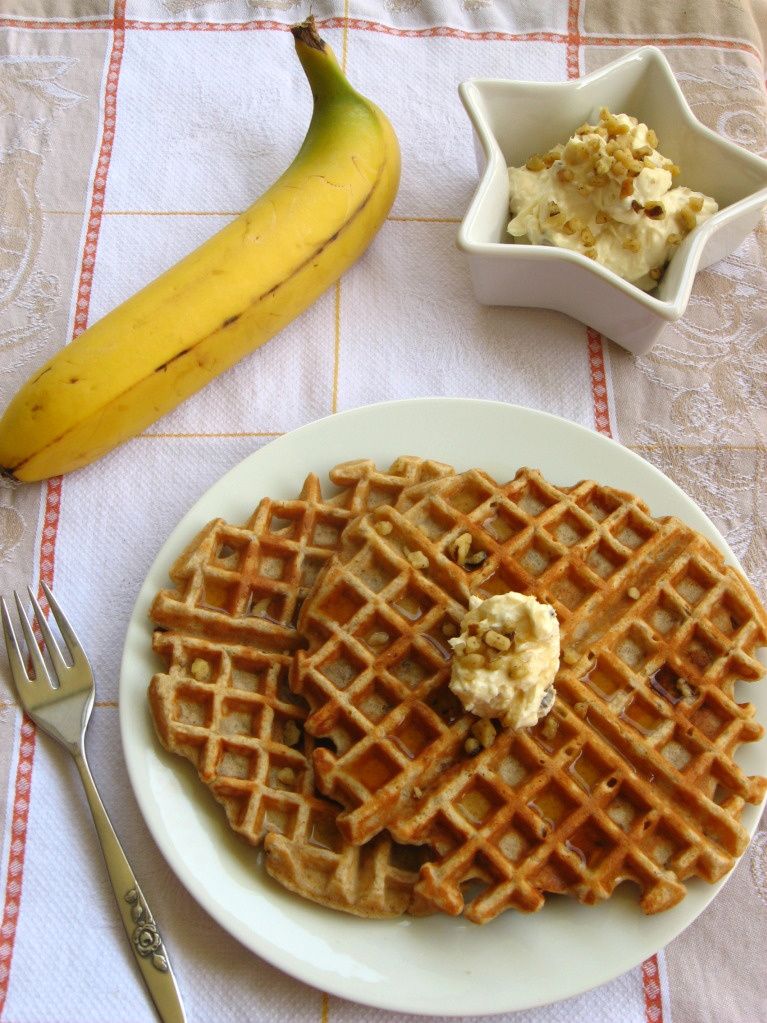
The basic premise was the same. I took two dishes I loved, banana nut bread and waffles, and smushed the recipes together (well, sort of). To a rich buttermilk waffle base, I added the goodies typically found in hearty banana nut bread: mashed ripe bananas, cinnamon, and chopped walnuts. These waffles were the perfect warm, comforting breakfast when served with . . . you guessed it . . .

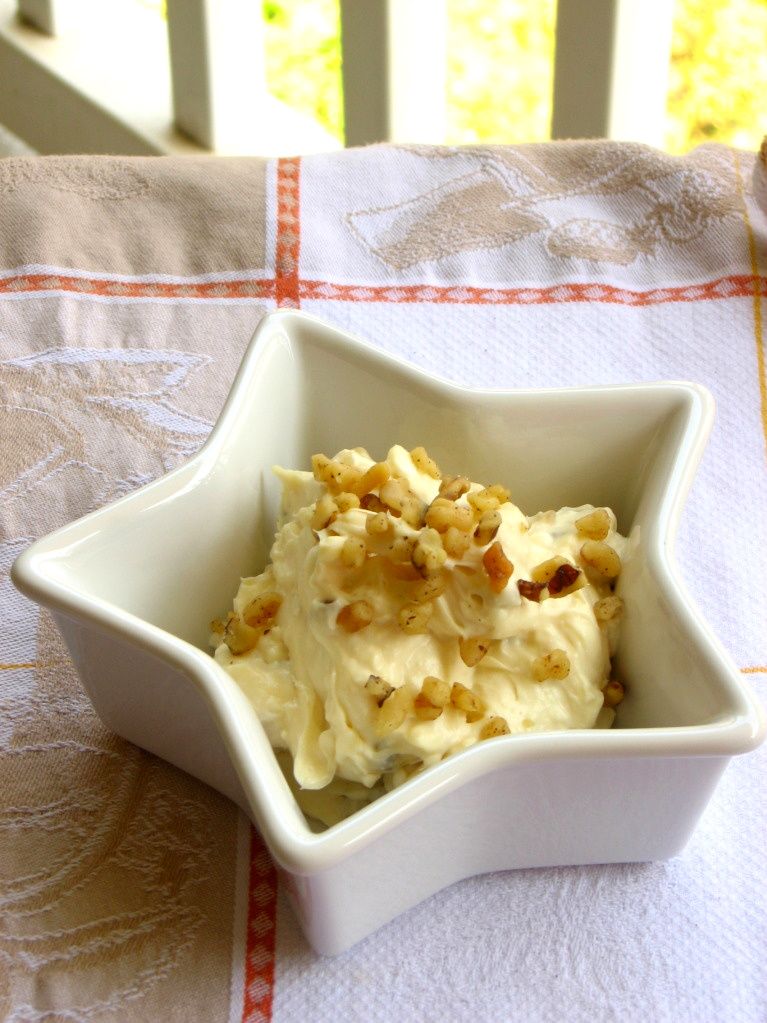
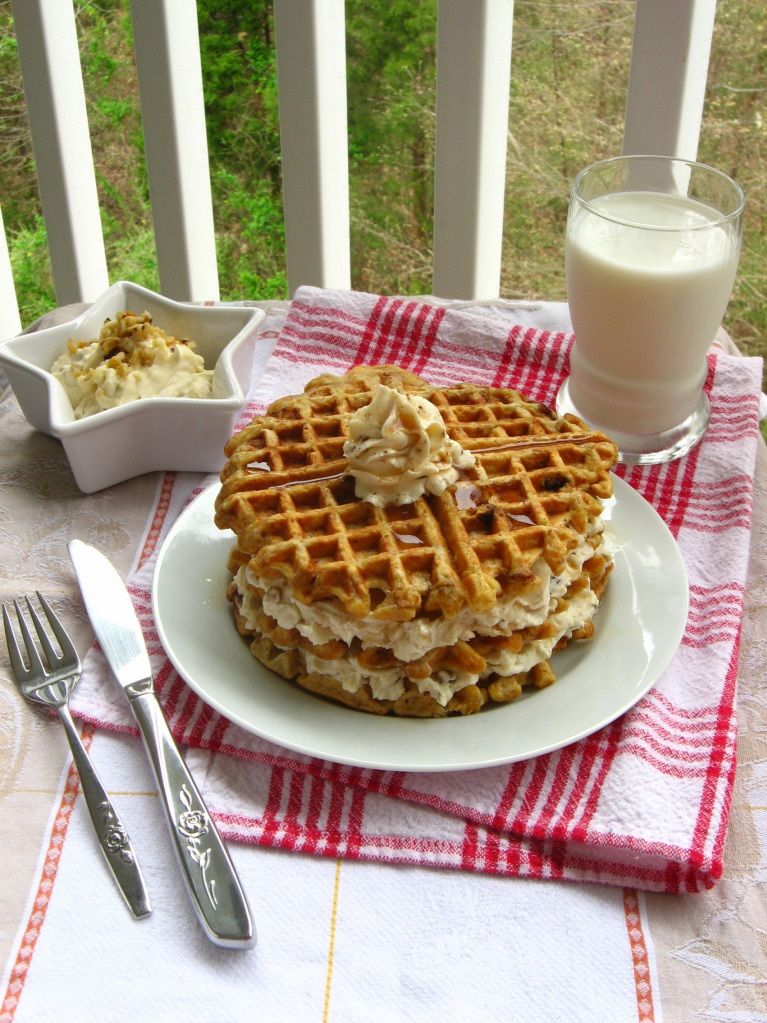
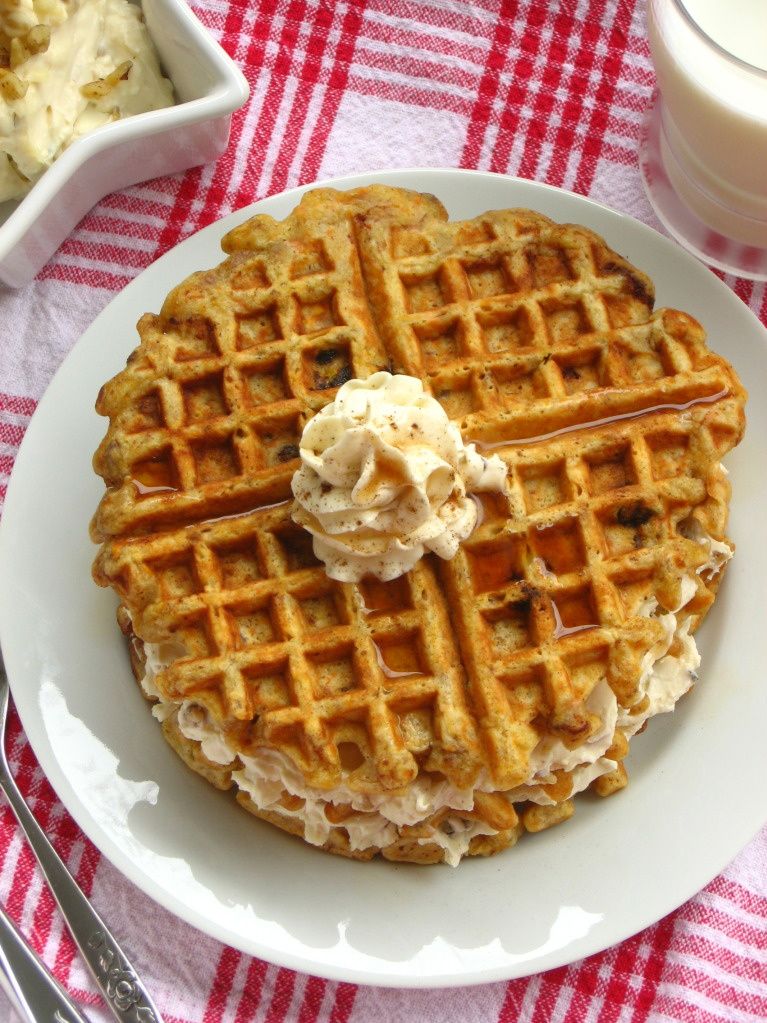
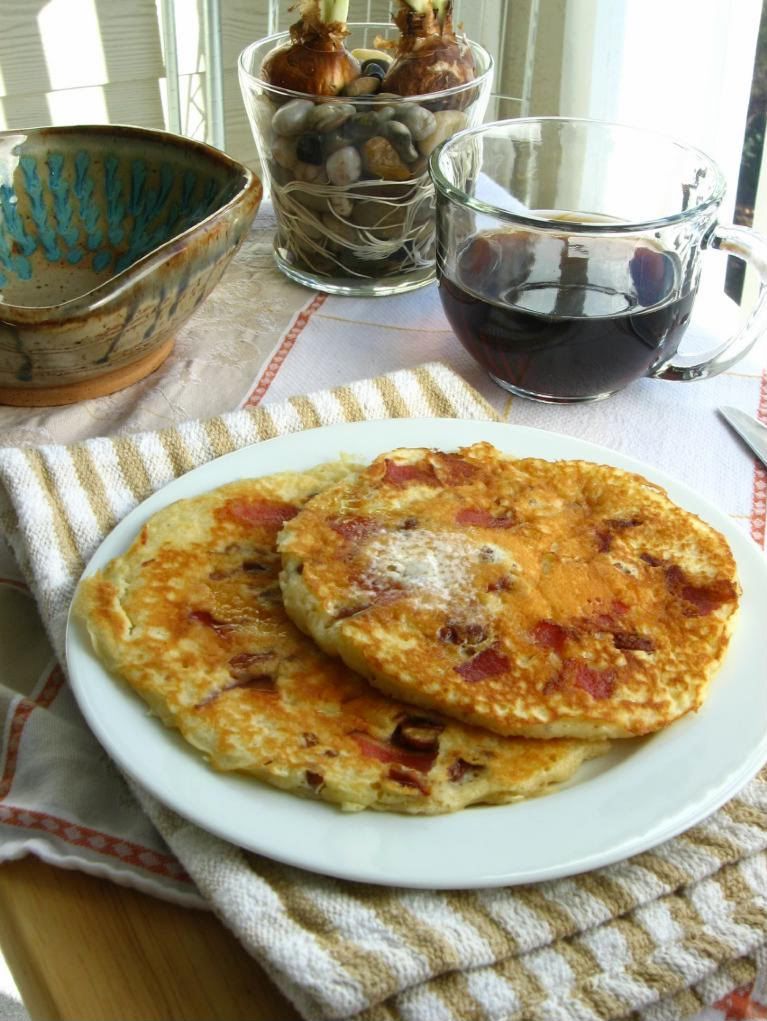
MAPLE NUT CREAM CHEESE SPREAD! I can’t repeat it enough — this spread is so tasty! It was a perfect complement to the flavors of the Banana Nut Bread Waffles what with the slight tang of the cream cheese and the sweetness of the maple.

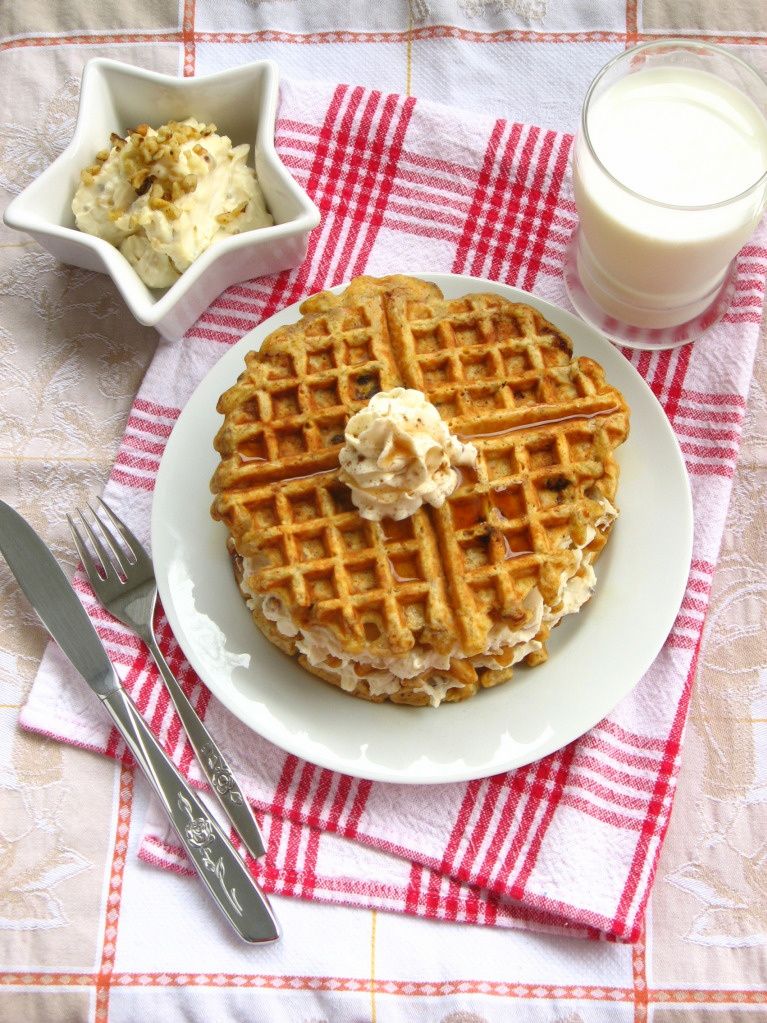
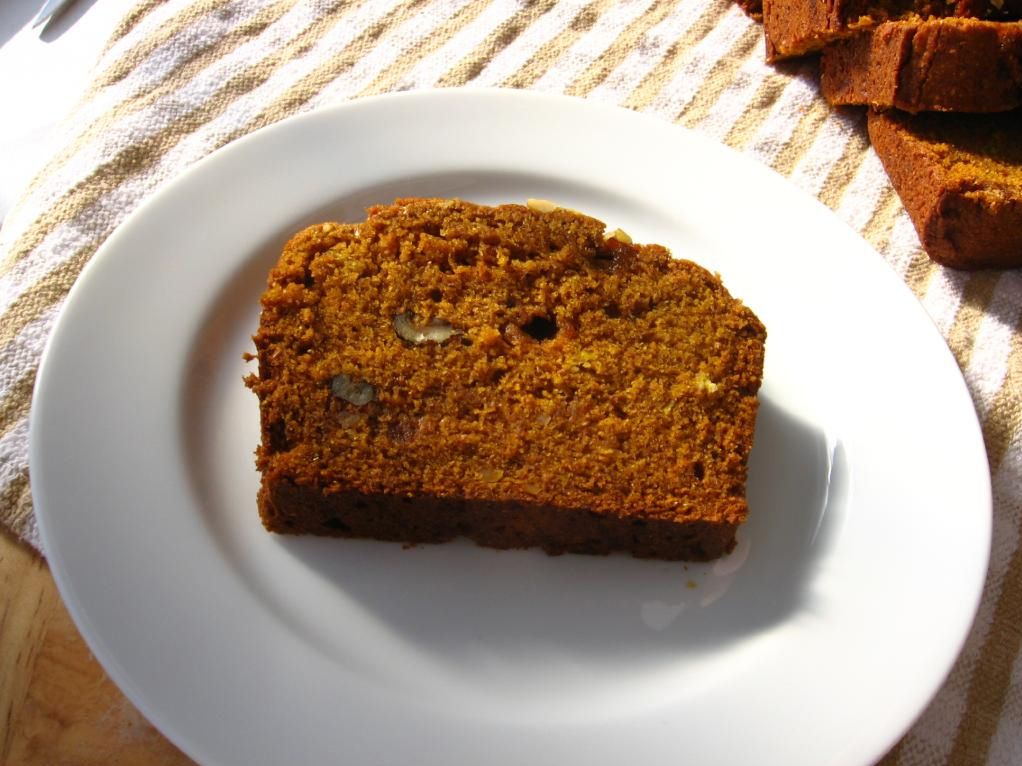
Banana Nut Bread flavor with a clean loaf pan should excite you. Hearing that this is a quick and simple waffle recipe should excite you even more! Sometimes you want a fancy breakfast for company — sometimes you just want to hurry up and EAT. These Banana Nut Bread Waffles are perfect for both situations. Frilly enough for a guest, fuss-free enough for a relaxing morning.

Oh, and of course I have to ask: what are your pet nicknames? Don’t just share the kosher ones, either! We want the embarrassingly ridiculous ones! We’ll only laugh a little bit.

Banana Bread Waffles


Recipe by: Adapted using the following recipes:

-Rich Buttermilk Waffles: Smitten Kitchen’s adaptation of Mark Bittman.
-Maple Cream Cheese Spread by Carolyn R. Shaw.
Yields: 4 to 6 servings

Waffle Ingredients:
2 cups all-purpose flour
1/2 teaspoon salt
2 tablespoons sugar
1 1/2 teaspoons baking soda
1 teaspoon cinnamon
1 3/4 cups buttermilk* or 1 1/2 cups sour cream or plain yogurt thinned with 1/4 cup milk
2 eggs, separated
4 tablespoons (1/2 stick butter, melted and cooled)
1/2 teaspoon vanilla extract
3 ripe bananas, mashed
3/4 cup walnuts, chopped
Cooking spray for waffle iron

Maple Nut Cream Cheese Spread Ingredients:
8 oz. cream cheese, softened
3-4 tablespoons maple syrup
1/8 cup chopped walnuts

Directions:
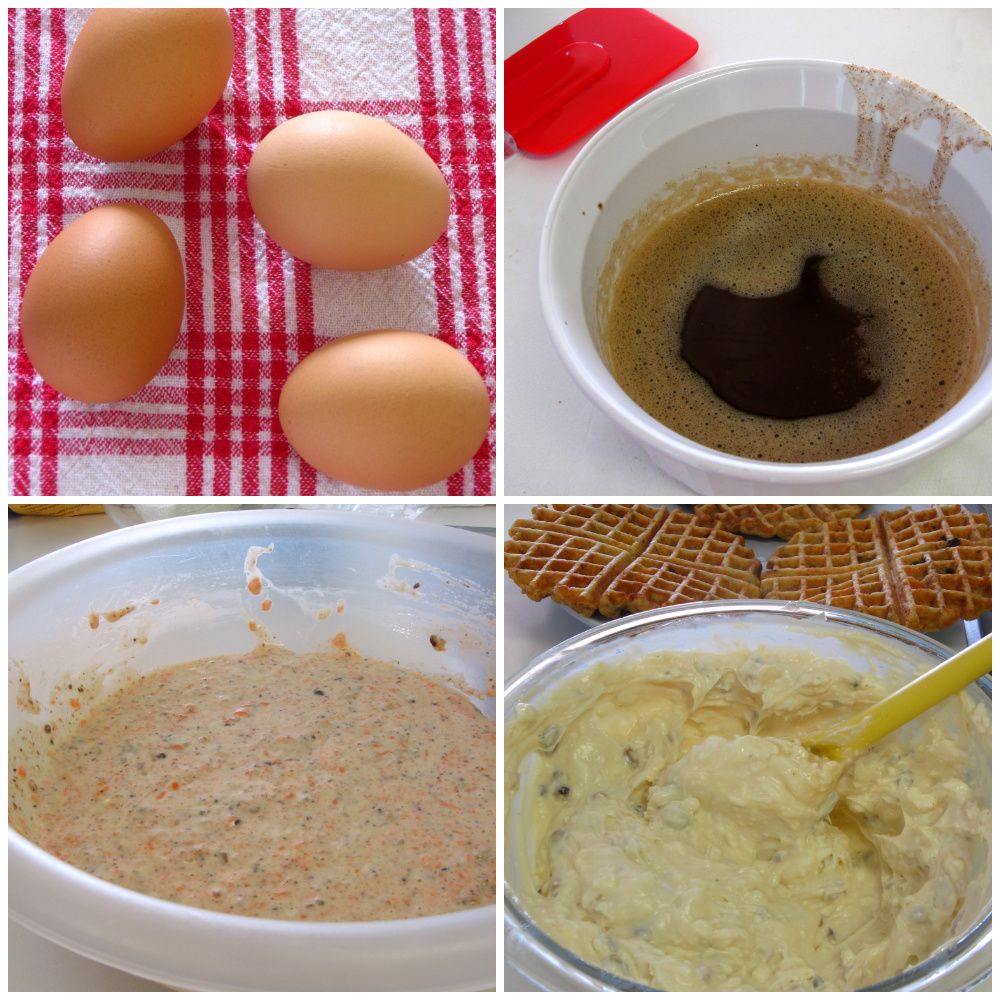
Combine the flour, salt, sugar, baking soda, and cinnamon. Mix together the buttermilk (or buttermilk substitute) and the egg yolks. Stir in the butter, mashed banana, and vanilla.

Spray the waffle iron lightly with oil and preheat it. Stir the wet into the dry ingredients. Beat the egg whites in a separate bowl with a whisk or electric mixer (make sure bowl and mixer are spotlessly clean) until they hold soft peaks. Stir them gently into the batter. Stir gently to combine.

Spread a ladleful or so of batter onto the waffle iron and bake until the waffle is done, usually 3 to 5 minutes, depending on your iron. Mix ingredients for Maple Nut Cream Cheese Spread together. Serve waffles immediately with a schmear of Maple Nut Cream Cheese, or keep warm for a few minutes in a low oven.

* The buttermilk can be substituted with 1 1/4 cups of milk at room temperature, mixed with two tablespoons white vinegar, left to clabber for 10 minutes.


Happy breakfasting!

P.S. Say happy happy birthday to Mike! Yesterday was a big birthday for him. More on that and his fancy schmancy birthday dinner soon!


Share Share this post with friends!

Carrot Cake Waffles

Wouldn’t it be cool if bakers got to choose flashy names like WWF Wrestlers? You could be the Vanilla Villain, the Meat Tenderizer, the Mighty Masher, the Blender Blade, the Sweaty Spatula.

Ew. Nevermind that last one.

Today, my flashy baking name is the Waffle Wrangler. See, I finally acquired a waffle iron. Or . . . okay, actually I acquired it months ago. You’ll forgive me for not having tried it out yet, right? Especially since I happen to know for a fact your waffle iron is sitting under a coat of dust in a dark cabinet somewhere? It’s okay! No shame! You just need a reason to lug it out, wipe it off, and heat it up. I think I can help.

Despite appearances, I have been anxious to try this baby out. Waffles seem especially apt for one of my favorite culinary tricks: combining two well-known dishes into one. For instance, the recipes for Peach Cobbler Cupcakes, Peach Crisp Pie, and Blueberry Lemon Cheesecake Cupcakes each combine two desserts into a super-dessert.

So of course, I’ve spent the last few weeks pondering what sort of waffles to create. I could’ve taken a cue from this breakfast and made Pecan Maple Bacon Waffles (yum), but I had an urge to try something new. Apple or peach crisp waffles? Chocolate cake waffles? A bacon, egg, and cheese waffle sandwich? Peanut butter and jelly waffles? And then, as if Mike were sending me telepathic messages reminding me about his favorite dessert, it dawned on me . . .

CARROT CAKE WAFFLES! I’ve actually been trying to think of some recipe to add carrot cake flavors to after seeing this amazing Carrot Cake Ice Cream over on Not Quite Nigella. This was my chance!

The foundation of the recipe I’ve spliced together is a simple but delicious buttermilk waffle recipe. To it, I’ve added the spice cake flavors of cinnamon, allspice, and nutmeg, bloomed in brown butter according to America’s Test Kitchen’s recommendation. I also added the lovely hunks you’d find in any carrot cake: raisins, chopped walnuts, and grated carrots. Finally, the waffles were topped with a schmear of Maple Nut Cream Cheese spread, which merges the main component of traditional carrot cake frosting with the familiar breakfast flavor of maple.

I was nervous the entire time I was mixing this batter: would it be the right consistency? Would the raisins and carrots burn? But it worked out perfectly! I did a little dance of joy (inwardly — mustn’t alarm the roommate!) with each waffle I successfully wrangled off of my waffle iron.

And how did they taste? Delicious, and exactly like you might expect: like the convergence of a hunky carrot cake and a fluffy waffle! The spices were warm and aromatic, and the nuts, raisins, and carrots made for a hearty texture. And I can’t forget one of the best parts: the Maple Nut Cream Cheese spread.

This Maple Nut Spread is ridiculous! If your cream cheese isn’t already softening to mix some up, you should grab it out of the fridge right now. It’s rich, creamy, and perfectly sweet, with the satisfying crunch of chopped walnuts. I want to spread this stuff on bagels, toast, waffles, you name it. The photos you see here (in which I tried to build a “layer cake” out of the waffles — ha ha, get it? Carrot Cake Waffles?) are only a slight exaggeration of how much Maple Nut Cream Cheese I ate with my breakfast. I’m too embarrassed to tell you how much of it I ate straight from the spoon, so just take my word for it: you’re going to love it.

Okay, you have your reason — now go dust off your waffle irons! Have your cake and eat it for breakfast, too!

5 from 1 reviews
Carrot Cake Waffles
 
Prep time
Cook time
Total time
 
It's like your favorite dessert -- but it's breakfast!!
Ingredients
Waffle Ingredients:
  • 2 cups all-purpose flour
  • 1/2 teaspoon salt
  • 2 tablespoons sugar
  • 1 1/2 teaspoons baking soda
  • 1 teaspoon cinnamon
  • 1 teaspoon nutmeg
  • 1 teaspoon allspice
  • 1 3/4 cups buttermilk
  • 2 eggs, separated
  • 4 tablespoons (1/2 stick) butter
  • 1/2 teaspoon vanilla extract
  • 1 cup raisins
  • 1 cup walnuts, chopped
  • 1 1/2 cup finely grated carrots
  • Cooking spray for waffle iron
Maple Nut Cream Cheese Spread Ingredients:
  • 8 ounces cream cheese, softened
  • 3-4 tablespoons maple syrup
  • 1/8 cup chopped walnuts
Instructions
  1. Bloom the spices in butter: Heat 4 tablespoons butter in skillet over medium heat until melted, 1 to 2 minutes. Continue to cook, swirling pan constantly, until butter is light brown and has faint nutty aroma, 2 to 4 minutes. Add spices and continue to cook, stirring constantly, 15 seconds. Remove from heat and cool to room temperature, about 30 minutes.
  2. Combine the flour, salt, sugar, baking soda.
  3. Mix together the buttermilk (or buttermilk substitute) and the egg yolks. Stir in the spiced butter and vanilla. Spray the waffle iron well and preheat it. Stir the wet into the dry ingredients.
  4. Beat the egg whites in a separate bowl with a whisk or electric mixer (make sure bowl and mixer are spotlessly clean) until they hold soft peaks. Stir them gently into the batter. Add carrots, walnuts, and raisins. Stir gently to combine.
  5. Spread a ladleful or so of batter onto the waffle iron and bake until the waffle is done, usually 3 to 5 minutes, depending on your iron. Spray iron with cooking spray between waffles as needed.
  6. To make Maple Cream Cheese spread, simply combine nuts, syrup, and cream cheese and mix well. Serve waffles immediately with a schmear of Maple Cream Cheese spread (which will get lovely and melty), or keep them warm for a few minutes in a low oven. Waffles also freeze well. You can make a big batch, allow them to cool, and freeze them for a homemade alternative to preservative-laden commercial frozen waffles.


Breakfast for dessert-lovers!

Vegan Pumpkin Nut Bread

Babies have an uncanny ability to make you silly. We’ve all experienced the strange, instantaneous transformation: you’re walking along, the picture of respectability, when you spot bright eyes and baby CHEEKS! It’s always the cheeks that really push you over the edge. Suddenly, you’re cooing, peekabooing, vroooooming airplane spoons . . . anything for a smile, or best of all, a baby giggle!

My friend Amelia knows all too well what one will do for a baby. Her little Rowan (now 6 months old) wasn’t tolerating dairy very well, so mama had to give it up! No tall glasses of milk, no cheesy pizzas, no gooey lasagnas — and worst of all, hubby was still able to chow down! I’m going to be honest (with apologies to vegans out there): I would not be a fan of a dairy-free lifestyle. I enjoy meat, but I’d be much quicker to give it up than my beloved cheese, butter, and milk! Amelia’s a champ, though; with nary a complaint, she’s gone almost completely dairy-free for months. She deserves a mommy medal, but perhaps she’d settle for a loaf of vegan pumpkin bread?

I first spotted this beauty on Joy the Baker awhile back, when Joy admitted to sometimes searching for vegan recipes just because she’s out of butter or eggs. I love the honesty, not to mention the resourcefulness. A girl after my own heart. Gotta have sweets and gotta avoid the mid-recipe grocery store run.

This pumpkin bread was nice and moist, with a deep caramel-esque flavor from the brown sugar and maple. I added oats for more heartiness. One loaf went to Amelia, and Mike and I kept one for breakfasting. We defiled our loaf by slathering it with butter (more apologies to the vegans!), but it’d be delicious spread with cream cheese (oh wait! sorry vegans!), peanut butter, pumpkin, maple syrup, vegan margarine, mud . . . it’s just good! Just spread it with something creamy and suited to your dietary leanings, and consume!

I will say that it wasn’t as grand, in my tastebuds’ opinions, as regular old pumpkin quick bread. I think I prefer a brighter pumpkin spice flavor to the depth of the maple and brown sugar combo in this recipe. Nevertheless, if you’re out of eggs, following a vegan lifestyle, or simply avoiding dairy for a cute little imp of a babe, this is a nice, hearty option. We have the last bit of our loaf sitting in our freezer waiting for Saturday morning breakfast!

Vegan Pumpkin Walnut Bread


Recipe by: Joy the Baker, slightly adapted by Willow Bird Baking
Yields: 2 loaves

Ingredients:
2 cups all-purpose flour
1 1/2 cups white whole wheat flour (or whole wheat flour, or use only all-purpose flour)
2 cups light brown sugar, packed
1/3 cups granulated sugar
2 teaspoons baking soda
1 teaspoon baking powder
1 teaspoon salt
1 teaspoon freshly grated nutmeg
1 teaspoon cinnamon
1 teaspoon allspice
1/2 teaspoon cloves
1 15-ounce can pumpkin puree, or just under two cups
1 cup vegetable oil
1/3 cup maple syrup
1/3 cup water
1 cup chopped walnuts
1/2 cup oats

Directions:
Preheat oven to 350 degrees F. Place a rack in the center of the oven. Grease and flour two loaf pans and set aside.

In a large bowl, whisk together flours, sugars, baking soda, baking powder, salt and spices.

In a medium bowl, carefully whisk together pumpkin puree, oil, maple syrup and water. Add the wet ingredients to the dry ingredients and use a spatula to fold all of the ingredients together. Make sure to scrape the bottom of the bowl well, finding any stray flour bits to mix in. Fold in most of the chopped walnuts and oats, reserving some to sprinkle on top of the batter once in the pan.

Divide the dough between the two greased pans and sprinkle with a few walnut pieces. Bake for 1 hour to 1 hour and 15 minutes, or until a skewer inserted in the center comes out clean. Remove from the oven. Let rest in the pans for 20 minutes, then invert onto a cooling rack.

Serve warm. To freeze, double wrap in plastic wrap and then wrap in foil.


Enjoy!


Share Share this post with friends!

Strawberry Walnut Ricotta Muffins

I’m detecting a pattern here: something about cold weather makes me want a big, hot breakfast. Usually my breakfast is a small, rushed affair: a couple of turkey sausages and I’m on my way. This weekend, though, promised inches of snow and icy conditions in Charlotte. Breakfast had to stand up to the cold!

Thankfully, Smitten Kitchen had recently equipped me with a killer muffin recipe. Deb posted these fantastic-looking Ricotta Muffins last week. They were billed as a very slightly sweet, nutty muffin with a surprising hint of fennel. Very intriguing, but I fiddled with the idea a bit to produce more what I was craving. I ditched the fennel, sweetened these babies up a bit, and added in some fresh strawberries. The result is really a whole different beast: sweet, fruity, light, cheesy, nutty, hearty . . . a breakfast superstar!

…but a beast, nonetheless. These things are fussy. The ricotta and sour cream filling is runny (as Deb mentions in her post, perhaps it’d be different if you were to use fresh ricotta and crème fraiche), so the batter has to be piped on top of it, which is quite a mess.

The muffins are also very tender (what with the ricotta mixture in the middle, as well as strawberries breaking up the muffin, in my case) and so they can’t be scooped out of their wells. Instead, I had to let them cool in the pan for about 20 minutes before inverting them onto the cooling rack. They cooled with their cute little muffin bottoms in the air, and finally, they were firm enough to turn over and stick in the fridge. My kitchen was a disaster area — bowls, beaters, pans, cutting boards, berries — but I wouldn’t be writing this if they weren’t worth it.

Like so many fruity baked goods, these were amazing after being refrigerated overnight. Wonderful news, because you probably don’t want to spend the time and effort required to make these first thing in the morning. I popped them into the microwave for 30 seconds before Mike and I managed to devour, oh, 11 of them. Full disclosure! The two of us ate ELEVEN MUFFINS! I told you they were worth the trouble. The ricotta makes for a fluffy, moist, gooey muffin, and the strawberries were lovely with the tang from the yogurt and sour cream. They weren’t too sweet — perfect for breakfast (though who am I kidding . . . I can definitely do dessert for breakfast on occasion).

Muffins freeze well, too, so why not make a double batch and freeze up a few for later? I actually intended to do just that (my double batch made 27 muffins), but at the rate Mike and I are going . . . yeah, we’ll see how many of these make it to the freezer! I hope you’re enjoying some hearty, warm breakfasts of your own this winter (and for all my friends enjoying summer across the globe right now, run through a sprinkler or two for me!)

Strawberry Walnut Ricotta Muffins


Recipe by: Pastries from La Brea Bakery (adapted by Smitten Kitchen, and then by Willow Bird Baking)
Yields: 12-14 muffins

Ingredients:
1/2 cup (2 ounces) walnuts (can substitute pecans)
3 cups unbleached pastry flour or unbleached all-purpose flour
3/4 cup granulated sugar
1 tablespoon plus 1 teaspoon baking powder
3/4 teaspoon baking soda
1 1/2 cups plain yogurt
3/4 cup vegetable oil
1/2 cup (4 ounces) ricotta cheese
6 tablespoons crème fraîche or sour cream
3 tablespoons confectioners’ sugar
1 1/4 cup chopped strawberries
Kosher salt, to taste

Adjust the oven rack to the center position and preheat oven to 325°F. Lightly butter a 1/2-cup capacity muffin tin (I used Cake Release. Butter and flouring the tin will also work. Make sure that when you invert the pans, these babies are going to come out!)

Spread the nuts on a baking sheet and toast in the oven until lightly browned, about 8 to 10 minutes. Shake the pan halfway through to ensure that the nuts toast evenly. Cool, chop finely and set aside. Turn the oven up to 350°F.

In a large bowl, sift the flour, sugar, baking powder and baking soda together to combine. Make a large well in the center and pour in the yogurt and oil. Whisk together the liquids and gradually draw in the the dry ingredients, mixing until incorporated. Fold in chopped strawberries.

To prepare the filling: Place the ricotta in a mixing bowl and, if stiff, break it up wtih a rubber spatula to loosen. Stir in the sour cream or crème fraîche, confectioners’ sugar, and a pinch of salt.

Using a pastry or plastic bag with the corner cut off, fill each muffin tin one-third of the way with batter. Place one tablespoon of the ricotta filling into the center of each muffin. Pipe the remaining batter into the cups, filling them to just below the rim (resist the urge to overfill). Sprinkle about 1 teaspoon of the nuts over the top of each muffin.

Bake for 25 to 30 minutes, until lightly brown and firm to the touch. Let cool in pan for about 15-20 minutes before inverting over a cooling rack. Let cool upside down. When completely cool, refrigerate in an airtight container until it’s time to eat! Heat for a few seconds in the microwave before eating.


Mixing up the batter and some overfilled muffins fresh from the oven.


Cooling off upside down, and then getting packed up for the fridge.


See that snow in the background? Brrr!


Share Share this post with friends!

Pecan Maple Bacon Pancakes

I don’t care what my Buffalonian roommate says, it has been cold in Charlotte. She chokes back laughter as I layer on two pairs of pants, a nightgown, a long-sleeve tee, my rubber duckie bathrobe, a scarf, mittens, and fuzzy socks to take Byrd out in the 20 degree weather every morning. A winter coat would be nice right about now, but I don’t own one. Thankfully, you can usually get by with a thick jacket and a scarf in the Carolinas.

Then again, I’m “that girl” who used to wear flip-flops all winter. One day I looked down at my exposed toes standing in the few inches of snow we’d accumulated and thought to myself . . . well, it was something like, “I am stupid.” So maybe I’m just not a good judge of what sort of clothing one should have on hand. At any rate, I was not prepared for this icy blast. I’ve been Grumpy McGrumpster carrying a snuggie-wrapped Byrd down three flights of stairs every morning (she hurt her wittle knee, and so she is now transported everywhere like a princess).

After a week of shivering, I needed a big, hot breakfast on Saturday. I found a fantastic collection of pancake tippery over at Deb’s Smitten Kitchen and invited Mike over for a pancake marathon. I got a little sassy and decided to make Pecan Maple Bacon Pancakes: fluffy, light flapjacks filled with chopped pecans, shreds of freshly cooked bacon, and a drizzle of maple syrup cooked right in. They were the perfect sweet and savory breakfast treat.

Of course, pancakes aren’t pancakes without a little customization. We also indulged in Pecan Chocolate Chunk, Peanut Butter, Peanut Butter Chocolate Chunk, and finally, Peanut Butter Bacon Pancakes — all of which were well-received! I loved the idea of freezing my freshly cooked, cooled pancakes for a homemade alternative to packaged convenience breakfasts, but it didn’t work out. Oh, they froze beautifully in their ziplock bag, separated by sheets of waxed paper . . . but we got hungry again Saturday night, ripped them open, and devoured them all! Perhaps I’ll make a bigger batch next time around.

Our pancakes were lovely served with maple sausage on the side, but next time, maybe I’ll cook it right into the pancakes as well! Oh, and I’m not the only one who had a craving for breakfast this week, according to my Google Reader. For delicious breakfast ideas to accompany your flapjacks, try Barbara Bakes’ Breakfast Hashbrown Casserole, Lick The Bowl Good’s Banana Pecan Butter Buns, or My Baking Addiction’s Breakfast Parfaits. Great minds bake alike!

Pecan Maple Bacon Pancakes


Recipe by: Martha Stewart’s Original Classics Cookbook, with adaptations from Smitten Kitchen and Willow Bird Baking
Yields: about 9 6-inch pancakes

Ingredients:
2 cups all-purpose flour
2 teaspoons baking powder
1 teaspoon baking soda
1/2 teaspoon kosher salt, or slightly less table salt
3 tablespoons sugar
2 large eggs, lightly beaten
3 cups buttermilk
4 tablespoons unsalted butter, melted, plus 1 tablespoon extra for brushing griddle
6-7 slices brown sugar bacon
1/2 cup pecans, chopped (and toasted, optionally)
maple syrup for drizzling

Directions:
1. Preheat oven to 400°F. Place bacon on a foil-lined baking sheet and bake for 15-20 minutes or until crispy. Allow to cool and crumble on a paper towel. If desired, toast pecans in a dry skillet over low-medium heat, shaking constantly.
2. Preheat an electric griddle to 375°F, or place a griddle pan or cast-iron skillet over medium-high heat. Whisk together the flour, baking powder, baking soda, salt, and sugar in a medium bowl. In a separate bowl, mix the eggs and buttermilk. Pour the buttermilk mixture and 4 tablespoons melted butter into the dry ingredients and whisk until just combined. The batter should have small to medium lumps.
2. Test the griddle by sprinkling a few drops of water on it. If the water bounces and spatters, the griddle is hot enough. Using a pastry brush, brush the remaining 1/2 teaspoon butter onto the griddle. Wipe off the excess with a folded paper towel.
3. Using a 4-oz. ladle, about 1/2 cup (for a 6-inch pancake), pour the batter in pools 2 inches apart. Drop some pecans and some bacon crumbles onto each pancake. Using a spoon, drizzle a small amount of maple syrup over the top of the pancake.* When the pancakes have bubbles on top and are slightly dry around the edges, about 2 1/2 minutes, flip over. If any batter oozes, push it back under with your spatula. Cook until golden on bottom, about 1 minute.
4. Repeat with the remaining batter. You can keep the finished pancakes on a heat-proof plate (or baking sheet) in the oven at 175°F. Serve warm with butter and maple syrup.

*NOTE: Other delicious toppings include berries, chocolate chunks, other nuts, peanut butter chips, or cinnamon chips. We love a variety, so we made several Pecan Maple Bacon Pancakes and then went crazy with the rest of the batter!


Fresh bacon sizzling, and then a Pecan Maple Bacon Pancake waiting for a drizzle of maple syrup and a flip!


Good Morning, Sunshine!


Share Share this post with friends!

1 8 9 10 11