Thanks to RW Garcia for sponsoring this post.
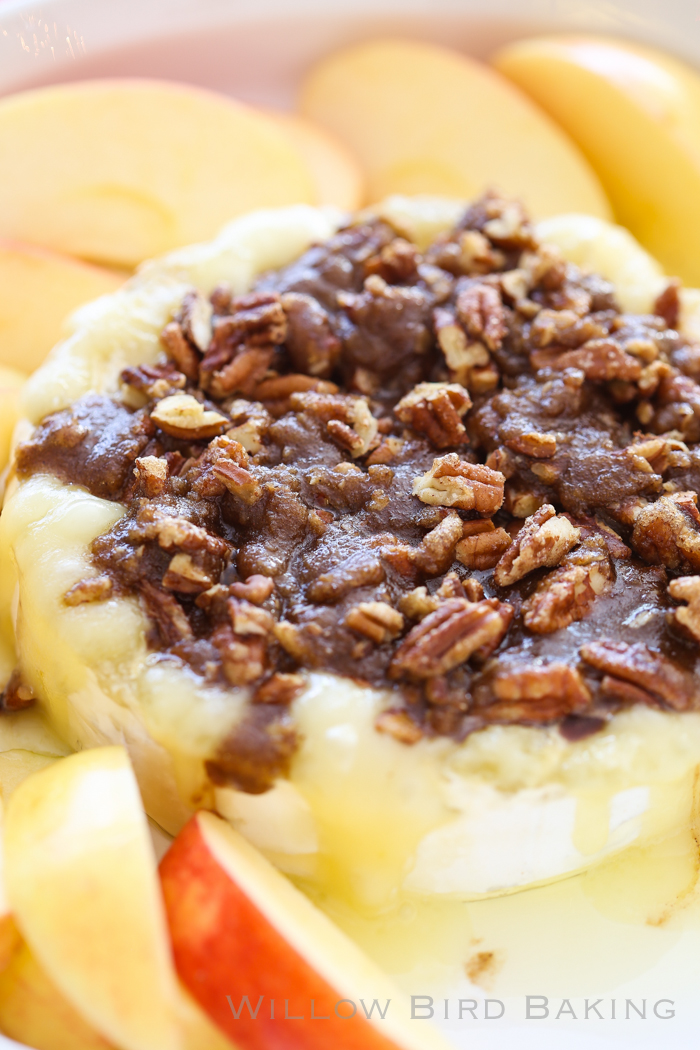
Maple Brown Sugar Brie
Y’all can keep your main courses; I’ll be over here eating the best parts of any holiday meal: the appetizers and the desserts. Or in this case, both in one!

Thanks to RW Garcia for sponsoring this post.
Maple Brown Sugar Brie
Y’all can keep your main courses; I’ll be over here eating the best parts of any holiday meal: the appetizers and the desserts. Or in this case, both in one!
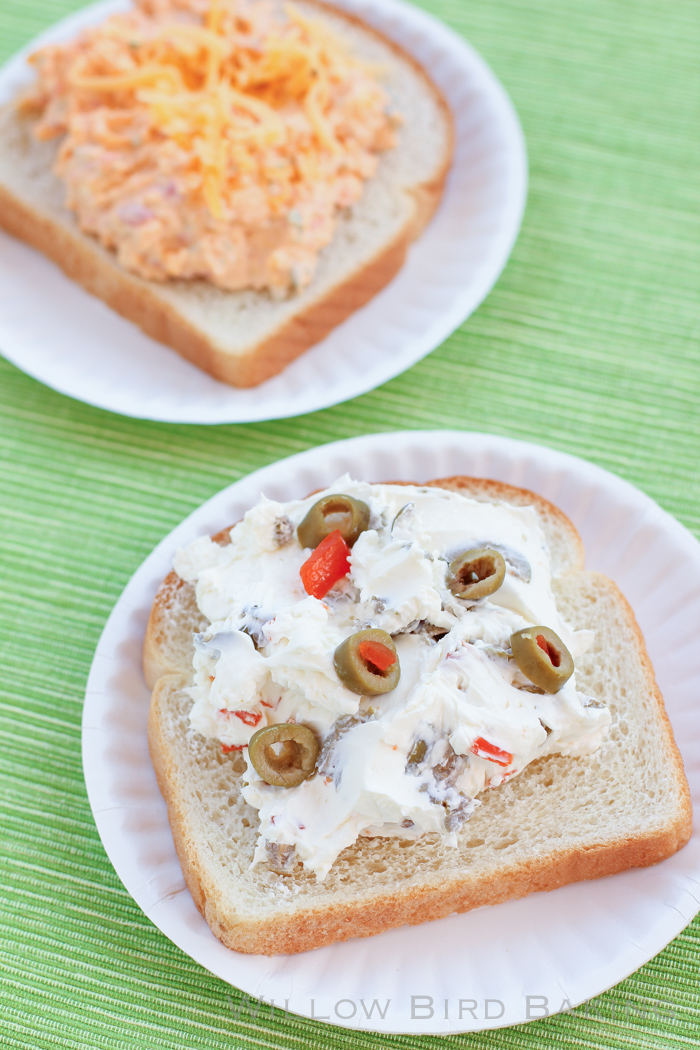
Simple Sandwich Spreads: Pimento Cheese and Olive Cream Cheese
A few times a year I get an intense craving for pimento cheese. Not lame pimento cheese: it has to be fresh, spicy, homemade pimento cheese. And not served in just any way: it has to be piled onto a slice of plain white bread, folded over and served with a Coke.
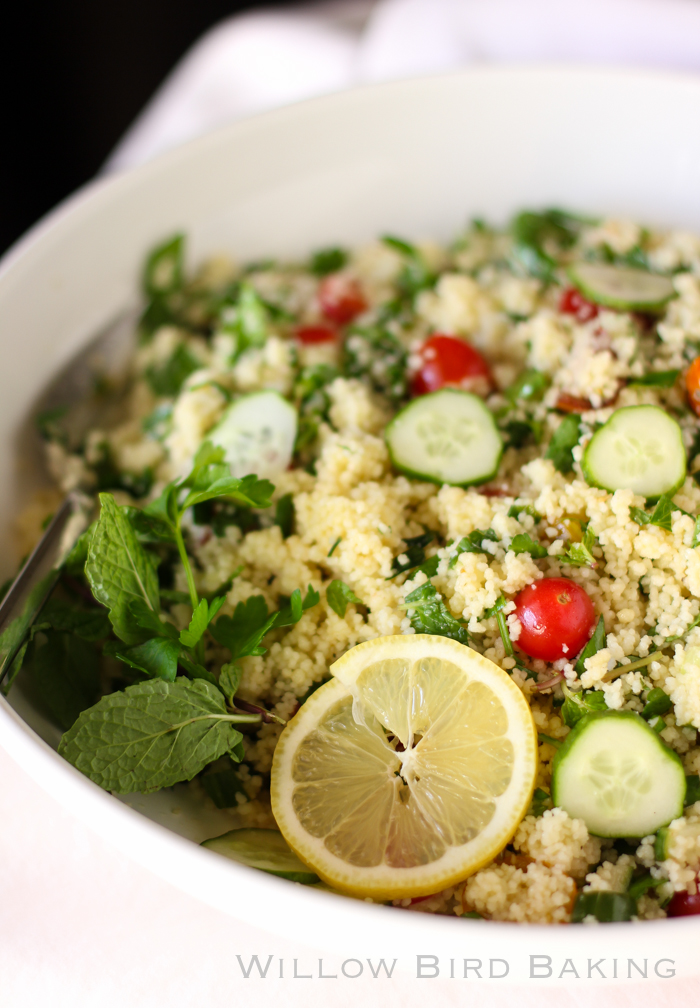
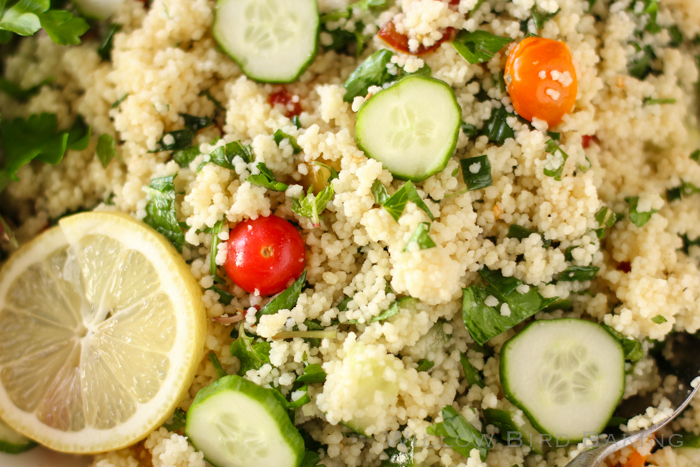
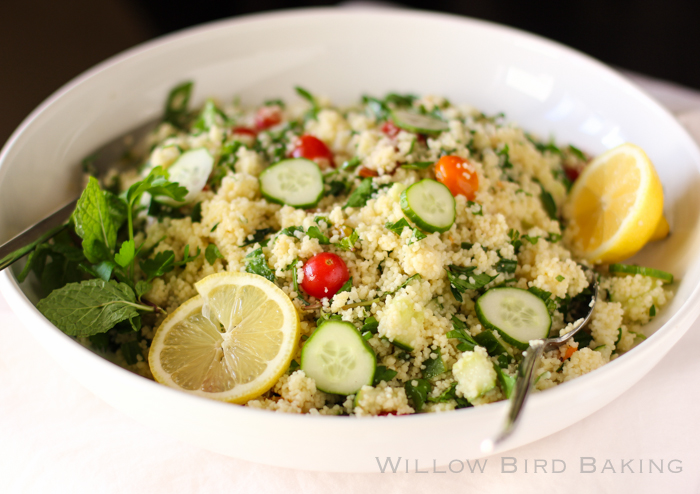
Easy, Healthy Couscous Tabbouleh
Thanks, Foodie, for sponsoring this post.
My green cutting board rapped against the countertop, followed by the metallic thud of the knife. Leaving these two faithful friends for a moment, I held each vegetable under the open faucet — the cold skinned cucumber, each plump tomato, the clingy herbs — and wrapped them in a paper towels. Back at the board, the rhythmic slooce slooce slooce of the knife through each vegetable became a steady companion for the next dozen minutes or so, and I let myself breathe with the beat.
Eventually, the broth on the stovetop boiled, bubbles rolling over bubbles, olive oil separating and rejoining around the edges of the saucepan. The dry couscous hit the mixture with a hiss and I silenced it with a whisk. Lemony steam billowed up around my face before I eclipsed the pan with the lid, settled it on the back burner, and turned my attentions to the dressing. A quick squeeze of lemon juice, a sprinkle of salt, a grind of pepper. Whisking through the slow drizzle of green-tinted oil. I tossed the cold vegetable dice into the resulting olivey emulsion, letting them marinate until the moist couscous was ready to be tossed in. Cold herbs met warm couscous. The whole bowl was shoved onto a cold refrigerator shelf, but not until after I savored a forkful or two.
Paying attention to my five senses as I worked produced so much satisfaction and reminded me all over again how small choices affect my daily mood. It’s that very idea that inspired me to create the new Willow Bird Baking #happymoments2014 Challenge. In the past, our challenges have all focused on food. This one will involve food as well, but it’s much broader than that. This challenge is about finding tiny pockets of joy in your everyday life.

How to Join In: Happy Moments 2014 is a fun, low-pressure weekly challenge. Each week’s task aims to help you find joy! There will be lots of options so that people of many income levels, activity levels, and locations can participate. Sign up for the #happymoments2014 challenge weekly email below to receive the challenge each week! The challenge will last for 12 weeks, and by the end of those 3 months, I hope these tiny moments of appreciation will have become a habit.
Challenge #1: To get you started and give you a taste (literally) of what the challenges will be like, here’s the first one:
This week, prepare and eat a healthy meal or snack in a mindful way.
I can’t wait for you to join me as we try to capture the happiness that’s waiting there for us.
One year ago: Boozy Icebox Cake
Two years ago: Healthy Roasted Tomato and Onion Bread Soup
Three years ago: Two Exquisite Tea Sandwiches
Four years ago: Pumpkin Cheesecake Bread Pudding
Easy, Healthy Couscous Tabbouleh
Recipe by: Slightly adapted from Epicurious
Yield: 6-8 servings
This easy, flavorful salad is a healthy meal to help you with your New Year’s resolutions! I love making a big batch of it and eating it for a quick lunch throughout the week.
Ingredients:
1 cup chicken broth
1 cup water
1/2 cup fresh lemon juice, divided
1/3 cup plus 2 tablespoons olive oil, divided
1 1/2 cups couscous
1 seedless cucumber, cut into 1/4-inch pieces, plus cucumber slices for garnish
9 ounces cherry tomatoes, sliced in halves
3/4 cup finely chopped scallion
1 teaspoon kosher salt
a few grinds pepper
2 cups loosely packed fresh parsley leaves, minced
1 cup loosely packed fresh mint leaves, minced, plus mint sprigs for garnish
Directions:
Prep all your materials first: chop the veggies and herbs, measure out the ingredients, etc. Bring chicken broth, water, 1/4 cup of the lemon juice, and 2 tablespoons olive oil to a boil in a medium saucepan. Whisk in the couscous and cover the pan, removing it from the heat. Let it sit and steam for 5 minutes before fluffing it with a fork and setting it aside to cool. In a large bowl, whisk together the remaining 1/4 cup lemon juice, 1/3 cup olive oil, salt, and pepper. Toss the cucumber, tomatoes, and scallions in the dressing and allow this to sit for 15 minutes. Add in the couscous and herbs and toss the salad well. Cover it and chill it for at least an hour to allow the flavors to meld. Garnish with extra cucumber slices and herb sprigs.
Need some inspiration finding a healthy recipe? Try these from some bloggers I love:

Buttery Almond Stuffed Morning Buns
I wrote this post as part of the Plugrá Butter Brigade. Thanks, Plugrá, for sponsoring this post and for making my favorite butter!
Mike and I accidentally celebrated our 5-month wedding “anniversary” yesterday. You may wonder how it’s possible to accidentally celebrate an anniversary. Allow me to regale you with a tale of intrigue and fondue (okay, or incompetence and fondue.)
Mike and I have always been bad at anniversaries. It’s not because we don’t love each other or whatever. It’s just because dates and times and calendars and schedules are hard and stupid and I hate them. And apparently I’m a sullen 5-year-old about it. So there.
I have trouble knowing what day of the week or month it is at any given time (I’ve even surrendered the job of writing the date on the board in my classroom to my students’ more capable hands). So year after year while dating, we let our anniversary pass us by (and we had around 14 of those before getting married!)
When we got married, I was pretty sure this phenomenon of forgetting anniversaries would end. In fact, we were so honeymoonish and in love and gross that I was pretty sure we were going to start celebrating monthly anniversaries like those cloying couples on Facebook. YOU KNOW THE ONES.
Then we missed the first one. And the second. BUT I WAS BUSY. We were up to our ears in moving boxes! Whatever! It would happen.
Three months, four months. Every now and then I’d count up how long we’d been married and be shocked. Time goes so fast! Who has time to celebrate? We were still unpacking!
Another thing we were similarly lame about was using the awesome fondue set my parents had given us for our wedding. I kept promising Mike (who was for some reason really adorably excited about fondue?) we would set it up and have fondue when we were finally “settled in.” You know, SETTLED IN: boxes recycled, apartment assembled, some semblance of normalcy achieved. Only we never seemed to get there. Who can clean when you’re planning 3 entirely new English curricula plus two other preps and trying to keep up with Dance Moms?
Finally, winter break came and we were able to fully clean the apartment for the first time since we’d moved in. I was shocked my vacuum cleaner still worked. I hadn’t seen my feather duster in months. I found I’d grown kind of sentimental about the pile of unsorted mail towering on the bookshelf. Stop looking at me like that.
One night we were sitting in our newly cleaned living room and I realized I finally felt home. It was time to celebrate! Mike and I decided to have a New Year’s celebration with (drumroll) THE FONDUE SET. We couldn’t manage it on New Year’s Eve, though (midweek and all that), so we moved it to the weekend.
YOU KNOW, THE WEEKEND. JANUARY 4. OUR FIVE-MONTH ANNIVERSARY. And that’s the story of how, with no actual planning or intention, we managed to finally, accidentally celebrate our flippin’ anniversary. Now someone please set an alarm for August 4. And hire someone to clean my apartment. Thanks.
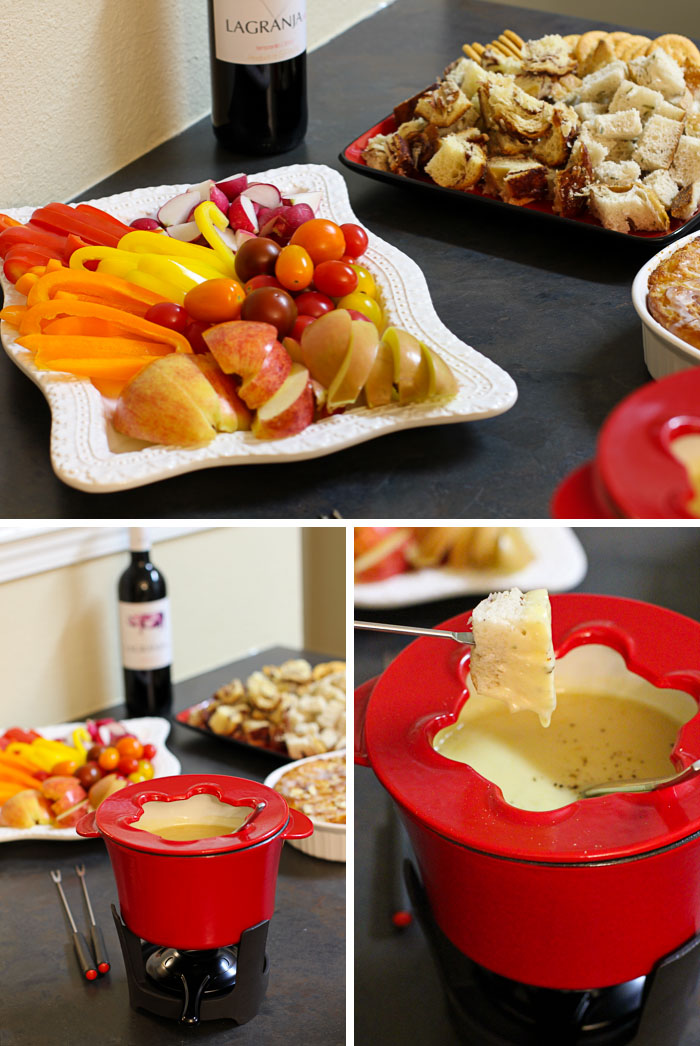
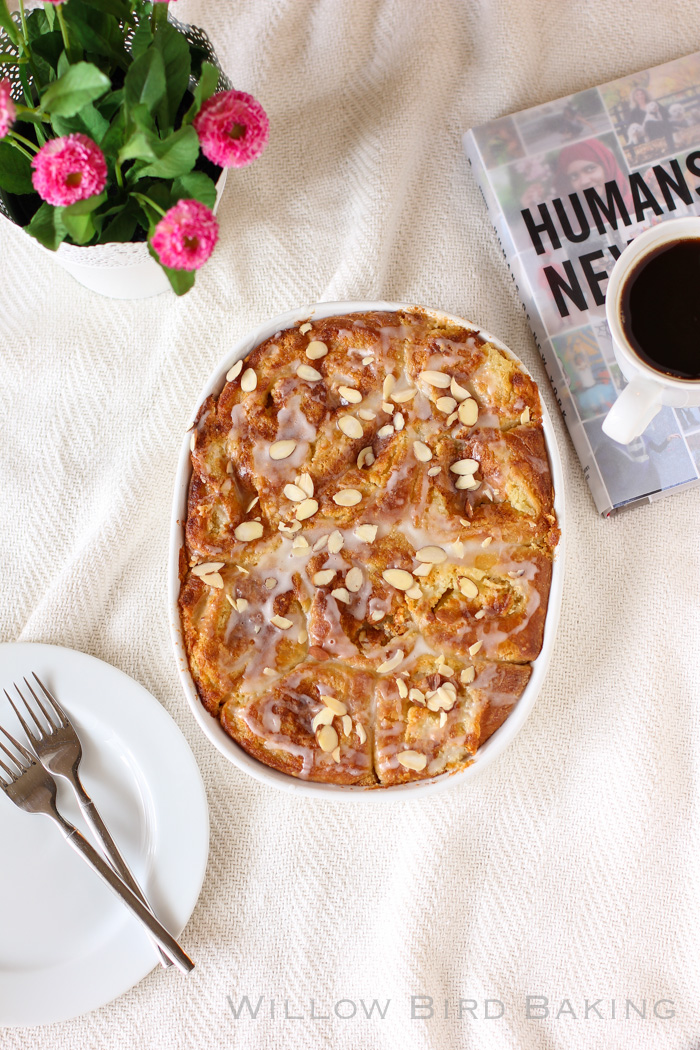
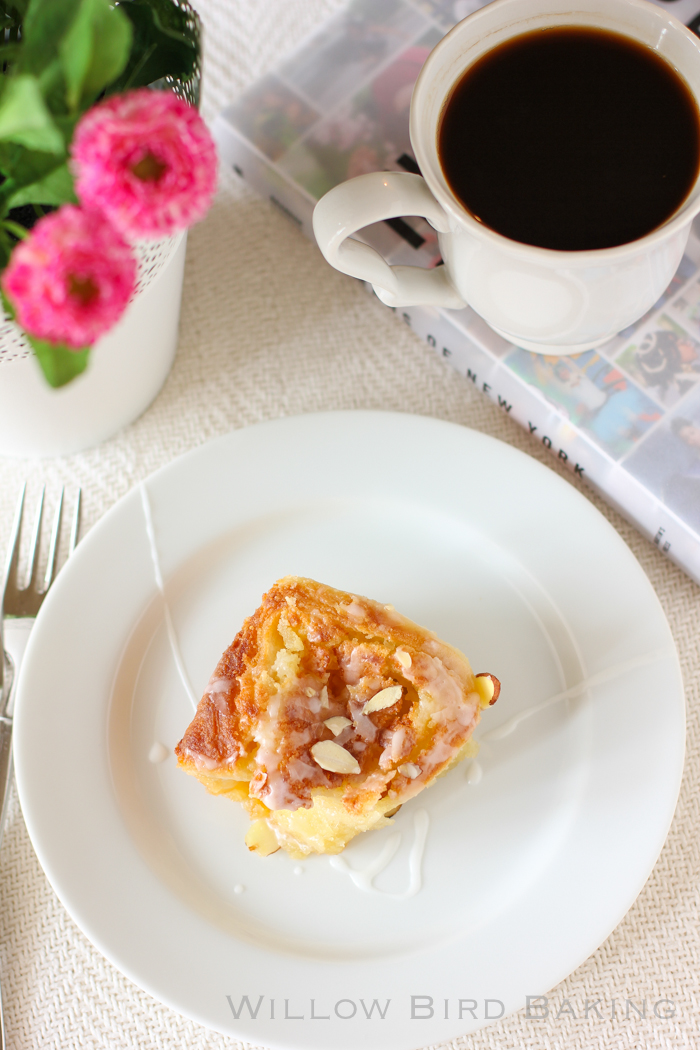
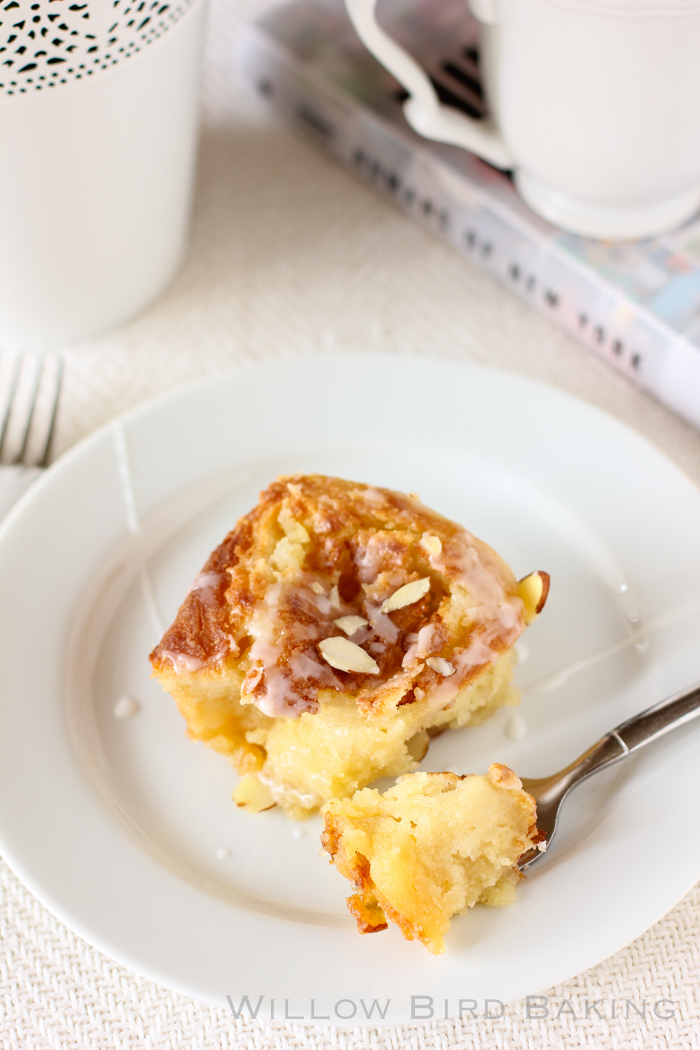
It was pretty snazzy accidental celebration if I do say so myself! The fondue was fancy-schmancy and delicious (we made a traditional Swiss fondue with Gruyère and Chardonnay). We watched the finale of Star Trek: Deep Space Nine, because we’re nerds and we do that sort of thing. And for dessert, we had these incredible Buttery Almond Stuffed Morning Buns.
![]()
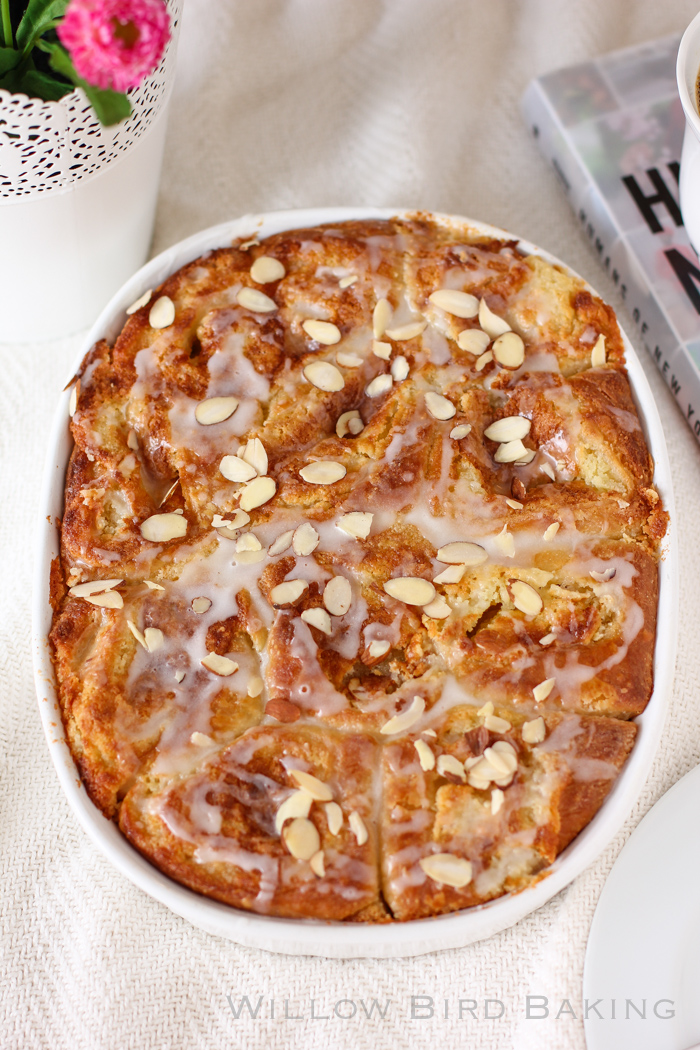
These buns are definitely a special occasion treat. They’re the best yeast rolls, soaked with butter (using my favorite Plugrá Butter), stuffed with an indulgent almond mixture, and drizzled with a sweet almond glaze. Basically, they’re insane. If you’re an almond croissant fan like me, you’ve gotta try them! Maybe it’ll accidentally be your anniversary? You never know . . .
One year ago: Boozy Icebox Cake
Two years ago: Healthy Roasted Tomato and Onion Bread Soup
Three years ago: Two Exquisite Tea Sandwiches
Four years ago: Pumpkin Cheesecake Bread Pudding
Buttery Almond Stuffed Morning Buns
Recipe by: Willow Bird Baking
Yield: 24 buns
If you love yeast rolls and almond croissants, you’re going to adore these incredible Buttery Almond Stuffed Morning Buns. The buttery texture and incredible almond flavor make these my new favorite breakfast item!
Roll Ingredients:
1/4 cup warm water (100-110 degrees F)
1 package (2 1/4 teaspoons) active dry yeast
2 tablespoons white vinegar
2 cups milk minus 2 tablespoons, room temperature
5 cups flour
3 tablespoons sugar
1 teaspoon salt
1 teaspoon baking soda
1 teaspoon baking powder
2/3 cup cold shortening
2 tablespoons butter, melted, for after baking
Filling Ingredients:
1 pound butter, softened (I use Plugrá Butter)
1 1/4 cups granulated sugar
2 cups almond paste (this is about two 8-ounce cans)
1 teaspoon almond extract
2 eggs
dash of salt
1 1/2 cups sliced almonds, divided
Glaze Ingredients:
1/2 cup powdered sugar
1 tablespoon milk
1/8 teaspoon almond extract
Directions:
Note: I don’t recommend halving yeast recipes; instead, if you don’t want 24 rolls at once, consider freezing some for later. To freeze some of the unbaked rolls, just wrap them well before the second rise and freeze them. Once frozen, pop them out of the pan all together and store in the freezer, wrapped in plastic wrap and in a zip top bag or wrapped in foil. When you want to bake them, stick them back in a greased pan, thaw them in the fridge overnight, proof for the instructed amount of time, and bake like usual. I also love making a full dough recipe and using half to make savory buns (like these or these) and half to make sweet buns for dessert. If you do this, just half the filling recipes and roll out the dough half at a time.
Make the yeast dough: Mix the warm water and yeast in a medium bowl and let the yeast foam for about 10 minutes. Put 2 tablespoons white vinegar in a measuring cup and then add milk up to the 2 cup line. Set this aside. In a separate large bowl (or the bowl of a mixer fitted with a dough hook), whisk together flour, sugar, salt, baking soda, and baking powder and cut the shortening into the mixture with two knives or a pastry cutter until the shortening looks like small peas. Stir yeast mixture and milk mixture into the dry ingredients and mix well, kneading just a few turns. Transfer the dough to a bowl lightly sprayed with cooking spray, cover tightly with plastic wrap, and store in refrigerator overnight.
Make the filling: The next morning, in a large bowl, cream together softened butter and sugar until pale, fluffy, and smooth. Add in almond paste, dash of salt, and almond extract and mix until well combined — it’ll be a little lumpy, and that’s okay. Beat in egg.
Roll out the dough: Preheat the oven to 400 degrees F and lightly spray a 9 x 13-inch baking dish (or two smaller baking dishes) with cooking spray. Turn the chilled dough out onto a well-floured surface and roll it into a large rectangle about 1/8-inch thick (I carefully cut the dough in half and worked with half at a time to make it more manageable; if you do this, just spread on half of the filling ingredients for each half you roll). Spread the almond paste mixture gently and evenly all over the dough and sprinkle on about half of your sliced almonds. Gently roll the dough up into a spiral and cut it into rolls, placing them close together in your prepared baking dish (at this point, you could wrap and freeze the rolls for later if you wanted).
Proof the rolls, bake, and glaze: Cover the rolls with a clean dish cloth and let them rise in a warm spot (I set them on my oven’s heat vent) until they’ve nearly doubled, about 2 hours. Bake them for about 15-20 minutes or until browned on top (if you take them out at just lightly golden brown, they may still be doughy in the center). Brush with 2 tablespoons melted butter and return to the oven for 1 more minute. Whisk together ingredients for the glaze and drizzle it over the rolls. Sprinkle with remaining sliced almonds. Serve immediately.
My students teach me life lessons every day.
That’s something teachers are supposed to say in order to earn their Good Teacher Badge, but for me it’s also true. For example, this past Thursday I found myself in a complicated situation on the internet (oh, the internet), and handling it live with my students’ input proved to be one of the most educational experiences I think we’ve had all year. It all started with a negative book review . . .
At the beginning of 7th grade, my students read a young adult mystery novel set in Japan. It’s not my favorite book in terms of writing or character development, but it serves my purpose each year: to introduce them to Japan in an engaging and accessible way, and to serve as a backdrop and vehicle, respectively, for our more in-depth studies of haiku and essay organization in class. Essentially, I have my reasons for keeping it in the curriculum, but I don’t personally love it.
On my personal account on a popular book review site, I said as much. The site is designed to allow you to share book reviews and ratings with friends, so I felt perfectly comfortable giving my honest and blunt opinion. It was around four years ago when I reviewed the novel, saying, in short, that the simplicity of the book annoyed me.
Imagine my surprise when the author of the book himself — I’ll call him Snarky McSnarkerson — responded to my review. He was defensive and implied that the reason I didn’t like his book was because, basically, I’m a stuffy old teacher who’s not in touch with what kids actually like. This was funny to me, since part of what draws me to middle school language arts is my adoration of young adult literature.
I responded with a touch of sarcasm. It was not the most angelic response, but also not inappropriate. In class, I mentioned the exchange to my students and expressed my surprise over the whole affair. It didn’t occur to me that they might search for the review online, but a few of them found it and also responded to Snarky McSnarkerson. I was proud of how they were supportive of me but also classy and mature in their responses, not resorting to rudeness or immature name-calling. Indeed, they were quite a bit more mature than Snarky McSnarkerson himself! I thanked them but also asked that they no longer fuel the discussion.
A few years passed. Then, this past Thursday, I received another response from McSnarkerson out of the blue.

In his new response, he not only insulted me (saying that maybe someday my students would get a “real teacher”), but also my students (pointing out the grammatical errors in their posts). I was livid. I responded curtly to McSnarkerson himself and posted about the situation on Facebook (where it was promptly shared by a prominent author). In disbelief, I told my current students about the situation, being careful this time to ask them not to contribute to the online exchange. They were all outraged to hear of McSnarkerson’s rudeness and his unfair implications, just like I had been.
I knew this was a ripe teaching moment about how to navigate the internet, and how in the real world, we can vote with our wallets (I’d already told McSnarkerson I wouldn’t be using his book anymore). But I didn’t expect for my students to be quite the wonderful teachers they turned out to be!

We chatted about the inevitable urge to gang up on someone with friends online, and how we must remember that to do so would be cruel. We talked about the difference between responding to be nasty and responding with a thoughtful point. We remembered examples of when people had been unkind to others in groups — like the comments on Rebecca Black’s music video, “Friday,” and how they must have made her feel.
While we were discussing the uncertainty involved in handling an online disagreement effectively, my unfailingly positive and practical student, Lauren, raised her hand. She humbly offered the class, “I learned that if you stop responding to someone and fueling a situation, it usually goes away.” I think her comment literally stopped me in my tracks. What a novel idea. Wasn’t I supposed to be the one saying the wise, mature stuff? I laughed.
“That’s a great point, Lauren. So maybe I shouldn’t have responded to McSnarkerson at all? Or maybe I shouldn’t have responded to his newest comment? And, oh. Maybe I shouldn’t have mentioned it on Facebook?” The whole class paused with me. We all shifted and grinned uneasily. A new discussion had begun: Could Ms. Ruble have navigated the internet in a more effective way?
In true language arts style, we journaled about it. I told them to imagine that they’d left a negative review of Harry Potter and J.K. Rowling had just sent them a nasty comment (we all agreed this scenario was ridiculous — who doesn’t love Harry Potter and Rowling? — but for the sake of journaling, they used their imagination.) They had to first write their initial impulse, and then think of at least two better strategies they could use to handle it productively.
I was so proud of their suggestions. They proposed:
-Write out the response you’d initially want to post, but then ball it up and throw it away instead.
-Write a response, but instead of posting it, send it to someone you trust to edit it.
-Write a response, but instead of immediately posting it, wait 24 hours and then revise it to make sure it’s productive and kind.
-Don’t respond at all.
-No matter what you do, don’t share the situation with others to gang up or gossip, because it creates a bigger problem.

I love when real-life situations come about that they can learn from. I love it even more when they can learn from someone else’s mistakes instead of their own — even if those mistakes are mine! My initial goal in posting my frustrations and a link to the exchange on Facebook was to bring to public light the author’s unkind actions. If I had it to do over again, though, I might handle it in a different way (this is the reason I’m not naming the author or linking to the exchange in this post). Maybe I’d use one of the effective ways my students proposed. And instead of public shaming, I can “voice” my feelings about McSnarkerson by not buying his products.
I appreciate these kids more each and every day.
* * *
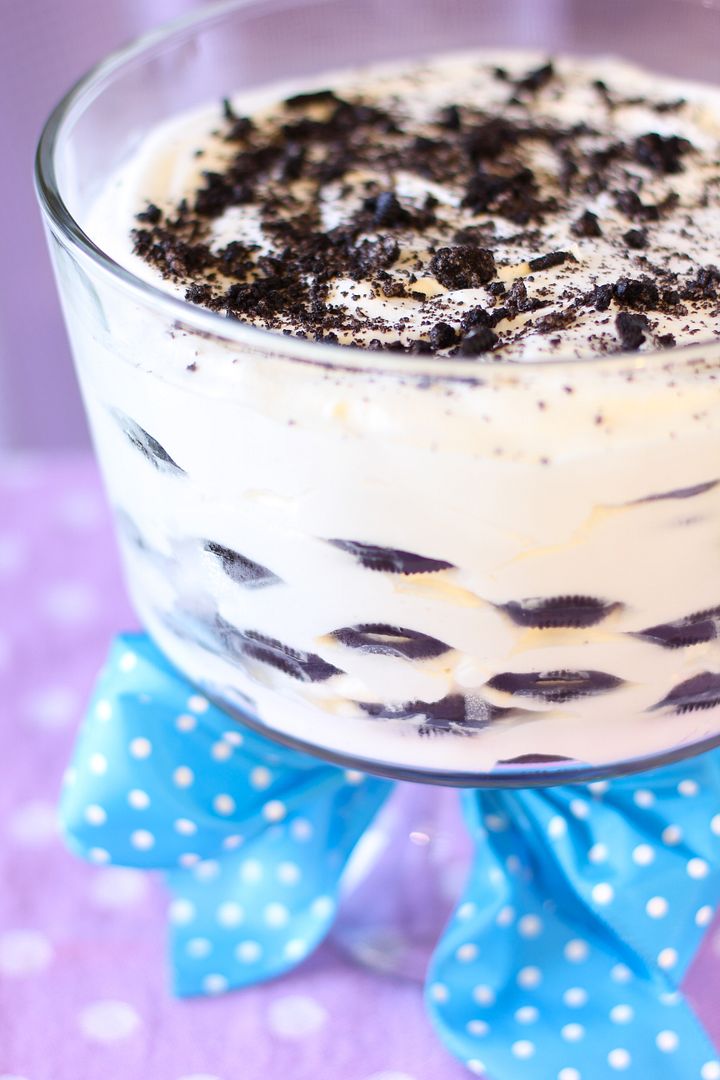
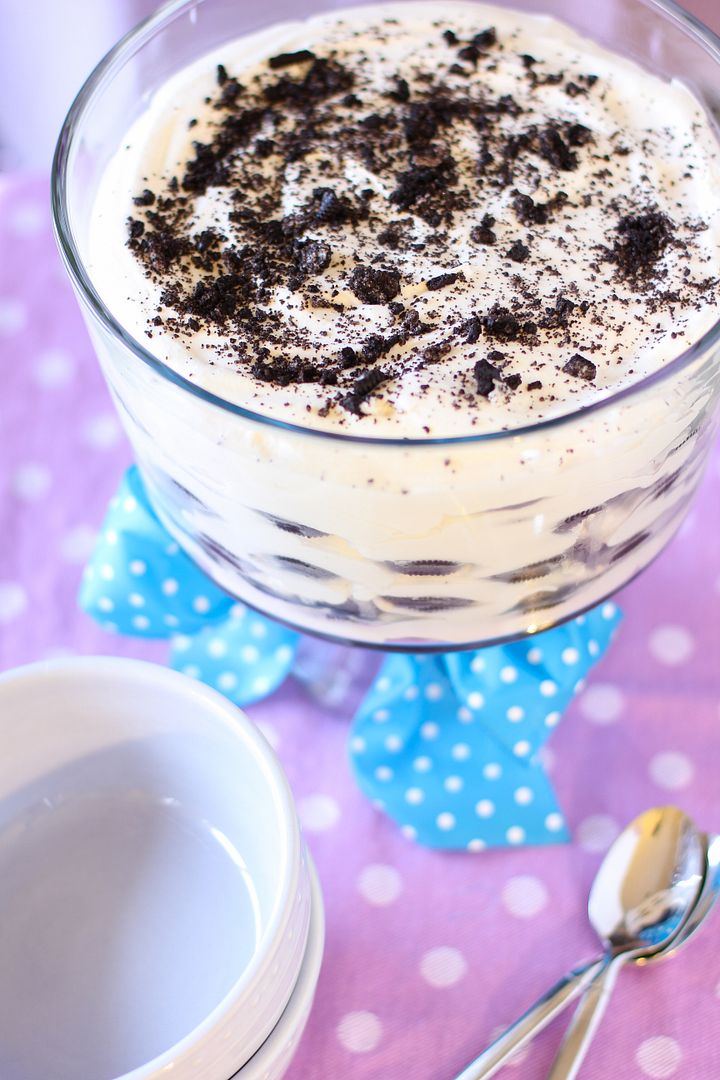
After all that tension, I needed to whip up an easy dessert this weekend, and there is nothing easier than an icebox cake. Icebox cakes layer wafer or sandwich cookies with billowy whipped cream and then chill it to form a delicious, velvety, cake-like dessert. I decided to spike my cream with some almond liqueur for a tasty zing, and now I can’t stop eating this thing. I love that something that takes 5 minutes to prepare can end up so pretty and tasty. Enjoy!
How do you effectively handle disagreements online, where it’s so much easier to be unkind or act rashly?
One year ago: Healthy Roasted Tomato and Onion Bread Soup
Two years ago: Willow Bird Baking’s Best of 2010
Three years ago: Pumpkin Cheesecake Bread Pudding
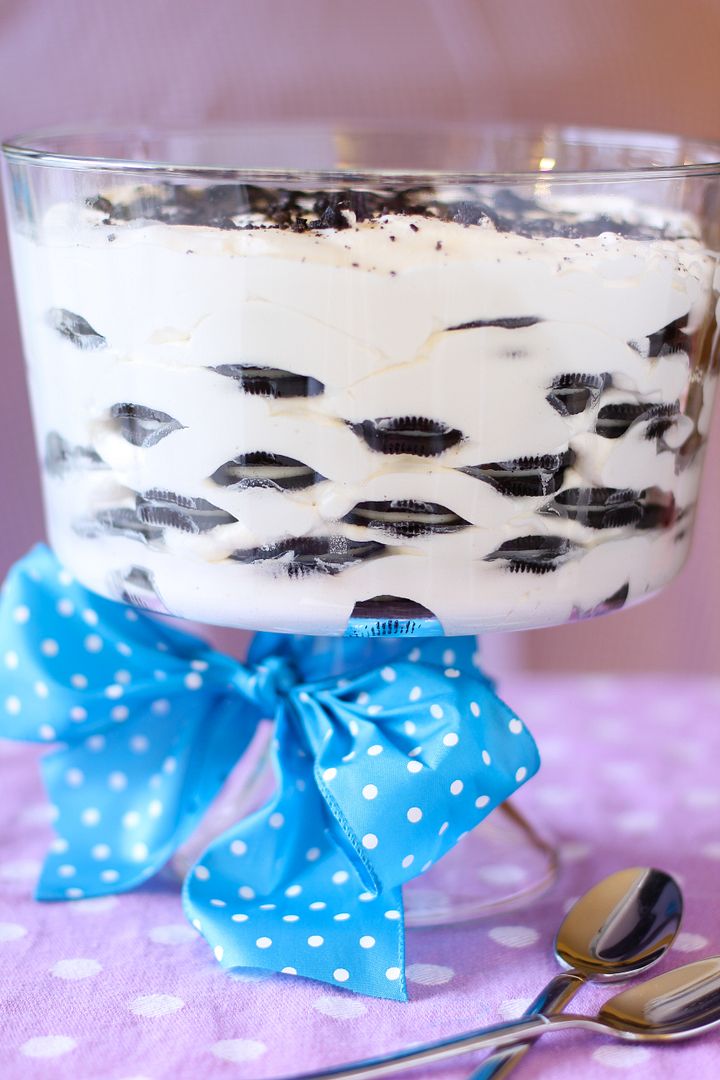
Boozy Icebox Cake
Recipe by: Adapted from Smitten Kitchen, originally adapted from The Magnolia Bakery Cookbook
Yield: 6-8 servings
Icebox Cake is so easy, fast, and delicious. It’s probably the dessert with the biggest bang for your buck. This version is made with oreo cookies and a bunch of whipped cream — and Amaretto for a zing! The cream softens the oreos as they chill overnight into a velvety, cake-like dessert.
Ingredients:
3 cups heavy cream
1/4 cup almond liqueur (like Amaretto) (optional)
3 tablespoons sugar
2 teaspoons vanilla extract
2 packages chocolate sandwich cookies (like Oreos)*
*You might want an extra package on hand in case your trifle dish is larger.
Directions:
Fit a mixer with a whisk attachment and whisk the heavy cream, almond liqueur (if using), sugar, and vanilla extract together in a large chilled bowl until it forms soft peaks. In a trifle dish, arrange a single layer of oreo cookies (for my dish, I used between 8-11 cookies per layer, since the sides flare outward) in a circle, with a cookie or two in the middle. Carefully spread about a 1/2 cup of whipped cream over this first layer. Repeat layering cookies and whipped cream, ending with a layer of whipped cream on top. Crumble a last cookie over the top. Cover and refrigerate overnight before serving.