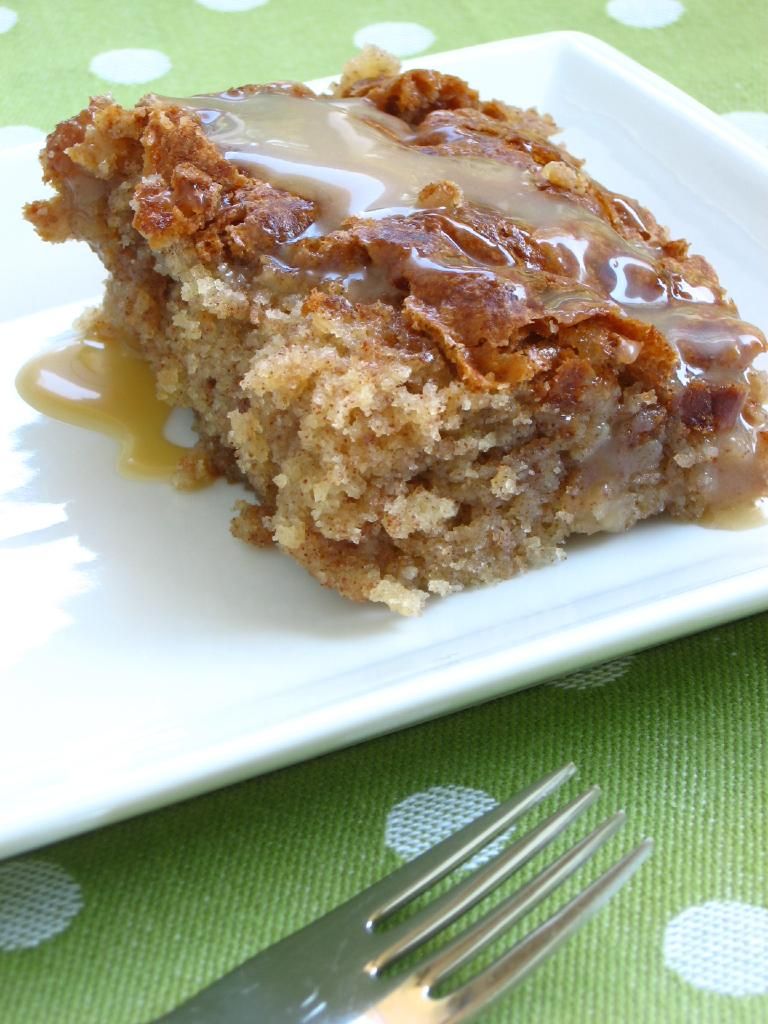
Honeybun Cake with Caramel Sauce

Willow Bird Baking is a contestant in Project Food Blog, a contest comprised of a series of challenges to find the next food blog star. Today is the last day to vote for me in Round 2! To vote, register for a Foodbuzz account. Once you’re registered, sign in and go here. To vote, click the heart next to the words “Vote for this Entry.” I am so grateful for your support!

Willow Bird Bakers, I have one thing to say to you:

You’re my honeybun, sugarplum,
Pumpy-umpy-umpkin; you’re my sweetie pie.
You’re my cuppycake, gumdrop,
snoogums-boogums; you’re the apple of my eye!
And I love you so and I want you to know
That I’ll always be right here,
And I love to sing sweet songs to you,
Because you are so dear!

Mike thinks this song is annoying, but we’ll ignore him for a moment — because it’s too true to resist. I got an email today from a stranger-turned-fast-friend that reminded me (again!) how special the opportunity to share with you really is.

This now-friend, J, said that she’s been experiencing some hard times, and that something she found here — on a food blog of all things — comforted her on a difficult day.

Little did she know that I was also having a difficult day: Byrd’s tummy has been upset and after all her knee surgery woes, this feels like the proverbial camel’s back-breaking straw. Mike and I are struggling with the distance between us, among other things. A confluence of so many issues has been forming a river of worry in my heart.

Her note letting me know that she had found comfort here was, so fittingly, a huge comfort to me. Apart from just the reminder that the food community is an army of friends and supporters, her email calmed the river of worry and helped me listen to the living waters inside of me. The main points of a sermon I heard just this past Sunday while visiting Mike in Raleigh flooded into my mind: God is in control, He is faithful, and I can rest in Him in my time of need.

Indeed, Jesus said, “Come to Me, all you who labor and are heavy laden, and I will give you rest.”

With how you’ve supported me, no wonder I can’t help but call you my honeybuns — and give you some honeybun cake.

This cake is a simple, fuss-free dessert to make and serve. More importantly, though, it’s dynamite! The buttery cake base with the deep cinnamon swirl reminds me of the best sort of coffee cake, and the buttery caramel drizzle makes it gooey, just like a real honeybun. Each bite is a revelation of different flavors, since the swirl ensures you get a different proportion of cinnamon to butter cake with each forkful. In short: YUM.

Regarding the recipe, it calls for a box cake mix. I’m not a box mix snob — I’m of the camp that says use a box mix if you feel like it, and don’t use one if you don’t feel like it. Frankly, box mixes taste great. The only argument against them that resonates with me is the fact that they contain preservatives and artificial flavorings, but really, y’all, we’re making a honeybun cake — exactly how healthy do you think you could make this thing? (answer: not very.) We eat dessert in moderation anyway (ahem).

That being said, I prefer to make things from scratch. One reason is because I feel like people are too far removed lately from the raw ingredients of their meals, and have decided that baking or cooking from scratch is intimidating. A primary message of my blog is that cooking from scratch isn’t scary — that anyone can do it. Another reason I cook from scratch is just because I like to. Simple!


from-scratch version

For this cake, I tried it two ways. I didn’t set out to try it two ways, mind you, but that’s how it ended up happening! First, I tried baking it with a homemade cake mix. Turns out that recipe’s proportions were off somehow. The cake overflowed a bit, and was gooey in the center while done on the sides. Disappointed and in need of a dish for a school potluck, I grabbed my roommate’s box of butter cake mix and hastily remade the cake.

When my second cake was in the oven, though, I realized that my first cake was actually lookin’ pretty delicious despite being wonky. If anything, the slightly undercooked middle was appealingly moist. Just like that, I had two cakes — and the perfect setup for a box mix versus homemade comparison!


box mix version – note the yellow!

So which did I like better? Honestly, it was a very close call. The box mix has a more pronounced butter flavor that was delicious, but did taste artificial. The homemade cake had a deeper from-scratch flavor, but wasn’t as buttery. In the end, I think I preferred the homemade version, but with such close results, you can feel comfortable going either way. If you do use the homemade cake mix, though, be prepared for the wonky manner in which is bakes — and maybe line your oven with foil to guard against spills.

What about you – do you use box cake mixes? Why or why not?

Honeybun Cake with Caramel Sauce


Recipe by: My friend Lora and Martha Stewart (caramel sauce)
Yield: one 9 x 13 inch cake; serves about 12-15 depending on size of pieces

Cake Ingredients:
1 box butter recipe yellow cake mix (or 1 recipe homemade cake mix, below)
4 eggs
1 cup milk
3/4 cup vegetable oil
1 cup sugar
2 tablespoons cinnamon
1 cup brown sugar

Caramel Sauce Ingredients:*
3/4 cups sugar
1/8 cup water
1/2 cup heavy cream
1/8 cup creme fraiche or sour cream
1/4 teaspoon pure vanilla extract
Pinch of coarse salt

Directions:
Make caramel sauce first. Prepare a bowl set in an ice-water bath. Place sugar and water in a saucepan and heat over medium-high heat until it boils and the sugar is dissolved. Throughout this process, use a wet pastry brush to wash down the sides of your saucepan often to prevent crystal formation. Reduce the heat to medium and cook until the mixture reaches 345 degrees on a candy thermometer (begin swirling gently when you see hints of amber, so the sugar cooks evenly), about 5-7 minutes. Immediately remove from the heat and add cream carefully (the mixture will bubble up) while whisking constantly. Return mixture to medium heat until it boils and sugar melts.

Remove from heat, and pour into the bowl set in your ice-water bath. Let the caramel cool, whisking often, for 10 minutes before whisking in creme fraiche, vanilla, and salt. Cover and refrigerate at least 2 hours before serving over heated honeybun cake. Can store in the refrigerator for up to 5 days.

To make honeybun cake, preheat oven to 200 degrees F. Mix together homemade or store-bought cake mix, eggs, milk, sugar, and oil. Pour this mixture into a greased 9 x 13 inch baking pan. Mix cinnamon and brown sugar together and sprinkle this mixture over the batter. Use a fork to swirl the batter over the entire cake, going to the bottom of the pan, until it is well-swirled. Bake cake at 200 degrees F for 20 minutes before increasing the temperature to 300 degrees F and baking for an additional 30 minutes. Drizzle caramel sauce over hot pieces of cake.

*(Alternate glaze, if you’re not a caramel fan (though that is some phenomenal caramel, y’all, and very easy to make with a candy thermometer! Glaze: mix 1 cup powdered sugar, 2 tablespoons milk, 1 teaspoons vanilla and pour over hot cake.)

Homemade Cake Mix


Recipe by: My Kitchen Cafe
Yield: one box mix worth

NOTE: as mentioned in the post above, this recipe bakes wonkily in a 9 x 13 in. pan. Visit My Kitchen Cafe to read her note about it. I still think it’s worth making, since mine turned out delicious, but do line your oven with foil and watch that the sides of the cake don’t burn while you’re waiting for the middle to finish cooking.

Yellow “Cake Mix” Cake Ingredients:
2 cups granulated sugar
1 1/2 cups all-purpose flour
1 1/2 cups cake flour
1/2 cup nonfat dry milk powder
1 tablespoon baking powder
1 teaspoon salt
16 tablespoons butter (2 sticks), cut into 1/2-inch pieces and chilled
1 tablespoon vanilla extract
2 teaspoons imitation butter flavor

Directions:
Pulse sugar, flours, milk powder, baking powder, and salt in a food processor for 15 seconds to combine. Add butter, vanilla, and butter flavor and pulse until the mixture resembles coarse meal (much finer than, say, a pie crust). Freeze the dry mixture in a zipper-lock bag for up to 2 months or use immediately in recipe above.

If you liked this post, please:
Subscribe to Willow Bird Baking
Follow Willow Bird Baking on Twitter
Follow Willow Bird Baking on Facebook
Give this post a thumbs up on StumbleUpon


ShareOther ways to share this post with friends!

Honeybun Cake Preview (and Project Food Blog Voting Now Open!)

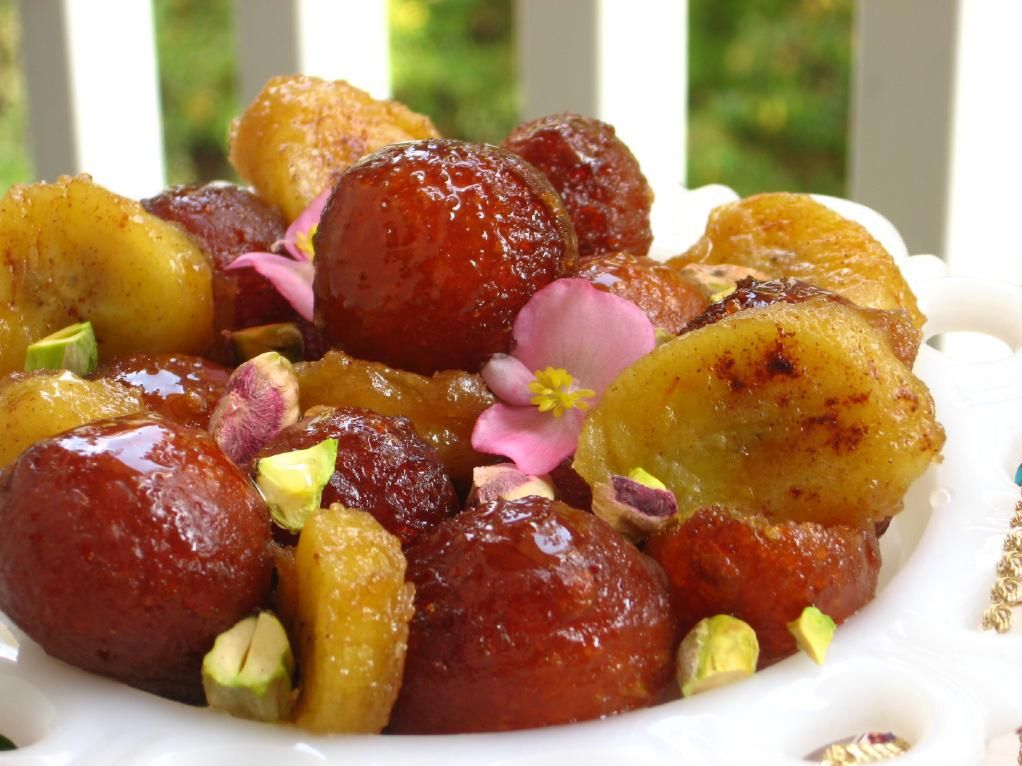
In case you missed it (perhaps you were vacationing in sunny Mexico? Trekking through the Himalayas? Stuck in an elevator?), Willow Bird Baking is a contestant in Project Food Blog, a contest comprised of a series of challenges to find the next food blog star. On Saturday I posted my post for Challenge #2, a dessert as fragrant with memories as it is with rosewater, cardamom, and saffron: the Indian treat Gulab Jamun.

Voting for Challenge #2 is now open! To vote, register for a Foodbuzz account. Once you’re registered, sign in and go here. To vote, click the heart next to the words “Vote for this Entry.” I am so grateful for your support!

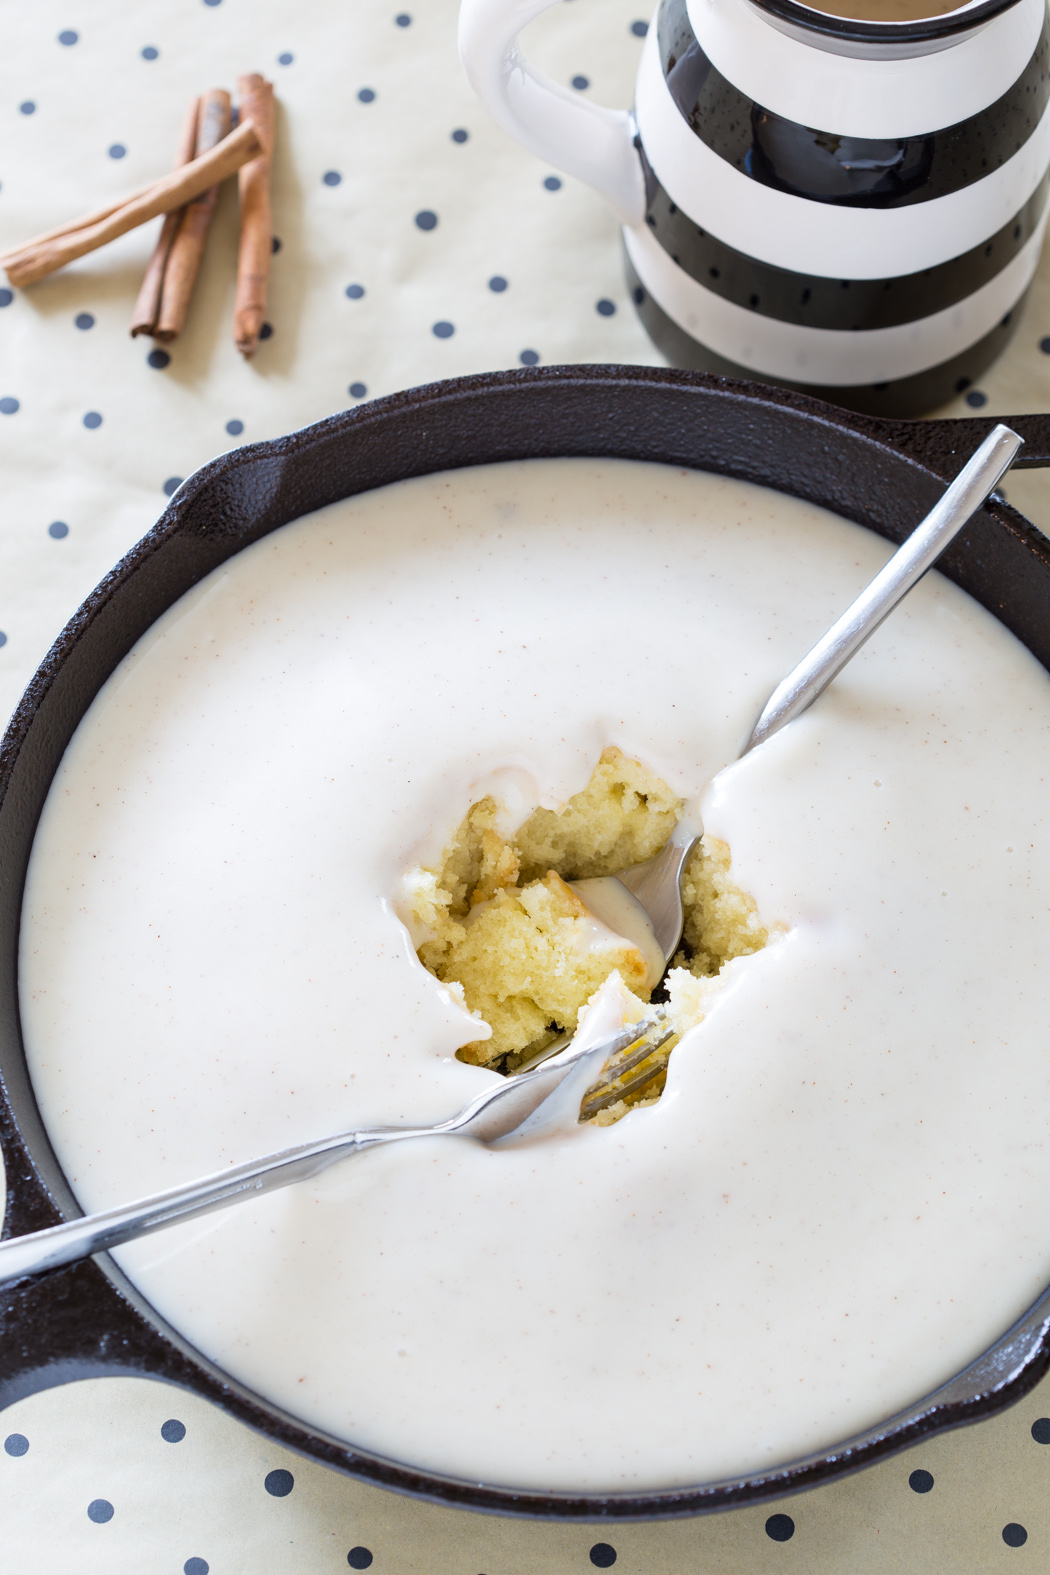
As a tiny token of my gratitude, here’s a sneak preview of the delicious treat I have coming up for you midweek! You do not wanna miss this thing!

If you liked this post, please:
Subscribe to Willow Bird Baking
Follow Willow Bird Baking on Twitter
Follow Willow Bird Baking on Facebook
Give this post a thumbs up on StumbleUpon

ShareOther ways to share this post with friends!

Gulab Jamun with Caramelized Bananas — and an Indian Buffet Love Story

I have heavy scent memories of an Indian restaurant Mike and I used to frequent called Jaipur. They must have burned incense every night for years. Maybe the scent is something the owner remembered but couldn’t place — something from when his synapses weren’t yet refined enough for memory. His mother burning it in the kitchen in a now-faraway home on the subcontinent, and he, just a baby then, lying swaddled in a room down the hall, his blankets collecting particles of sandalwood in each fold.

It’s sweet to imagine what the little restaurant means to him. It means something sweet to me, too. The orange and pink and gold, the weight of the incense, the guttural cry of otherworldly Indian music accompanied by sitar tones — all of it connected to a pseudo-memory for me. A memory of dust, colors, street food, and lights — an India I’ve never visited except in East Asian art classes, narrow Indian restaurants, the marigold-filled scenes of Monsoon Wedding, and the memories and photographs of friends.

Jaipur was also special to me and Mike because it was “our restaurant.” I remember weekend after weekend of trekking across town in my now-long-gone Altima, arriving at the buffet after dark. I remember rationing each plate so that I could have seconds of some of my favorites — palak paneer and red lentils — and sopping up every drop with warm naan.

I remember the shy waiter who knew our order before we sat down, and the chef who stopped us before we could serve ourselves from the buffet if he had a fresher, newer batch of bread. I remember smooth, sweet mango lassis, holding hands across the table . . . and spooning up warm, fragrant Gulab Jamun into tiny bowls alongside fruit-studded rice pudding.

It’s literally been years since I’ve been back to Jaipur now, and these neon and curry memories are even more poignant with Mike living across the state from me. When I saw that Project Food Blog Challenge #2 was to make a classic dish from another culture that’s out of your comfort zone, I knew I had to do some justice to Jaipur and our times there.

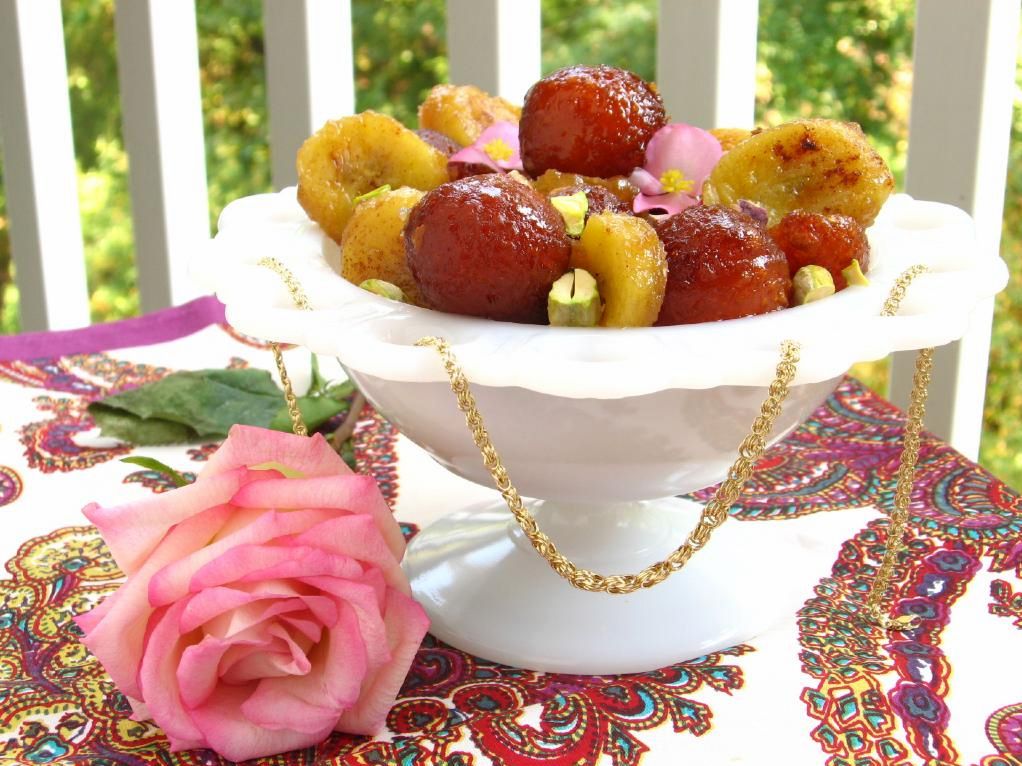
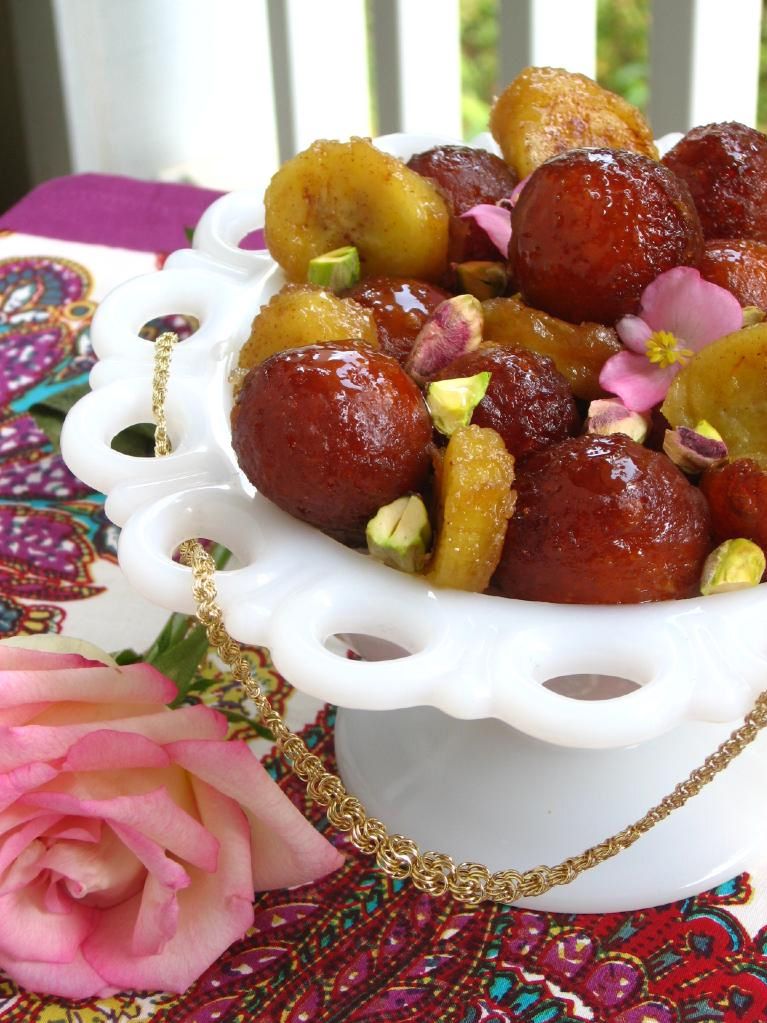
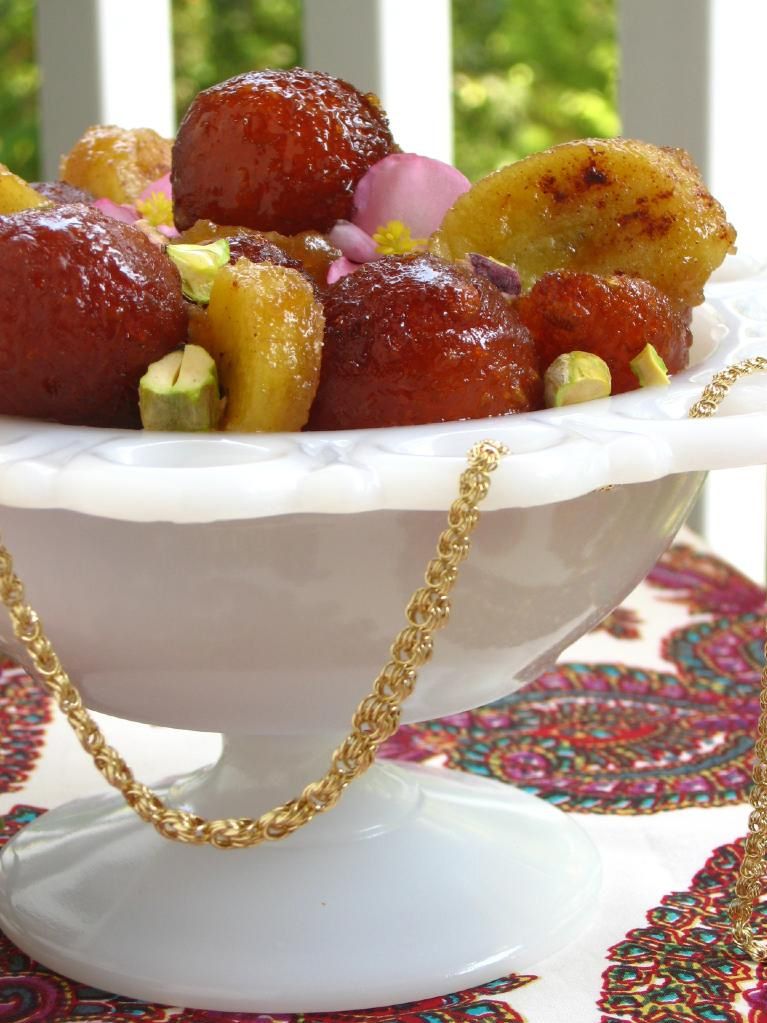
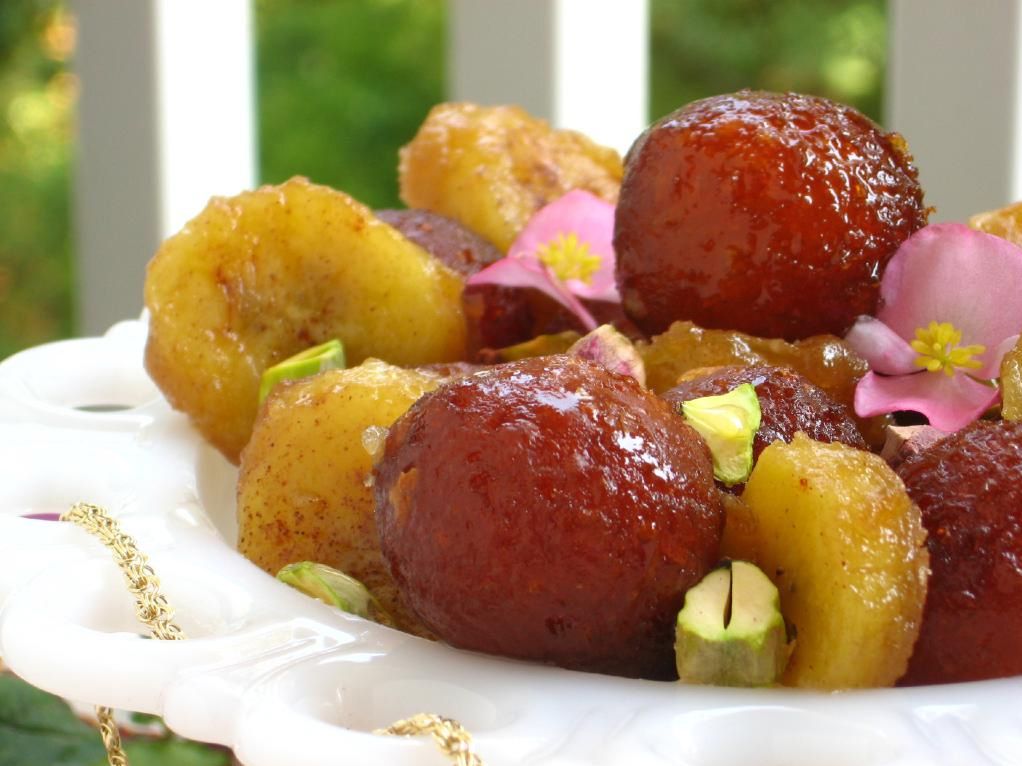
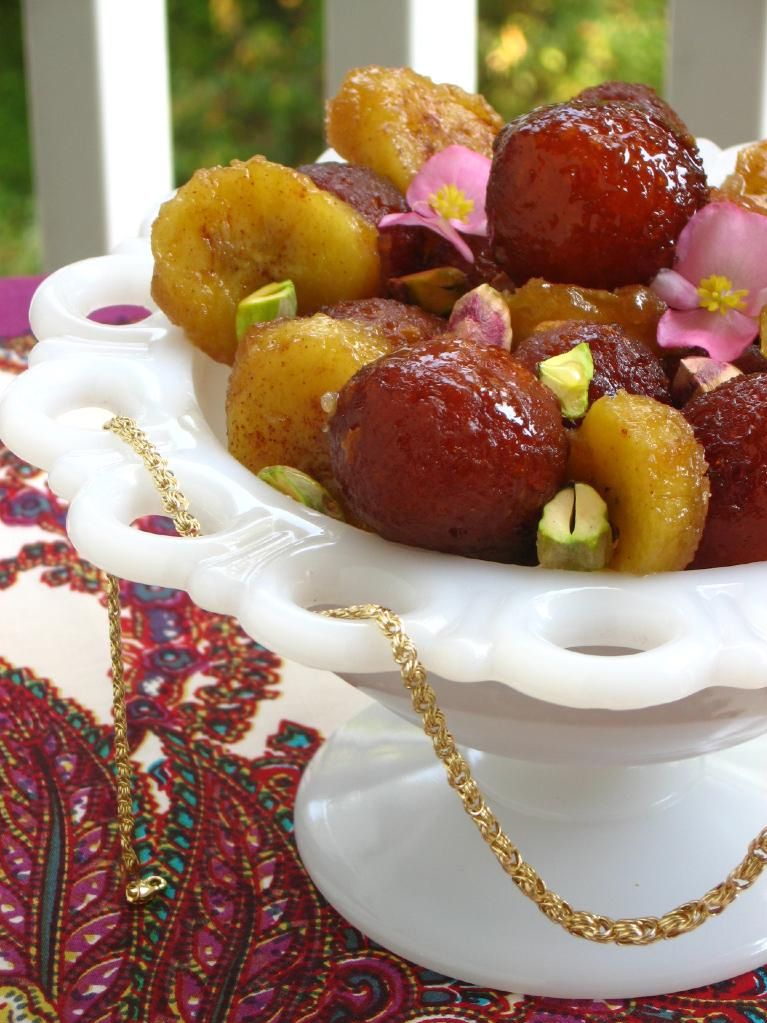
Gulab jamun, named for their rose flavoring and a fruit they resemble, are cake-like, juicy dumplings loaded with a sweet rose, cardamom, and saffron syrup. They’re common at Indian weddings and were often the highlight of our dinner at Jaipur. I savored mine in two bites, while Mike devoured each dumpling in one gulp.

While these rosy, sticky dumplings are a joyful memory for me, making them wasn’t something I considered before reading Project Food Blog’s Challenge #2. They’re fried — and frying things is not something I love. My fry-phobia not about the health considerations (have you seen my blog lately?), but rather, the difficulty of maintaining an appropriate oil temperature, the mess, and the inevitable burnt/undercooked disasters. Remember the Tumbleweed Burger post, where my attempt to fry onions produced a sum total of one halfway acceptable onion (okay, even that one was pretty pitiful) that I used in pictures and then threw away?

I’m fighting for something I love, though, and I hope my steps away from my comfort zone are steps towards becoming the next food blog star.

It wasn’t enough to recreate my favorite, sultry Indian dessert — I wanted to bring something of my taste to the table. I paired the gulab jamun with caramelized bananas and pistachios, hoping to create a rich, floral, indulgent product that would be incredible served warm over vanilla bean ice cream.

My first version was a little too sweet, though (sugar syrup AND caramelized bananas). I reduced the sugar in the bananas and the gulab jamun syrup in the recipe below in hopes that it balances out. I’ll try it this way next time — no loss if it doesn’t work, because the bananas and dumplings are both delicious on their own as well!

What about you? What food stirs up important memories for you? Is it a type of cuisine, a certain dish?

Gulab Jamun with Caramelized Bananas


Recipe by: Gulab jamun by Show Me the Curry, and caramelized bananas adapted by Willow Bird Baking
Yield: 10-15 gulab jamun, depending on the size

Syrup Ingredients:
1.5 cups sugar
2 cups water
a few drops rose essence (or about 4x the amount of rosewater)
1/2 teaspoon (or to taste) ground cardamom
a few strands saffron (optional)

Ball Ingredients:
1/2 cup instant dry milk powder
2 tablespoons all-purpose flour
2 tablespoons yogurt
1 tablespoon ghee, clarified butter, or vegetable oil
1/4 teaspoon baking soda
oil for frying (at least 1.5 inches deep)
pistachios for garnish

Caramelized Banana Ingredients:
1 banana, slightly green, not quite ripe, sliced crosswise into 1/4″ slices
1 tablespoon light brown sugar
1.5 tablespoons unsalted butter
dash of cinnamon

Directions:
First, make the syrup. Combine all syrup ingredients in a sauce pan and bring to a boil. Once it boils, reduce the heat and allow it to simmer while you prepare the rest of the recipe.

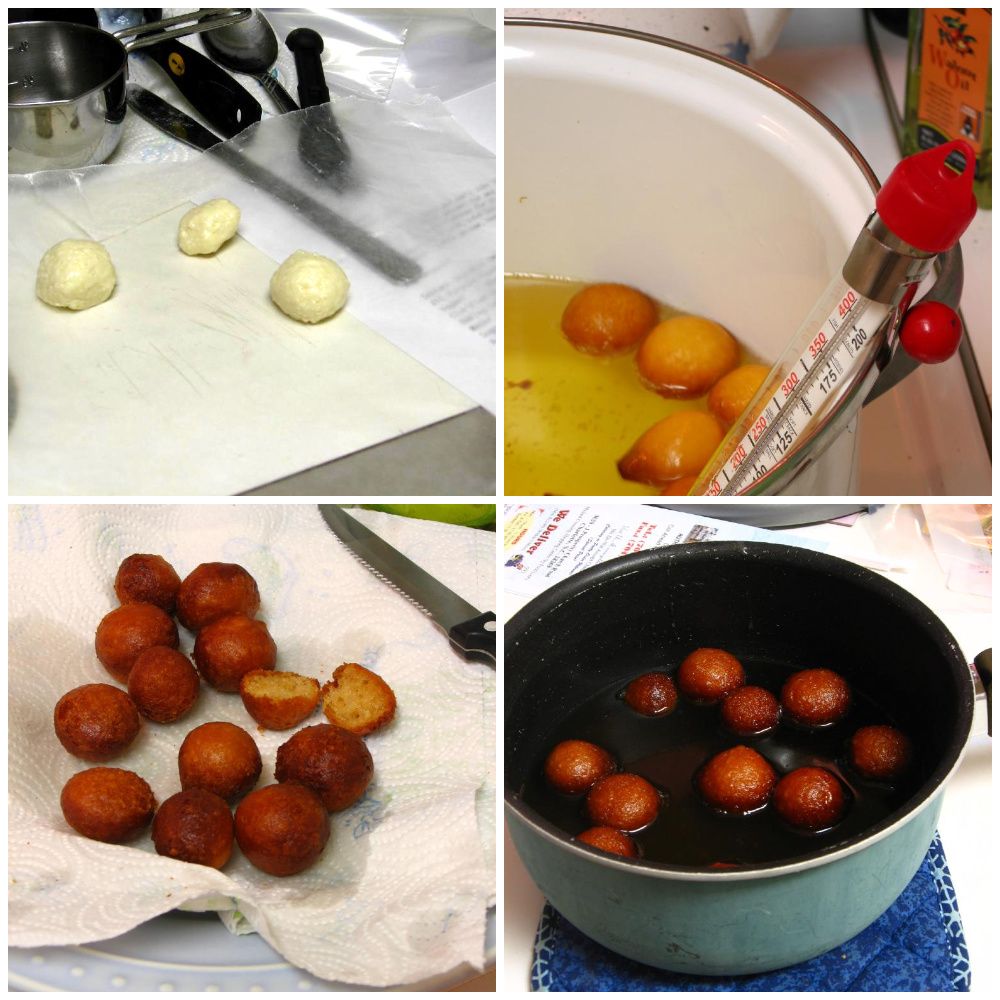
Begin heating the oil for deep-frying on low-medium heat. You want it to reach 230 degrees according to some websites, but I had more luck frying from 250-270. You want a slow, patient fry on these.

While oil heats, mix dry ingredients: milk powder, all-purpose flour, and baking soda. Add clarified butter (or ghee or vegetable oil) and then, slowly, the yogurt, mixing well to make a dough. Allow it to rest for 5-10 minutes (don’t worry if it looks wet at first — after resting it will be right). With oiled hands, form into 10-15 small balls (they will nearly double in size throughout the cooking and soaking process, so do make them smaller than you think you should).

Test the oil: drop in a small piece of dough. If it sits at the bottom of the pan for a moment before coming to the surface, the oil is ready. Drop in 3-4 balls at a time and, after they float up, rotate them continuously for an even color. Be patient — when the balls are a dark golden brown, remove them with a slotted spoon and let them drain on paper towels.

When all balls are draining, bring the syrup up to a boil again. Drop in the balls, turn off the heat, and cover the syrup. Allow balls to soak at least 45 minutes to overnight.

When about ready to serve, caramelize bananas. Heat a large, non-stick skillet over medium-high heat. When hot, add half of the butter and let it sizzle for a few seconds before adding bananas. These should brown for about 30 seconds without being disturbed. Then turn them over and add brown sugar, cinnamon, and last half of butter. Shake the pan to keep the bananas moving and cook about a minute more, until sugar is melted and bananas are caramelized, but still solid. Remove from heat. Serve gulab jamun with caramelized bananas and pistachios to garnish. You can also serve warm gulab jamun and caramelized bananas over vanilla ice cream.

Willow Bird Baking is a contestant in Project Food Blog, a contest comprised of a series of challenges to find the next food blog star. To see my contestant profile, please click here. Voting for Challenge #2 begins on September 27 — will you consider voting for me? I’ll post a reminder and instructions on how to do so on that date. I am so grateful for your support!


If you liked this post, please:
Subscribe to Willow Bird Baking
Follow Willow Bird Baking on Twitter
Follow Willow Bird Baking on Facebook
Give this post a thumbs up on StumbleUpon


ShareOther ways to share this post with friends!

Assorted Donut Muffins and Project Food Blog: Vote Now!

Willow Bird Baking is a contestant in Project Food Blog, a contest comprised of a series of challenges to find the next food blog star. If you missed it, my first challenge post explains why I blog, and what makes WBB special. Voting for Challenge #1 is now open! To vote, register for a Foodbuzz account. Once you’re registered, sign in and go here. To vote, click the heart next to the words “Vote for this Entry.” I am so grateful for your support!


At this point, just about all of us have either made Donut Muffins, eaten Donut Muffins from a generous friend, bookmarked a recipe for Donut Muffins, drooled over photos of Donut Muffins, or cursed the day Donut Muffins were invented as we kicked our scales across the bathroom.

I was in the “bookmarked the recipe” category for way too long. Every time I’d see another Donut Muffin post pop up in my Google Reader, I’d admonish myself for not having made them yet. They’re billed as warm, pluffy cake-donut-like muffins that have soaked up butter before being coated in cinnamon and sugar. It’s basically criminal that I hadn’t made them until this past weekend. But don’t worry — I made up for lost time.

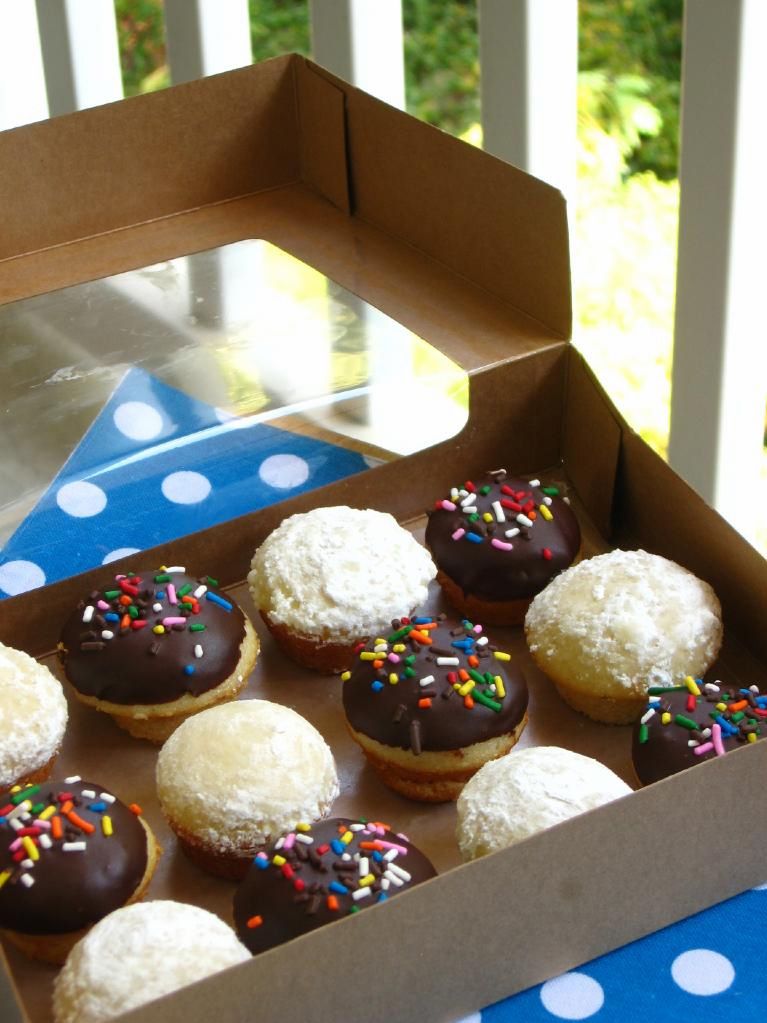
What’s the fun of donuts? The taste, definitely — but also the puff of powdered sugar, the jam centers, the colorful sprinkles, the melty chocolate, the sticky glaze. A major component of what makes donuts so fun is the assortment. Even though I have a favorite donut, I always buy a few kinds so that I can pick through the box excitedly, tasting different combinations and flavors. So why make just one sort of Donut Muffin? Especially when it’s so easy to make a few kinds?

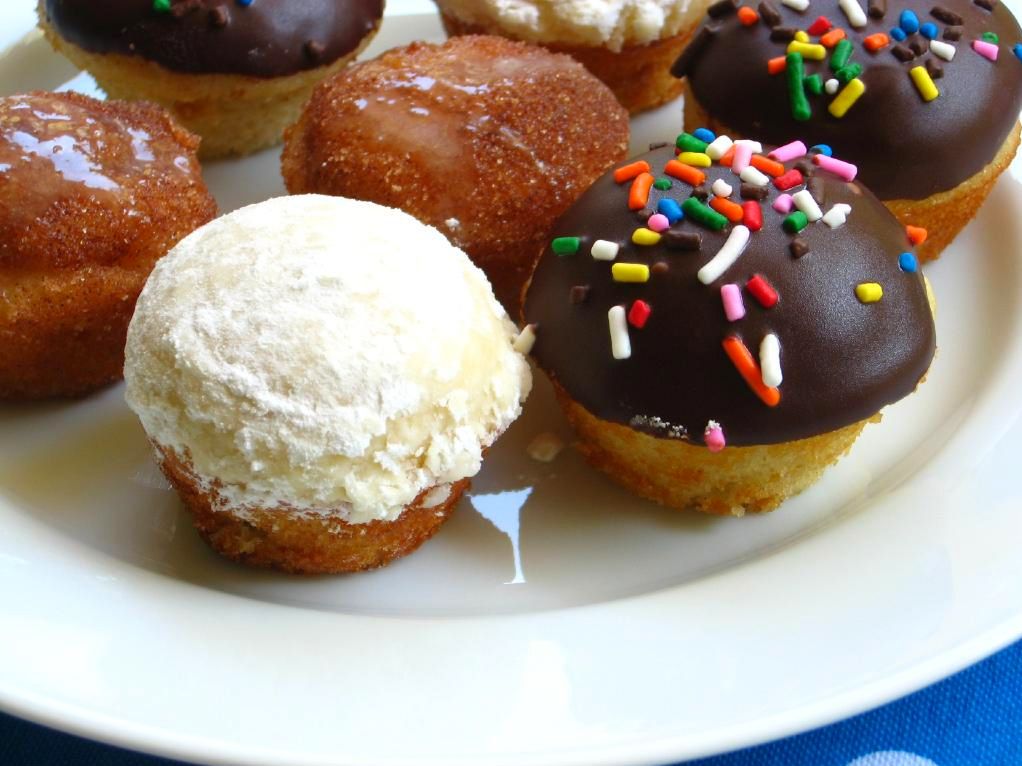
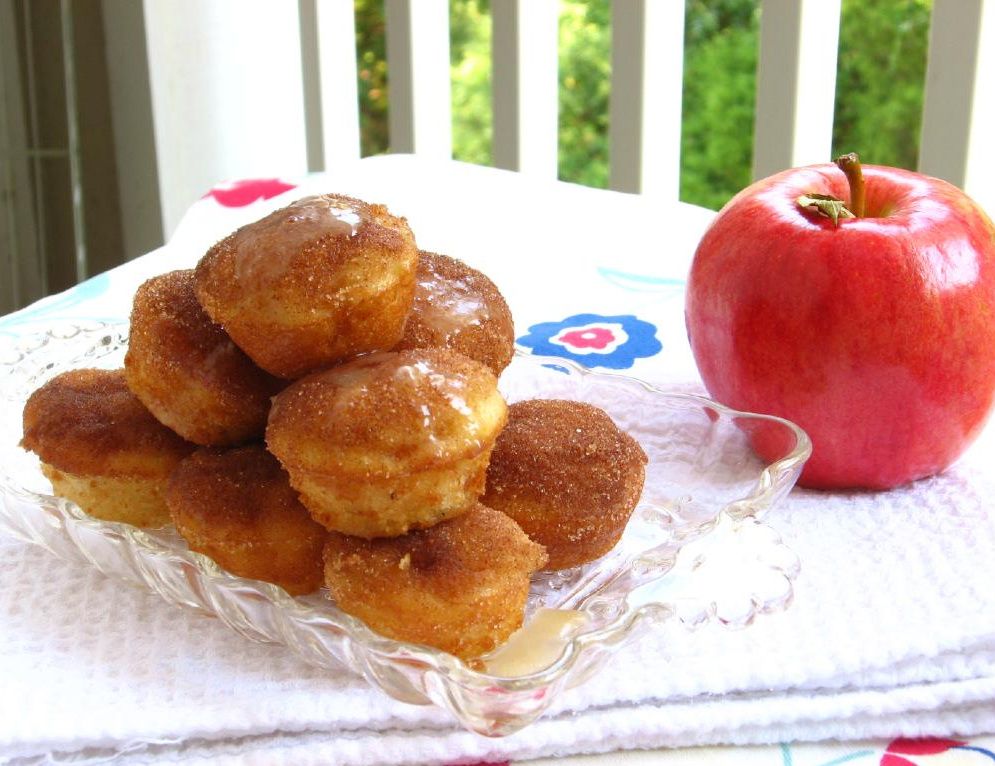
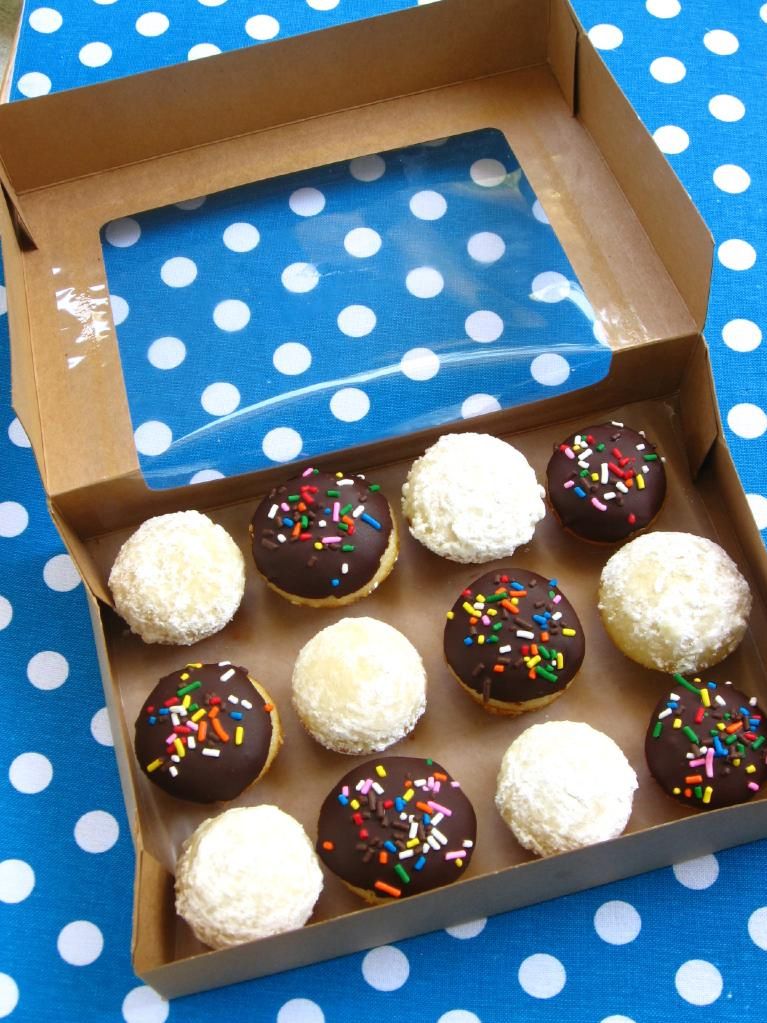
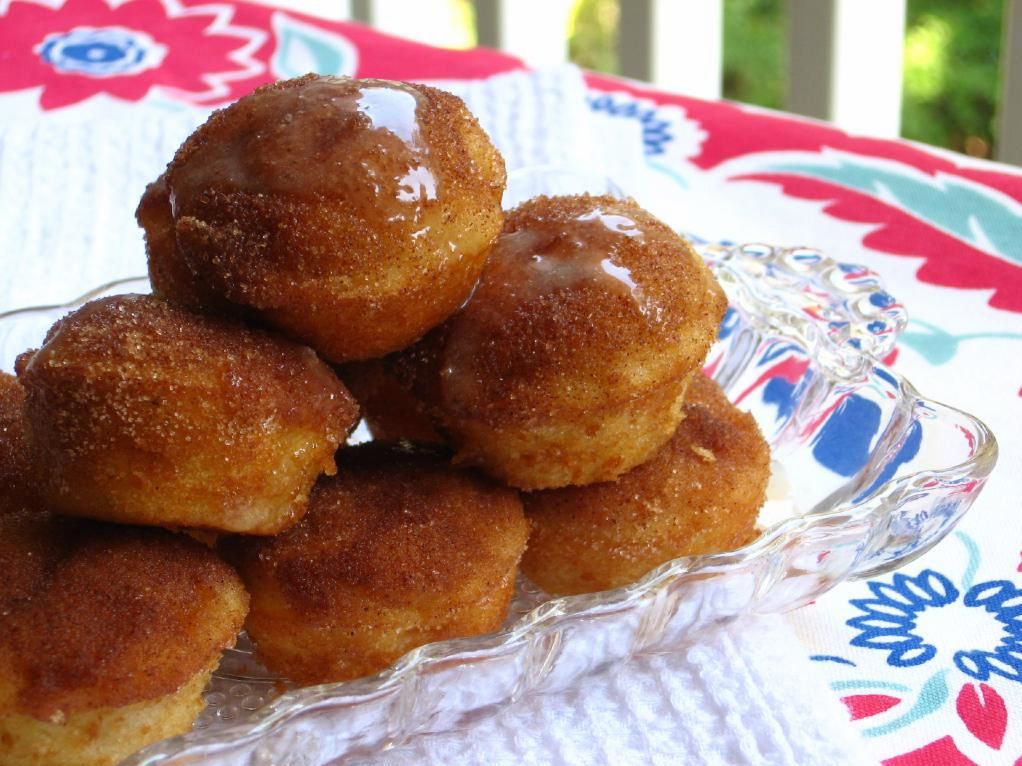
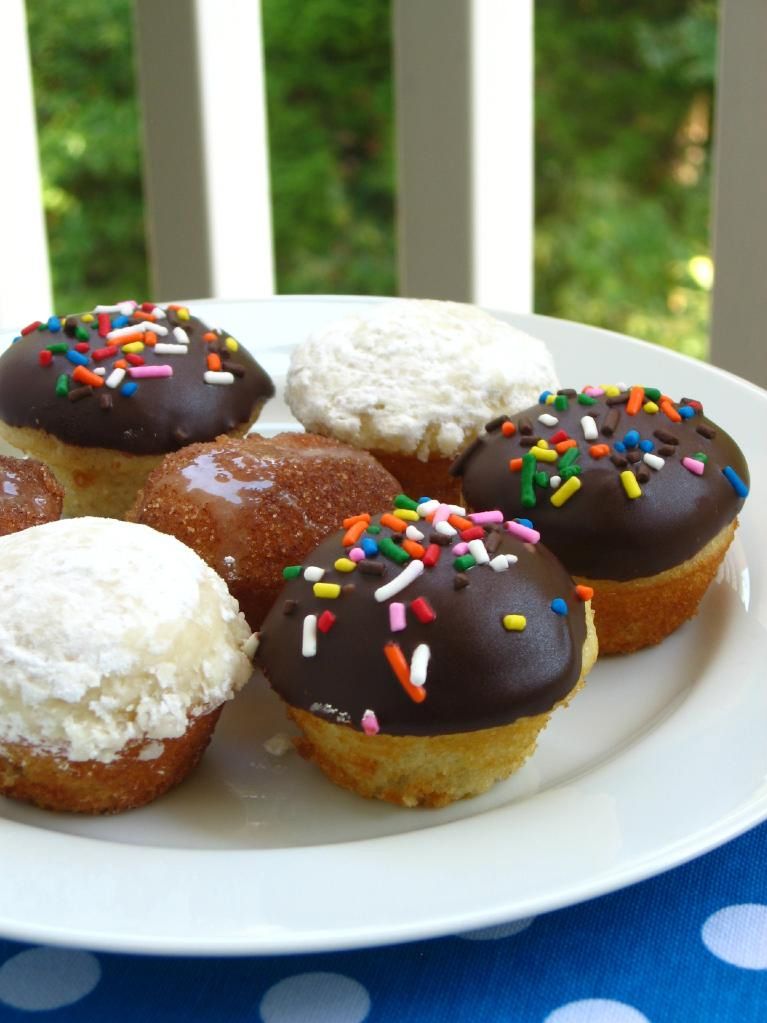
In my Donut Muffin assortment: Caramel Apple Donut Muffins, Jam-Filled Powdered Sugar Donut Muffins, and of course, Chocolate Sprinkle Donut Muffins.

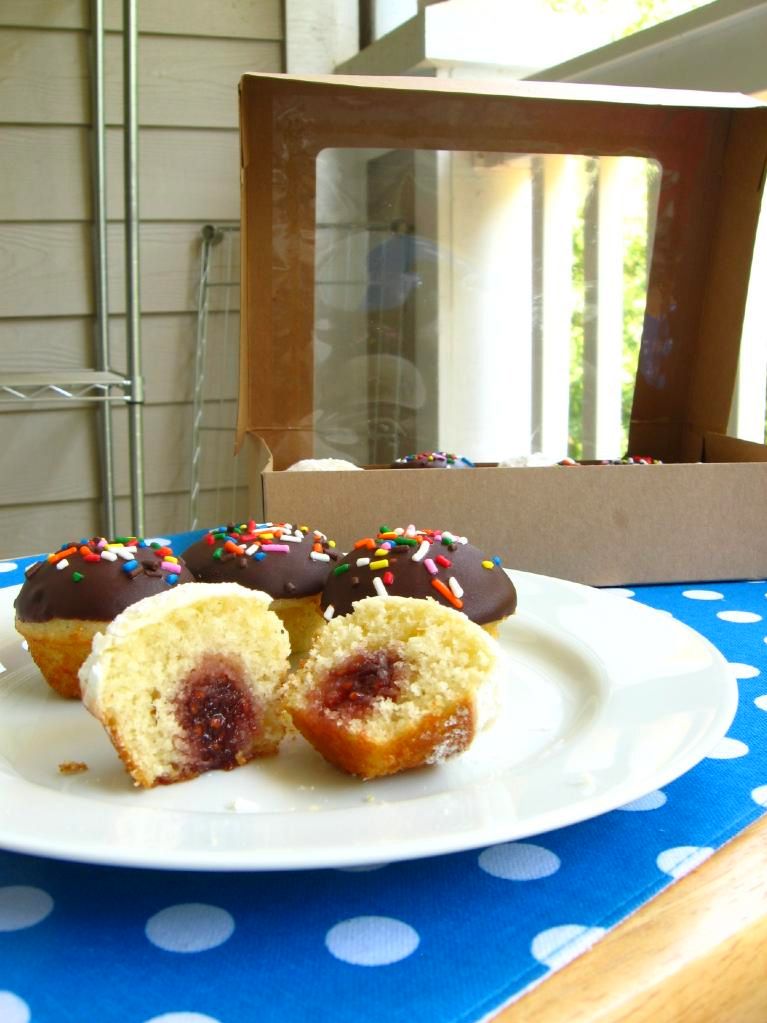
You start out by making the batter like normal, but then separate a third of it to add diced apples to. After baking all the muffins up, the apple donut muffins get coated in cinnamon, sugar, and a caramel glaze. Another 1/3 of the batch gets coated with powdered sugar and filled with raspberry jam. The final 1/3 gets a bath in melted chocolate and some sprinkles. I bought a box of bakery cookies just to have a cute little “donut box” to put them in (no clue what I’m going to do with those cookies)!

The Chocolate Sprinkle Donut Muffins were good — but next time I’ll fill them with whipped cream or pastry cream for more donuttiness (that is a Merriam-Webster-certified real word, y’all. Okay, it’s not. Not even close). The Jam-Filled Powdered Sugar Donut Muffins were delicious little jammy bites. But the Caramel Apple Donut Muffins . . . they were OUT OF THIS WORLD. Like, OUT OF THIS GALAXY. Like, OH MY GOODNESS. My roommate had to sit down when she took her first bite, and she insists they’re the best thing I’ve ever made. Are you dicing apples yet? Good.

When they’re warmed up slightly, full of apply, buttery, cinnamon-sugary goodness, and coated with the buttery caramel glaze, these fluffy Caramel Apple Donut Muffins are analogous to the donuts you’d drive across town for. Sure, you want the assortment — and I ate plenty of the other two tasty flavors — but these are the ones you’d keep coming back for.

By the way, are you afraid of caramel? That’s probably because you’ve been using recipes with directions that say things like “look for an amber color,” or, even better, a “dark amber color.” I don’t know about you, but I think “amber” is pretty subjective. What gives? We stopped using terms like “low oven” and “slow oven” in recipes long ago in favor of fancy little things called oven temperatures. It’s time we switched over our sugar recipes to include temperatures as well. Caramel is nowhere near as frightening with a candy thermometer, y’all. You’ll be glad to see I’ve provided temperatures for your caramel sauce below, since I’m not feeling prehistoric.

What’s your favorite kind of donut? I think mine changed with my first bite o’ Donut Muffins! The recipe below shows you how to make all 3 kinds at once, but feel free to make just one sort if you’re feeling decisive.

Assorted Donut Muffins


Recipe by: Willow Bird Baking, adapted from the base recipe by Buns In My Oven. Caramel sauce by Martha Stewart.
Yield: 36 mini-muffins or 18 regular muffins

Batter Ingredients:
3/4 cup sugar
1 large egg
1 1/2 cups all purpose flour
2 tsp baking power
1/4 tsp salt
1/4 tsp ground nutmeg
1/4 cup vegetable oil
3/4 cup milk (low fat is fine)
1 tsp vanilla extract

Extras for Chocolate Sprinkle Donut Muffins:
melted chocolate
sprinkles
whipped cream (if desired, for filling)

Extras for Caramel Apple Donut Muffins:
2 tablespoons melted butter, for dipping
1/4 cup sugar mixed with 1 1/2 teaspoons cinnamon
1/4 apple, peeled and diced (I used a Gala apple)
caramel sauce (recipe below)

Extras for Jam-Filled Powdered Sugar Donut Muffins:
raspberry jam (or flavor of your choice)
about 3/4 cup powdered sugar, sifted
melted butter leftover from Caramel Apple Donut Muffins

Directions:
Prepare two mini-muffin pans by spraying with cooking spray. Preheat the oven to 350 degrees F. Beat sugar and egg together in a large bowl until fluffy. In a smaller bowl, whisk together flour, baking powder, salt, and nutmeg. Pour dry ingredients into wet ingredients and stir until combined. Add vegetable oil, milk, and vanilla extract and mix. Separate 1/3 of mixture into separate bowl and fold in diced apples (these will be the Caramel Apple Donut Muffins). Pour all batter into prepared muffin tins, filling each about 3/4 full. Bake for 13-15 minutes until tester comes out clean.

Let cool in the pan for a few minutes before removing onto a cooling rack (if muffins are extremely delicate and difficult to remove, you may need to bake them a minute longer — mine weren’t quite done enough. On the cooling rack, separate the donut muffins into 3 batches: the apple muffins, 1/2 of the plain muffins, and the other half of the plain muffins. These will be your three types of donuts.

For the Caramel Apple Donut Muffins: Melt the butter in the microwave and mix the cinnamon and sugar in a separate bowl. When the muffins are cool enough to handle, dunk the tops into the melted butter and then into the cinnamon-sugar mixture. Let dry/cool on cooling rack as you prepare caramel sauce (as directed in recipe below). Store caramel in fridge and drizzle on heated Apple Muffins right before serving.

For the Chocolate Donut muffins: When the muffins are cool enough to handle, dunk the tops into the melted chocolate. Add colorful sprinkles. You could fill these with pastry cream or whipped cream using a narrow pastry tip inserted into the bottom of the muffin if you wanted a cream-filled donut muffin.

For the Jam-Filled Powdered Sugar Donut Muffins: When the muffins are cool enough to handle, dunk the tops into the leftover melted butter and then into sifted powdered sugar. When donuts are cool, fill them with raspberry jam using a small pastry tip jabbed into the bottom of the muffin. Be careful not to overfill and burst your muffin (that should definitely be a more popular idiom than ‘burst your bubble,’ don’t you agree?) You may have to re-powder tops before serving if you keep these overnight, since some of the powdered sugar dissolves.

NOTE: Store all your muffins in an airtight container in the fridge.

Caramel Sauce Ingredients:
3/4 cups sugar
1/8 cup water
1/2 cup heavy cream
1/8 cup creme fraiche or sour cream
1/4 teaspoon pure vanilla extract
Pinch of coarse salt

Directions:
NOTE: This makes more caramel than you need, but I don’t reduce the recipe because it would make it difficult to use a candy thermometer, a tool that I believe is absolutely crucial in preparing caramel. I know you can find something else to spoon caramel sauce over — and this is truly delectable caramel.

Prepare a bowl set in an ice-water bath. Place sugar and water in a saucepan and heat over medium-high heat until it boils and the sugar is dissolved. Throughout this process, use a wet pastry brush to wash down the sides of your saucepan often to prevent crystal formation. Reduce the heat to medium and cook until the mixture reaches 345 degrees on a candy thermometer (begin swirling gently when you see hints of amber, so the sugar cooks evenly), about 5-7 minutes. Immediately remove from the heat and add cream carefully (the mixture will bubble up) while whisking constantly. Return mixture to medium heat until it boils and sugar melts.

Remove from heat, and pour into the bowl set in your ice-water bath. Let the caramel cool, whisking often, for 10 minutes before whisking in creme fraiche, vanilla, and salt. Cover and refrigerate at least 2 hours before serving over Caramel Apple Donut Muffins. Can store in the refrigerator for up to 5 days.

If you liked this post, please:
Subscribe to Willow Bird Baking
Follow Willow Bird Baking on Twitter
Follow Willow Bird Baking on Facebook
Give this post a thumbs up on StumbleUpon

ShareOther ways to share this post with friends!

Chocolate Peanut Butter Bliss Cheesecake and Project Food Blog

I have something important to tell you.

In a world that boasts thousands upon thousands of food blogs, I have to tell you what makes my little corner of the web something special.

Foodbuzz is hosting Project Food Blog, a competition to crown the next food blog star. Willow Bird Baking is a contestant, and the first challenge isn’t a challenge for me at all. It’s simply to tell you why I’m here, and what I stand for — something I’ve been convicted of over and over again.

Listen, I cook accessible food. I try to take lovely photos. I write in tune with my personal life — sometimes laughing, sometimes crying, always eating. Those things are special, but they’re not what makes me unique.

What really makes me unique are two things: Chocolate Peanut Butter Bliss Cheesecake, and a stranger’s 91-year-old grandfather.

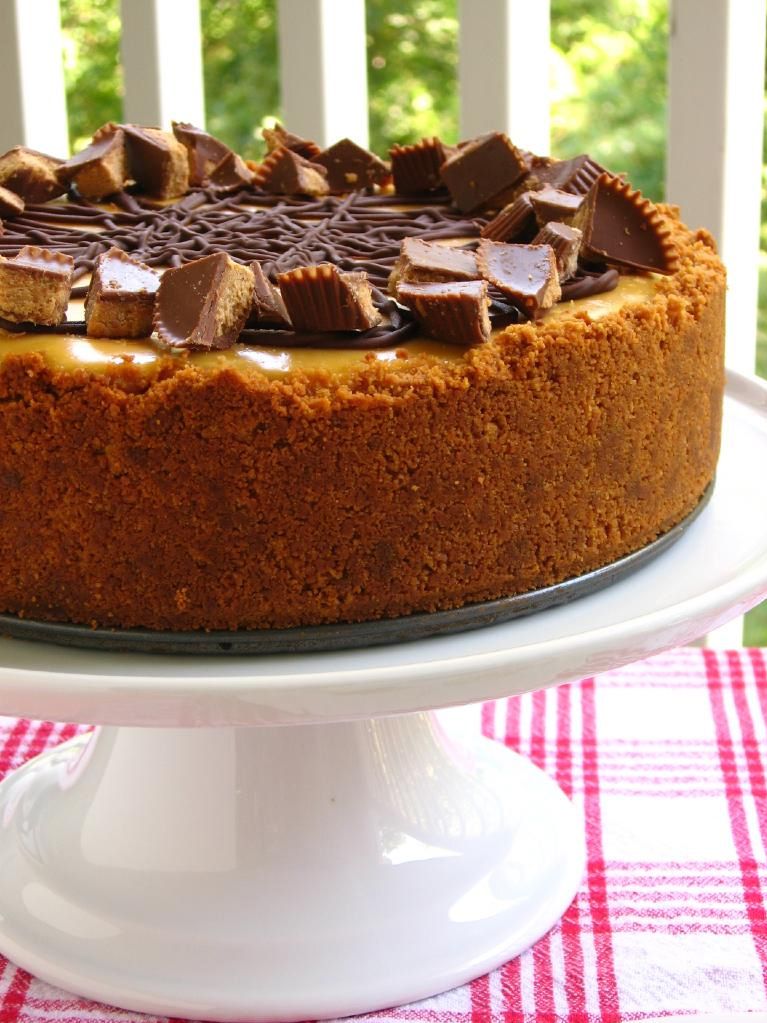
This rich cheesecake was more than just a cheesecake. It was an experiment. It was a gift. It was an experience. It embodies what makes Willow Bird Baking unique:

1. I believe in creativity. I dream of combining individual desserts into super desserts, mixing dessert with breakfast, and drizzling caramel all over everything. Maybe a few dollops of cookie dough, too? I’m constantly creating and improving food. Over the past year, it’s been so rewarding to see photos and read accounts of how your creativity was sparked by a recipe here!

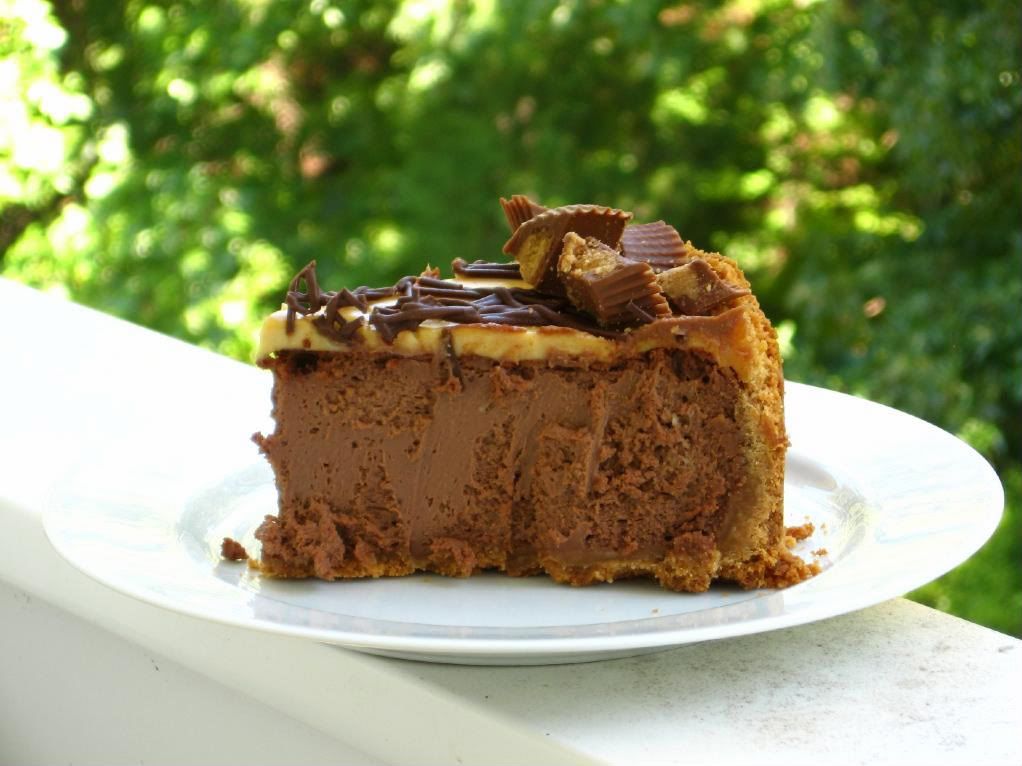
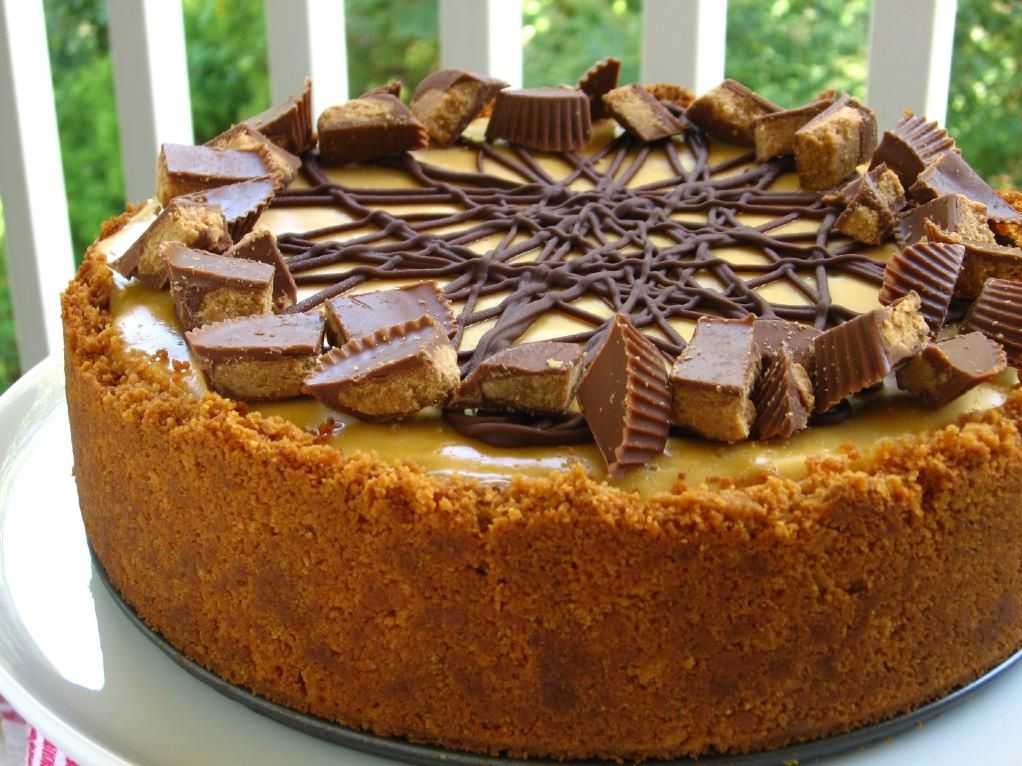
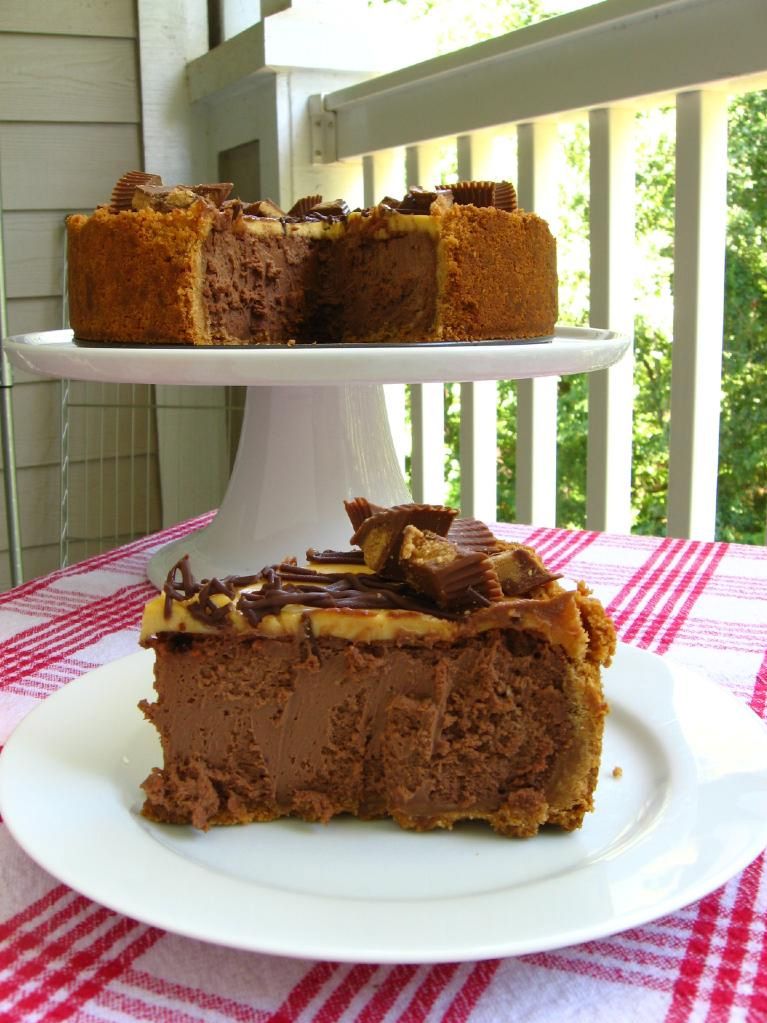
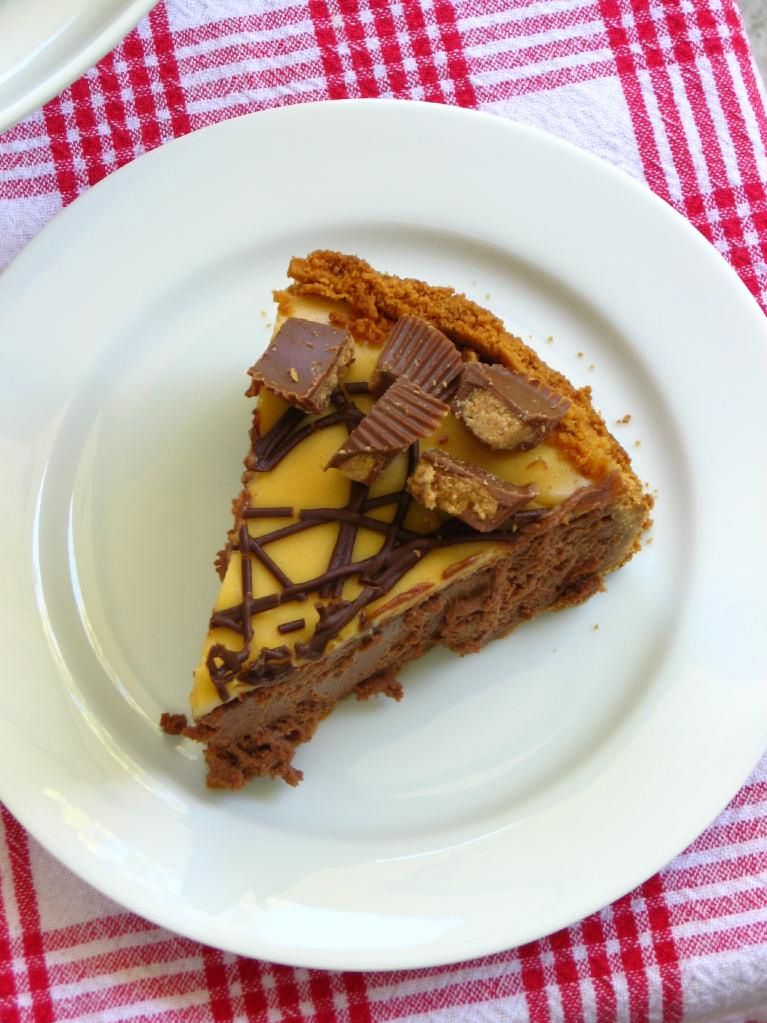
This cheesecake was born of my desire to innovate. A peanut butter sandwich cookie crust instead of an chocolate sandwich cookie crust? Sure! I’m smitten with fun ideas. Sure enough, with a creamy chocolate cheesecake slapped into that crust and a cool, soft peanut butter mousse spread on top, it was the best peanut butter and chocolate dessert combo I’d ever tasted.

2. I believe in challenging yourself. Like any home cook, I have family recipes I love to make, but I’m also adamant about the value of trying new things. Especially fancy things that make you want to say, “Oh, that’s lovely, but I could never do that.”

My culinary journey was one of continually tackling challenging recipes, and with every puffy puff pastry or foot-ed macaron, I felt proud of myself. It’s an incredible feeling to know that by encouraging you to take on these challenges as well, I can give you that sense of pride and accomplishment. For instance, the Croissant Challenge on Willow Bird Baking inspired 17 readers to make homemade croissants in their own kitchens for the very first time — and many more have committed to do so! I have never had a prouder blogging experience than seeing those beautiful croissant pictures roll in.

3. I believe in cooking impressive meals for those you love. This Chocolate Peanut Butter Bliss Cheesecake was made on a whim. Mike was coming to visit and I knew I wanted to make him dessert, but having just started teaching with a heavier load than usual, I was exhausted. I decided to make some simple bar cookies and began gathering supplies in the grocery store.

Somewhere near the butter aisle, though, I realized that we only get so much time to show our love to the special people in our lives. After imagining his face upon seeing a ridiculous surprise cheesecake in the fridge, I replaced the bar cookie ingredients and set about gathering cheesecake supplies. I worked all evening to create this recipe for him. It was so worth the effort to see him enjoying each bite, and I think it did more for my heart than it did for his.

You can have take-out days. We all do that. But every now and then, you need a recipe that you can set in front of your family to say, you are so important to me. I’ve got those for you.

Speaking of sharing love through food, there’s one last story to tell: the story of how a stranger’s 91-year-old grandfather reminded me of my blogging purpose.

Almost a month ago, I went to explore a blog post that had linked to my Peach Cobbler Cupcakes.

What I found was Songs of the Self, a blog by Jessica, a mom from Georgia. The post recounted how she’d made the Peach Cobbler Cupcakes for her grandfather’s 91st birthday party. As I read about her experience, I saw a photo that gave me pause — one of her husband helping her to sprinkle streusel on each cupcake and smiling for the camera.


photos used with permission by Jessica

I don’t know why it hit me like it did, but suddenly I was reading through tears. I realized that this was a family somewhere, working together to make a recipe that I created, following each little direction. The post from the next day shows the birthday party: her sweet grandfather in a silly party hat blowing out candles, her grandmother laughing, her tiny daughter Olivia representing the youngest generation.

At the end of her post, Jessica noted, “My cupcakes were beyond a hit! Everyone ranted and raved about them! …Yippee for crafty me!” Being able to participate in her special occasion in some meaningful way, and especially knowing that my recipe had a part in making her feel proud of herself reminded me of why I blog. As I closed her post with a filled heart, I thought of my friend Maranda’s proud post after making her first batch of homemade croissants — a post that inspired a similar effect in me.

The truth is, I blog to create a virtual communal table. Come sit, bake, eat, learn, and enjoy. Come try new things within a comfortable web of support. Come forgive yourself for your flaws, laugh at your kitchen flops, and ponder your life with a popsicle in hand.

Perhaps most of all, come and eat some Chocolate Peanut Butter Bliss Cheesecake. I saved a piece just for you.

Please take a look at my Project Food Blog profile and consider voting for Willow Bird Baking on September 20, 2010. Thank you so much for your support — you are precious to me!

Chocolate Peanut Butter Bliss Cheesecake


Recipe by: Willow Bird Baking, pieced together from Jerome Chang (peanut butter mousse), Joelen (chocolate cheesecake)
Yields: 15-20 pieces

Crust Ingredients:
1 pack (32) of peanut butter sandwich cookies, processed into crumbs
5 and 1/3 tablespoons butter, melted

Cheesecake Ingredients:
4 packages (8 oz. each) of cream cheese, room temperature
1 cup sugar
1 teaspoon of vanilla extract
4 eggs, room temperature
3 (1oz) squares semisweet bakers chocolate (melted and cooled)

Peanut Butter Mousse Ingredients:
1/2 teaspoon powdered gelatin
2 tablespoons cold water
1 cup heavy cream
2 large egg yolks
1 1/2 tablespoons sugar
3 tablespoons salted smooth peanut butter

Optional decorations:
Reese’s cups
melted chocolate
whipped cream

Directions: Preheat the oven to 350 degrees. For the crust, mix the crust ingredients together and press into bottom and up the sides (about 3 inches) of a springform pan. Set aside.

For the cheesecake: Mix cream cheese and sugar in a large bowl until well blended and creamy. Add the eggs and continue mixing until combined. Add chocolate and continue mixing until combined. Pour mixture into prepared crust and smooth top with a spatula.

Bake for 55 minutes or until center of cake is almost set. The top may crack, but it doesn’t particularly matter, since you’ll be covering it anyway. Let the cake fully cool. When almost cool, place it in refrigerator to chill while you prepare peanut butter mousse.

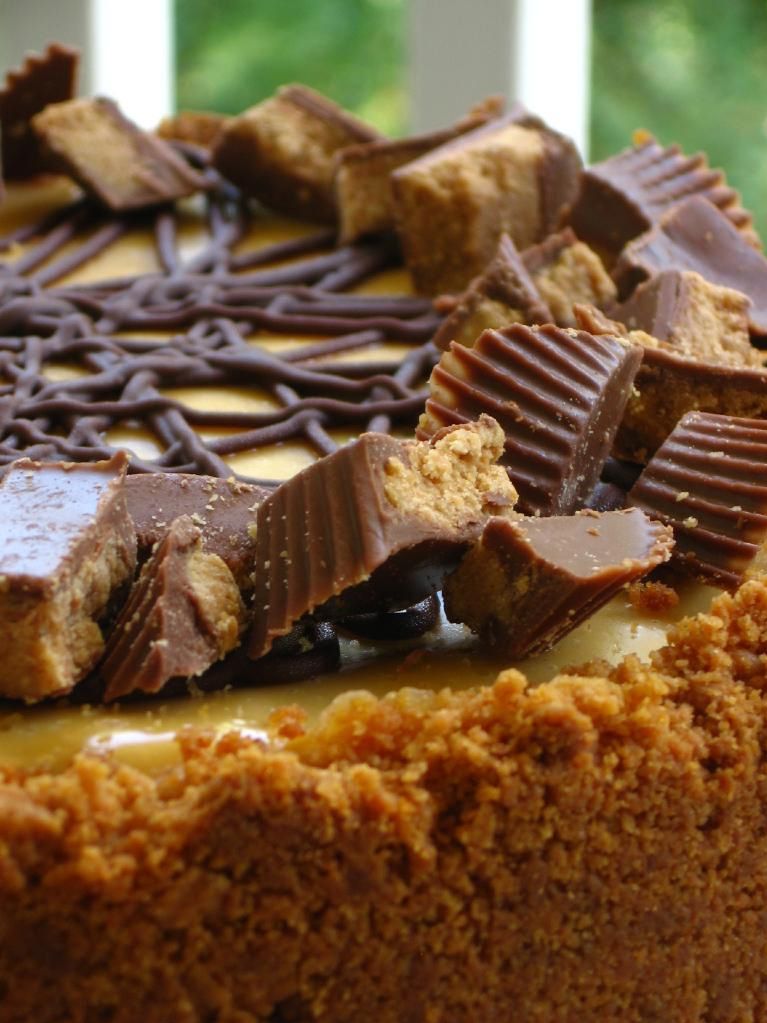
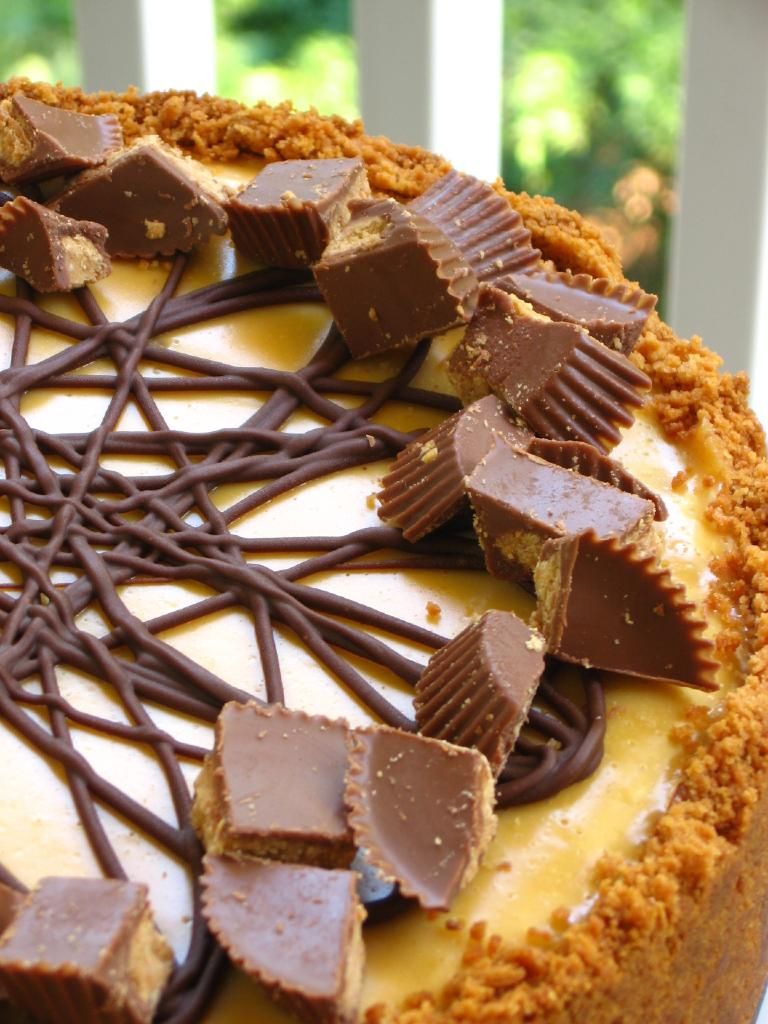
For peanut butter mousse, dissolve the gelatin over the water in a small bowl and let stand for 5 minutes. In a saucepan over moderate heat, cook the cream until it bubbles around the edges. In another bowl, whisk together egg yolks and sugar. Temper the eggs: pour about 1/2 cup hot cream into the egg yolks slowly while whisking vigorously. Then slowly pour the egg mixture into the saucepan of cream (whisking constantly). Cook over low heat, stirring constantly, until thickened, about 3 minutes. Remove from the heat and whisk in the peanut butter and the gelatin. Place mixture into a wide bowl to allow it to cool for a bit, then chill it for just a little while — not until set, but until it’s not so runny. Pour the mixture onto the top of the pie and refrigerate at least one hour or overnight. You can pipe on melted chocolate and decorate with chopped Reese’s cups, if desired.

When completely chilled, loosen the cake from rim of springform pan by wrapping the pan in warm dishtowels. The remove the springform pan. Refrigerate the cheesecake for one day or overnight before serving. Garnish with fresh whipped cream if desired.

If you liked this post, please:
Subscribe to Willow Bird Baking
Follow Willow Bird Baking on Twitter
Follow Willow Bird Baking on Facebook
Give this post a thumbs up on StumbleUpon

ShareOther ways to share this post with friends!

1 101 102 103 104 105 127